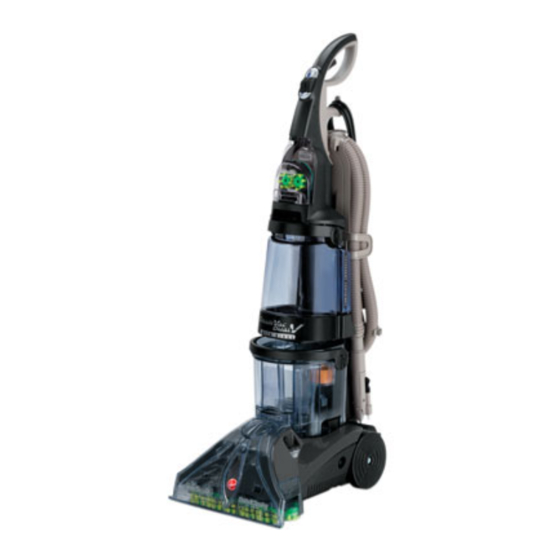
Summary of Contents for Hoover F7410
- Page 1 ™ ENGLISH ➜ pp. 1-17 ™ ESPAOL ➜ pág. 18-28 Carpet Cleaner The Easy to Use Carpet Cleaner HOOVER SteamVac™ carpet cleaner cleans carpet fibers by ® applying, scrubbing and removing hot tap water and cleaning solution. www.hoover.com...
-
Page 2: Important Safeguards
• Use indoors only. • Use only on surfaces moistened by left outdoors, or dropped into water, the cleaning process. Do not take it to a Hoover Sales and Service immerse product. Center or Authorized Hoover Warranty Service Dealer. malfunction or breakdown, grounding pro- •... -
Page 3: Table Of Contents
If you need any assistance: Parts needed for assembly ..3 Visit our website at www.hoover.com. Click on the “Service” button to find Assembling carpet cleaner ..4-6 the service outlet nearest you OR Cleaner description . -
Page 4: Assembling Carpet Cleaner
The assembled cleaner will look like this drawing. Model with SpinScrub™ hand tool is shown. NOTE: If the cord protector (A) on back of Attach upper handle handle should become dislodged during Remove clean water tank (upper tank) from unpacking, make sure it is reposi- carpet cleaner. -
Page 5: Storing Hose And Tools
1-10 1-11 Rotate top of caddy toward cleaner Storing hose and Identify the hose parts before storing hose. handle. Slide caddy down so notch (G) on I. Nozzle connector end tools caddy rests in hook (H) on cleaner. J. Solution tube Press hose, a few inches from nozzle con- nector end (I), into caddy. -
Page 6: Cleaner Description
1-18 1-19 How to reattach tool Pull tool down and outward. To reposition the tool, reverse this procedure. cover The tool cover is designed with a break-away feature which allows it to snap free if it is pushed open too far. To reattach, align hinges of cover with holes on sides of tool storage area. -
Page 7: General Operation
Check clean water tank also; it may need to before cleaning. be refilled. Do not use without float and float retainer in place. If broken or dis- lodged, take to an Authorized Hoover Service Center or Dealer for repair. Continued ➜... -
Page 8: Filling The Clean Water Tank
If irritation persists, call a physician. WARNING: Certain oxygenated-type Fill container (16 oz.) with HOOVER Carpet/ Upholstery Detergent or HOOVER Hard cleaners, such as OxiClean* and Floor Cleaning Solution. TuffOxi** will damage your Do not use Hard Floor Cleaning Solution on car- SteamVac™... -
Page 9: Emptying The Recovery Tank
2-17 2-18 2-16 Position bottom of tank onto cleaner using Push up on the handle once the tank is back Push the top of the tank and tank one hand on each side of the tank to center handle while supporting the back of the unit to latch it to the unit. -
Page 10: Before You Begin
See pages 10-14 for instructions on various a. Vacuum thoroughly - For carpet, use skirts and draperies. cleaning tasks. a HOOVER vacuum cleaner with an agitator e. Pretreat spots and heavy traffic for best results. Vacuum upholstery with a areas with HOOVER Spot & Stain... -
Page 11: Cleaning Carpet
Release trigger and slowly push pet look fresher. tions for Figs. 2-9 to 2-12. carpet cleaner forward over area just 2. Fill detergent container with HOOVER sprayed with solution (dry stroke). Then Carpet/Upholstery Detergent according to slowly pull carpet cleaner back toward you instructions for Figs. -
Page 12: Cleaning Bare Floors
1. Fill clean water tank according to instruc- brush to help provide the scrubbing action tions for Figs. 2-9 to 2-12. 2. Fill detergent container with HOOVER Hard Floor Cleaning Solution according to instructions for Figs. 2-13 to 2-14. 3. Set SpinScrub mode selector to GENTLE SCRUB. -
Page 13: Select Tool
3. Fill clean water tank according to instruc- tions for Figs. 2-9 to 2-12. 4. Fill detergent container with HOOVER 3-16 Available at additional cost if not included with your cleaner. -
Page 14: Cleaning Carpeted Stairs
Pad must be completely dry before reattaching to module. Replacement pads may also be purchased. Ask for HOOVER part no. 40308001. Using the scrub tool With a little solution, test the scrub tool on a hidden area before using on the desired surface. -
Page 15: Cleaning Upholstery
Cleaning upholstery 3-22 3-23 instructions for Figs. 2-13 to 2-14. 5. Attach tool to end of hose. Do not point tools toward people or pets. 6. Dry hands and plug carpet cleaner into a properly grounded outlet. 7. Set Wash/Rinse switch to WASH. Turn cleaner ON. -
Page 16: If You Have A Problem
• Blown fuse/tripped breaker automated referral of authorized service outlet locations (U.S. only). • Replace fuse/reset breaker Do not send your cleaner to Hoover in North Canton, Ohio for service, this will only Problem: Low solution pick-up result in delay. -
Page 17: Service
Full One Year Warranty (Domestic Use) Your HOOVER appliance is warranted in nor- mal household use, in accordance with the Owner’s Manual against original defects in material and workmanship for a period of one full year from date of purchase. This warranty...


