Table of Contents
Advertisement
Quick Links
Advertisement
Table of Contents

Related Manuals for Jay-Lor A100


Summary of Contents for Jay-Lor A100
- Page 1 Owner Manual a100...
-
Page 2: Table Of Contents
14.1 Weighing (All Models) ....................33 14.2 Side Door Discharge (All Models) ................... 34 14.3 Speed/Direction Control Pedal (A50 and A100 Self-Propelled Models) ......34 14.4 Auger On/Off Control (All Models) .................. 35 14.5 Steering (A50 and A100 Self-Propelled Models) ............. 35... - Page 3 28.7 Caster Assembly (A50 Skid Steer Model) ............... 55 29.0 HYDRAULIC SYSTEM MAINTENANCE................. 56 29.1 Checking Level in Hydraulic Oil Reservoir (A50 Models except Skid Steer) ....56 29.2 Checking Level in Hydraulic Oil Reservoir (A100 Models) ..........57 29.3 Replacing Hydraulic Oil and Hydraulic Oil Filter(s) (All Models except Skid Steer) ..57 29.4 Maintaining Breather/Filter Assembly (A50 Models except Skid Steer)......
- Page 4 Figure 38 - Auger Support Bushing Grease Locations ............... 52 Figure 39 - A50 and A100 Self-Propelled Steering Chain and Sprocket Lubricate Location ..53 Figure 40 - A50 and A100 Self-Propelled Steering Shaft Support Bearings Grease Locations ..53 Figure 41 - A50 and A100 Self-Propelled Steering Assembly Grease Location ......
- Page 5 Figure 46 - A100 Hydraulic System Oil Reservoir ..............57 Figure 47 - A50 Self-Propelled Hydraulic Oil Filter Location ............58 Figure 48 - A50 Trailer, Stationary, Truck Mounted Hydraulic Oil Filter Location......59 Figure 49 - A100 Self-Propelled, Trailer, Truck Mounted Hydraulic Oil Filter Locations ....59 Figure 50 - A100 Stationary Hydraulic Oil Filter Location ............
-
Page 6: Introduction
This manual covers the A50 and A100 series models manufactured by Jaylor. Keep this manual readily available for reference and be sure to pass it on to new operators or owners. Contact your nearest Jaylor dealer or distributor if you need assistance or information. -
Page 7: Owner/Operator's Responsibility
Jaylor product will be found in different locations depending on which A50 or A100 model you own. As a rule of thumb, the A50 serial number can be found on the side of the hydraulic oil reservoir while the A100 serial number can be found on the power supply cover. -
Page 8: Customer Reference Information
AAA-055-00138 Rev. 1/14/15 6.0 CUSTOMER REFERENCE INFORMATION Jaylor Model Number: Jaylor Serial Number: Date Purchased: Dealer Name: Dealer Phone: Scale Indicator Model Number: Scale Indicator Serial Number: Other Main Components: Jaylor Owner Manual - 7 - Mini Mixer Models... -
Page 9: Safety
AAA-055-00138 Rev. 1/14/15 7.0 SAFETY All implements with moving parts are potentially hazardous. There is no substitute for a cautious, safe-minded operator who recognizes the potential hazards and follows reasonable safety practices. The manufacturer has designed the implement to be used with all its safety equipment properly attached to minimize the chance of accidents. -
Page 10: General Safety
(if not, block wheels). • Keep body parts away from unloading door when open. • Do not protrude feet outside the platform while traveling (A50 and A100 self-propelled models). • Do not operate when any guards are damaged or removed. •... -
Page 11: Driving And Hauling Safety
• Hitch weight of A50 trailer is approximately 100 lbs (45 kg) plus 10% of payload [200 lbs (91 kg plus 12% of payload for A100 trailer]. Therefore, use only a towing vehicle with adequate hitch and brakes to stop the vehicle coupled with the machine and payload. -
Page 12: Hydraulic Safety
AAA-055-00138 Rev. 1/14/15 • Clear the area of bystanders, especially children, when carrying out any maintenance and repairs or making any adjustments. • Do not allow grease or oil to build up on the machine. • Always use glove and eye protection when handling the battery. 7.8 Hydraulic Safety •... -
Page 13: A50/A100 Safety Sign-Off Form
AAA-055-00138 Rev. 1/14/15 8.0 A50/A100 SAFETY SIGN-OFF FORM Anyone who will be operating and/or maintaining the machine must first read and clearly understand ALL safety, operating, and maintenance information presented in this manual. Annually review this information with personnel. An untrained operator is unqualified to operate this machine. -
Page 14: Safety Sign Locations
3. ‘Rotating Auger Hazard’ Decal Location (see Figure 6) 4. ‘High Pressure Fluid Hazard’ Decal Location (see Figure 7) NOTE – Although the appearance of the other three A50 models (stationary, trailer, truck mounted) differ from the A50 self-propelled model, general locations of the safety decals will stay the same. -
Page 15: Safety Sign Locations (A100 Standard Models)
AAA-055-00138 Rev. 1/14/15 9.2 Safety Sign Locations (A100 Standard Models) Figure 2 - A100 Safety Decal Locations for Standard Models 1. ‘Warning’ Decal Location (see Figure 3 for self-propelled model and Figure 4 for all other models) 2. ‘Pinch Point Hazard’ Decal Location (see Figure 5)* 3. -
Page 16: Figure 3 - Self-Propelled 'Warning' Decal
AAA-055-00138 Rev. 1/14/15 Figure 3 - Self-Propelled ‘Warning’ Decal Figure 4 - General ‘Warning’ Decal Jaylor Owner Manual - 15 - Mini Mixer Models... -
Page 17: Figure 5 - 'Pinch Point Hazard' Decal
AAA-055-00138 Rev. 1/14/15 Figure 5 - ‘Pinch Point Hazard’ Decal Figure 6 - ‘Rotating Auger Hazard’ Decal Figure 7 - ‘High Pressure Fluid Hazard’ Decal Jaylor Owner Manual - 16 - Mini Mixer Models... -
Page 18: Safety Sign Locations (A50 Ce Models)
5. -‘Rotating Auger Hazard and Rotating Knives’ Decal (see Figure 10) 6. -‘Keep Safe Distance From Hot Surfaces’ Decal (see Figure 17) NOTE – Although the appearance of the other three A50 models (stationary, trailer, truck mounted) differ from the A50 self-propelled model, general locations of model applicable safety decals will stay the same. -
Page 19: Safety Sign Locations (A100 Ce Models)
AAA-055-00138 Rev. 1/14/15 9.4 Safety Sign Locations (A100 CE Models) Figure 9 - A100 Safety Decal Locations for CE Models 1. -‘Remove Ignition Key Before Servicing, Maintaining, or Adjusting the Vertical Mixer’ Decal (see Figure 11) -‘Wear Ear Protective Gear When Operating the Vertical Mixer’ Decal (see Figure 12) -‘Wear Safety Boots When Operating, Servicing, Maintaining, or Adjusting the Vertical Mixer’... -
Page 20: How To Install Safety Signs
AAA-055-00138 Rev. 1/14/15 Figure 12 - ‘Wear Ear Figure 11 - ‘Remove Ignition Figure 10 - ‘Rotating Auger Protective Gear When Key Before Servicing, Hazard and Rotating Knives’ Operating the Vertical Mixer’ Maintaining, or Adjusting Decal Decal the Vertical Mixer’ Decal Figure 13 - ‘Wear Safety Figure 15 - ‘Read Manual Figure 14 - ‘Keep Safe... -
Page 21: Machine Components
AAA-055-00138 Rev. 1/14/15 10.0 MACHINE COMPONENTS The main machine components for the A50 and A100 models are shown on the following pages. Find the figure showing the model you will be operating and become familiar with the information given. 10.1 A50 Self-Propelled Mixer Components Figure 18 - A50 Self-Propelled Mixer Components 1. - Page 22 AAA-055-00138 Rev. 1/14/15 21. Horn Button – Equipped on CE units. forwards. 7. Operator Platform – The operator should Push button in to sound horn. 22. Foot Safety Switch – Equipped on CE always be standing on the platform while operating the mixer.
-
Page 23: A50 Stationary Standard Mixer Components
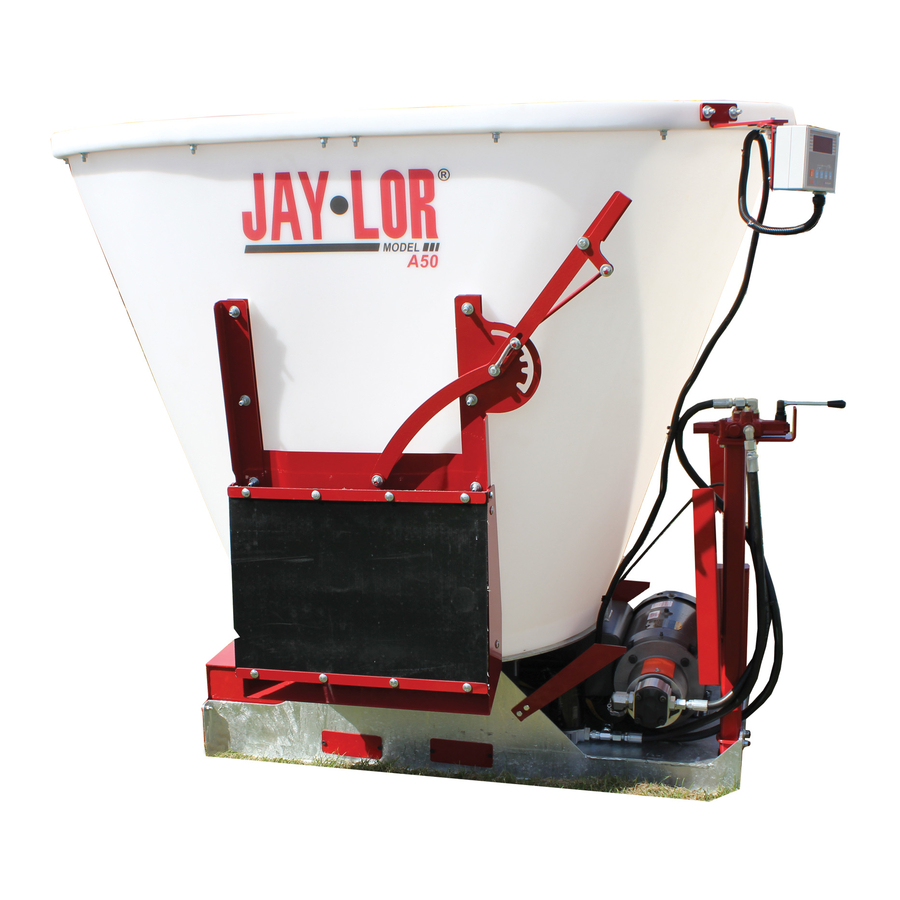
AAA-055-00138 Rev. 1/14/15 10.2 A50 Stationary Standard Mixer Components Figure 19 - A50 Stationary Mixer Components 1. Mixer Drum – Used to contain the feed 5. Hydraulic Oil Reservoir/Cap – Remove while it is cut and mixed by the vertical this cap to add oil. -
Page 24: A50 Skid Steer Mixer Components
AAA-055-00138 Rev. 1/14/15 10.3 A50 Skid Steer Mixer Components Figure 20 - A50 Skid Steer Mixer Components 1. Mixer Drum – Used to contain the feed 7. Electronic Scale Indicator – Displays the while it is cut and mixed by the vertical weight inside the drum. -
Page 25: A50 Trailer Mixer Components
AAA-055-00138 Rev. 1/14/15 10.4 A50 Trailer Mixer Components Figure 21 - A50 Trailer Mixer Components 1. Mixer Drum – Used to contain the 7. Door Open/Close Control – Used to control feed while it is cut and mixed by the feed discharge rate. -
Page 26: A50 Truck Mounted (Ce Stationary) Mixer Components
AAA-055-00138 Rev. 1/14/15 10.5 A50 Truck Mounted (CE Stationary) Mixer Components Figure 22 - A50 Truck Mounted Mixer Components 1. Mixer Drum – Used to contain the feed 8. Unloading Door – Door can be opened to while it is cut and mixed by the vertical allow feed to be discharged. -
Page 27: A100 Self-Propelled Mixer Components
AAA-055-00138 Rev. 1/14/15 10.6 A100 Self-Propelled Mixer Components Figure 23 - A100 Self-Propelled Mixer Components 1. Mixer Drum – Used to contain the feed 15. Standard Unloading Door – Door can be while it is cut and mixed by the vertical opened to allow feed to be discharged. - Page 28 AAA-055-00138 Rev. 1/14/15 24. Additional Unloading Door (Optional) - hydraulic oil cooler electric fan, hydraulic valve solenoids, and auxiliary components Door can be opened to allow feed to be discharged. (if applicable). 25. Additional Door Open/Close Control 9. Auger On/Off Control – All units are (optional) –...
-
Page 29: A100 Stationary Mixer Components
AAA-055-00138 Rev. 1/14/15 10.7 A100 Stationary Mixer Components Figure 24 - A100 Stationary Mixer Components NOTE – Power supply cover is shown in the ‘down’ position for clarity 1. Mixer Drum – Used to contain the feed 6. Electric Motors – Power machine. 7. -
Page 30: A100 Trailer Mixer Components
AAA-055-00138 Rev. 1/14/15 10.8 A100 Trailer Mixer Components Figure 25 - A100 Trailer Mixer Components 1. Mixer Drum – Used to contain the 8. Unloading Door – Door can be opened to feed while it is cut and mixed by the allow feed to be discharged. -
Page 31: A100 Truck Mounted Mixer Components
AAA-055-00138 Rev. 1/14/15 10.9 A100 Truck Mounted Mixer Components Figure 26 - A100 Truck Mounted Mixer Components NOTE – Power supply cover is shown in the ‘down’ position for clarity 1. Mixer Drum – Used to contain the feed 8. Unloading Door – Door can be opened to while it is cut and mixed by the vertical allow feed to be discharged. -
Page 32: Operation
Check that the machine is clean and free of debris. Check that the steering chain is tight (A50 and A100 self-propelled models). If chain is loose, see section ‘33.0 Steering Chain Maintenance’. Check that the trailer coupler connects securely to the towing vehicle ball (A50 and A100 trailer models). -
Page 33: Breaking-In
On units with manual auger control valves, check control to be sure that it moves without too much resistance (be sure T-handle is not in ‘lock’ position on A50 self-propelled units). On CE self-propelled units, make sure that the engine can only be started when auger on/off switch is in the ‘off’... -
Page 34: Controls
When attaching the indicator to the machine, be sure that it is securely fastened. On A50 and A100 models, the scale indicator is located on the upper mixer drum (near operator). The mounting bracket arm assembly allows the scale indicator to be turned to face every direction. -
Page 35: Side Door Discharge (All Models)
14.3 Speed/Direction Control Pedal (A50 and A100 Self-Propelled Models) The A50 and A100 self-propelled models have the ability to be driven by the operator. Speed and direction (forward/reverse) are controlled by a foot pedal on the operator’s platform. Forward and reverse are indicated on the platform. -
Page 36: Auger On/Off Control (All Models)
AAA-055-00138 Rev. 1/14/15 14.4 Auger On/Off Control (All Models) All A50 and A100 model augers (except skid steer model) are controlled using either a manual or electronic valve (refer to section ‘10.0 Machine Components’ for control locations). Auger rotational speed can be controlled by altering the engine speed. However, decreasing the engine speed too much will also decrease the output torque which under heavy loads could cause the engine to stall. -
Page 37: Driving
Rev. 1/14/15 15.0 DRIVING The A50 and A100 self-propelled models are designed to be easily and conveniently maneuvered down narrow alleyways with sharp turns. The following outlines the procedure and possible hazards to be aware of while driving the machine. -
Page 38: Transporting
A loaded mixer (machine and payload) may weigh as much as 2,500 lbs (1134 kg) for an A50 model and 5,000 lbs (2,268 kg) for and A100 model. The operator must use their own discretion when negotiating rough and uneven terrain. Improper operation of the loaded machine can cause loss of control, severe injury, or death. -
Page 39: Figure 31 - Trailer Coupler Positions
AAA-055-00138 Rev. 1/14/15 NOTE - Some jurisdictions may require a safety chain for this size of machine (not included). Please follow all local highway and transport laws and regulations. Warning: Always be sure that the trailer coupler and towing vehicle ball are of the same size and specification. -
Page 40: Transporting A50 And A100 Truck Mounted Models
For an A50 model, run the forks in from the door side of the under frame (see Figure 32). For an A100 model, run the forks in from the non-power supply platform side of the under frame (see Figure 32). -
Page 41: Transporting The A50 Skid Steer Model
(10 mph). Never transport faster than the road or terrain conditions will allow you to do safely. If upgrades are included (stand and wheels) ensure excessive force from the skid steer loader is not exerted onto the wheel casters as this could result in damage to A50 skid steer components. -
Page 42: Cutting And Mixing
Warning: Never load an unhitched machine (A50 and A100 trailer models). The machine is designed to be loaded only when properly hitched. Improper loading can cause loss of control, severe injury, or death. - Page 43 AAA-055-00138 Rev. 1/14/15 Caution: It is recommended that commodities are added to the mixing chamber while the auger is turning for maximum mix efficiency. Starting the augers from a standstill with a full load in the mixing chamber places additional stress on the machine and may decrease mix quality.
-
Page 44: General Field Operation
4. Clear area of all bystanders (especially children) and make sure there are no riders on the machine. For A50 skid steer model only proceed to step 7 (steps 5 and 6 do not apply). 5. Start the engine at low idle, using choke if necessary (on CE units it will be necessary to put the auger on/off switch in the ‘off’... -
Page 45: Figure 35 - Typical Total Mix Ration (Tmr) Achieved In Mixing Chamber
AAA-055-00138 Rev. 1/14/15 Figure 34 - Typical Total Mix Ration (TMR) Achieved in Mixing Chamber 11. Transport the machine to the feeding area. NOTE - It is not recommended that the unit be transported for long distances when the mixing chamber is fully loaded. Transporting will compact the mixture and can make startup difficult. -
Page 46: Storage
(found under the operator’s platform) (A50 and A100 self-propelled models). 8. Apply spray lubricant to all moving parts on the trailer coupler (A50 and A100 trailer models). 9. Touch up all paint nicks and scratches to prevent rusting. -
Page 47: Troubleshooting
AAA-055-00138 Rev. 1/14/15 20.0 TROUBLESHOOTING Your Jaylor mixer is designed to receive a variety of feed material in its mixing chamber to cut and mix prior to unloading. It is a simple and reliable system that requires minimal maintenance. The following section lists possible problems, causes, and solutions to the problems you may encounter with your Jaylor mixer. - Page 48 AAA-055-00138 Rev. 1/14/15 - Clear packed material - Auger jammed. and resume mixing. - Un-lubricated auger - Lubricate auger support Auger stops rotating support bushing. bushing. during mixing. - Auger leading edge - Adjust auger height. digging into drum floor. - If unloading door is open, - Improper use of safety foot safety switch must...
-
Page 49: Standard Model Specifications
Height 68.25 inches (1.73 meters) Weight 1,000 lbs (455 kg) Length 80.5 inches (2.04 meters) Width 57.5 inches (1.46 meters) A50 Skid Steer Height 62 inches (1.57) Weight 1,313 lbs (596 kg) Length 108 inches (2.74 meters) Width 48 inches (1.22 meters) -
Page 50: Maintenance And Service Information
AAA-055-00138 Rev. 1/14/15 22.0 MAINTENANCE AND SERVICE INFORMATION This section covers the maintenance required for your Jaylor mixer. It is essential that your Jaylor receive this maintenance to retain the safety, dependability, and performance originally built into your Jaylor product. By following a careful service and maintenance program for your machine, you should enjoy many years of trouble-free service. -
Page 51: Following An Effective Maintenance Schedule
AAA-055-00138 Rev. 1/14/15 25.0 FOLLOWING AN EFFECTIVE MAINTENANCE SCHEDULE It is the owner/operator’s responsibility to operate, lubricate, maintain, and store the machine in accordance with all instructions and safety procedures. Remember, the guidelines established in this manual are general. All maintenance and service work is NOT limited to these guidelines. -
Page 52: Fluids And Lubricants
AAA-055-00138 Rev. 1/14/15 METRIC TORQUE SPECIFICATIONS Bolt Bolt Torque* Diameter 10.9 “A” (N.m) (lb-ft) (N.m) (lb-ft) 1050 1495 1103 2100 1550 2600 1917 3675 2710 Figure 36 - Metric Bolt Specifications Torque figures indicated above are valid for non-greased or non-oiled threads and heads unless otherwise specified. -
Page 53: Lubricating
AAA-055-00138 Rev. 1/14/15 28.0 LUBRICATING Refer to section ‘27.0 Fluids and Lubricants’ for the recommended grease for use on your Jaylor. Use section ‘36.0 Maintenance and Service Records’ to keep a record of all scheduled servicing. 1. Wipe grease fitting clean before greasing, to avoid injecting dirt and grit. 2. -
Page 54: Steering Chain And Sprocket Assembly (A50 And A100 Self-Propelled Models)
28.2 Steering Chain and Sprocket Assembly (A50 and A100 Self-Propelled Models) Figure 38 - A50 and A100 Self-Propelled Steering Chain and Sprocket Lubricate Location 1. Apply oil or spray lubricant to the ENTIRE steering roller chain every 1 WEEK. DO NOT over lubricate the chain. -
Page 55: Steering Assembly (A50 And A100 Self-Propelled Models)
1. Remove side cover and grease u-joint and gears every 1 MONTH. 28.5 Speed/Direction Control Bushing (A50 and A100 Self-Propelled Models) Figure 41 - A50 and A100 Self-Propelled Speed/Direction Control Bushing Lubricate Location 1. Apply spray lubricant inside the bushings shown above every 1 MONTH (found under the operator’s platform). -
Page 56: Wheel Hubs (A50 And A100 Trailer Models)
AAA-055-00138 Rev. 1/14/15 28.6 Wheel Hubs (A50 and A100 Trailer Models) Figure 42 - A50 and A100 Trailer Hub Grease Location 1. Remove hub cap and grease every 6 MONTHS (if equipped, grease hub through grease fitting). 28.7 Caster Assembly (A50 Skid Steer Model) Figure 43 - A50 Skid Steer Model Caster Grease Location 1. -
Page 57: Hydraulic System Maintenance
A50 or A100 model. Use section ‘36.0 Maintenance and Service Records’ to keep a record of all scheduled servicing. All A50 and A100 models (except the A50 skid steer model) are equipped with a hydraulic system with reservoir. Check the reservoir oil level daily. -
Page 58: Checking Level In Hydraulic Oil Reservoir (A100 Models)
To complete this procedure, follow these steps: a. Locate the drain plug as shown in Figure 44 for A50 models and Figure 45 for A100 models. Place a large oil pan or pail beneath the drain plug. - Page 59 AAA-055-00138 Rev. 1/14/15 e. Fill the reservoir with qualified oil. Be sure to fill to the height specified in Figure 44 for A50 models and Figure 45 for A100 models. Remember, the reservoir holds approximately 8.5 US gallons (32 liters) for A50 models and 14 US gallons (53 liters) for A100 models.
- Page 60 AAA-055-00138 Rev. 1/14/15 Figure 47 - A50 Trailer, Stationary, Truck Mounted Hydraulic Oil Filter Location 1. Spin-on Filter Element - Rotating the element counterclockwise by hand will release the element from the filter head. Likewise, rotating the element clockwise will tighten it.
- Page 61 AAA-055-00138 Rev. 1/14/15 Figure 49 - A100 Stationary Hydraulic Oil Filter Location 1. Spin-on Filter Element - Rotating the element counterclockwise by hand will release the element from the filter head. Likewise, rotating the element clockwise will tighten it. 2. Filter Head NOTE –...
-
Page 62: Maintaining Breather/Filter Assembly (A50 Models Except Skid Steer)
29.4 Maintaining Breather/Filter Assembly (A50 Models except Skid Steer) Each A50 hydraulic oil reservoir is designed with a breather/filter cap on the top to vent the internal system pressure to atmosphere. It must be kept clean and free of contaminants and debris to function properly. -
Page 63: Auger Maintenance
AAA-055-00138 Rev. 1/14/15 31.0 AUGER MAINTENANCE Every Jaylor mixer is fitted with vertical auger(s) equipped with knives for cutting material. 31.1 Knife Maintenance To maintain knives, follow this procedure: 1. Clear the area of bystanders, especially small children. 2. Park mixer on a flat, level surface, unplug the motor, and wait for all moving parts to stop before servicing, adjusting or repairing. -
Page 64: Auger Height Adjustment
32.0 TIRE AIR PRESSURE Inflate tires on all Jaylor A50 and A100 models to the manufacturer’s recommended pressure. The inflation pressure will be on the tire. Ensure all tires are at the recommended pressure. -
Page 65: Steering Chain Maintenance (A50 And A100 Self-Propelled Models)
It may be necessary to occasionally tighten the steering chain if it becomes too loose. To tighten the chain, see Figure 52. Figure 52 - A50 and A100 Self-Propelled Steering Chain Adjustment 1. Steering Assembly Securing Bolts – These bolts must be loosened before the chain can be tightened. -
Page 66: Trailer Coupler Maintenance (A50 And A100 Trailer Models)
5. Push down the hitch coupler-locking lever to its horizontal locking position. 6. Repeat steps 1 through 5 until a snug fit is obtained. Figure 53 - A50 and A100 Trailer Coupler Maintenance 1. Hitch Coupler Locking lever 2. Adjustment Nut 3. -
Page 67: A50 And A100 Periodic Maintenance Chart
Every 1 year (or earlier if oil Replace hydraulic oil and filter(s) All A50/A100’s* quality has degraded) Engine or electric motor maintenance All A50/A100’s* Refer to manufacturer’s manual *Does not apply to A50 Skid Steer model Jaylor Owner Manual - 66 - Mini Mixer Models... -
Page 68: Maintenance And Service Records
AAA-055-00138 Rev. 1/14/15 36.0 MAINTENANCE AND SERVICE RECORDS NEXT DESCRIPTION OF DATE OF IMPORTANT NOTES ON SERVICE MAINTENANCE OR SERVICE: SERVICE: SCHEDULE SERVICE: DATE: - PHOTO COPY AS NECESSARY - Jaylor Owner Manual - 67 - Mini Mixer Models... -
Page 69: Ec Declaration Of Conformity For Applicable Models
EG-Konformitätserklärung bezüglich Maschinen CE-Déclaration de Conformité concernant Machines ENG - Declaration of Conformity We, JAY-LOR Canada INC., 071213 10th Line, East Garafraxa, Ontario L9W 6Z9, Canada, declare on our exclusive responsibility that the Machine for livestock feed mixing [JayLor A100SP, A50SP & A50TR Series] conforms to the norms and documentation as defined in the EC Directives: Machine Directive 2006/42/EC and NEN-EN 703 2004+A1 2009. -
Page 70: Safety Sign
AAA-055-00138 Rev. 1/14/15 38.0 SAFETY SIGN The Safe Operation of SAFETY a Jaylor FIRST Vertical Mixer is a Must! #1 ALL TWINE MUST BE REMOVED from bales while the bale is on the ground and before the bale is placed into the mixer. -
Page 71: Limited Warranty
071313 10 Line, East Garafraxa Ontario, Canada, L9W 6Z9 Tel: (519) 787-9353 Fax: (519) 787-7053 E-mail: jaylor@jaylor.com 39.0 LIMITED WARRANTY JAYLOR (the Seller) warrants the articles and units sold to be free from defects in material and workmanship and to conform to applicable specifications. These express warranties are the sole warranties of the Seller, and any other warranties, express, implied in law or implied in fact, are hereby specifically excluded. - Page 72 AAA-055-00138 REV:5 PHONE ADDRESS EMAIL Toll Free 800.809.8224 071213 10th Line Sales sales@jaylor.com Phone 519.787.9353 East Garafraxa, Ontario Nutrition nutrition@jaylor.com Service 519.787.8058 L9W 6Z9, Canada Service service@jaylor.com JAYLOR. www.
Need help?
Do you have a question about the A100 and is the answer not in the manual?
Questions and answers