Table of Contents
Advertisement
Quick Links
Download this manual
See also:
Operating Manual
Advertisement
Table of Contents

Related Manuals for Becker Active 50


Summary of Contents for Becker Active 50
- Page 1 OPERATING GUIDE...
-
Page 2: Table Of Contents
Contents >>> CONTENTS Emissions and disposal Switching on Warranty Switching off > D Safety instructions Overview of the scope of Delivery Basic information about the The Navigation device Overview of the navigation device > GB touch screen Operating manual contents General operation Operation Use of the product... - Page 3 CONTENTS >>> The destination list Calling special destination phone The Blocked roads button Icons used number (depending on the model) The Vehicle data button > D Operating the last destinations list Additional point of interest information 52 The Format button >...
- Page 4 >>> CONTENTS SituationScan Connecting Bluetooth telephones settings Country information The detour assistant Calling up a device list > D Automatic connection Blocking a section of the road The Park Assistant > GB Searching for cell phones The departure assistant permanently Connecting from device lists Trip computer Map display options...
- Page 5 CONTENTS >>> Technical terminology > D index Model overview and technical > GB specifications NOTICE > F EU Declaration of Conformity Disposal of the unit > I Disposal of the battery > PL Duty to supply information according to battery legislation (BattV) Removing the battery The information and data contained in these documents are subject to change...
-
Page 6: Warranty
> F 24-month warranty (battery: 6 months) thorised by the manufacturer or by the for BECKER units, beginning on the day manufacturer himself. > I of delivery to the final customer (buyer). This warranty does not affect or >... -
Page 7: D Safety Instructions
SAFETY INSTRUCTIONS >>> Safety instructions > D Safety instructions > GB • Use of the device is only permitted if the traffic conditions are suitable and you are absolutely sure that its use presents no risk, distraction or inconvenience to you, your passengers or other road users. >... - Page 8 > I • Only use original BECKER accessories. This way it is ensured that all relevant provisions will be met and that health risks > PL and damages to the product are avoided. Dispose of the used product or the battery according to the legal regulations in effect.
-
Page 9: The Navigation Device
The use of the GPS = Global Positioning This operating manual contains the This product is a high performance PND > GB description of your Becker navigation (Personal Navigation Device) for use in system eliminates the tedious process equipment. vehicles. Protect the product and the of looking in street maps. -
Page 10: Telefon (Selected Models)
: standard Navigation system > Unpack the contents carefully and - : not available Ready 50 Active 50 check them thoroughly. : optional Vehicle integration Becker OneShot speech control Speed camera warning Driver warnings Telephone Trip computer 3D city view... -
Page 11: Scope Of Delivery
THE NAVIGATION DEVICE >>> Scope of delivery Complaints Description of the device > D In case of complaints, please consult The navigation device consists of the your dealer. The equipment may be sent > GB basic unit and the accessories included in directly to United Navigation in its the scope of delivery. -
Page 12: The Basic Unit
>>> THE NAVIGATION DEVICE The basic unit Cable for power supply from cigarette USB connection cable > D lighter The basic unit consists of the complete With the USB connection cable provided, electronic unit: it is possible to connect the Navigation This cable allows the unit to be connect- >... -
Page 13: Cable For Vehicle Integration
THE NAVIGATION DEVICE >>> Cable for vehicle integration Information about the Registration (for certain models only) > D documentation You can register your product using our With a 4-pin 2.5mm jack cable you can > GB software service. We will then inform integrate your Navigation... -
Page 14: Overview Of The Scope Of Delivery
>>> OVERVIEW OF THE SCOPE OF DELIVERY > D > GB > F > I > PL Scope of delivery Overview of the scope of Delivery 1 Basic device – PND (Personal Navigation Device) 2 USB connection cable 3 Unit holder with carrier plate (the design depending on the model) 4 Cable for power supply via the vehicle cigarette lighter (12/ 24 Volt) with integrated TMC-antenna (depending on the... -
Page 15: Overview Of The Navigation Device
OVERVIEW OF THE NAVIGATION DEVICE >>> > D > GB > F > I > PL Front of unit with controls and displays Overview of the navigation device 5 Rear of unit 1 Back button Press = Back function in most applications Press and hold = Open the main menu 2 Touch screen showing the main menu selected 3 Touch screen key... -
Page 16: Top Of Unit
>>> OVERVIEW OF THE NAVIGATION DEVICE > D > GB > F > I > PL Top of the unit Underside of the unit 1 Standby switch (sleep mode) 2 Slot for Micro SD card 3 Mini USB connection / connection for power supply 4 On / off switch (I/O) -
Page 17: Maintenance And Care
GENERAL OPERATION >>> Your mobile navigation system was • Do not store your mobile navigation General operation Maintenance and care designed and manufactured with great system in cold environments. During > D The unit is maintenance-free. care and should be treated with equal operation, when the unit warms up to >... -
Page 18: Battery Quality Declaration
>>> GENERAL OPERATION Battery quality declaration Display quality declaration Power supply > D The capacity of the rechargeable battery In some cases, for technical reasons, a Note: > GB in your mobile navigation system few discoloured dots (pixels) may be You can charge the Navigation device decreases with... -
Page 19: Using The Battery
GENERAL OPERATION >>> Using the battery Connection for the cigarette lighter > D The internal power supply is via the Note: integrated rechargeable battery. The > GB If the cigarette lighter has recently been rechargeable battery is maintenance- used and is still hot, wait until the lighter free and does not require any particular >... -
Page 20: Connection To The Mains Outlet
>>> GENERAL OPERATION Connection to the mains outlet TMC antenna (depending on the GPS antenna > D model) Danger! Unit antenna > GB The supplied TMC antenna is integrated Make sure that your hands are not wet The GPS antenna is integrated into the into the cable for power supply. -
Page 21: Cable For Vehicle Integration
GENERAL OPERATION >>> Cable for vehicle integration Memory card > D (depending on model, optional) Your Navigation device has a slot for a > GB micro SD memory card. With a 4-pin 2.5mm jack cable you can As the map data is stored in an internal integrate your Navigation... -
Page 22: Inserting The Memory Card
>>> GENERAL OPERATION Inserting the memory card Unit bracket > Remove the memory card from its > D The Navigation device can be attached packaging without touching or soiling > GB directly to the windscreen with the unit the contact bar. holder. -
Page 23: On The Windscreen
GENERAL OPERATION >>> On the windscreen The unit holder can be attached directly > D to the windscreen using the suction > GB mechanism. > Press the carrier plate onto the four > F retaining lugs of the unit holder. >... -
Page 24: Adjusting The Unit Holder's Position
>>> GENERAL OPERATION Adjusting the unit holder’s position Switching the Navigation device Switching on > Loosen the fastening screws > Set the On/Off switch on the > D on/off until the carrier plate can be undersideof the unit to I. >... -
Page 25: Switching Off
GENERAL OPERATION >>> > Press the button for the required Switching off > If you agree to the request contained in language. > D You can switch the unit off at any time. this prompt, press the button. > The selection is confirmed by pressing >... -
Page 26: Basic Information About The
>>> GENERAL OPERATION Basic information about the Operation Basic information about the > D When you touch a button on the touch touch screen menus screen, the button in question is briefly > GB The Navigation device is fitted with a shown outlined in red to confirm the During operations, you are assisted by touch screen. -
Page 27: Entries Made With The Entry Menu
GENERAL OPERATION >>> You can tell whether a telephone is If route guidance is already active, the Entries made with the entry menu already connected by the symbol on the current destination address and a button > D Some applications require entries to be Phone button. -
Page 28: Entering Characters
>>> GENERAL OPERATION Entering characters Accepting proposals Scrolling through the lists Characters are entered by pressing the During entry, the Navigation device If you have already entered some of the > D keys in the central area. makes proposals in the uppermost line. letters of the selection you want, you can >... -
Page 29: Special Characters And Accent Marks
GENERAL OPERATION >>> The selection list appears. Other character sets Different character sets can be selected > D for the keyboard of the Navigation > GB device. > F > I > In order to switch to the special > PL >... -
Page 30: Entering Numbers
>>> GENERAL OPERATION Entering numbers Switching between upper and lower case: Deleting characters Switch to the numbers keyboard in order During free text entry, it is possible to To delete the last character, use the back > D to enter figures. switch between upper/lower case and key. -
Page 31: The Back Button
GENERAL OPERATION >>> The back button Content Manager Installing the Content Manager > D is integrated in the bottom left You can install the Content Manager on The Content Manager is a PC-based hand corner of the casing. your computer with the following steps: >... -
Page 32: Starting The Content Manager
Click on Details to see the computer. > D Execute the following actions to start the > Select Becker details during copying. Content Manager: > GB > Click on Content Manager The Content Manager is automatically started immediately after installation. -
Page 33: Transferring Pictures
FAQ in the Support backup copy. that it is simpler to find these again, if area Becker homepage needed. Note: (www.mybecker.com). We recommend that you always create Note: the backup. -
Page 34: Navigation Mode
>>> NAVIGATION MODE Signals from at least three satellites are Navigation Mode What is navigation? Safety instructions required to determine your position; > D The term "navigation" (lat. navigare = to • Road traffic regulations always take your height above sea level can be >... -
Page 35: Selecting Navigation
NAVIGATION MODE >>> Selecting Navigation Note: > D The menu items Set current position Navigation mode is called up from the Select from last destinations (fast access > GB main menu. New destinations can be mode) can also be used to select a entered in the menu "... -
Page 36: Smart Guess
>>> NAVIGATION MODE Last destinations list The destination list The destination list displays, line by line, > D The last destinations visited and saved all destinations available for fast dialling. > GB destinations are displayed in the Last Each line of the destination list is divided destinations list and can be selected into two fields. -
Page 37: Icons Used
NAVIGATION MODE >>> Icons used Operating the last destinations list Displaying or editing a destination The following icons are used in the Any destination stored in fast access > D Start with existing destination destination list: mode can be displayed and edited. >... -
Page 38: Personal Destinations
>>> NAVIGATION MODE Selecting a destination from Personal Option Meaning Option Meaning > D destinations Protect entry Delete all The destination is pro- All destinations (except entries ™ tected from automatic for the protected desti- You can call up Google points of inter- >... -
Page 39: Editing Personal Destinations
NAVIGATION MODE >>> Editing Personal destinations Selecting a destination from Contacts > In the list of your own destinations, ® ® > D You can call up Microsoft Outlook press the button in front of the contacts that have been imported into >... -
Page 40: The New Destination Menu
>>> NAVIGATION MODE 10 entries, a list of contacts is displayed The New destination menu straight away. > D > In the input menu, select the first > GB letters of the entry you are looking for. > Press the button when the name >... -
Page 41: Layout Of The New Destination Menu
NAVIGATION MODE >>> Layout of the New destination menu Select on map Entering the address With the button Select on map , you can > D Enter address button in the Enter address select a destination directly on the map destination input menu opens the menu >... -
Page 42: Selecting A Country
>>> NAVIGATION MODE Selecting a country Selecting an address and starting route Note: You can select a country from those > D guidance If required, press the arrow keys available using the button for the country You can enter the exact destination or use the scroll wheel on >... - Page 43 NAVIGATION MODE >>> Selecting a town Using the town list Note: The destination can be entered by either Once a few letters of the desired town > D If two words need to be entered you using the name or ZIP code. have been entered you can display a list must separate them with the character >...
- Page 44 >>> NAVIGATION MODE Selecting the street Using the street list Selecting the Intersection In the Street menu field the street and Once a few letters of the desired street After entering the destination town and > D house number can be entered separate- have been entered you can display a list street, you can enter a junction so as to >...
- Page 45 NAVIGATION MODE >>> Selecting a house number Displaying the route Storing a destination After entering the destination town and Once the address has been entered, the In the address input menu, the Save > D street, you can enter a house number so address input menu allows the route to button opens a menu where a name can >...
- Page 46 >>> NAVIGATION MODE If the route guidance is already running Note: Note: and a waypoint has already been entered > D The symbols above the progress bar If there is no GPS signal when the route you will be asked whether the new refer to restrictions that you may have is calculated, the following will be >...
-
Page 47: Entering Address By Speech
NAVIGATION MODE >>> If your entry is unique, after a short time Entering address by speech (selected models) You can start address entry using speech the menu for entering addresses will be > D from the fast access function or from the displayed with your entry filled in. -
Page 48: Points Of Interest
>>> NAVIGATION MODE If your entry was not unique or the Entries identified with the symbol Points of interest Navigation device was not able to open up a further list when they are > D Points of interest (POI) are included in the uniquely assign your entry, you will be selected. -
Page 49: Point Of Interest In The Vicinity
NAVIGATION MODE >>> > Select the desired point of interest. Note: > D You can also press the All categories button. An input menu will then open > GB and you can enter the name of a point of > F interest directly and confirm it. -
Page 50: Point Of Interest Near To An Address
>>> NAVIGATION MODE available Points interest By pressing of the button next to Point of interest near to an address > Press POI near location categories for the city entered will be the selected POI, you can display the > D displayed. -
Page 51: Entering A Point Of Interest Directly
NAVIGATION MODE >>> > Select the desired destination in the > Press the Start to begin route guidance Entering a point of interest directly > Press the POI search by name button. list. to the point of interest straight away. >... -
Page 52: Additional Point Of Interest Information
>>> NAVIGATION MODE Additional point of interest information Marco Polo City Guides Selecting a destination from the map Any additional information that is > D The MARCO POLO travel guide is similar You may also select a destination directly provided for a point of interest can also to the function "Enter special destination"... - Page 53 NAVIGATION MODE >>> > Press the Select button. You can select a new destination by touching the map even during the route > D guidance in progress, in order to insert a > GB stopover replace destination. When touching the display, a >...
-
Page 54: Coordinate Entry
>>> NAVIGATION MODE > Then enter the desired values using Where possible, an address matching Coordinate entry the buttons the coordinates will be displayed. You > D You can also enter your destination using The entry field at the beginning may be can view the destination on the map, geographic coordinates. -
Page 55: Route Planning
NAVIGATION MODE >>> By pressing Add stage you can now add a Route planning stage to the route. > D The route planning menu allows you to Rename route After pressing you can create and select individual routes. To do >... -
Page 56: Simulation Of The Route
>>> NAVIGATION MODE You can call up the route options using Creating a new route > Drücken Sie in der Routenplanung die Options button. > D Create new route Taste > GB Simulation of the route There is a play button on the left >... -
Page 57: Editing A Route
NAVIGATION MODE >>> Editing a route Option Meaning > Select the route you wish to edit. > D Replace stage You can replace the > Press the button in front of the selected stage with > GB stage you wish to edit. another intermediate destination. -
Page 58: Optimising A Route
>>> NAVIGATION MODE This will take you to the navigation Optimising a route Navigation settings If you have entered several destinations settings menu. > D The navigation settings contain all the for a route, you can use the Navigation > GB settings that are relevant to the Configuration device to optimise the order of the... -
Page 59: The Map View Button
NAVIGATION MODE >>> > Press the button to select The Map view button whether to use 2D or 3D mode. > D You can select whether the map is to be > Press the button to select the displayed in 3D or 2D mode, in a split >... -
Page 60: Auto Zoom
>>> NAVIGATION MODE The following setting options are • Street names 2D Street names 3D Auto zoom > Press the available in the extended settings: You can select whether the street Auto zoom button in the > D names should be displayed ( ) or not extended settings. -
Page 61: Select Poi Categories
NAVIGATION MODE >>> Select POI categories You can select which POI symbols are to > D be displayed on the map. > GB > Press the Select POI categories button in the extended settings. > F > I > You can then switch the display of Touch the first field to select one of the >... -
Page 62: 3D City View
>>> NAVIGATION MODE > Confirm your setting in the Advanced Under these options, you can select The Route overview button displays for the travel without a selected menu by pressing the button. > D With the options in this setup menu you route. -
Page 63: The Guidance Info Button
NAVIGATION MODE >>> The Guidance info button Setting Meaning > D Guidance info In the settings window you Signposts When this function is can select which additional information activated, you receive > GB you would like displayed during route additional important guidance. -
Page 64: The Route Options Button
>>> NAVIGATION MODE The Route options button Setting Meaning Note: > D You can edit your driving profile in the Junction If this function is This information can only be displayed if view Route options settings window. The activated, you will see it is contained in the map material. -
Page 65: Selecting The Vehicle Profile
NAVIGATION MODE >>> Select a speed and exit the speed menu Selecting the vehicle profile Selecting the route type > After pressing the This setting influences the calculation of with the back button Route type button, > D > Exit the vehicle selection menu, too, the expected time of arrival and blocks select one of the following options. -
Page 66: Time-Dependent Route Guidance
>>> NAVIGATION MODE Time-dependent route guidance Avoiding particular types of road The TMC button If this function is switched on ( After pressing the button Avoid you can > D You can configure settings for the information (statistical information) on exclude various types of road, e.g. -
Page 67: The Voice Guidance Button
NAVIGATION MODE >>> • Volume The Voice guidance button Setting Meaning You can select the standard volume for > D Voice guidance In the settings window Rerouting This button allows you voice announcements for each start of you can make settings relating to the to choose whether the >... -
Page 68: Setting The Voice
>>> NAVIGATION MODE Setting the Voice Setting the Volume The Warnings button In the Voice settings window you can set With the Volume settings window, you > D Warnings In the settings window you can the voice that will make the navigation can set the standard volume for voice select which warnings are to be >... -
Page 69: Setting Driver Alerts
NAVIGATION MODE >>> • Speed info The following signs are available in the Setting Driver alerts You can select whether speed limits If this information is saved in the map individual categories: > D are displayed in parallel to the material and is supported by your Curve warnings •... -
Page 70: Setting Speed Info
>>> NAVIGATION MODE The following settings are available. Setting Speed info Setting Meaning Speed info settings window allows to > D Voice A speaker’s voice warns select whether speed limits output you of exceeding the Setting Meaning > GB displayed in parallel to the navigation. speed limit. -
Page 71: The Blocked Roads Button
NAVIGATION MODE >>> > Select the blocked road you want. You can now set whether or not the road The Blocked roads button should be blocked for each day of the > D Blocked roads In the settings window you week. -
Page 72: The Vehicle Data Button
>>> NAVIGATION MODE The Vehicle data button Note: > D This menu allows the calculation of an Press the Block 24 h , button to set a > Press the Extra-urban button to enter economic route by using the fuel block for an entire day. - Page 73 NAVIGATION MODE >>> If the automatic function is switched off, The Format button The Time button you can select the desired time zone by > D Format In the settings window you can You can select the time zone relevant for Use auto time pressing the button below Time...
-
Page 74: Traffic Announcements Using Tmc
>>> NAVIGATION MODE The Reset button Traffic announcements using Note: > D You can reset the navigation settings to TMC (depending on the model) As the traffic announcements are their factory settings. transmitted by radio stations, we cannot > GB The settings will then be reset. -
Page 75: Displaying Tmc Messages On The Map
NAVIGATION MODE >>> Displaying TMC messages on the map Using TMC > D Current TMC messages are displayed on When the Navigation device has been at- the map graphically. Sections of the tached to the carrier plate (power supply > GB route where there are traffic problems with the integrated TMC antenna con- are highlighted blue. -
Page 76: Taking Announcements Into Consideration When Calculating Routes
>>> NAVIGATION MODE The part of the route with the travel Reading a message Taking announcements into > Press on the desired message in the direction > D consideration when calculating routes If a TMC message lies on your route, list. -
Page 77: Calling Up The Map Display
NAVIGATION MODE >>> The red route or route marked blue for The map display an obstruction shows the previous route. > D The map display is used primarily for The route marked yellow displays the > GB route guidance. However, you can also alternative route calculated. -
Page 78: Structure Of The Map Display
>>> NAVIGATION MODE The map display will then appear and, if Speed limit on the road currently Power level/telephone status being driven (display (depending on the model) GPS reception is available, will show > D available for all roads), signs for the Button for calling up the options your current position. -
Page 79: The Information Box
NAVIGATION MODE >>> Your current position is displayed on the If you press the Info box again, more or Information is also displayed in the map via the position icon. less fields are displayed. At least one bottom left corner in the preview area. >... -
Page 80: Split Screen With Route Guidance
>>> NAVIGATION MODE Split screen with route guidance Route guidance with arrow display Note: > D If you follow the lane recommendation, the next driving maneuver is possible > GB without changing lanes. > F Next driving maneuver > I Current street or street to which the next driving maneuver leads >... -
Page 81: Map Display With Junction View
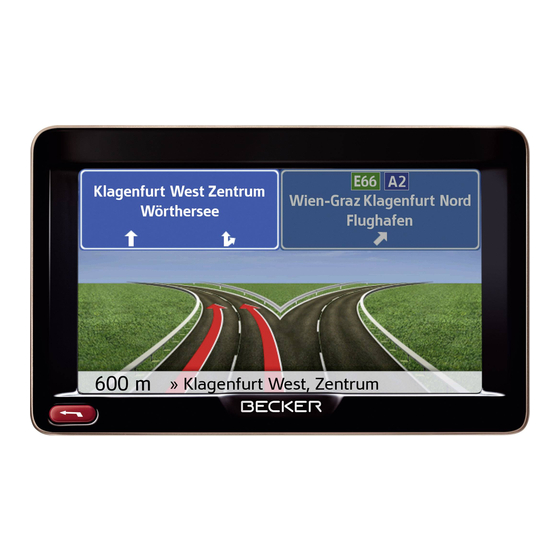
NAVIGATION MODE >>> Traffic lane recommendation (only Map display with Junction view Tunnel view appears on some multi-lane roads; You can display a detailed and realistic When your enter a longer tunnel, a three > D green arrows = recommended view of the lane situation at many dimensional tunnel view appears. -
Page 82: Using The Map Display
>>> NAVIGATION MODE Using the map display Changing the announcement volume Note: The volume of announcements can be > D The tunnel view provides a schematic Repeating the last announcement adjusted. view of the route layout of the tunnel. > GB During route guidance, the system The whole tunnel layout, the first route announces important information, e.g. -
Page 83: Map Zooming
NAVIGATION MODE >>> An x now appears next to the speaker Map zooming Moving the map symbol . With pressing the The map can be zoomed into in steps by You can move the map to any point. > D >... -
Page 84: Map Orientation
>>> NAVIGATION MODE The viewing angle will be lower and the Map orientation You can orient the map for example in When a route is activated, the map view horizon is moved back after a while into > D the direction of travel. can be oriented in different ways. -
Page 85: D The Detour Assistant
NAVIGATION MODE >>> > Press the number of TMC announcements and symbol. Note: POIs are displayed. A message is displayed with the > D If there is a traffic jam announcement > Press one or more buttons to display question "You are probably standing in a on the route, the TMC symbol >... -
Page 86: The Departure Assistant
>>> NAVIGATION MODE lot to the destination are governing for Map display options Note: the selection. > D The scope of the displayed functions In the map display options, you can > Touch a parking possibility on the map depends on whether route guidance or >... -
Page 87: Displaying The Whole Route
NAVIGATION MODE >>> touching the screen shortly, allow you to Displaying the whole route play the simulation in up to 16x speed, or > D (Only available when route guidance is to step from route section to route active.) > GB section. -
Page 88: Selecting Alternative Routes Change Route Options
>>> NAVIGATION MODE Selecting alternative routes Change route options Canceling route guidance > D You can have the different routes (Only available when route guidance is (Only available when route guidance is displayed by the navigation device. active.) active.) > GB >... -
Page 89: Entering/Deleting A Stopover
NAVIGATION MODE >>> Entering/deleting a stopover Blocking route temporarily > D Block road ahead (Only available when route guidance is Using the option, you active.) can block a stretch of road ahead > GB With this function, you can enter a temporarily. -
Page 90: Setting Day/Night Display
>>> NAVIGATION MODE As soon as you selected the stretch, a Setting day/night display Display current position route will calculated. > D You can switch the Navigation device You can display your current position and Furthermore, the distance and time display from day to night and vice versa. -
Page 91: Entering The Destination
NAVIGATION MODE >>> By pressing the Country info button you Displaying/selecting different routes Entering the destination can display country-specific information You can use the Navigation device to > D (Only available when route guidance is such as the maximum permitted speed display various routes. -
Page 92: Skipping A Destination
>>> NAVIGATION MODE Skipping a destination > D If a planned route with several destina- tions is active, you may delete the cur- > GB rent destination of the route. Route guid- ance to the next destination is then > F started. -
Page 93: Telephone Mode
TELEPHONE MODE >>> If your navigation device has an If Bluetooth is activated and the Telephone mode Calling up the telephone mode integrated Bluetooth® interface, you can Navigation device is already connected > D (only selected models) connect it to a mobile phone equipped to a cell phone, the telephone menu is >... -
Page 94: Telephone Menu
>>> TELEPHONE MODE The Navigation device now attempts to In the upper area of the telephone menu, Telephone menu (only selected reconnect the cell phone last connected. the signal strength of the cell phone, the > D models) When the connection is established, the charging level of the cell phone, the tele- >... -
Page 95: Phonebook
TELEPHONE MODE >>> > In the telephone menu, press the Dial Phonebook Note: In the phonebook, the system displays button. > D the phonebook entries loaded from the Press the button to delete the > GB SIM card and from the memory of the characters entered. - Page 96 >>> TELEPHONE MODE > In the input menu, select the first Note: Icon Meaning letters of the entry you are looking for. > D You may also first have a list displayed Private phone number Note: that corresponds letter > GB •...
-
Page 97: Text Messages (Sms)
TELEPHONE MODE >>> • Call back Text messages (SMS) By pressing the Call back button you (only selected models) > D can start a call to the sender’s number. If this function is supported by the mobile > GB Extract numbers •... -
Page 98: Incoming Text Message
>>> TELEPHONE MODE Each line of the number list is divided into Incoming text message Number lists You will receive notification of any text two fields. Each list field is designed as a > D In the number lists, the phone numbers messages received, depending on the button. -
Page 99: Icons Used
TELEPHONE MODE >>> Icons used Dialing an available number Selection Meaning The following icons are used in the You may select directly the numbers/ > D Protect entry The entry is protected number list. names available in the number list. against automatic dele- >... -
Page 100: Lists Loaded From Cell Phone
>>> TELEPHONE MODE The device list shows line by line all cell Lists loaded from cell phone Connecting Bluetooth telephones > In the number list, call the respective phones that were already connected to > D So that you may make and receive calls Missed Received list using the buttons... -
Page 101: Automatic Connection
TELEPHONE MODE >>> Automatic connection Searching for cell phones After activation, your Navigation device > D Note: attempts to establish a connection to the Prior to a search, switch on Bluetooth® > GB cell phone last connected. on the cell phone to be searched for. >... -
Page 102: Connecting From Device Lists
>>> TELEPHONE MODE Connecting from device lists Connecting a mobile phone From the device list, you may initiate a You can also attempt to establish a > D connection to a cell phone. If a cell phone connection to the Navigation device from >... -
Page 103: Disconnecting A Connected Telephone
TELEPHONE MODE >>> Disconnecting a connected telephone Telephone calls Accepting a call > D You may disconnect the connection to a For an incoming call, a ringing tone will In the telephone calls section, you can cell phone currently connected via sound. -
Page 104: Ending A Call
>>> TELEPHONE MODE If you have switched on the automatic Ending a call During a call call acceptance described > D You can end an active call. During a call, you have various control "Automatic call acceptance" on page 107, options. -
Page 105: Telephone Settings
TELEPHONE MODE >>> > To call the options menu of the call • Private mode Hands free Telephone settings screen, press the Options button. You can transfer a call back to the cell > D The telephone settings include all the phone. -
Page 106: Switching Bluetooth On And Off
>>> TELEPHONE MODE You will branch to the menu for the • Bottom icon: function off Switching Bluetooth on and off telephone settings. > D Bluetooth With the button, you can switch Bluetooth on or off. Visibility > GB Start With the Visibility button, you can switch... -
Page 107: Automatic Call Acceptance
TELEPHONE MODE >>> Automatic call acceptance Telephone volume Updating the phonebook > D With this function, you can set whether With this function, you can set the With this function, you can update or or not or after which time an incoming volume of the ringtone and the volume retransfer the stored phonebook entries >... -
Page 108: Text Message Notification
>>> TELEPHONE MODE • Read out automatically Bluetooth name Text message notification (depending An incoming text message will be read > D on the model) With this function, you can assign a out automatically. name for your Navigation device. This With this function you can set how the >... -
Page 109: Marco Polo City Guides
TOOLS >>> Under Tools, the following functions are Tools Marco Polo City Guides Image viewer* grouped together, depending on the > D With the travel guide, you can select, for model: Note: > GB example, MARCO POLO Top-Highlights • Marco Polo City Guides The image viewer cannot be called up or MARCO POLO Insider Tips and start •... -
Page 110: The Image Viewer Menu
>>> TOOLS The image viewer menu Selecting an image > D In the image viewer menu, you can select images, start a slide show and call > GB up the settings. > F > I A message is displayed stating that the >... -
Page 111: Enlarging The Image
TOOLS >>> Press the buttons to the left and right of Enlarging the image Displaying image information > Show the image menu. > Show the image menu. the image to move to the next or > D > Press the >... -
Page 112: Slide Show
>>> TOOLS Slide show Country information > D In the slide show, all the pictures in the The country information enables you to current folder level are automatically > GB display country-specific information for displayed sequentially. numerous countries (maximum permit- >... -
Page 113: Blocking A Section Of The Road
TOOLS >>> Blocking a section of the road Symbol Meaning > D permanently Speed limit in built-up areas > GB With the Block option you can block indi- vidual route sections permanently. The Speed limit outside built-up > F Navigation device then calcu-lates a di- areas >... - Page 114 >>> TOOLS > Using the buttons The points will be marked by the letters set the first peri- A and B. od when the road is to be blocked on > D > Define the direction of blockage for the this day.
-
Page 115: Trip Computer (Depending On Model)
TOOLS >>> Travel time without breaks in the Trip computer (depending on journey > D model) Travel time with breaks in the > GB journey The Trip computer provides a data Compass display with average speeds, maximum > F Calls up the stopwatch with lap speeds, etc. - Page 116 >>> TOOLS Press the Stop button to stop the recording. The time continues if you > D Start press the button again after > GB stopping the recording. Reset Press the button to delete all > F recordings and reset all times to zero. >...
-
Page 117: Selecting System Settings
SETTINGS >>> Settings Selecting system settings The system settings menu Operation > D You can select the various settings You can change various basic settings Selection options optionsfrom the system settings menu. > GB for all applications on the Navigation Select the desired menu item by press- device. -
Page 118: The Individual Menu Items
>>> SETTINGS The individual menu items Automatic on/off The Navigation device can switch > D Battery automatically to sleep mode when the > GB Your Navigation device may be operated vehicle ignition is switched off. using an external power supply unit or Prerequisite for this: >... -
Page 119: Day/Night Display
SETTINGS >>> • Bottom icon: The function is switched Day/night display Brightness off, the Navigation device does not You can set the Navigation device display You can set the brightness of the display > D switch off automatically. to day, night or automatic. separately for day and night display. -
Page 120: Design By Day
>>> SETTINGS > Confirm your selection by pressing the Design by day Design by night With this option, the menu and map Two schemes with different contrasts back button . The new night > D display during the day can be switched to are available to select for the map display will take effect when activating >... -
Page 121: Setting The Colour
SETTINGS >>> Scrolling Setting the colour Language You can change the colour of the icons The texts on the touch screen can be Using the buttons or the scroll > D and other design elements. displayed in a variety of languages. wheel, it is possible to scroll through the >... -
Page 122: Sounds
> Press the ton, you can display further information button. such as used licences, installed contents The Navigation device is reset to the and map material. Always quote these factory settings. details in enquiries to the service provid- ed by Harman/Becker. -
Page 123: Calibration
SETTINGS >>> Calibration If the touch screen responds incorrectly > D when buttons are pressed, it needs to be > GB calibrated. > F Starting the calibration You can start the calibration using the > I following button: > PL >... -
Page 124: Technical Terminology
>>> TECHNICAL TERMINOLOGY JPG/JPEG Technical terminology (Greenwich Mean Time) (Global Positioning System) (Joint Photographic Experts Group) > D Central European Time standard GPS determines your actual geographi- The JPEG is the most common type of > GB Standard time at 0 degree longitude (the cal position by the use of satellites. - Page 125 TECHNICAL TERMINOLOGY >>> Stylus A stylus is an input pointer which is used (Traffic Message Channel) > D for the operation of touch-screens, mo- Traffic announcements transmitted by > GB bile phones or PDAs. most FM stations via RDS. Basis for The stylus consists basically of a plastic dynamic navigation.
-
Page 126: Index
index >>> INDEX Content Manager ....31 Numerics Start ......32 >... -
Page 127: Number List
INDEX >>> > D ID3 tag ......124 Navigation ......34 Restrictions Image viewer . - Page 128 >>> INDEX Short route ..... . . 65 Slide show ..... . 112 >...
-
Page 129: Model Overview And Technical Specifications
MODEL OVERVIEW AND TECHNICAL SPECIFICATIONS >>> Model overview and technical specifications : standard Navigation system > D - : not available Ready 50 : optional Ready 50 Active 50 > GB EU 19 > F Weight 195 g 195 g... -
Page 130: Notice
>>> NOTICE Dear customer, NOTICE In conformance with current EC guidelines, any person may operate this unit. This unit > D conforms to the current valid European or harmonized national regulations. This > GB designation is your guarantee that the unit conforms to the applicable specifications concerning electromagnetic compatibility. -
Page 131: Disposal Of The Unit
NOTICE >>> Disposal of the unit > D Customer information on the disposal of electrical and electronic devices > GB (private households) According to the self-proclaimed corporate principles of United Navigation GmbH, your > F product has been developed and manufactured from high-quality, recyclable materials and components. -
Page 132: Disposal Of The Battery
>>> NOTICE Disposal of the battery > D Duty to supply information according to battery legislation (BattV) > GB Batteries must not be disposed of in household waste. It is the duty of the user to return used batteries. Please only dispose of >... - Page 133 NOTICE >>> > D > GB > F > I > PL > Completely discharge the battery (leave the unit switched on with no power supply until it automatically switches off). > Unscrew and remove the two housing screws using a small TX5 screwdriver. >...
- Page 134 - Germany...
Need help?
Do you have a question about the Active 50 and is the answer not in the manual?
Questions and answers