Table of Contents
Advertisement
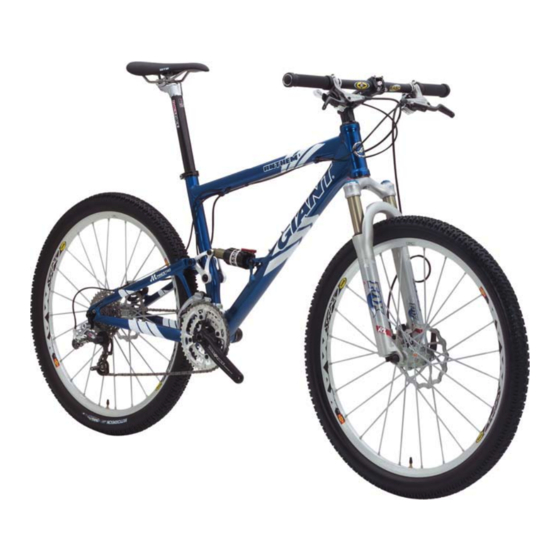
Anthem service manual
Maestro suspension performance. No brake influence, no pedal kick-back, linear rising rate,
superb traction, and absolute efficient pedaling.
Rock-solid lateral rigidity which increase sprinting efficiency and tight cornering stability in
racing courses and singletrack.
The Anthem is built on the basis of our Maestro suspension technology with all the features
that meet today's XC racing demand.
Aggressive and agile XC racing geometry
Lightweight frame design
Newly designed rear shock. Works well even when set up with little to no sag without
sacrificing the original Maestro suspension performance & characteristics.
Advertisement
Table of Contents

Related Manuals for Giant ANTHEM


Summary of Contents for Giant ANTHEM
- Page 1 Anthem service manual Maestro suspension performance. No brake influence, no pedal kick-back, linear rising rate, superb traction, and absolute efficient pedaling. Rock-solid lateral rigidity which increase sprinting efficiency and tight cornering stability in racing courses and singletrack. The Anthem is built on the basis of our Maestro suspension technology with all the features that meet today’s XC racing demand.
-
Page 2: Table Of Contents
ABLE ONTENTS Notice to authorized Giant dealers Spare Parts Exploded Drawing Spare Parts List Mounting Bolt Torque Settings Dual Suspension Quick Start Guide Basic Terms & Shock Set-Up Overview Air Shick Set-up Setting and Adjusting Rebound Damping Front Suspension Travel & Sag Guide Maintenance General maintenance Replacement of Rear Shock... -
Page 3: Notice To Authorized Giant Dealers
Notice to authorized Giant dealers The Anthem is a new XC racing bike based on the Maestro suspension system. It inherits the strengths of Maestro suspension technology and is tuned and perfected to yield most efficient XC racing machine. The Anthem is designed to get from start to finish fastest, and take the rider to the podium. -
Page 4: Mounting Bolt Torque Settings
Mounting bolt torque settings Dual Suspension Quick Start Guide Basic Terms & Shock Set-Up Overview TERMS Bottomed Out: When a shock absorber or suspension fork (herein after referred to as “shock”) is compressed completely and all the suspension travel has been used. - Page 5 Platform Valve On bikes equipped with a Manitou Stable Platform Valve™ (SPV)™ rear shock, you can adjust the bike’s pedaling efficiency by increasing the air pressure in the SPV air cartridge. Increasing the air pressure will resist pedal-induced bobbing. Decreasing the air pressure will make the suspension more sensitive to small bump forces.
-
Page 6: Air Shick Set-Up
AIR SHOCK SET-UP Giant cross-country and trail bikes feature an air shock equipped Maestro suspension design. All rely on sag for proper riding performance. SETTING AND ADJUSTING MAESTRO (ANTHEM) SAG (air shock) 1. Pump the main air chamber to a psi (pounds per square inch) equivalent to rider’s body weight . -
Page 7: Front Suspension Travel & Sag Guide
FRONT SUSPENSION TRAVEL & SAG GUIDE To determine bike’s front suspension travel adjustments and recommended settings, please refer to the fork manufacturer’s technical manual. A suspension fork is effective at both absorbing bump forces and helping the tire to track the ground for improved traction and braking control. When in active mode, a fork will rely on sag to keep the front tire in better contact with the ground during braking. -
Page 8: Maintenance
Maintenance General Maintenance Inspect all suspension bolts and tighten if necessary to required torque settings. Do not use high-pressure water sources to wash or rinse bicycle. Doing so can displace any lubricants that are present, as well as possibly forcing water and/or contaminants into the bearing that can harm the pivot and bearing, reduce performance, and cause premature wear. -
Page 9: Replacement Of Rocker Arm
Replacement of rocker arm Before dismantling the rocker arm: Remove the rear shock. Rock arm Rear Triangle Bolt Step 1: Rock arm Bolt Loosen the bolt and remove the rocker arm. Repeat Step 1 in reverse to reassemble the rocker arm. Recommended torque for the rear triangle bolt is 120-150 kgf-cm. -
Page 10: Replacement Of Joint/Clev
Replacement of Joint/clev Before dismantling the Joint/Clev: Remove the crank, Remove the chain wheel. Joint/Clev bolt Step 1: Loosen the Joint/Clev bolt and Joint/Clev remove the Joint/Clev. Rear triangle bolt Repeat Step 1 in reverse to reassemble the Joint/Clev. Recommended torque for the rear triangle bolt is 120-150 kgf-cm. Recommended torque for the Joint/Clev bolt is 120-150 kgf-cm.