Advertisement
- 1 At a glance
- 2 Before using for the first time
- 3 Starting up the appliance
- 4 Preparation
- 5 Operation of the menus
- 6 Adjusting the grinding fineness
- 7 Cleaning and maintenance
- 8 Inserting, changing and removing the water filter
- 9 Transport, Storage and Disposal
- 10 Technical data
- 11 Safety Instructions
- 12 Documents / Resources
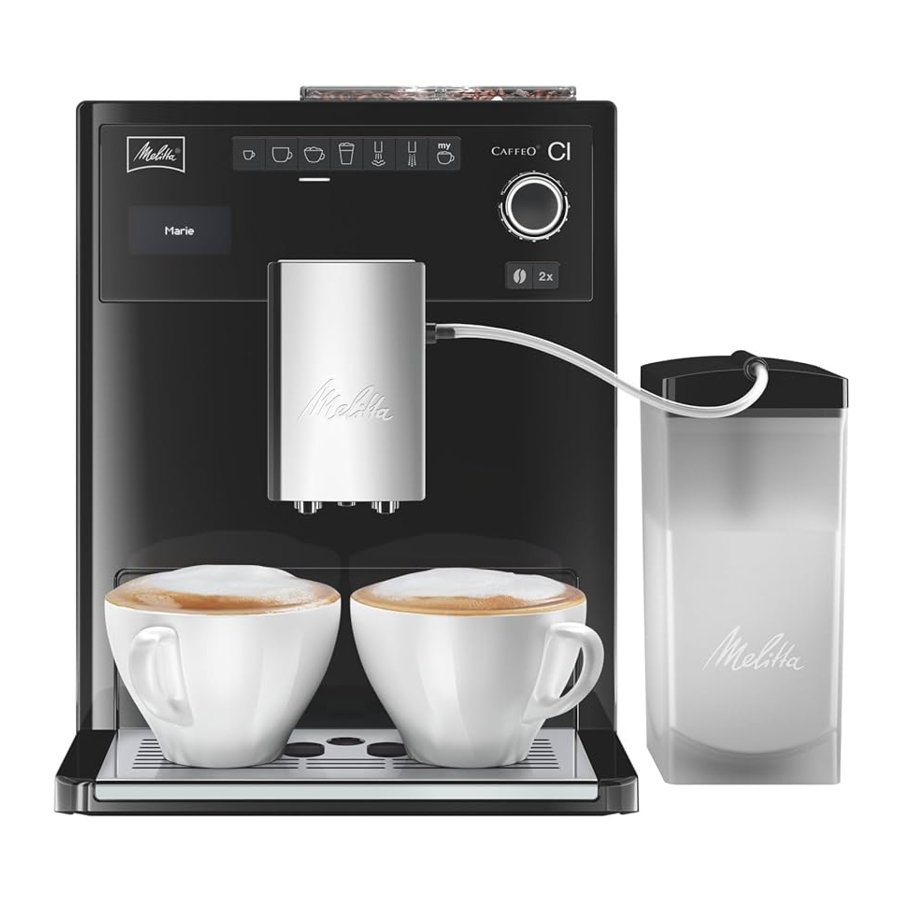
At a glance
Figure A

| 1 | Drip tray with cup plate and coffee grounds container (internal) |
| 2 | Float for the water level indicator in the drip tray |
| 3 | Height-adjustable outlet with LED cup illumination |
| 4 | Text display |
| 5 | ON/OFF button  |
| 6 | Water tank |
| 7 | Two-chamber "Bean Select" bean container |
| 8 | Ground coffee chute with lid |
| 9 | Buttons |
| 10 | Rotary switch |
| 11 | Milk container (except with Type E 970-306) |
Figure B

| 12 | Power cable |
| 13 | Brewing unit and identification label (behind the cover) |
| 14 | Grinding fineness adjustment |
Buttons
 | Dispensing espresso. |
 | Dispensing Café Crème. |
 | Dispensing Cappuccino. |
 | Dispensing Latte Macchiato. |
 | Press briefly: dispensing milk froth. Press and hold: dispensing hot milk. |
 | Dispensing hot water. |
 | My Coffee: selecting preset personal settings. |
 | Adjusting the coffee strength in four levels. |
 | Press before selecting coffee and coffee specialities: Dispense two cups of the selected product. |
Before using for the first time
Check the scope of supply
Use the following list to check the completeness of the delivery. Please contact your retailer if there are missing parts.
- Milk container
- Milk hose
- water filter
- Screw-in aid for the water filter
- Test strips to determine water hardness
General information
- Only use pure water without carbonation.
- Use the supplied test strip to determine the hardness of the water used and set the water hardness.
- If you wish to use a water filter, do not insert it until after the initial startup.
Information for using for the first time
The appliance must be vented before it is used for the first time. The appliance may only be switched on with a completely filled water tank.
Graphic display example

Starting up the appliance
Switching on for the first time

Danger of fire and electric shock due to incorrect supply voltage, incorrect or damaged connections and power cable!
- Ensure that the supply voltage corresponds to the supply voltage specified on the identification label of the appliance. The identification label is located on the right side of the appliance behind the cover (Figure B, 13).
- Make sure that the power socket meets the applicable standards for electrical safety. If in doubt, contact a qualified electrician.
- Never use damaged power cables (damaged insulation, bare wires).
- Place the appliance on a stable, dry and level surface with sufficient clearance (at least 10 cm) to the sides.
- Plug the power cable into a suitable power socket.
- Press the
![]() button to switch on the appliance. After switching on, first set the language and then the time.
button to switch on the appliance. After switching on, first set the language and then the time. - Turn the rotary switch (FigureA, 10) to selective the respective setting (language, hour, minute).
- Press the rotary switch to save the each setting.
After making the settings, fill the bean container:
- Filling the bean container. Then fill the water tank:
- Lift up the lid of the water tank6 and pull the water tank up and out of the appliance.
- Fill the water tank with fresh tap water only up to the max. mark.
- Insert the water tank into the appliance.
- Press the rotary switch.
- Place a vessel under outlet 3.
- Press the rotary switch. First, an automatic rinsing is carried out. The appliance is ready for operation when the buttons illuminate.
Filling the bean container

Danger for persons allergic to caffeine!
Since a residual quantity of the previously used beans remains above the grinder, the two types of beans mix when changing to a different bean type. Consequently, when switching over to decaffeinated beans, the first two cups may still contain coffee that is not decaffeinated. This means that only the third cup of coffee prepared after the switchover is free of caffeine.
In the 2-chamber "Bean Select" bean container, two different types of coffee can be filled. Change the coffee type using the tilt lever.
- Fill bean container 7 with fresh coffee beans (max. 135 g per chamber).
- Select the desired bean type by setting the tilt lever to the appropriate chamber.
Switching the Appliance On and Off
- Place a vessel under outlet 3.
- Press the on/off
![]() button to turn the appliance on or off. The appliance may perform an automatic rinse.
button to turn the appliance on or off. The appliance may perform an automatic rinse.
Preparation
- Fill the water tank with fresh water every day. The water tank must always be filled with enough water for the operation of the appliance.
- Fill the bean container preferably with espresso beans or bean mixtures for fully automatic coffee machines. Do not use any ground, glazed, caramelised, or otherwise sugar-coated coffee beans.
- Beverage dispensing stops automatically when the set dispensed quantity is reached.
- Beverage dispensing can be stopped prematurely by pressing the respective button again. Two options are available for the preparation:
- Standard: Change the settings such as coffee strength or quantity directly when dispensing.
- My-Coffee: Call up saved settings with the
![]() button.
button.
Preparing Café Crème or Espresso
- Switch on the appliance.
- Place a vessel under outlet 3.
- Press the
![]() button to set the coffee strength.
button to set the coffee strength. - Press the
![]() button (for Espresso) or
button (for Espresso) or ![]() button (for Café Crème). The grinding process and coffee dispensing starts.
button (for Café Crème). The grinding process and coffee dispensing starts. - The dispensed quantity can be adjusted or prematurely stopped by turning the rotary switch.
 button (for Espresso) or
  button (for Café Crème). The grinding process and coffee dispensing starts.
Preparing a cappuccino
- Switch on the appliance.
- Place a vessel under outlet 3.
- Connect the tube with the outlet and the supplied Melitta® milk container (Image C) or insert in a conventional milk carton.

- Press the
![]() button to set the coffee strength.
button to set the coffee strength. - Press the
![]() button. The grinding process and coffee dispensing starts.
button. The grinding process and coffee dispensing starts. - The dispensed quantity (coffee) can be adjusted or prematurely stopped by turning the rotary switch.
- The dispensed quantity (milk) can be adjusted or prematurely stopped by turning the rotary switch.
- Perform the Easy Cleaning programme or select another beverage.

Preparing a latte macchiato
- Switch on the appliance.
- Place a vessel under outlet3.
- Connect the tube with the outlet and the suppliedMelitta® milk container (Image C) or insert in a conventional milk carton.
- Press the
![]() button to set the coffee strength.
button to set the coffee strength. - Press the
![]() button. The heating and dispensing of milk starts.
button. The heating and dispensing of milk starts. - The dispensed quantity (milk) can be adjusted or prematurely stopped by turning the rotary switch.
- The dispensed quantity (coffee) can be adjusted or prematurely stopped by turning the rotary switch.
- Perform the Easy Cleaning programme or select another beverage.
Preparing milk froth or warm milk
- Switch on the appliance.
- Place a vessel under outlet 3.
- Connect the tube with the outlet and the supplied Melitta® milk container (Image C) or insert in a conventional milk carton.
- Press the
![]() button (briefly for milk froth/long for warm milk). The heating and dispensing of milk starts.
button (briefly for milk froth/long for warm milk). The heating and dispensing of milk starts. - The dispensed quantity can be adjusted or prematurely stopped by turning the rotary switch.
- Perform the Easy Cleaning programme or select another beverage.
The preparation of 2 cups option using the ![]() button is not possible.
button is not possible.
Preparing hot water
- Switch on the appliance.
- Place a vessel under outlet3.
- Press the
![]() button. Hot water will start dispensing.
button. Hot water will start dispensing. - The dispensed quantity can be adjusted or prematurely stopped by turning the rotary switch.
The preparation of 2 cups option using the ![]() button is not possible.
button is not possible.
Preparing beverages with ground coffee
- Switch on the appliance.
- Open the lid of the ground coffee chute 8.
- With the supplied coffee scoop, fill the ground coffee (do not use instant products) into the ground coffee chute8 (max. one coffee scoop).
- Close the lid of the ground coffee chute8.
- Place a vessel under outlet 3.
- Press the
![]() button. Coffee dispensing now starts. If no coffee was dispensed from the appliance within 3 minutes after opening the ground coffee chute, the appliance will switch back to coffee bean operation and will discard the ground coffee into the coffee grounds container to prevent later risk of overfilling the brewing chamber.
button. Coffee dispensing now starts. If no coffee was dispensed from the appliance within 3 minutes after opening the ground coffee chute, the appliance will switch back to coffee bean operation and will discard the ground coffee into the coffee grounds container to prevent later risk of overfilling the brewing chamber. - The dispensed quantity can be adjusted or prematurely stopped by turning the rotary switch.
- The preparation of 2 cups using the
![]() button is not possible.
button is not possible.
My Coffee button: Preparing beverages with personal settings
- Switch on the appliance.
- Place a vessel under the outlet.
- Press the My Coffee button
![]() continuously until the desired user name appears on the display.
continuously until the desired user name appears on the display. - Press the button for the desired beverage. Beverage dispensing will start.
- To exit the My Coffee mode, press the My Coffee button
![]() continuously until the time or Ready appears on the display.
continuously until the time or Ready appears on the display.
Operation of the menus
- With the appliance switched on, press the rotary switch 10 for longer than two seconds. The main menu will appear on the display 4.
- Turn the rotary switch 10 to select a sub-menu.
- Press the rotary switch 10 to call up a selected sub-menu.
- Select Exit to exit the respective menu and to return to the previous menu.
- Select Exit in the main menu or press any dispensing button to return to standby mode.
Overview of the submenus
| Submenu | Meaning |
| "Exit" | To exit the main menu |
| "My Coffee" | To enter personal coffee settings |
| "Care" | Rinsing, Easy Cleaning, Intensive Cleaning, cleaning, descaling, insert filter |
| "Energy- Saving Mode" | To change the energy-saving mode settings |
| "Set clock" | To change the time |
| "Auto OFF" | To change the settings for automatic switch-off |
| "Water hardness" | Setting the water hardness |
| "Language" | To change the language |
| "Statistics" | To display the total number of dispensed beverages |
| "System" | To reset the appliance to the default settin |
"My Coffee" sub-menu
Here, different beverage settings can be set and saved for standard dispensing and for "My Coffee" dispensing.
- Settings for standard dispensing: The settings saved in the standard profile can be directly accessed using the respective dispensing buttons.
- Settings for My Coffee dispensing: Defines individual beverage settings for up to four people. Beverages with the defined setting can be accessed later by selecting the respective profile with the My Coffee button.
Editing user profiles
- Call up the My Coffee sub-menu
- Select the desired user profile. When using for the first time,Name 1 to Name 4 as well as Standard are available for selection.
Entering a user name
- Call up the My Coffee sub-menu
- Select the desired user profile.
- Select Change name in the menu.
- Select the individual letters of the name. The first letter is automatically capitalised. Up to 9 characters can be entered.
- Select
![]() to delete a letter.
to delete a letter. - Select the empty field to enter a space.
- Select Exit to save the name.
 to delete a letter.
Entering user settings for beverages
- Call up the My Coffee sub-menu
- Select the desired user profile.
- Select a beverage (e. g. ,Latte Macchiato).
- Select a property (e. g. ,milk quantity).
- Select the desired quantity (e. g. ,80 ml). If the setting for a given property is not changed, the factory setting will be used.
Direct save function
If settings such as the dispensed quantity or coffee strength are changed during My Coffee dispensing, the changes will be directly saved under the current user name.
The following settings are possible:
- Dispensed quantity: 30 ml to 220 ml
- Coffee strength: can be adjusted in four levels (from
![]() = mild to
= mild to ![]() very strong)
very strong) - Brewing temperature: low, medium, high
- Milk froth quantity: 10 ml to 220 ml
- Milk quantity: 0 ml to 220 ml
 very strong)
Switching user to enabled/disabled
Users can be switched to disabled. Disabled users remain stored in the appliance, but cannot be selected using the My Coffee button ![]() .
.
- Call up the My Coffee sub-menu
- Select the desired user profile.
- Select Enabled/disabled in the menu.
- Select Disabled in the menu. A tick appears next to Disabled to confirm.
- Proceed in the same way to switch a user back to Enabled, only select Enabled in the menu.
"Care" sub-menu
Here, various integrated care and cleaning programmes can be started.
| Menu item | Meaning |
| "Exit" | To exit the sub-menu |
| "Rinsing" | To rinse the coffee unit |
| "Easy Cleaning" | To rinse the milk unit |
| "Intensive Cleaning" | To start the Intensive Cleaning programme for the milk unit |
| "Cleaning" | To start the cleaning programme for the coffee unit |
| "Descaling" | To start the descaling programme for the coffee unit |
| "Filter" | Inserting, changing and removing the water filter |
"Energy-saving mode" sub-menu
Here, you can set how much time elapses before the appliance switches to the energy-saving mode.
In energy-saving mode, the appliance consumes much less energy than in standby mode. However, we recommend switching the appliance off using the ON/OFF button ![]() if it will not be used for an extended period (e. g. overnight).
if it will not be used for an extended period (e. g. overnight).
- Call up the Energy-Saving Mode sub-menu
- Select the desired time after which the appliance should switch to energy-saving mode. If you do not want the appliance to switch to energy-saving mode, select OFF in the menu. The appliance then returns to the main menu.
"Set clock" sub-menu
Here, the time can be changed or disabled.
- Call up the Set clock sub-menu.
- Select the current hours and minutes. The appliance then returns to the main menu. The time is saved and displayed when ready for operation.
- To disable the time display, set the time at 00:00. No time is displayed when the appliance is ready for operation.
"Auto-OFF" sub-menu
Here, the elapsed time before the appliance automatically switches off can be set. Alternatively, you can also set a specific time at which the appliance switches off automatically. It is not possible to fully disable the Auto-OFF function. After the last action, the appliance switches off at the earliest after 8 minutes and at the latest after 8 hours. When both an elapsed time (OFF after. . . ) and a switch OFF time (OFF at. . . ) are set, the appliance selects the switch-off time that occurs earlier after the last action.
Setting the switch-off delay
- Call up the Auto OFF sub-menu.
- Select OFF after. . . in the menu to set the elapsed time after which the appliance switches off automatically.
- Set the desired time (e. g.1 hour). The appliance then returns to the main menu.
Setting a specific switch-off time
- Call up the Auto OFF sub-menu.
- Select OFF at. . . in the menu to set the time of day at which the appliance switches off automatically.
- Set the desired time of day (e. g. ,23:25). The appliance then returns to the main menu.
"Water hardness" sub-menu
Here, the water hardness can be set. Use the test strip provided to determine the water hardness in your area. In doing so, please comply with the instructions on the test strip packaging. Water hardness is set at "Very hard" in the factory.
- Call up the Water hardness sub-menu.
- Select the water hardness range for your area (e. g.Very hard). The appliance then automatically returns to the main menu.
| Water hardness range | °dH | °fH |
| Soft | 0 - 7. 2 °dH | 0 - 13 °f |
| Medium | 7. 2 - 14 °dH | 13 - 25 °f |
| Hard | 14 -21. 2 °dH | 25 - 38 °f |
| Very hard | > 21. 2 °dH | >38 °f |
"Language" sub-menu
Here, the language for the display can be set.
- Call up theLanguage sub-menu.
- Select the desired language (e. g.English).
- To confirm the question (e. g.Change language?), select Yes in the menu. The appliance then automatically returns to the main menu.
"Statistics" sub-menu
Here, the total number of coffee specialities prepared since the appliance was first started up can be called up.
- Call up the Statistics sub-menu.
- The total number of all prepared beverages is displayed.
"System" sub-menu
Here, the appliance can be reset to the default settings and vented.
Resetting the appliance to the default settings
- Call up the System sub-menu.
- Select Factory settings in the menu.
- Select Reset in the menu. All settings including the personal settings in the My Coffee menu are reset to the default settings.
Overview of default settings:
| Espresso | Dispensed quantity | 50 ml |
| Coffee strength | Strong | |
| Brewing temperature | normal | |
| Café Crème | Dispensed quantity | 120 ml |
| Coffee strength | normal | |
| Brewing temperature | normal | |
| Cappuccino | Dispensed quantity | 60 ml |
| Milk froth quantity | 80 ml | |
| Coffee strength | Strong | |
| Brewing temperature | High | |
| Latte Macchiato | Dispensed quantity | 70 ml |
| Milk froth quantity | 180 ml | |
| Milk quantity | 0 ml | |
| Coffee strength | normal | |
| Brewing temperature | High |
Adjusting the grinding fineness
The grinding fineness level was optimally adjusted prior to delivery. It is therefore recommended to only adjust the grinding fineness after about 1 000 coffee preparations (about 1 year).
The grinding fineness can only be set while the mill is running. Thus, the grinding fineness should be adjusted directly after coffee dispensing starts.
If the coffee flavour is not sufficiently intense, it is recommended to set a finer grinding level.
Set the grinding fineness with the lever 14.
- To the right = Coarser grinding fineness
- To the left = Finer grinding fineness
Cleaning and maintenance
Electric shock hazard due to supply voltage!
- Pull the power supply plug before cleaning.
- Never immerse the appliance in water.
- Do not use a steam cleaner.
Daily cleaning
- Wipe the outside of the appliance with a soft damp cloth and normal imdishwashing liquid.
- Empty the drip tray.
- Empty the coffee grounds container.
Cleaning the brewing unit
It is recommended to clean the brewing unit once a week.
- Switch off the appliance.
- Pull off the cover 13 to the right.
- Press and hold the button on the handle of the brewing unit (Image E).

- Turn the handle clockwise until the stop.
- Pull the brewing unit out of the appliance by the handle.
- Rinse the brewing unit thoroughly on all sides with clear water. The area shown in Image F (arrow) must be free of coffee residues.

- Let the brewing unit drip dry.
- Remove coffee residues from the appliance.
- Insert the brewing unit back into the appliance, press (and hold) the red button (Image E) and turn the handle of the brewing unit counterclockwise until the stop.
- Insert the cover until it clicks in.


Rinsing the coffee unit (Rinsing)
The appliance performs an automatic rinsing of the coffee unit when it is switched on and off. The coffee unit can also be rinsed in between. The coffee unit can also be rinsed in between.
- Place a vessel under outlet 3.
- Call up the Care sub-menu.
- Select Rinsing in the menu.
- Select Start in the menu. The rinsing starts (hot water will flow out of the outlet during the process).
Rinsing the milk unit ("Easy Cleaning" programme)
After each preparation of a beverage with milk, the appliance will prompt you to rinse the milk unit (Easy Cleaning?). The Easy Cleaning programme can also be performed in between.
- Place a vessel under outlet 3.
- Call up the Care sub-menu.
- Select Easy Cleaning in the menu.
- Connect the tube to the outlet and to the drip tray (Image D).
")
- Press the rotary switch 10 to confirm.
")
The "Easy Cleaning" programme starts (hot water and hot steam run through the outlet and the tube during the process).
Cleaning the milk unit ("Intensive Cleaning" programme)
With the "Intensive Cleaning" programme, the milk unit is cleaned thoroughly with a cleaning agent.
To ensure optimum protection of your appliance and the best hygiene standards, it is recommended to perform the "Intensive Cleaning" programme once a week.
Only use Melitta® PERFECT CLEAN milk system cleaner.
- Clean the milk tube and the milk outlet opening.
- Place a vessel (0. 5 l capacity) under the outlet3.
- Call up the Care sub-menu.
- SelectIntensive Cleaning in the menu.
- Fill the milk container with 50 ml Melitta® PERFECT CLEAN milk system cleaner.
- Then add 450 ml of warm tap water to the milk container.
- Connect the tube to the milk container and to the outlet (Image C).
- Press the rotary switch 10 to confirm. The "Intensive Cleaning" programme starts (hot steam and hot cleaning liquid runs out of the outlet during the process).
- Follow further instructions on the display until the end of the programme.
- Subsequently, the programme interrupts automatically and prompts for rinsing of the milk container.
- Rinse out the milk container thoroughly.
- Fill the milk container with tap water.
- Connect the tube to the milk container and to the outlet (Image C).
- Press the rotary switch 10 to confirm.
- Empty the vessel (0. 5 l capacity) and place it under the outlet3 again.
- Press the rotary switch 10 to confirm. The "Intensive Cleaning" programme will continue (hot water runs out of the outlet during the process). The appliance is then ready for operation.
Cleaning parts of the milk system
It is recommended to clean the milk container, milk distributor and the cover of the front milk distributor regularly, in addition to the "Intensive Cleaning programme".
- Disconnect the tube from the outlet.
- Flip open the outlet forwards.
- Pull the milk unit downwards in the direction of the arrow and out of the outlet (Image G).
![]()
- Remove the front cover from the milk distributor (Image H).

- Rinse the individual parts with hot water.
- Reassemble the parts in reverse order.


Integrated cleaning programme
The integrated cleaning programme (takes about 10 minutes) removes residues and coffee oil residues that cannot be removed by hand. The progress bar on the text display 4 shows the current progress of the cleaning programme.
The cleaning programme should be performed every 2 months or after 200 brewed cups of coffee, at the latest, however, when a corresponding message appears on the text display 4.
Only use Melitta® PERFECT CLEAN cleaning tabs.
- Flip up the lid of the water tank6.
- Pull the water tank 6 up and out of the appliance.
- Fill the water tank 6 with tap water up to the max. mark.
- Reinsert the water tank 6.
- Connect the tube to the drip tray and to the outlet (Image D).
- Call up the Care sub-menu.
- Select Cleaning in the menu.
- Select Start in the menu. The cleaning programme starts.
- Empty the drip tray and coffee grounds container in between and reinsert them.
- If the message "Place a vessel with 0. 7 l capacity under the outlet" appears on the text display 4, place a corresponding vessel under outlet 3.
- Two rinsing processes will be executed.
- If the message "Add cleaning tab to the ground coffee chute" appears on the text display 4, open the lid of the ground coffee chute, throw in a cleaning tab (Image I) and close the lid again.

- The cleaning programme will continue (approx. 5 minutes), water flows out of the outlet and in the drip tray inside the appliance.
- When the message "Empty tray and vessel" appears on the text display 4, empty the vessel under the outlet and the drip tray. Then reinsert them both.
- After the cleaning programme is finished, the appliance is ready for operation.

Integrated descaling programme
The descaling agent can cause skin irritations!
- Comply with the safety instructions and the dosing information specified on the descaling agent packaging.
The integrated descaling programme (takes about 25 minutes) removes lime scale residue inside the appliance. The progress bar on the text display 4 shows the current progress of the descaling programme.
The descaling programme should be performed every 3 months, at the latest, however, when a corresponding message appears on the text display 4. Only use Melitta® ANTI CALC.
- Call up the Care sub-menu.
- Select Descaling in the menu.
- Select Start in the menu. The descaling programme will start.
- When the message "Empty tray and vessel" appears on the text display 4, empty the the drip tray and the coffee grounds container and reinsert them.
- When the message "Remove water tank" appears on the text display 4, flip up the lid of the water tank 6 and pull the water tank 6 up and out of the appliance, and empty it.
- If a water filter is used, remove it from the water tank.
- Add the descaling agent to the water tank according to the instructions on the packaging.
- Reinsert the water tank 6.
- Place a vessel (min. 0. 7 l capacity) under the outlet3.
- Press the rotary switch 10 to confirm.
- Connect the tube to the drip tray and to the outlet (Image D).
- Press the rotary switch 10 to confirm. The descaling programme will continue (approx. 20 minutes), water flows out of the outlet and in the drip tray inside the appliance.
- When the message "Empty tray and vessel" appears on the text display 4, empty the vessel under the outlet and the drip tray. Then reinsert them both.
- When the message "Refill water tank" appears on the text display 4, flip up the lid of the water tank 6 and pull the water tank 6 up and out of the appliance.
- Rinse the water tank 6 thoroughly.
- Fill the water tank 6 with tap water up to the max. mark.
- Reinsert the water tank 6.
- The descaling programme will continue (approx. 5 minutes), water flows out of the outlet and in the drip tray inside the appliance.
- When the message "Empty tray and vessel" appears on the text display 4, empty the vessel under the outlet and the drip tray. Then reinsert them both.
- After the descaling programme is finished, the appliance is ready for operation.
Inserting, changing and removing the water filter
The Melitta® PRO AQUA filter cartridge filters lime scale and other contaminants from the water. The water filter should be changed regularly, at the latest when the appliance prompts to do so. The water filter is available in specialised shops.
When the water filter is inserted, changed or removed, this must be confirmed in the Filter sub-menu. Once the water filter is inserted or changed, the appliance resets the water filter cycle to zero and is able to prompt for changing the water filter again at the right time.
Inserting the water filter
- Put the water filter in a glass with tap water for several minutes before inserting it in the appliance.
- Call up the Care sub-menu.
- Select Filter in the menu.
- Select Insert filter in the menu.
- Select Start in the menu.
- Flip up the lid of the water tank 6.
- Pull the water tank6 up and out of the appliance.
- Carefully screw the Melitta® PRO AQUA filter cartridge into the thread on the base of the water tank using the screw-in aid at the bottom end of the coffee scoop provided.
- Fill the water tank6 with tap water up to the max. mark.
- Reinsert the water tank 6.
- Press the rotary switch 10 to confirm.
- Empty the vessel (0. 5 l capacity) and place it under the outlet3 again.
- Press the rotary switch 10 to confirm. The appliance rinses and then returns to standby mode.
The water hardness is automatically set to Soft.
Changing the water filter
The water filter should be changed when a prompt to do so appears on the text display 4.
- Call up the Care sub-menu.
- Select Filter in the menu.
- Select Change filter in the menu.
- Select Start in the menu.
- Flip up the lid of the water tank 6.
- Pull the water tank 6 up and out of the appliance.
- Unscrew the water filter from the thread on the base of the water tank.
- Carefully screw the new Melitta® PRO AQUA filter cartridge into the thread on the base of the water tank using the screw-in aid at the bottom end of the coffee scoop provided.
- Fill the water tank 6 with tap water up to the max. mark.
- Reinsert the water tank 6.
- Press the rotary switch 10 to confirm.
- Empty the vessel (0. 5 l capacity) and place it under the outlet 3 again.
- Press the rotary switch 10 to confirm. The appliance rinses and then returns to standby mode.
Removing the water filter
The Melitta® PRO AQUA filter cartridge should not remain dry over an extended period of time. It is therefore recommended to store the Melitta® PRO AQUA filter cartridge in a glass of water in the refrigerator when the appliance will not be in use for extended periods.
- Flip up the lid of the water tank 6.
- Pull the water tank 6 up and out of the appliance.
- Unscrew the water filter from the thread on the base of the water tank.
- Reinsert the water tank 6.
- Call up the Care sub-menu.
- Select Filter in the menu.
- Select Remove filter in the menu.
- Select Start in the menu.
- The prompt "Filter has been removed, set water hardness" is shown appears on the text display 4.
- Set water hardness.
Transport, Storage and Disposal
Venting the appliance
There is a risk of burn injuries and scalding due to hot steam and the hot steam pipe! The appliance releases hot steam when it is vented.
- Never allow any part of your body, e. g. your face to come into contact with the hot steam.
It is recommended to vent the appliance if it will not be used for an extended period of time and before transport. This also protects the appliance against frost damage.
- Remove the water filter if necessary.
- Place a vessel under outlet 3.
- Call up the System sub-menu.
- Select Venting in the menu.
- Select Start in the menu.
- Flip up the lid of the water tank 6 and pull the water tank 6 up and out of the appliance.
- Connect the tube to the drip tray and to the outlet (Image D).
- Press the rotary switch 10 to confirm. The appliance heats up.
- The appliance is vented and then switches off completely.
Transport
- Vent the appliance.
- Empty and clean the drip tray and coffee grounds container.
- Empty the water tank and th bean container. If necessary, vacuum out beans that are stuck at the bottom.
- Secure loose parts (cup plate etc. ) with suitable adhesive tape.
- If possible, transport the appliance in the original packaging including the hard foam elements.
Troubleshooting
| Malfunction | Cause | Measure |
| Coffee only flows drop-by-drop. | Grinding fineness is too fine. | Adjust the grinding fineness more coarse. Clean the brewing unit. Perform a descaling or cleaning programme if necessary. |
| Coffee does not flow. | Water tank not filled or incorrectly inserted. | Fill the water tank and make sure it is properly inserted. |
| The brewing unit is clogged. | Clean the brewing unit. | |
| Grinder does not grind the coffee beans. | Beans do not drop into the grinder (beans are too oily). | Tap lightly on the bean container. |
| Foreign objects in the grinder. | Call the hotline. | |
| The tilt lever is vertical. | Move the tilt lever to the right or left. | |
| Loud grinder noise. | Foreign objects in the grinder. | Call the hotline. |
Bean symbols  are flashing although the bean container is full. are flashing although the bean container is full. | Insufficient quantity of ground beans in the brewing chamber. | Press the button for cup dispensing. |
| Appliance indicates "no water" even though the water tank is filled.
| The float is blocked. | Check the condition of the float in the water tank, remove the water and carefully shake the tank. |
| The brewing unit can no longer be reinserted after removal. | The brewing unit is not properly locked. | Check whether the handle for locking the brewing unit is correctly engaged. |
| The actuator is not in the proper position. | Simultaneously press on the ON/OFF button  and the My Coffee button and the My Coffee button  . The appliance now runs the initialisation process. . The appliance now runs the initialisation process. | |
| System error shown on the text display | Software error | Switch the appliance off and switch it on again with the ON/OFF button  ; if this does not solve the problem call the hotline. ; if this does not solve the problem call the hotline. |
 illuminates on the display.
Technical data
| Technical data | |
| Operating voltage | 220-240 V, 50/60 Hz |
| Power consumption | maximum 1400 W |
| Pump pressure | maximum 15 bar |
Dimensions
|
|
Capacity
|
|
| Weight (empty) | 9. 3 kg |
Ambient conditions
|
|
Safety Instructions
Please carefully read and comply with the operating instructions.
This appliance is for the preparation of coffee drinks from coffee beans or coffee powder and for heating milk and water.
This appliance is intended for private domestic use.
Any other use is considered contrary to intended use and may lead to personal injury and material damage.
This appliance complies with the applicable European guidelines.
It has been built according to the latest technology. However, there are residual hazards.
To prevent hazards, you must follow the safety instructions.
Melitta shall not be liable for any damage caused by non-compliance with safety instructions.
Electrical current poses a hazard!
- Risk of injury due to electrical shock if the appliance or power cable is damaged. To avoid hazards caused by electrical current:
- Do not use a damaged power cable.
- A damaged power cable may only be replaced by the manufacturer, their after sale service or a similarly qualified person.
- Do not open any screwed covers on the appliance housing.
- Only use the appliance if it is in a technically faultless condition.
- A defective appliance may only be repaired by an authorised workshop. Do not attempt to repair the appliance yourself.
- Do not make any changes to the appliance, its components and its accessories.
- Do not immerse the appliance in water.
- Do not let the power cable come into contact with water.
Burn injuries and scalding!
Released fluids and steam can be very hot. Parts of the appliance also become very hot. To prevent scalding and burns:
- Avoid skin contact with the released fluids and steam.
- Do not touch any nozzles on the outlet during operation.
General safety!
To prevent personal injury and material damage:
- Do not operate the appliance in a cabinet or similar object.
- Do not reach into the interior of the appliance when it is in operation.
- Keep children under 8 years of age away from the appliance and its power cable.
- The appliance can be used by children from an age of 8 as well as by persons with limited physical, sensorial or mental capacities, or lacking experience and knowledge if they are supervised or were instructed on safe use of the appliance and understand the resulting risks.
- Children may not play with the appliance. Children younger than 8 years of age may not perform cleaning and user maintenance. Children over 8 years of age must be supervised during cleaning and user maintenance.
- Disconnect the appliance from the power supply if it is unsupervised for a longer period of time.
- Do not operate the appliance at high altitudes over 2000 m.
- When cleaning the appliance and its components, comply with the instructions in the corresponding chapter.
Documents / ResourcesDownload manual
Here you can download full pdf version of manual, it may contain additional safety instructions, warranty information, FCC rules, etc.
Advertisement


Need help?
Do you have a question about the CI E970-103 and is the answer not in the manual?
Questions and answers