Table of Contents
Advertisement
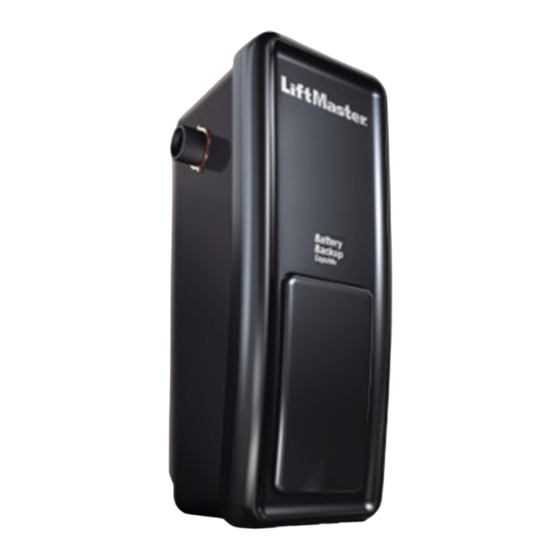
GARAGE DOOR OPENER
Model 3800
For Residential Sectional Doors With
Torsion Assemblies Only
Owner's Manual
■
Please read this manual and the enclosed safety materials carefully!
Fasten the manual near the garage door after installation.
■
■
The door WILL NOT CLOSE unless The Protector System
connected and properly aligned.
■
Periodic checks of the opener are required to ensure safe operation.
■
The model number label is located behind the hinged door of your opener.
®
The Chamberlain Group, Inc.
845 Larch Avenue
Elmhurst, Illinois 60126-1196
www.liftmaster.com
®
and cable tension monitor are
Advertisement
Table of Contents

Related Manuals for Security + 3800

Summary of Contents for Security + 3800
- Page 1 The Chamberlain Group, Inc. 845 Larch Avenue Elmhurst, Illinois 60126-1196 www.liftmaster.com ® GARAGE DOOR OPENER Model 3800 For Residential Sectional Doors With Torsion Assemblies Only Owner’s Manual ■ Please read this manual and the enclosed safety materials carefully! Fasten the manual near the garage door after installation.
-
Page 2: Table Of Contents
TABLE OF CONTENTS Introduction Operation 21-25 Safety symbol review and signal word review ..2 Operation safety instructions .....21 Planning . -
Page 3: Planning
Planning • The torsion bar must extend at least 1" to 5" Survey your garage area to see if any of the conditions (2.5 cm to 12 cm) past the bearing plate. below apply to your installation. Additional materials may be required. -
Page 4: Preparing Your Garage Door
Preparing your Garage Door WARNING Before you begin: To prevent possible SERIOUS INJURY or DEATH: • Disable locks. • ALWAYS call a trained door systems technician if garage • Remove any ropes connected to garage door. CAUTION door binds, sticks or is out of balance. An unbalanced •... -
Page 5: Carton Inventory
Carton Inventory purchased. If anything is missing, carefully check the Your garage door opener is packaged in one carton packing material. which contains the motor unit and the parts illustrated below. Note that accessories will depend on the model Remote Control Visor Clip ®... -
Page 6: Assembly
ASSEMBLY STEP 1 WARNING Attach the Collar to the Motor Unit To prevent possible SERIOUS INJURY or DEATH, the collar To avoid installation difficulties, do not run the MUST be properly tightened. The door may not reverse CAUTION garage door opener until instructed to do so. correctly or limits may be lost due to collar slip. -
Page 7: Installation
WARNING INSTALLATION IMPORTANT INSTALLATION INSTRUCTIONS WARNING To reduce the risk of SEVERE INJURY or DEATH: 1. READ AND FOLLOW ALL INSTALLATION WARNINGS AND 7. NEVER wear watches, rings or loose clothing while INSTRUCTIONS. installing or servicing opener. They could be caught in garage door or opener mechanisms. -
Page 8: Attach The Emergency Release Rope And Handle
WARNING INSTALLATION STEP 2 Attach the Emergency Release Rope To prevent possible SERIOUS INJURY or DEATH from a and Handle falling garage door: CAUTION • Thread one end of the rope through the hole in the top • If possible, use emergency release handle to disengage of the red handle so “NOTICE”... -
Page 9: Attach The Cable Tension Monitor (Required)
Figure 1 INSTALLATION STEP 4 Attach the Cable Tension Monitor Opener (Required) Torsion Bar This opener comes standard with the cable tension monitor. It is supplied as a device to monitor the Drum cables for ANY slack that may occur and will reverse the door when excessive slack is detected, Cable eliminating service calls. -
Page 10: Install The Control Console
WARNING WARNING CAUTION WARNING INSTALLATION STEP 5 Install the Control Console To prevent possible SERIOUS INJURY or DEATH from electrocution: Locate control console within sight of door, at a minimum • Be sure power is not connected BEFORE installing control height of 5' (1.5 m) where small children cannot reach, console. -
Page 11: Install Remote Light
IMPORTANT SAFETY INSTRUCTIONS WARNING To reduce the risk of SEVERE INJURY or DEATH: 1. This portable luminaire has a polarized plug (one blade is 5. NEVER use with an extension cord unless plug can be fully wider than the other) as a feature to reduce the risk of inserted. -
Page 12: Electrical Requirements
WARNING WARNING INSTALLATION STEP 7 Electrical Requirements To prevent possible SERIOUS INJURY or DEATH from electrocution or fire: To avoid installation difficulties, do not run the CAUTION WARNING opener at this time. • Be sure power is not connected to the opener, and disconnect power to circuit BEFORE removing cover to To reduce the risk of electric shock, your garage door establish permanent wiring connection. -
Page 13: Mount The Battery Backup Unit (Bbu)
INSTALLATION STEP 8 Mount the Battery Backup Unit (BBU) (not provided) 475LM Battery Backup Unit If the optional 475LM battery backup unit is part of this installation it should be installed at this time. • The BBU can be mounted to either the ceiling or a wall within 3' (.9 m) of the motor unit. -
Page 14: Install The Protector System
WARNING INSTALLATION STEP 9 Install The Protector System ® Be sure power is not connected to the garage door opener BEFORE installing the safety reversing sensor. The safety reversing sensor must be connected and CAUTION To prevent SERIOUS INJURY or DEATH from a closing aligned correctly before the garage door opener will garage door: move in the down direction. - Page 15 INSTALLING THE BRACKETS Figure 1 DOOR TRACK MOUNT (RIGHT SIDE) Be sure power to the opener is disconnected. Install and align the brackets so the safety reversing sensors Door will face each other across the garage door, with the Track beam no higher than 6"...
- Page 16 MOUNTING AND WIRING THE SAFETY REVERSING Figure 5 SENSORS Wing Nut 1/4"-20 • Slide a 1/4"-20x1/2" carriage bolt head into the slot on each sensor. Use wing nuts to fasten safety reversing sensors to brackets, with lenses pointing toward each other across the door.
-
Page 17: Adjustment
WARNING ADJUSTMENT STEP 1 Program the Travel Limits Without a properly installed safety reversal system, persons Travel limits regulate the points at which the door (particularly small children) could be SERIOUSLY INJURED CAUTION will stop when moving up or down. Follow the steps or KILLED by a closing garage door. -
Page 18: Setting The Force
ADJUSTMENT STEP 2 WARNING Setting the Force Without a properly installed safety reversal system, persons The force setting button is located on the front panel. (particularly small children) could be SERIOUSLY INJURED CAUTION The force setting measures the amount of force or KILLED by a closing garage door. -
Page 19: Test The Safety Reversal System
WARNING ADJUSTMENT STEP 3 Test the Safety Reversal System Without a properly installed safety reversal system, persons (particularly small children) could be SERIOUSLY INJURED TEST CAUTION or KILLED by a closing garage door. • With the door fully open, place a 1-1/2" (3.8 cm) board •... -
Page 20: Test Cable Tension Monitor
WARNING ADJUSTMENT STEP 5 Test Cable Tension Monitor To prevent possible SERIOUS INJURY or DEATH from a falling garage door: If your cable tension monitor has been activated the LED CAUTION • If possible, use emergency release handle to disengage will blink 9 times. -
Page 21: Operation
7. NEVER use emergency release handle unless garage doorway is clear of persons and obstructions. Using Your Garage Door Opener 5. If obstructed while closing, the door will reverse. If the Your LiftMaster Security✚ ® opener and hand-held remote obstruction interrupts the sensor beam, the opener control have been factory programmed to a matching lights will blink for five seconds. -
Page 22: Using The Wall-Mounted Control Console
Using the Wall-Mounted Control (PROG) Learn Feature Console The control console is equipped with a Prog <LEARN> button to assist in learning remote controls to the unit. THE LCD MOTION DETECTING CONTROL CONSOLE Press the Prog <LEARN> button once to initiate LEARN Press the push bar to mode and the display will show ‘Learn Remote Control - Automatic Light... -
Page 23: Care Of Your Opener
THE REMOTE CONTROL BATTERY CARE OF YOUR OPENER WARNING MAINTENANCE SCHEDULE To prevent possible SERIOUS INJURY or DEATH: Once a Month • NEVER allow small children near batteries. • Manually operate door. If it is unbalanced or binding, CAUTION • If battery is swallowed, immediately notify doctor. call a trained door systems technician. - Page 24 If not, move the position of the mounting bracket. • Check the safety reversing sensor. Remove any obstruction or align the receiving eye. See Installation 15. Power lock makes noise when operating. Step 9. • Call Liftmaster ® dealer for replacement power lock.
-
Page 25: Diagnostic Chart
Installed Safety Reversing Sensor “Learn” Button LED or Diagnostic Your garage door opener is programmed with self- “Learn” Button diagnostic capabilities. The “Learn” button/diagnostic LED will flash a number of times then pause signifying it has found a potential issue. Consult Diagnostic Chart below. Diagnostic Chart 1 FLASH Symptom: One or both of the Indicator lights on the safety reversing sensors... -
Page 26: Programming
PROGRAMMING NOTICE: If this Security ✚ ® garage door opener is operated with a non-rolling code transmitter, the technical measure in the receiver of the garage door opener, which provides security against code-theft devices, will be circumvented. The owner of the copyright in the garage door opener does not authorize the purchaser or supplier of the non-rolling code transmitter to circumvent that technical measure. -
Page 27: To Add, Reprogram Or Change A Keyless Entry Pin
To Add, Reprogram or Change a Keyless Entry PIN NOTE: Your new Keyless Entry must be programmed to operate your garage door opener. USING THE “LEARN” BUTTON USING THE LCD CONTROL CONSOLE LO C LI G NOTE: This method requires two people if the Keyless 1. -
Page 28: Programming Work Light Or Additional Work Light
Reprogramming Light or Additional Light Your garage door opener remote work light has already been programmed at the factory to operate with your opener. Any additional or replacement remote work lights will need to be programmed. 1. Press the “learn button” on light until LED comes ON. -
Page 29: Repair Parts
REPAIR PARTS Installation Parts L O C L I G PART PART DESCRIPTION DESCRIPTION 41B6299 Collar with set screws (2) 398LM LCD motion detecting door control 41A6102 Power door lock console 41A5266-1 Safety sensor brackets (2) 373W 3-Button remote control 380LM Remote work light 10A20... -
Page 30: Motor Unit Assembly Parts
Motor Unit Assembly Parts PART PART DESCRIPTION DESCRIPTION 41A6095 Motor with bracket 41DJ001 Logic board complete with plate 41B122 Power cord 41A6118 Absolute Encoder System 41A6348 Cover 41C168 Transformer... -
Page 31: Accessories
Remote Work Light: 475LM EverCharge™ Battery Backup System: Enables homeowner to turn on a Provides backup power to the model 3800 work light from their car with their and 3500 garage door openers. garage door opener remote or from anywhere in their home with an additional LiftMaster Security✚... -
Page 32: Repair Parts And Service
6020 S. Country Club Road Tucson, Arizona 85706 For professional installation, parts and service, contact SERVICE INFORMATION your local LIFTMASTER/CHAMBERLAIN dealer. Look for TOLL FREE NUMBER: him in the Yellow Pages, or call our Service number for a 1-800-528-9131 list of dealers in your area.