Table of Contents
Advertisement
Advertisement
Table of Contents

Related Manuals for Dell PowerEdge RAID Controller S100


Summary of Contents for Dell PowerEdge RAID Controller S100
- Page 1 Dell PowerEdge RAID Controller (PERC) S100, PERC S300 User’s Guide...
- Page 2 Reproduction of these materials in any manner whatsoever without the written permission of Dell Inc. is strictly forbidden. Trademarks used in this text: Dell™, the DELL logo, PowerEdge™, and OpenManage™ are trademarks of Dell Inc. Intel™ is a registered trademark of Intel Corporation in the U.S. and other ® countries. AMD is a registered trademark and AMD Opteron™, AMD Phenom™, and AMD...
-
Page 3: Table Of Contents
Contents WARNING: Safety Instructions SAFETY: General SAFETY: When Working Inside Your System Protecting Against Electrostatic Discharge Overview Introduction General Information, Intended Audience, and Prerequisites for Use Related Documentation PERC S100 Adapter or PERC S300 Adapter Descriptions About RAID RAID Terminology Features General Features Specifications... -
Page 4: Table Of Contents
Management Configuring the Controller: Using the PERC Virtual Disk Management Utility Troubleshooting System Startup Problems Warning Messages: Dell Inc. PERC S100 Adapter or Dell Inc. PERC S300 Adapter BIOS Screen Virtual Disk-Related Errors Physical Disk-Related Errors Appendix A Controller Specifications... -
Page 5: Table Of Contents
11 Appendix D ..... . . Contacting Dell Index ....... - Page 6 Contents...
-
Page 7: Warning: Safety Instructions
WARNING: Do not expose the Dell PowerEdge Expandable RAID Controller (PERC) S300 adapter to liquids. To reduce risk of fire hazard, do not cover or obstruct the ventilation openings of the system in which it is installed. Do not install the controller in a zero-clearance compartment. -
Page 8: Safety: General
Before you remove the system covers, perform the following steps in the sequence indicated. WARNING: Only trained service technicians are authorized by Dell to remove covers from the system, and access any of the internal components, unless the Dell documentation expressly states otherwise. -
Page 9: Protecting Against Electrostatic Discharge
In addition, take note of these safety guidelines when appropriate: • When you disconnect any cable, pull on its connector or on its strain-relief loop, not on the cable itself. Some cables have a connector with locking tabs. If you are disconnecting this type of cable, press in on the locking tabs before disconnecting the cable. - Page 10 WARNING: Safety Instructions...
-
Page 11: Overview
3 Gbps per port. The PERC S100 adaper is targeted as a low-cost RAID solution for Dell PowerEdge Value Servers. The PERC S100 adapter solution supports SATA Hard Disk Drives (HDD) and Solid State Disk (SSD) drives. -
Page 12: Related Documentation
Storage-interface technology, such as SAS and SATA Related Documentation For more information about the PERC S100 adapter or PERC S300 adapter and its relationship to the Dell OpenManage Server Administrator Storage Management documentation, see the Storage Management documentation available on the Dell Support website at support.dell.com/manuals. -
Page 13: Supported Platforms
Supported Platforms Table 2-1. Dell Systems and Support Matrix for the PERC S100 Adapter and PERC S300 Adapter PowerEdge Server PERC Controller, with Chipset and Adapter Support per Platform PowerEdge R210 PERC S100 adapter – Intel Ibex Peak chipsets PERC S300 adapter – Dell 3Gb/s SAS Adapter PowerEdge R210 II PERC S100 adapter –... - Page 14 Platform Requirements for the PERC S100 Controller and PERC S300 Controller Table 2-2. Platform Requirements — PERC S100 Controller or PERC S300 Controller Component Requirements Processor x86, 32-bit compatible processor greater than 500 MHz. Memory 512 MB or greater. Physical At least one Hard Disk Drives (HDD) or Solid State Disk (SSD) Drives.
- Page 15 Table 2-2. Platform Requirements — PERC S100 Controller or PERC S300 Controller Component Requirements Operating • Microsoft Windows Essential Business Server (x64) systems • Microsoft Windows Server 2008 Datacenter Edition (x64) • Microsoft Windows Server 2008 Enterprise Edition (x64) • Microsoft Windows Server 2008 Enterprise Edition (x86) •...
- Page 16 NOTE: The PERC S100 controller supports system boot to a tape using a Dell RD1000 tape device. Select Continue while in CTRL-R for RD1000 to remain first in the boot order. The RD1000 option goes to end of the boot order listing if <Ctrl><Alt><Del>...
-
Page 17: About Raid
About RAID A RAID disk array is a group of independent physical disks that provides high performance by increasing the number of drives used for saving and accessing data. A RAID disk subsystem improves I/O performance and data availability. The physical disks appear to the host system either as a single storage unit or multiple logical units. -
Page 18: Raid Terminology
RAID Terminology Disk Striping Disk striping allows you to write data across multiple physical disks instead of just one physical disk. Disk striping involves partitioning each physical disk storage space into stripes of the various sizes. These stripes are interleaved in a repeated sequential manner. - Page 19 NOTE: Mirrored physical disks improve read performance by read load balancing. NOTE: The PERC S300 controller only supports physical disks (SAS and SATA). SSD devices cannot be migrated to a PERC S300 controller. Figure 2-2. Example of Disk Mirroring (RAID 1) Stripe element 1 Stripe element 1 Duplicated Stripe element 2...
- Page 20 Figure 2-3. Example of Distributed Parity (RAID 5) stripe element1 stripe element2 stripe element7 stripe element8 stripe element13 stripe element14 stripe element19 stripe element20 stripe element25 parity (21-25) parity (26-30) stripe element26 Overview stripe element3 stripe element4 stripe element9 stripe element10 stripe element15 parity (11-15) parity (16-20)
-
Page 21: Features
Features General Features The features of the Dell PowerEdge RAID Controller (PERC) S100 and PERC S300 adapter are described in Table 3-1. NOTE: BAS, BGI, CC and OCE run only on the operating system. Table 3-1. Features of the PERC S100 controller and PERC S300 controller... - Page 22 Table 3-1. Features of the PERC S100 controller and PERC S300 controller RAID Controller Feature Description Boot support for RAID levels Boot support for degraded virtual disks Cache support for virtual disks Checkpointing Command queuing Features Allows boot support for Volume, RAID 0, RAID 1, RAID 5, and RAID 10.
- Page 23 A consistency check cannot be user-initiated in the PERC Virtual Disk Management utility. However, a consistency check can user-initiated when using Dell OpenManage Server Administrator Storage Management. Disk initialization For physical disks, initialization writes metadata to the physical disk, so that the controller can use the physical disk.
- Page 24 Table 3-1. Features of the PERC S100 controller and PERC S300 controller RAID Controller Feature Description Mirror rebuilding Online Capacity Expansion (OCE) Physical disks (general) Features A broken mirror can be rebuilt after a new physical disk is inserted and the physical disk is designated as a hot spare. The system does not have to be rebooted.
- Page 25 Table 3-1. Features of the PERC S100 controller and PERC S300 controller RAID Controller Feature Description • In a brief warning at the Dell Inc. PERC S100 Controller • At Dell OpenManage Server Administrator Storage • With a bi-color Status LED on each physical disk. The green NOTE: adapter and a backplane that has removable physical disks.
- Page 26 NOTE: For more information on how to open the system and add parts, see the Hardware Owner’s Manual, available on the Dell Support website at support.dell.com/manuals. Perform the following steps for physical disk roaming: NOTE: These steps do not apply to systems that have a backplane with hot-swap capability.
- Page 27 Table 3-1. Features of the PERC S100 controller and PERC S300 controller RAID Controller Feature Description Virtual disks (general) Up to eight virtual disks are supported. The PERC S100 adapter and PERC S300 adapter allows: • Creating virtual disks of different RAID levels on a single •...
- Page 28 Table 3-1. Features of the PERC S100 controller and PERC S300 controller RAID Controller Feature Description Virtual disk migration The controller supports automatic virtual disk migration Virtual disk RAID levels Virtual disk transformation Features from a PERC S100 adapter to a PERC S300 adapter (or vice versa).
-
Page 29: Specifications
I/O Controller Communication to the system Communication to end devices SAS connectors SATA connectors Lead-free Supported operating systems Dell-compliant SATA compatibility Yes Dell-compliant SAS compatibility Dell-supported direct-connected end devices *SMART error support through management applications Backplane supported systems PERC S100 adapter... - Page 30 Table 3-2. Specifications for the PERC S100 adapter and PERC S300 adapter Specification Software-based RAID Maximum number of virtual disks Support for internal tape drive Support for global hot spare Maximum number of hot spares *SMART is supported under the Windows Driver but is not supported with Unified Extensible Firmware Interface (UEFI) and CTRL-R.
-
Page 31: Hardware Installation
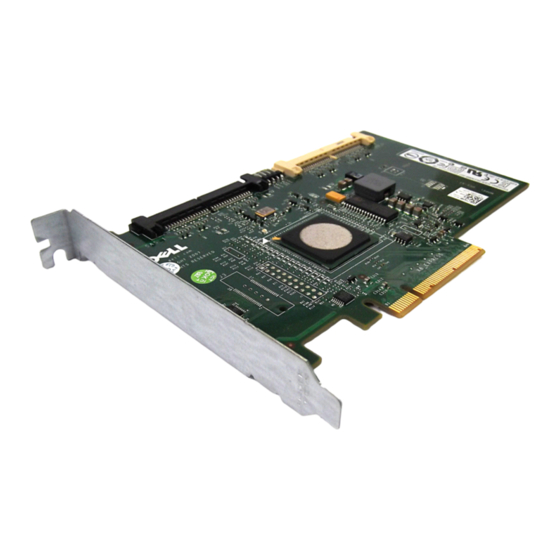
Hardware Installation Before You Begin This chapter describes how to install the Dell PowerEdge RAID Controller (PERC) S300 adapter. NOTE: The PERC S100 controller is an integral component of the motherboard. Hardware installation instructions are not required for a system with a PERC S100 controller. -
Page 32: Installing The Perc S300 Adapter
Dell Support website at support.dell.com/manuals. 1 Unpack the PERC S300 Adapter and check it for damage. NOTE: If the PERC S300 Adapter is damaged, contact Dell Support at support.dell.com. 2 Turn off the system and attached peripherals. Disconnect the system power cable from the electrical outlet. - Page 33 Figure 4-1. Installing a PERC S300 Adapter bracket screw PCI-E slot PCI bracket PERC S300 Adapter filler bracket Hardware Installation...
- Page 34 Figure 4-2. Connecting the Cables cables to the physical disks (applies to systems with a PERC S300 adapter) or to backplanes (applies only to systems with a PERC S300 modular) PERC S300 Adapter Hardware Installation SAS/SATA x4 internal connectors (2)
-
Page 35: Connect Physical Disks To The Perc S300 Adapter
Connect Physical Disks to the PERC S300 Adapter WARNING: Critical system components might be damaged if the installer is not properly grounded to prevent electrostatic discharge (ESD). NOTE: Use either the standard power connector or, if available on the power supply, a SATA/SATA II power connector. - Page 36 Hardware Installation...
-
Page 37: Installing The Microsoft Windows Drivers
Installing the Drivers The Dell PowerEdge RAID Controller (PERC) S100 or PERC S100 adapter require controller drivers to operate with the supported operating systems. This chapter contains the procedures for installing the controller drivers for the following operating systems: Microsoft Windows Server 2008 •... - Page 38 Pre-Installation Requirements for the Controller Drivers • Make sure that your system has the latest BIOS and firmware updates from the Dell Support website at support.dell.com/manuals. • Perform the pre-installation procedures in Table 5-2 before you install the controller drivers and the operating system.
- Page 39 Install the PERC S300 adapter (as required) Initialize physical disks (as required) Steps Boot the system. When the Dell Power-On Self-Test (POST) screen appears, press <F2>. Wait until the Dell PowerEdge System window appears. Perform the following, depending on the controller: •...
- Page 40 Table 5-2. Pre-Installation Procedures For The Controller Drivers Procedure Create a bootable virtual disk Check controller options and the boot list priority Installing the Drivers Steps See "Creating Virtual Disks" on page 51. At the PERC S100 Virtual Disk Management utility or PERC S300 Virtual Disk Management utility, use the arrow keys to select Controller Options.
- Page 41 <Ctrl><Alt><Delete> to reboot the system. Boot the system. When the POST screen appears, press <F2>. At the Dell PowerEdge System screen, use the arrow keys to scroll to Boot Sequence. Press <Enter>. Make sure that Hard drive C: is the first device listed.
- Page 42 Installing the Controller Drivers During the Operating System Installation: For Systems with a PERC S100 Adapter CAUTION: The latest firmware, drivers and applications must be installed whenever the controller software is upgraded. A previous version of the driver might not work with the latest controller software and vice versa. NOTE: When using an external USB floppy disk drive, make sure to connect it to the system when the system is turned-off and before starting step 1.
- Page 43 Additional Device appears. Press <S> on the keyboard. Insert the requested media disk (as applicable) and press <Enter>. 6 At the next Select the driver to be installed window, select Dell PERC S100 S300 Controller... Click Next to load the driver files.
- Page 44 Installing the Controller Drivers During the Operating System Installation: For Systems with a PERC S300 Adapter CAUTION: The latest firmware, drivers and applications must be installed whenever the controller software is upgraded. A previous version of the driver might not work with the latest controller software and vice versa. NOTE: When using an external USB floppy disk drive, make sure to connect it to the system when the system is powered-off and before starting step 1.
- Page 45 Additional Device. Press <S> on the keyboard. Insert the requested media disk (as applicable) and press <Enter>. 8 At the Select the driver to be installed window, select Dell PERC S100, S300 Controller... Click Next to load the driver files.
- Page 46 Installing the Drivers...
-
Page 47: Management
PERC S100 Virtual Disk Management utility and the PERC S300 Virtual Disk Management utility. NOTE: To configure the PERC S100 adapter or PERC S300 adapter with Dell OpenManage Server Administrator Storage Management, see the Dell Support Website at support.dell.com/manuals. - Page 48 If the PERC Virtual Disk Management utility does not appear and your system uses a PERC S100, press F2 to access the Dell system BIOS. At the SATA Settings field, make sure that SATA Controller is set to RAID Mode. If the settings are correct and the PERC Virtual Disk Management utility still does not appear contact Dell support at support.dell.com.
- Page 49 NOTE: For a description of virtual disk and physical disk states, see Table B-2 and Table B-3, located on the Dell Support website at support.dell.com/manuals. NOTE: The first virtual disk listed in Virtual Disks must be the bootable virtual disk.
- Page 50 Initializing Physical Disks New physical disks must be initialized before they can be used. Initialization writes controller configuration information to the physical disk. Physical disks with the following statuses can be initialized: • Non-RAID — A physical disk that was configured by a non-PERC S100 adapter or PERC S300 adapter.
-
Page 51: Creating Virtual Disks
You can create virtual disks after the physical disks are initialized, especially if the virtual disk is a bootable virtual disk for your system. If you have not decided what RAID level to use, see the Raid Technology Guide, located on the Dell Support website at support.dell.com/manuals. Before You Begin •... - Page 52 4 At the Physical Disks field, select the physical disk(s) on which to create a virtual disk: For each physical disk, press the <Insert> key to select the physical disk. (The physical disks can be inserted in any order.) After selecting the physical disk(s) to be included in the virtual disk, press <Enter>.
- Page 53 Table 6-3. Selection of Virtual Disk Sizes To Create This Perform This Task Virtual Disk Size < 2.199 TB Use the <Page Up> or <Page Down> keys to select a size in large increments Use the up arrow or down arrow keys to select a size in small increments.
- Page 54 configuration information with the existing configuration information. The previously deleted virtual disk re-appears in the PERC Virtual Disk Management utility. CAUTION: Make sure that all physical disks that are part of a virtual disk are in the system before you delete the virtual disk. 1 Power-up the system to start booting.
- Page 55 Swapping Two Virtual Disks Use the Swap Two Virtual Disks option of the PERC Virtual Disk Management utility to arrange virtual disks in a different order. CAUTION: Do not swap the first-listed virtual disk at Virtual Disks if it is the system’s bootable virtual disk.
- Page 56 Managing Global Hot Spares This option enables you to create a global hot spare from a selected physical disk, or to delete a global hot spare. NOTE: A global hot spare can be created only if a physical disk is in Ready or Normal status at the Physical Disks field.
- Page 57 Viewing Physical Disk Details 1 Power-up the system to start booting. 2 When prompted, press the <Ctrl><R> keys to access the PERC Virtual Disk Management utility. 3 At the Main Menu field, select View Physical Disk Details. Press <Enter>. 4 Use the arrow keys to choose a physical disk. 5 Physical disk information is displayed at the top of the window: •...
- Page 58 Rescanning Disks This option enables you to rescan all channels and detect new or removed physical disks or virtual disks. • To perform a rescan, select Rescan Disks from the Main Menu field and press <Enter>. (The activity indicator, in the information field at the top of the window, spins while the physical disks are being polled).
- Page 59 Table 6-4. Controller Options Controller Option Pause if Degraded Pause if Failed Continuing to Boot After using the PERC Virtual Disk Management utility, return the system to its normal booting process by selecting Continue to Boot in the Main Menu field and pressing <Enter>. Description When ON, the BIOS stops booting when a degraded...
- Page 60 RAID Configuration and Management...
-
Page 61: Troubleshooting
Troubleshooting To get help with your Dell PowerEdge RAID Controller (PERC) PERC S100 adapter and PERC S300 adapter, contact your Dell Technical Service representative or access the Dell Support Web site at support.dell.com. The chapter discusses four major categories of troubleshooting: •... - Page 62 The boot order is incorrect for a bootable virtual disk Troubleshooting Corrective Actions At system startup, when the Dell POST screen appears, press <F2> to enter the Dell Inc. PowerEdge BIOS screen. Scroll to Boot Settings. Press <Enter> and make sure that Boot Mode is set to BIOS.
- Page 63 Management utility list after the system is rebooted NOTE: When booting from a Non-Raid virtual disk, creating a virtual disk in Dell OpenManage Server Administrator Storage Management changes the virtual disk order and displaces the bootable Non-Raid virtual disk from the first position. PERC S100...
-
Page 64: Adapter Or Dell Inc. Perc S300 Adapter Bios Screen
Dell Inc. PERC S300 Adapter BIOS Screen The Dell Inc. PERC S100 Controller BIOS screen or Dell Inc. PERC S300 Controller BIOS screen is one of the first screens to appear during your system’s boot sequence. If the system’s virtual disks were in Normal or Ready... - Page 65 Table 7-3. Warning Messages: Dell Inc. PERC S100 or PERC S300 Adapter BIOS Warning Message Corrective Action This warning message appears when at least one virtual disk is WARNING: Found in a Degraded state and Pause if Degraded is set to ON at virtual disks the PERC Virtual Disk Management utility.
- Page 66 Table 7-4. Warning Messages: Dell Inc. PERC S100 or S300 Adapter BIOS Warning Message Corrective Action This warning message appears when at least one virtual disk is WARNING: Found in a Failed state and Pause if Failed is set to ON at the virtual disks PERC Virtual Disk Management utility.
- Page 67 Table 7-5. Warning Messages: Dell Inc. PERC S100 or S300 Adapter BIOS Warning Message Corrective Action This warning message appears when multiple virtual disks are WARNING: Found in Degraded and Failed state and Pause if Degraded or virtual disks Pause if Failed are set to ON at the PERC Virtual Disk that are Management utility.
- Page 68 Table 7-6. Warning Messages: Dell Inc. PERC S100 or S300 Adapter BIOS Warning Message Corrective Action This warning message appears when: BIOS NOT INSTALLED - • The INT13 Boot Support option has been set to OFF at User Disabled INT13 BIOS...
- Page 69 Table 7-7. Other Errors Appearing on the BIOS Issue Likely Causes to Check Corrective Actions The RAID 0 goes Faulty physical disk offline and the RAID 1 becomes degraded in a PowerEdge R210 system with two drives. When attempting to DUPs are not update system supported.
-
Page 70: Virtual Disk-Related Errors
There must be sufficient available free space on the physical disk(s) used by the virtual disk. See "Understanding RAID Levels" in the RAID Technology Guide, located on the Dell Support website at support.dell.com/manuals, for a description of RAID levels and the allowable number of physical disks used with each RAID level. - Page 71 Table 7-8. Cannot Create a Virtual Disk Likely Causes to Check The desired physical disk is unavailable The system already has a maximum of eight virtual disks Table 7-9. A Virtual Disk is in a Failed State Likely Causes to Check The virtual disk has lost one or more physical disks A physical disk in the virtual disk...
- Page 72 • Replace the physical disk or disks. Rebuild the physical disk using Storage Management. See the applicable Storage Management screen, located on the Dell Support website at support.dell.com/manuals. Delete the virtual disk that has the failed metadata.
- Page 73 Table 7-11. Cannot Assign a Dedicated Hot Spare to a Virtual Disk Likely Causes to Check The RAID level does not allow a dedicated hot spare to be created The designated physical disk does not have sufficient capacity to be a dedicated hot spare The physical disk is already part of a virtual disk The physical disks are of...
- Page 74 Table 7-12. Cannot Create a Global Hot Spare The physical disk is already part of a virtual disk The physical disk assigned as the global hot spare has failed The physical disk assigned as the global hot spare is missing Troubleshooting (continued) A global hot spare cannot be selected if it is already...
-
Page 75: Physical Disk-Related Errors
Physical Disk-Related Errors Table 7-13. The Physical Disk Fails Likely Causes to Check A physical disk is not visible in the PERC Virtual Disk Management utility or is offline A physical disk is highlighted red at the PERC Virtual Disk Management utility Table 7-14. - Page 76 Table 7-15. The Wrong Physical Disk was Removed Likely Causes to Check A physical disk has been removed from a virtual disk Table 7-16. Cannot Initialize a Physical Disk Likely Causes to Check The physical disk cannot be initialized Troubleshooting Corrective Actions The removal of one physical disk from a virtual disk causes:...
-
Page 77: Appendix A
Appendix A Controller Specifications This section contains information about the Dell PowerEdge RAID Controller (PERC) S100 and S300 adapter specifications: • Read, write, and cache policy • Physical and virtual disk tasks • Virtual disk specifications • Supported RAID levels... -
Page 78: Controller Tasks
Controller Tasks Table A-2 indicates the tasks that are supported or not supported by the PERC S100 Adapter and PERC S300 adapter. Table A-2. PERC S100 Adapter and PERC S300 Adapter Tasks PERC S100 adapter or PERC S300 adapterTask Name Enable alarm Disable alarm Quiet alarm... -
Page 79: Virtual Disk Tasks
Virtual Disk Tasks Table A-4 indicates the virtual disk tasks that are supported/not supported by the controllers. Table A-4. Virtual Disk Tasks Virtual Disk Task Name Assign and unassign dedicated hot spare Create virtual disk Reconfigure Delete (any) virtual disk Start a check consistency Cancel check consistency Initialize virtual disk... -
Page 80: Virtual Disk Specifications
Virtual Disk Specifications Table A-6 indicates the virtual disk specifications that apply to the PERC S100 Adapter and PERC S300 adapter. Table A-6. Virtual Disk Specifications for the PERC S100 adapter and PERC S300 adapter Virtual Disk Specification Maximum number of virtual disks per controller Minimum virtual disk size Maximum virtual disk size Maximum number of physical disks per virtual disk... -
Page 81: Appendix B
A virtual disk is data storage created by a controller from one or more physical disks. The virtual disk is viewed by the operating system as a single disk. The Dell PowerEdge RAID Controller (PERC) S100 controller and PERC S300 controller allows: •... -
Page 82: Understanding Raid Levels
RAID Level Volume (can be created only using the PERC S100 Virtual Disk Management utility or PERC S300 Virtual Disk Management utility. Dell OpenManage Server Administrator Storage Management can manage a Volume but cannot create it.) NOTE: Unless mentioned otherwise,... - Page 83 Table B-1. RAID Levels and Characteristics RAID Level Main Characteristics RAID 1 (mirroring) Mirrors data on one physical disk to another, to provide basic redundancy. In the event of a single physical disk failure a second copy of the data exists, which can be used to restore the data to a new, replacement physical disk.
- Page 84 Table B-1. RAID Levels and Characteristics RAID Level RAID 5 (striping with parity) Disk States - Virtual and Physical Disks The following tables indicate the statuses that can appear at the PERC Virtual Disk Management utility. Table B-2. Physical Disk States State Definition ATAPI...
- Page 85 Ready state to either the Failed or Degraded state, depending on the virtual disk’s RAID level. For additional information about rescanning to update storage configuration changes, see the OpenManage documentation available on the Dell Support website at support.dell.com/manuals. Table B-4. Failure Status by Virtual Disk RAID Level...
- Page 86 Creating Virtual Disks: Future Expansion When creating virtual disks, consider whether or not the virtual disk capacity needs to be expanded in the future. For a Microsoft Windows operating system, format the virtual disks with New Technology File System (NTFS). Microsoft Corporation provides a utility (diskpart.exe) that can dynamically extend an NTFS file system onto any unused adjacent space.
- Page 87 Every time a physical disk is connected or disconnected while online, a rescan is performed. A rescan is automatically performed when Dell OpenManage Server Administrator Storage Management detects that a physical disk has been added or removed.
- Page 88 Global Hot Spares A global hot spare is a backup physical disk that can be used by any redundant virtual disk. It is not assigned (dedicated) to any specific virtual disk. Virtual disks can typically be rebuilt by using a global spare disk, as long as the global hot spare is not already part of the virtual disk and has enough available capacity.
-
Page 89: Appendix C
Plug the system into a different outlet so that the system and the receiver are on different branch circuits. If necessary, consult a Dell Technical Support representative or an experienced radio/television technician for additional suggestions. For additional regulatory information, see the owner’s manual or user’s guide for your system. -
Page 90: Fcc Notice (U.s. Only)
A Notice About Shielded Signal Cables: Use only shielded cables for connecting devices to any Dell device to reduce the possibility of interference with radio communications services. Using shielded cables ensures that you maintain the appropriate Electromagnetic Compatibility classification for the intended environment. - Page 91 CAUTION: The FCC regulations provide that changes or modifications not expressly approved by Dell Inc. could void your authority to operate this equipment. These limits are designed to provide reasonable protection against harmful interference in a residential installation. However, there is no guarantee that interference may not occur in a particular installation.
-
Page 92: Industry Canada Notice (Canada Only)
Canada. CAUTION: The Industry Canada regulations provide that changes or modifications not expressly approved by Dell Inc. could void your authority to operate this equipment. CE Notice (European Union) Marking by the symbol indicates compliance of this Dell system to the Electromagnetic Compatibility Directive 89/336/EEC and the Low Voltage Directive 73/23/EEC of the European Union. - Page 93 This Dell device is classified for use in a typical Class B domestic environment. A "Declaration of Conformity" in accordance with the preceding directives and standards has been made and is on file at Dell Inc. Products Europe BV, Limerick, Ireland. Appendix C...
-
Page 94: Ce Mark Notice
CE Mark Notice This equipment complies with the essential requirements of the European Union Directive 1999/5/EC. Appendix C... -
Page 95: Appendix D
NOTE: If you do not have an active Internet connection, you can find contact information on your purchase invoice, packing slip, bill, or Dell product catalog. Dell provides several online and telephone-based support and service options. Availability varies by country and product, and some services may not be available in your area. - Page 96 Appendix D...
-
Page 97: Index
59 cache policy, 77 CE Mark Notice, 94 CE Notice (European Union), 92 checkpointing, 22 chipsets, configuration at the Dell system BIOS, 39 Command Queuing, 22 consistency check, 23 continuing to boot the system, 59 controller driver, download procedure, 37... - Page 98 electrostatic discharge, protecting against, 9 errors, physical disks dedicated hot spare has failed or is in error, 75 Failed status is displayed, 75 errors, virtual disks Failed status, 71 virtual disk has been deleted, 73 ESD protection, 9 fault tolerance, 23 FCC Notice (U.S.
- Page 99 OCE, 24 offline virtual disks, warning message, 66 Online Capacity Expansion, 24 options changing controller options, 58 options, controller, 58 PERC S100 controller, Management Setup, 45 PERC S100 Virtual Disk Management utility, PERC S300 Virtual Disk Management utility access to it, 48 PERC S300 Adapter installation, 32 PERC S300 adapter...
- Page 100 rescanning for changes in state, 87 configuring the controller using the PERC S100, 47 safety general, 8 safety instructions, 7 working inside your system, 8 specifications, PERC S100 adapter, PERC S300 adapter, 77 specificationsÖ virtual disks, 80 Storport, driver support, 26 stripe size, 26 support for RAID level, 22 text colors, PERC S100 Virtual...
- Page 101 BIOS not installed, user disabled INT13 BIOS load, 68 found virtual disks that are Degraded, 65 found virtual disks that are Offline, 66 no boot device available, 68 warning messages PERC S100 Controller BIOS screen, PERC S300 Controller BIOS screen warning messages write policy, 77 , 64...
- Page 102 Index...
-
Page 103: Glossary
Glossary — An adapter enables the system to access peripheral devices by D A P T E R converting the protocol of one bus or interface to another. An adapter may also provide specialized function. For example, a RAID controller is a type of adapter that provides RAID functions. - Page 104 immediately and the main memory read is aborted (or not started). If the data is not cached (a cache miss), it is fetched from main memory and saved in cache memory. — The process of utilizing a high speed memory buffer, referred to as a A C H I N G “cache,”...
- Page 105 — Fault tolerance is the capability of the disk subsystem to A U L T O L E R A N C E undergo a single drive failure for the physical disks in a virtual disk without compromising data integrity and processing capability. The PERC S100 controller and PERC S300 controller provide this support through redundant virtual disks in RAID levels 1, 5 and 10.
- Page 106 — Replacement of a failed component while the system is running and W A P operating normally. — The process of writing zeros to the data fields of a virtual disk N I T I A L I Z A T I O N and, in fault tolerant RAID levels, generating the corresponding parity to put the virtual disk in a Ready state.
- Page 107 NCQ (N A T I V E O M M A N D allows multiple, outstanding commands to be active on a drive at the same time. A I D O N F I G U R A T I O N replacement physical disk.
- Page 108 The functions include procedures you can use to configure physical disks and virtual disks. The PERC Virtual Disk Management utility differs from the Dell Inc. system BIOS, which contains the BIOS settings for each Dell platform and is accessed by pressing <F2> during system startup.
- Page 109 SAN (S T O R A G E R E A network that attaches disk storage subsystems to servers. The storage devices are accessible to multiple hosts at the same time. S A S ( S E R I A L T T A C H E D device interface that leverages the proven Small Computer System Interface (SCSI) protocol set.
- Page 110 — Disk striping writes data across all physical disks in a virtual disk. Each T R I P I N G stripe consists of consecutive virtual disk data addresses that are mapped in fixed-size units to each physical disk in the virtual disk using a sequential pattern. For example, if the virtual disk includes five physical disks, the stripe writes data to physical disks one through five without repeating any of the physical disks.