Table of Contents
Advertisement
Available languages
Available languages
Quick Links
Manual de instrucciones - Ventilador de techo
Instruction Manual - Ceiling Fan
Manuel d'instructions - Ventilateur de plafond
Manual de instruções - Ventilador de teto
Manuale di istruzioni - Teto Ventilator
Bedienungsanleitung - Deckenventilator
Model:
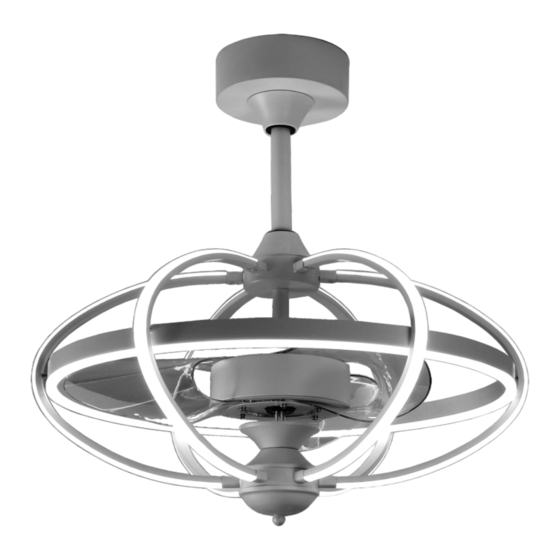
Miami
3
colour
LED
Specification:
230V, 50Hz, 50 W
LED
T
3
colour
Remote control
Reverse function
LED
www.bastilipo.com
Advertisement
Table of Contents

Subscribe to Our Youtube Channel
Related Manuals for Bastilipo Miami


Summary of Contents for Bastilipo Miami
- Page 1 Instruction Manual - Ceiling Fan Manuel d'instructions - Ventilateur de plafond Manual de instruções - Ventilador de teto Manuale di istruzioni - Teto Ventilator Bedienungsanleitung - Deckenventilator Model: Miami colour Specification: 230V, 50Hz, 50 W colour Remote control Reverse function...
-
Page 3: Manual De Instalación
MANUAL DE INSTALACIÓN Gracias por elegir un producto Partes BASTILIPO. Estas instrucciones le proporcionarán información valiosa y Abra con cuidado el embalaje. Retire los necesaria para usarlo y mantenerlo en elementos de las inserciones de espuma perfecto estado. Por favor, dedique de poliestireno. - Page 4 Montaje cobre techo abovedado o con ángulo 76cm 20° De separación alrededor del Techo ven lador inclinado Tija 2.3m de altura Preparación Funcionamiento mando a distancia Instalación de Tija Apaga el ventilador y ALL OFF Este ventilador se puede montar con tija las luces L I G H T ALL OFF...
-
Page 5: Conexión Del Mando A Distancia
Afloje los tornillos de fijación del yugo y la Montar y colgar el ventilador tuerca en la parte superior de la carcasa del motor. Retire el pasador y el clip de la Si desea extender la longitud colgante de varilla (si aún no lo ha hecho). Deslice la su ventilador, debe quitar la bola colgante varilla hacia abajo a través del dosel. - Page 6 Con el soporte para colgar asegurado a S e g ú n l a s D i r e c t r i c e s E u r o p e a s 2 0 0 2 / 9 5 C E , la caja de salida y capaz de soportar el 2002/96/CE, relativas a la ventilador, ahora está...
-
Page 7: Installation Preparation
INSTALLATION MANUAL Thank you for choosing a BASTILIPO Parts product. These instructions will provide you with valuable information Carefully open the packaging. Remove necessary to use and keep it in perfect the elements from the Styrofoam inserts. condition. Please take a few minutes... -
Page 8: Preparing The Fan Site
Angled Mounting recommended for a vaulted or angled ceiling 76cm 20° From separa on The ceiling around the fan inclined Downrod 2.3m Tall Remote control operation Preparing the fan site Turn off the fan and Seatpost Installation ALL OFF lights L I G H T ALL OFF O N / O F F... -
Page 9: Remote Control Connection
Loosen yoke set screws and nut at top of Mount and hang the fan motor housing. Remove pin and clip from downrod (if you have not already done If you wish to extend the hanging length of so). Slide downrod through canopy. your fan, you must remove the hanging ball from the 6 inch downrod provided to Tread electrical wires through downrod... -
Page 10: Warranty
With hanging bracket secured to the According to the European D i r e c t i v e s 2 0 0 2 / 9 5 C E , outlet box and able to support to fan, 2002/96 / CE, relative to the you are now ready to hang your fan. -
Page 11: Préparation De L'installation
Merci d'avoir choisi un produit Inventaire des pièces BASTILIPO. Ces instructions vous f o u r n i r o n t l e s i n f o r m a t i o n s Ouvrez soigneusement l'emballage. -
Page 12: Fonctionnement De La Télécommande
Montage plafond voûté en cuivre ou avec angle 76cm 20° De la sépara on Le plafond autour du incliné ven lateur Jarret 2.3m D'hauteur Préparation Fonctionnement de la télécommande Installation de la tige de selle Éteignez le ventilateur et ALL OFF Ce ventilateur peut être monté... - Page 13 Loosen the yoke set bolts and the nut on Mount and hang the fan the top of the motor housing. Remove the pin and clip from the downrod (if you If you want to extend the hanging length haven't already). Slide the rod down of your fan, you must remove the hanging through the canopy.
-
Page 14: Garantie
Avec le support de suspension fixé à la S e l o n l e s D i r e c t i v e s Européennes 2002 / 95CE, boîte de sortie et capable de supporter le 2002/96 / CE, relatives à la ventilateur, vous êtes maintenant prêt à... -
Page 15: Manual De Instalação
AT E N Ç Ã O A N T E S D E C O M E Ç A R A I N S T A L A Ç Ã O . S A L V E E S T A S INSTRUÇÕES. • Use apenas peças de reposição Bastilipo. • Para reduzir o risco de ferimentos pessoais, Shank Guarnição superior... -
Page 16: Operação De Controle Remoto
Montagem de teto abobadado de cobre ou com ângulo 76cm 20° Da separação em volta do fã Teto inclinado Tija 2.3m de altura Operação de controle remoto Preparação Instalação do espigão de selim Desligue o ventilador e ALL OFF as luzes L I G H T ALL OFF O N / O F F... - Page 17 Afloje os tornillos de fijación del yugo y la Monte e pendure o ventilador tuerca na parte superior da carcasa del motor. Retire-se do pasador e do clipe de Se você deseja estender o comprimento la varilla (si aun no lo ha hecho). Deslice de suspensão de seu ventilador, deve la varilla hacia abajo a través del dosel.
- Page 18 Com o soporte para colgar asegurado a De acordo com as Diretrizes E u r o p é i a s 2 0 0 2 / 9 5 C E , la caja de salida y capaz de soportar o 2002/96 / CE, relativas à...
-
Page 19: Manuale Di Installazione
Avvertenze SI PREGA DI LEGGERE ATTENTAMENTE QUESTO MANUALE PRIMA DI INIZIARE L'INSTALLAZIONE. CONSERVA QUESTE ISTRUZIONI. • Utilizzare solo pezzi di ricambio Bastilipo. Finitura superiore Shank • Per ridurre il rischio di lesioni personali, collegare il ventilatore direttamente alla struttura di supporto dell'edificio secondo queste istruzioni e utilizzare solo l'hardware in dotazione. -
Page 20: Funzionamento Del Telecomando
Montagem de teto abobadado de cobre ou com ângulo 76cm 20° Dalla separazione Techo a orno a fan Teto inclinado Shank 2.3m de altura Funzionamento del Preparação telecomando Instalação do espigão de selim Spegni la ventola e ALL OFF luci L I G H T ALL OFF O N / O F F... - Page 21 Allentare i bulloni di fissaggio del giogo e Monta e appendi il ventilatore i l d a d o s u l l a p a r t e s u p e r i o r e dell'alloggiamento del motore. Rimuovi il Se si desidera estendere la lunghezza di perno e la clip dal downrod (se non l'hai s o s p e n s i o n e d e l v e n t i l a t o r e , è...
-
Page 22: Garanzia
Com o suporte de suspensão preso à Secondo le Direttive Europee 2 0 0 2 / 9 5 C E , 2 0 0 2 / 9 6 / C E , caixa de tomadas e capaz de suportar o relative alla riduzione dell'uso di ventilador, agora você... - Page 23 SORGFÄLTIG DURCH, BEVOR SIE MIT DER INSTALLATION BEGINNEN. ANLEITUNG Schaft AUFBEWAHREN. Oberteil • Verwenden Sie nur Bastilipo-Ersatzteile. • Um die Verletzungsgefahr zu reduzieren, den Ventilator gemäß dieser Anleitung direkt an die Gebäudeunterkonstruktion anschließen und nur die mitgelieferte Hardware verwenden. • Um einen möglichen Stromschlag zu vermeiden,...
- Page 24 Montage Kupfergewölbedecke oder mit Winkel 76cm 20° Von der Trennung um Die Decke die Fan geneigt Scha 2.3m Groß Vorbereitung Fernbedienungsbetrieb Sattelstützenmontage Lüfter ausschalten und ALL OFF D i e s e r Ve n t i l a t o r k a n n m i t e i n e r Beleuchtung L I G H T ALL OFF...
- Page 25 Lösen Sie die Joch-Set-Schrauben und Montieren und hängen Sie den die Mutter auf der Oberseite des Lüfter Motorgehäuses. Entfernen Sie den Stift und den Clip vom Unterrohr (falls noch Wenn Sie die hängende Länge Ihres Lüfters nicht geschehen). Schieben Sie die verlängern möchten, müssen Sie die Stange durch die Haube nach unten.
- Page 26 Wenn die Aufhängehalterung an der Gemäß den europäischen R i c h t l i n i e n 2 0 0 2 / 9 5 C E , Anschlussdose befestigt ist und den 2002/96/CE, in Bezug auf die Ventilator tragen kann, können Sie Ihren Reduzierung des Einsatzes Ventilator jetzt aufhängen.
- Page 28 Compañía Pineda Álvarez, S.L. P.I. Sta. Isabel c/Alicatadores, 23 El Viso del Alcor (Sevilla) CP 41520 Spain T +34 955 741 038 Fax +34 955 741 254 www.bastilipo.com...
Need help?
Do you have a question about the Miami and is the answer not in the manual?
Questions and answers