
Subscribe to Our Youtube Channel
Related Manuals for SingularXYZ X1 Series


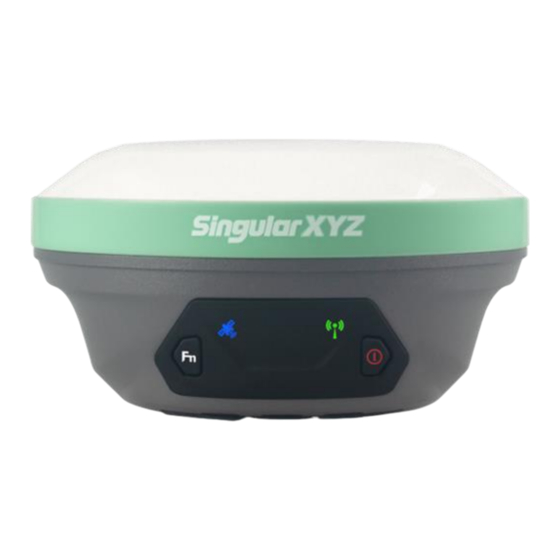
Summary of Contents for SingularXYZ X1 Series
- Page 1 X1-Series GNSS Receiver User Manual V1.0, modified on 2023.9. X1-series GNSS Receiver User Manual V1.0...
- Page 2 E-mail: singularxyz@singularxyz.com Trademark notice © 2021 SingularXYZ Intelligent Technology Ltd. All rights reserved. SingularXYZ is the official trademark of SingularXYZ Intelligent Technology Ltd., registered in People’s Republic of China, EU, USA and Canada. FCC Notice ○ SingularXYZ X1 GNSS receivers comply with the limits for a Class B digital device, pursuant to the Part 15 of the FCC rules when it is used in the Portable Mode.
- Page 3 CAUTION- A Caution alerts you to a possible risk of damage to the equipment and/or data loss. Warranty Notice SingularXYZ does not warranty devices damage because of force majeure (lighting, high voltage or collision). SingularXYZ does not warranty the disassembled devices.
- Page 4 Contents 1 Introduction ....................1 1.1 About the receiver ....................1 1.2 Receiver features ....................1 1.3 X1 Receiver Packing List ..................1 1.3.1 Basic Supply kit..................2 2 User Interface ....................3 2.1 Environmental requirements ................3 2.2 Front panel ......................3 2.3 Lower housing ......................
- Page 5 Chapter 1 Introduction The SingularXYZ X1-Series (hereinafter X1) GNSS Receiver User Guide is aimed to help you get familiar with the X1 receiver and start your project effectively. We highly recommend you to read this manual before surveying, even you have used other GNSS RTK receivers before.
- Page 6 1.3.1 Basic Supply kit X1 GNSS Receive User Manual V1.0...
- Page 7 Chapter 2 Setup the X1 Receiver This chapter provides general information on environmental requirements, setup, power supply and connection of the X1 receiver. Environmental requirements To keep the receiver with a reliable performance, it is better to use the receiver in safe environmental conditions: •...
- Page 8 Power supply 2.4.1 Battery The receiver is equipped with internal batteries. - 6700 mAh, over 20 hours working time - Fast charge of 2.5 hours charging time 2.4.2 External Power Supply The receiver is connected to an external power supply through a lemo to RS232 cable, and make sure that the red alligator clip is connected to the positive of external power supply, black one to negative.
- Page 9 This chapter describes static survey through X1 receiver and SingularXYZ Converter software. For static survey, X1 supports 3 data formats: XYZ, Rinex3.02 and Rinex3.04. XYZ format is raw observation data and you can convert the data from SingularXYZ binary format (*.XYZ) to RINEX format via SingularXYZ Converter Software (Contact SingularXYZ support team for the tool).
- Page 10 2. Option Settings. Input Record name and Point name. Set the Collection Interval, Observation Time and Data Format. 3. Open the Loop Record according to you needs. If this option is opened, receiver will delete the earliest recorded data to keep recording when the record space is full.
- Page 11 4. Open the Auto Record Static according to you needs. If this option is opened, the receiver automatically records static data after it is power on. 5. Set the Record Space in the end. It will limit the amount of data that receiver record.
- Page 12 Click start to static survey. Static Data Download The raw observation data is saved in internal memory of X1 receiver, when connected with PC via TYPE-C cable, the X1 receiver can work as a USB Flash Disk – SingularXYZ_DISK, which means you can copy the static data to PC directly. In addition, you can download the static data via WebUI, connect the WiFi of the X1 receiver and log in 192.168.10.12 (Username: admin, Passwords: admin) Go to Work management >>...
- Page 13 RINEX Convert After copy raw observation data to PC, you can convert the data from SingularXYZ binary format (*.XYZ) to Rinex in SingularXYZ Converter software. The following steps give an example of Rinex convert. 1. Start SingularXYZ Converter software; 2. Click open and select the path of your XYZ data;...
- Page 14 X1 GNSS Receive User Manual V1.0...
- Page 15 This chapter introduces how to conduct RTK Survey with SingularPad Software. SingularPad is professional Android-based surveying software developed by SingularXYZ team. SingularPad is fully functional as a field surveying software, equipped with complete work modes and necessary functions for surveyors.
- Page 16 In Project Manager interface, you can click previous projects in the Project List to remove or open it. If you have added one project, you can click the project name in the main interface to check the current project details, including Project Name, Project Path and Coordinate systems parameters.
- Page 17 4.3.2 Bluetooth connection After creating a new project, switch to Device interface, click Communication. You can connect SingularPad with SingularXYZ X1 GNSS receivers. Make sure device Bluetooth turned on, click Find device and select SN number of your X1 receiver.
- Page 18 port Power: High and low (low power will reduce the RTK range) ⚫ The following steps give an example of internal radio transmission. 1. Go to Device >> Base. Set Base ID and choose the Diff Mode firstly. 2. Set Start up Mode, SingularPad supports Single Point, Input Base Coordinates and Use Current Coordinates.
- Page 19 3. Set Data Link as Internal Radio. Set parameter settings, Channel, Frequency, Protocol, Baud Rate and Power. 4. When start Base succeed, it will show as below in SingularPad. Device Internet: This mode uses GPRS (internet data) to transmit the correction data from Base to Rover.
- Page 20 on the server (with static IP address), and the Rover receives the correction data by Ntrip protocol. The following steps give an example of device internet transmission. 1. Insert a SIM card to the X1 receiver and then turn on the receiver. 2.
- Page 21 4. Parameter Settings. Choose NTRIP in Connect Mode. Input the server IP, Port, Password in the CORS Settings. APN Settings (Access point number, acquire from the mobile service provider). Input Name, User and Password. 5. Set the Base access point in the end. 6.
- Page 22 Tip: X1 receiver does not support hot swap, please shut down the X1 receiver then insert the SIM card. If you turn on the receiver and insert the SIM card, please reboot the receiver. 4.4.2 Start Rover Station by SingularPad When work as a Rover station, SingularPad supports receive the correction data in Internal Radio mode, Device Internet mode and Phone Internet Mode.
- Page 23 3. Base Coordinates Change Alert: SingularPad will alert when you connect with different base station. When the Base station is VRS, please don’t open this. 4. Click Apply to start the Rover mode. When start Rover succeed, it will show as below in SingularPad.
- Page 24 set the server IP and port, and receives the correction data by Ntrip protocol. The following steps give an example of device internet transmission. 1. Go to Device >> Rover. Set Data Link as Device Internet. 2. Parameter Settings. Choose NTRIP in Connect Mode. Input the server IP, Port, User and Password in the CORS Settings.
- Page 25 3. Click Get button on the right and “Get MountPoint succeeded” will be displayed below. Then choose the mountpoint. 4. Phone internet access: Rover station will access the mountpoint via phone internet, you need to make sure controller have access to Internet. If don’t open this, rover station will access the moutpoint via device internet.
- Page 26 5. Base Coordinates Change Alert: SingularPad will alert when you connect with different base station. When the Base station is VRS, please don’t open this. 6. Click Apply to start the Rover mode. When start Rover succeed, it will show as below in SingularPad.
- Page 27 2. Set Connect Mode, for X1 receiver supports NTRIP and TCP Client. CORS Settings. Input the server IP, Port, User and Password in the CORS Settings. 3. Click Get button on the right to get the mountpoint list and choose the mountpoint.
- Page 28 4. Click Start button on the right to receive data from Base station. Then you can see the rover station is receiving data. 5. Auto connect to network: When this option is opened, SingularPad will connect to network automatically so that user don’t need to click start to connect network.
- Page 29 6. Base Coordinates Change Alert: SingularPad will alert when you connect with different base station. When the Base station is VRS, please don’t open this. 7. Click Apply to start the rover mode. When start Rover succeed, it will show as below in SingularPad.
- Page 30 X1 GNSS Receive User Manual V1.0...
- Page 31 Chapter 5 RTK Survey-field Data collect This section describes the basic survey functions of SingularPad, including Point Survey, Detail Survey, Control Point Survey, Point Stakeout, CAD Mapping and etc. Before RTK survey, you need to connect to the receiver and get a fixed solution. Point Survey Before RTK survey, please make sure that receiver is receiving the correction data and get a fixed solution, age means the time since the last differential data was...
- Page 32 The satellites number is on the top of the interface, click it you can check the satellite map and information. In the Survey interface, click Point Survey and enter point name, code and antenna height, then click to start or stop collecting data. X1 GNSS Receive User Manual V1.0...
- Page 33 In the floating window of the survey interface, you can see the display information. The default display information is NEH and Base distance, and click the floating window you can set them as you need. Except default display information, SingularPad supports Longitude, Latitude and Altitude etc. Click to select the map or calibration: Google Map (Standard Map/ ⚫...
- Page 34 Click to jump to map center ⚫ Click to show the whole points on the interface ⚫ Click to check the point coordinates, you can add, recover, import, and ⚫ export the data. After you choose a point, you can check the details and take notes or photos.
- Page 35 Click to set settings, in settings interface, you can edit receiver ⚫ parameter, for tolerance setting such as solution limit, HRMS limit, VRMS limit and etc., for smooth you can set survey delay and average GPS count and for settings you can set other options. Click to set display info, in display info interface, you can set the display ⚫...
- Page 36 Click to set tool bar, in tool bar interface, you can add or delete options ⚫ to point survey interface. You can customize the interface to meet whatever layout needs you might have. X1 GNSS Receive User Manual V1.0...
- Page 37 5.1.1 Tilt survey Tilt survey option will appear when receiver supports for tilt survey, it is available for SingularXYZ X1 GNSS receiver. When the pole tilts within 60°, the built-in sensor based tilt measurement system precisely calculates the actual offset...
- Page 38 In survey interface, you can find the bubble and angle value shows the pole you tilt. To ensure the accuracy, please keep the tilt angle less than 60°. When the pole tilts within 60°, the built-in sensor based IMU precisely calculates the actual offset, the accuracy of which can be accurate to ±2.5cm.
- Page 39 Show both local coordinates and Latitude/Longitude when measuring. Click to start or stop collecting data ⚫ Click to set settings, display info and tool bar. ⚫ Click to check point coordinates; you can add note, info, arrow drawing ⚫ and photo. Click to open IMU to do tilt survey.
- Page 40 Control point survey By measuring the coordinates of the same point several times, an accurate coordinate is obtained. Click to start or stop collecting data ⚫ Click to set settings, display info and tool bar. ⚫ Click to check point coordinates; you can add note, info, arrow drawing and ⚫...
- Page 41 Click button library to choose one ⚫ Click Import to get coordinates with different kinds of files, you can also ⚫ define a new form X1 GNSS Receive User Manual V1.0...
- Page 42 Choose a point to stake, SingularPad provides a navigation map when staking points/lines. If you are close to the target point enough, it will alarm you based on the alarm range you set. For X1 receiver, you can use IMU staking function. In the IMU staking, you can open IMU function, and don’t need to keep the receiver vertical to the ground, and the tilt angle supports maximum to 60°...
- Page 43 There is a direction prompt on the floating window ⚫ Click to start or stop stake points ⚫ Click to open or close IMU ⚫ Click to scale automatically ⚫ Click to jump to lasted point ⚫ Click to jump to next point ⚫...
- Page 44 Click Add to input line parameters, there are two types you can choose ⚫ Click Import to get coordinates with different kind of files, you can also define ⚫ a new format Choose a line to stake, set calculation mode and interval. Click to jump to next line ⚫...
- Page 45 Click to jump to previous line ⚫ Click to add stake ⚫ CAD mapping and stakeout When using for the first time, the CAD interface has no layers and floating window to display the features you need to stake. Click to create or import a CAD file, supporting *.dxf, *.dwg format ⚫...
- Page 46 Input parameters and save it Find the file you want to stake and import it. After create or import one, you can scan and edit in the CAD layer. Click to draw features, there are 12 types and methods you can choose, ⚫...
- Page 47 Click to find tools; they can help you to work smoothly, For example, to ⚫ find the intersection points of neighboring circles. In the CAD interface, you can choose a feature you want to stake, it will show up in blue.
- Page 48 blue. You can obtain the details about it, including length, start point, end point and center point. And choose the way to stake. Setting: Set the method of stake out, offset distance, interval etc. ⚫ Start station: If you set the start station as 5m, then the final mileage will plus ⚫...
- Page 49 If the current position is not within the range if the design surface, it will show “Out of surface!” if the current position is within the range of the design surface, it will show the fill or excavation value. Points Database The points, which are surveyed, staked, added, imported, and input from display map, will be stored in point database.
- Page 50 Add: Supports to add Input Point, and Display type Supports Local coordinate ⚫ and geodetic coordinate Recover: After delete the points, you can recover them in deleted points ⚫ interface Import: Import points by different formats of files ⚫ Export: Export points by different formats of files ⚫...
- Page 51 Data export/ import SingularPad supports to export/ import data including grid coordinate, Lat/Lon coordinate with various data format, support import *.dat/*.csv/*.kml file and export result of *.dxf/*.kml/*.shp/*.xls/*.csv. 5.9.1 Import points data Tap Import data in project interface, there are some predefined data formats, click More to get more predefined formats.
- Page 52 Data Type: support point database, transformation parameters file and code ⚫ library Import File Format: support *.csv, *.dat, *.txt, *.kml format etc. ⚫ Distance Unit: support meter, US survey feet and international feet ⚫ Besides, you can click now to create a User defined type. Format name: Enter the name for the format ⚫...
- Page 53 element selected. The elements include: code, northing, easting, elevation, latitude, longitude, altitude. Choose one format to import data. The default export path is internal storage/ SingularPad/import. You can also change to any other path where the file is. Click preview to take an inspection whether the format is right. 5.9.2 Export points data Tap Export in Project interface to export simple data of survey points.
- Page 54 Export Path: the default export path is internal storage/SingularPad/export; ⚫ you can also change to any other path where the file is File Name: support project name, operator,data, data time ⚫ Export File Format: support *.csv, *.dat, *.txt, *kml format etc. ⚫...
- Page 55 X1 GNSS Receive User Manual V1.0...
Need help?
Do you have a question about the X1 Series and is the answer not in the manual?
Questions and answers