Advertisement
Quick Links
Advertisement

Subscribe to Our Youtube Channel
Related Manuals for Seeley Braemar MDHVD1S


Summary of Contents for Seeley Braemar MDHVD1S
- Page 1 INSTALLATION MANUAL MULTI BULK-HEAD INVERTER AIR CONDITIONER (English) (MDHVD1S)
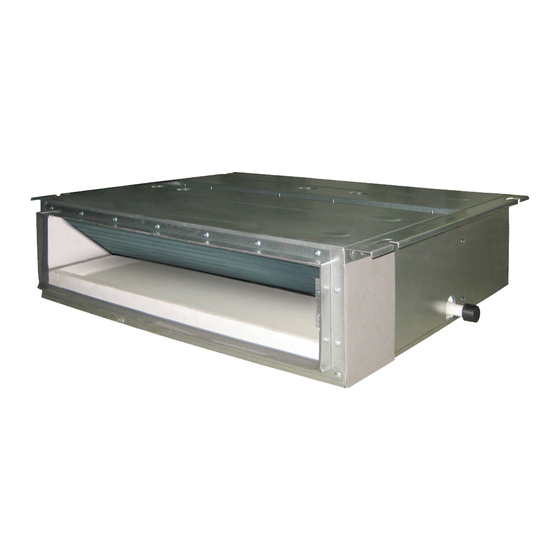
- Page 2 MDHVD1S Series Inverter Unit...
- Page 3 Further, it could expose the Installer and/or the Retailer to serious liability. warranty. Further, it could expose the Installer and/or the Retailer to serious liability. SEELEY INTERNATIONAL – INSTALLATION MANUAL SEELEY INTERNATIONAL - INSTALLATION MANUAL...
- Page 4 BEFORE YOU START BEFORE YOU START Installation training is available from Seeley International Installation training is available from Seeley International INSTALLER AND MAINTENANCE CONTRACTORS INSTALLER AND MAINTENANCE CONTRACTORS for quali ed and licensed installers; please contact your for quali ed and licensed installers; please contact your...
- Page 5 Ensure correct cable and circuit breaker are used. Power cable sizes are recommended only; AS/NZS 3000 and all local, state and national codes must be adhered to. Commissioning 21-22 Complete the commissioning sheet and checklist. SEELEY INTERNATIONAL - INSTALLATION MANUAL...
- Page 6 TROUBLESHOOTING TROUBLESHOOTING PROBABLE CAUSE PROBABLE CAUSE PROBLEM PROBLEM REMEDY REMEDY 1.1 Power failure. 1.1 Power failure. 1. The air conditioner 1. The air conditioner 1.1 Wait for power to resume. 1.1 Wait for power to resume. 1.2 Fuse blown or circuit breaker open. 1.2 Fuse blown or circuit breaker open.
- Page 7 Air inlet Air inlet Air inlet 6. Drain Pipe 6. Drain Pipe 6. Drain Pipe 6. Drain Pipe Air outlet Air outlet Air outlet Air outlet SEELEY INTERNATIONAL – INSTALLATION MANUAL SEELEY INTERNATIONAL - INSTALLATION MANUAL SEELEY INTERNATIONAL – INSTALLATION MANUAL...
- Page 8 INSTALLATION NECESSARY TOOLS FOR INSTALLATION Spirit Level Gas Leak Detector or soap and water solution Screw driver Vacuum Pump Impact Drill Refrigeration Gauges Pipe Expander, Flaring tool Measuring Tape Pipe Cutter Hacksaw Torque Wrench Hole core drill Open-end spanner set Knife INDOOR UNIT INSTALLATION INDOOR UNIT SELECTION FOR MULTI-SPLIT SYSTEMS...
- Page 9 DECAL ON THE UNIT. Seeley recommends the use of a safe tray under the indoor unit, complete with a separate drain. The indoor unit can be mounted on a suitable base. Ensure that the base is level and that the drains are free to be piped correctly with enough height to allow for condensate trap and fall to waste.
- Page 10 INDOOR UNIT INSTALLATION cont. INDOOR UNIT INSTALLATION cont. INDOOR UNIT INSTALLATION cont. INSTALLING HANGING BOLTS INSTALLING HANGING BOLTS NOTE: All hardware for hanging the Indoor Unit is to be supplied by the installer NOTE: All hardware for hanging the Indoor Unit is to be supplied by the installer INSTALLING HANGING BOLTS Select a suitable location for securing the hanging bolts.
- Page 11 COOLING mode (Fig 13). Fig 13 Fig 13 DUCT CONNECTIONS DIMENSION (mm) Supply Air Outlet Return Air Outlet MODEL Supply Air Outlet MDHV25D1S MDHV35D1S MDHV50D1S MDHV60D1S 1062 MDHV70D1S Return Air Inlet Fig 14 SEELEY INTERNATIONAL – INSTALLATION MANUAL SEELEY INTERNATIONAL - INSTALLATION MANUAL...
- Page 12 INDOOR UNIT INSTALLATION cont. FLANGE CONNECTIONS DIMENSION (mm) Supply Air Outlet Return Air Outlet MODEL Supply Air Outlet MDHV25D1S MDHV35D1S MDHV50D1S MDHV60D1S 1062 MDHV70D1S Return Air Inlet Fig 14 MDHVD1S Series Cassette Inverter...
- Page 13 Please avoid more than one reduced clearance to ensure proper operation at maximum ambient conditions. maximum operating temperature. Please avoid more than one reduced clearance to ensure proper operation at maximum ambient conditions. SEELEY INTERNATIONAL - INSTALLATION MANUAL SEELEY INTERNATIONAL – INSTALLATION MANUAL...
- Page 14 OUTDOOR UNIT INSTALLATION cont. OUTDOOR UNIT INSTALLATION cont. Location considerations should (cont): Location considerations should (cont): Fix unit in position to ensure it is kept upright and level Fix unit in position to ensure it is kept upright and level Wherever possible protect the unit from direct sunlight.
- Page 15 For Multi-split connections, each pipe should be labelled to identify which indoor unit it belongs to so as to avoid incorrect pipework. incorrect pipework. vacuum pressure of 100 vacuum pressure of 100 µPa µPa minimum. minimum. SEELEY INTERNATIONAL - INSTALLATION MANUAL SEELEY INTERNATIONAL – INSTALLATION MANUAL...
- Page 16 REFRIGERANT PIPE-WORK cont. REFRIGERANT PIPE-WORK cont. CONNECTION BETWEEN INDOOR UNIT AND OUTDOOR UNIT CONNECTION BETWEEN INDOOR UNIT AND OUTDOOR UNIT pressure gas blowing out, it is the signal of a leaking Indoor unit, check and test for leaks, repair and/or replace as pressure gas blowing out, it is the signal of a leaking Indoor unit, check and test for leaks, repair and/or replace as required.
- Page 17 90° (refer copper cable (5V-90 copper cable, consisting of PE insulated wires and a PVC cable jacket) used at 40° and national standard. rated to 90° (refer national standard. SEELEY INTERNATIONAL - INSTALLATION MANUAL SEELEY INTERNATIONAL – INSTALLATION MANUAL...
- Page 18 ELECTRICAL WIRING cont. ELECTRICAL WIRING cont. NOTES (cont.): NOTES (cont.): The speci cations of the breaker listed in the table are applied to the breaker with the working temperature at The speci cations of the breaker listed in the table are applied to the breaker with the working temperature at 40°...
- Page 19 Fix the Front panel in place with the ST2.9x6 screw. Fix the Front panel in place with the ST2.9x6 screw. Fig.25 Installation of the Wired Controller Fig.25 Installation of the Wired Controller SEELEY INTERNATIONAL - INSTALLATION MANUAL SEELEY INTERNATIONAL – INSTALLATION MANUAL...
- Page 20 START UP & COMMISSIONING Ensure the electrical wiring has been completed, connected and switched on at Isolator. Check for correct voltage and number of phases. Switch the Unit(s) on in cooling mode with the thermostat set to minimum temperature set point. Check suction and liquid pressure, check running current, check for noise and vibration, repair and/or rectify as required.
- Page 21 Note: Where the di erence in elevation between the Indoor unit and the Outdoor unit is greater than 6m, install an oil trap every 6m, in the vertical pipe section (refer Fig 19). CAUTION! REMOVE THE SERVICE GAUGE SET FROM THE LINES CAREFULLY. ESCAPING LIQUID REFRIGERANT CAN CAUSE BURNS. SEELEY INTERNATIONAL - INSTALLATION MANUAL...
- Page 22 ERROR CODES: MULTI-SPLIT OUTDOORS ERROR CODES: MULTI-SPLIT OUTDOORS When several malfunctions occur at the same time, they will be displayed circularly. When several malfunctions occur at the same time, they will be displayed circularly. Malfunction display methods:- Malfunction display methods:- Hardware malfunction: it will be displayed immediately, please refer to table Hardware malfunction: it will be displayed immediately, please refer to table Operation status: it will be displayed immediately, please refer to table...
- Page 23 – Above (+ ?m), Below (- ? m) or Level (0m) – Above (+ ?m), Below (- ? m) or Level (0m) Indoor unit #1 (m) Indoor unit #1 (m) – yes – yes Full load amps Full load amps SEELEY INTERNATIONAL - INSTALLATION MANUAL SEELEY INTERNATIONAL – INSTALLATION MANUAL...
- Page 24 COMMISSIONING CHECKLIST COMMISSIONING CHECKLIST Please put a tick Please put a tick in each box when satisfactorily completed in each box when satisfactorily completed Installation Installation No gas leak from connecting pipe? No gas leak from connecting pipe? Heat insulation on the connecting pipe? Heat insulation on the connecting pipe? Is drainage securely carried out? Is drainage securely carried out?
- Page 25 27 / 36 31 / 41 31 / 41 Connection Pipe Liquid mm(in) 6.35 (1/4) 6.35 (1/4) 6.35 (1/4) 9.52 (3/8) 9.52 (3/8) Vapour mm(in) 9.52 (3/8) 9.52 (3/8) 12.70 (1/2) 15.88 (5/8) 15.88 (5/8) SEELEY INTERNATIONAL - INSTALLATION MANUAL...
- Page 26 TECHNICAL SPECIFICATION: MULTI-SPLIT OUTDOORS TECHNICAL SPECIFICATION: MULTI-SPLIT OUTDOORS Braemar Braemar Outdoor Outdoor MCHV54D12 MCHV54D12 MCHV73D13 MCHV73D13 MCHV81D14 MCHV81D14 MCHV10D14 MCHV10D14 MCHV11D15 MCHV11D15 Part Number Part Number Power Supply Power Supply V/Ph/Hz V/Ph/Hz 220-240/1/50 220-240/1/50 Cooling Capacity Cooling Capacity 5.40 5.40 7.30 7.30 8.15...
- Page 27 Warranty conditions are subject to property access and industry Safety Standards. NOTE Seeley International strives for continuous product improvements, therefore specifications are subject to change For complete warranty terms and conditions, refer to separate Warranty Booklet and/or www.braemar.net.au without notice. Unit colour may vary slightly from that depicted in this booklet.
- Page 28 It is the policy of Seeley International to introduce continuous product improvement. Accordingly, specifications are subject to change without notice. Please consult with your dealer to confirm the specifications of the model selected. Seeley International Technical Support 1300 650 399...
Need help?
Do you have a question about the Braemar MDHVD1S and is the answer not in the manual?
Questions and answers