Advertisement
Available languages
Available languages
Quick Links
Bedienungsanleitung/Garantie
Instruction Manual/Guarantee • Gebruiksaanwijzing/Garantie
Istruzioni per l'uso/Garanzia
Kaffee-Vollautomat
Fully Automatic Coffee Machine • Koffi e-volautomaat
Macchina caffè completamente automatica
KA-V 2936
05-KAV 2936 Titel & D 1
03.12.2004, 12:10:38 Uhr
Advertisement

Related Manuals for CTC Union Clatronic KA-V 2936


Summary of Contents for CTC Union Clatronic KA-V 2936
- Page 1 Bedienungsanleitung/Garantie Instruction Manual/Guarantee • Gebruiksaanwijzing/Garantie Istruzioni per l’uso/Garanzia Kaffee-Vollautomat Fully Automatic Coffee Machine • Koffi e-volautomaat Macchina caffè completamente automatica KA-V 2936 05-KAV 2936 Titel & D 1 03.12.2004, 12:10:38 Uhr...
- Page 2 DEUTSCH Inhalt Übersicht Bedienelemente ........Seite Bedienungsanleitung........... Seite Garantie............... Seite 15 ENGLISH Contents Control element overview........Page Instruction Manual..........Page 16 Guarantee............Page 27 NEDERLANDS Inhoud Overzicht bedieningselementen ....... Pagina Gebruiksaanwijzing .......... Pagina 28 Garantie............Pagina 39 ITALIANO Indice Descrizione dei singoli pezzi ......Pagina Istruzioni per l’uso ..........
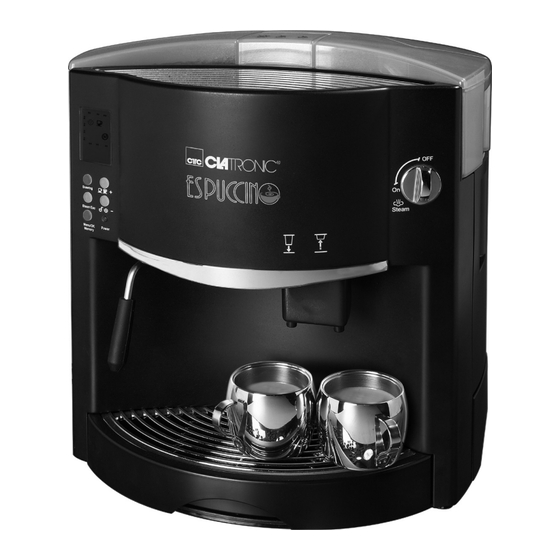
- Page 3 Geräteübersicht Device Overview • Apparaatoverzicht • Schema apparecchio Grafi k A • Diagram A • Grafi ek A • Grafi co A Grafi k B • Diagram B • Grafi ek B • Grafi co B 05-KAV 2936 Titel & D 3 03.12.2004, 12:10:39 Uhr...
- Page 4 Inhaltsverzeichnis Allgemeine Sicherheitshinweise Seite Geräteübersicht............. 3 • Lesen Sie vor Inbetriebnahme dieses Gerätes die Sicherheitshinweise ............4 Bedienungsanleitung sehr sorgfältig durch und Übersicht der Bedienelemente ........5 bewahren Sie diese inkl. Garantieschein, Kassenbon Bedienelemente und Display........5 und nach Möglichkeit den Karton mit Innenverpa- Bedienfeld ..............
- Page 5 • Die unter Spannung stehenden Geräteteile dürfen Bedienelemente und Display nicht in Kontakt mit Wasser kommen, es besteht Bedienfeld (15) Kurzschlussgefahr! • Bewegen Sie das Gerät nicht, wenn es in Betrieb ist. • Kaffeebohnen nur in den vorgesehenen Behälter (2) einfüllen. Andernfalls könnte das Gerät schwer beschädigt werden.
- Page 6 Weiteres zur Bedeutung der Warnmeldungen im Kapitel • Nehmen Sie den Deckel des Kaffeebohnenbehälters „Hilfe bei Störungen“. (1) ab. • Füllen Sie Kaffeebohnen ein (etwa bis zu 250 g). Heißwasser-/Dampf-Schalter (9) • Benutzen Sie frische Kaffeebohnen. Am besten geeignet ist eine Espresso-Röstung. Heißwasserbereitung im •...
- Page 7 • Andernfalls, wenn die Kaffeeausgabe zu schnell und Normale Tasse/Große Tasse ohne Cremabildung erfolgt, muss auf einen feinen Drücken Sie die Taste , wenn Sie zwischen den Mahlgrad eingestellt werden. Einstellungen normale Tasse und große Tasse wechseln Mit dem Drehknopf können Sie möchten.
- Page 8 Benutzen Sie die Dampfdüse (14) um Milch für Cap- Hinweis: Durch einmaliges Drücken der / BACK puccino aufzuschäumen oder um andere Getränke zu Taste, gelangen Sie in den Programmier-Modus der erwärmen. Wenn Sie Milch aufschäumen wollen, füllen Voreinstellungen für die „große Tasse“ (im Display Sie ein Gefäß...
- Page 9 Speichern Sie die Änderungen mit der Taste MENU/ • Gehen Sie zum Menüpunkt „Brühzeit“. Das Kaf- OK/MEMORY. feebohnen- und das Kaffeepulver-Symbol blinken gleichzeitig. Die maximale Füllmenge für die große Tasse ist 200 ml. • Verändern Sie die Brühzeit mit den Tasten Voreingestellt sind 100 ml Füllmenge bei Verwendung oder der gespeicherten, sowie bei der einer einmalig gewähl-...
- Page 10 erreicht. Drücken Sie die Taste erneut, erscheint der • Vor der Reinigung abwarten, bis sich das Gerät „15 Min-Pfeil“ wieder in der Horizontalen, dann der abgekühlt hat. „30 Min-Pfeil“ usw. Im nebenstehend dargestellten • Das Gerät nie in Wasser oder in anderen Flüssigkei- Beispiel wären also 2 1/2 Stunden eingestellt.
- Page 11 • Spülen Sie den Kaffeeauslauf mit heißem Wasser Sieb haftende Rückstände aus. entfernt werden. • Setzen Sie den Kaffeeauslauf wieder ein. Achten Sie Sollten sich die Öffnungen bitte auf den richtigen Sitz der Dichtung und das die- des Siebes nicht geöffnet se nicht beschädigt ist.
- Page 12 Hinweis: Die Antriebswelle der Brühgruppe muss auf die Kaffeesatz-Auffangbehälter reinigen Antriebswelle des Motors passen. Sollte dies nicht der • Ziehen Sie den Kaffeesatz-Auffangbehälter (8) heraus. Fall sein , gehen Sie wie folgt vor: • Entfernen Sie den Kaffeesatz. 1. Schalten Sie das Gerät mit dem I/O Schalter (5) aus. •...
- Page 13 Zum Entkalken des Gerätes, gehen Sie wie folgt vor: Hilfe bei Störungen • Stellen Sie ein Gefäß mit mehr als 1l Fassungsver- Während eine der beschriebenen Warnmeldungen mögen unter die Heißwasser-/Dampfdüse (14) (Die angezeigt wird, bewegen sich die Pfeilspitzen auf dem Tropfauffangschale (10) muss eingesetzt sein).
- Page 14 Mögliche Mögliche Störung Abhilfe Störung Abhilfe Ursachen Ursachen Die Steckdose mit Die verwendete Mit anderen Bei Betätigung Das Gerät hat einem anderen Ge- Kaffeemischung Kaffeemischungen Der Kaffee ist des Netzschal- keine Stromver- rät überprüfen und ist ungeeignet. versuchen. nicht cremig sorgung.
- Page 15 Garantie Service Wir übernehmen für das von uns vertriebene Gerät eine Sehr geehrter Kunde, Garantie von 24 Monaten ab Kaufdatum (Kassenbon). ca. 95% aller Reklamationen sind leider auf Bedienungs- Innerhalb der Garantiezeit beseitigen wir unentgeltlich fehler zurück zu führen und könnten ohne Probleme die Mängel des Gerätes oder des Zubehörs*), die auf behoben werden, wenn Sie sich telefonisch oder über Material- oder Herstellungsfehler beruhen, durch Repa-...
- Page 16 Contents General Safety Instructions Page Device Overview ............3 • Read the operating instructions carefully before Safety Information ............16 putting the appliance into operation and keep the Overview of the Controls ..........17 instructions including the warranty, the receipt and, if Controls and Display ...........
- Page 17 provided (2). Otherwise the machine might suffer Controls and Display severe damage. Control Panel (15) • Any water leaking from the bottom of the machine does not represent a fault. The water given off is residual water which is drained into the drip collector (10) whenever percolation is carried out.
- Page 18 Further information on the meanings of the warning mes- • Remove the lid of the coffee bean container (1). sages is to be found in the section on „Troubleshooting”. • Fill in coffee beans (up to approximately 250 g). • Please use fresh coffee beans.
- Page 19 Using the rotating dial you can Stored Aroma Setting/New Selection adjust the degree of grinding • Press the MENU/OK/MEMORY button if you do not to eight different levels from 1 want to use the factory settings. (very fi ne) to 8 (very coarse). The factory setting is suitable for If the „M”...
- Page 20 • Press the / BACK The machine switches back automatically to normal mode if no button is pressed for 10 seconds. Any chan- button. The device changes to ges you have made will not be stored. the “steam” mode. • Now press the MENU/OK/MEMORY button for fi...
- Page 21 Coffee Quantity Percolation Temperature You can make your coffee You can choose between with a small, normal or a normal, low and high large quantity of coffee. percolation temperature. The “normal” setting is The “normal” setting is shown in the display by shown in the display by 2 2 arrowheads in the midd- arrowheads in the middle.
- Page 22 Entering the Water Hardness Cleaning the Exterior of the Machine The time of descaling the • Clean the exterior of the machine and the accesso- machine is determined ries with a damp soft cloth. automatically from the • The machine has an integrated rotating plate for water consumption and easier handling and cleaning.
- Page 23 Cleaning the Brew Group • Hold the fi lter up to the light and check which fi lter openings are blocked. Clean the openings with the Before cleaning the device switch it to the „O“ point of a needle if necessary. position and then remove the mains plug (19) from •...
- Page 24 5. When the brew group is correctly inserted, close the Emptying and Cleaning the Drip Collector service door. Empty and clean the drip collector (10) regularly, Note: Only if the service door can be closed easily especially when it is full. This is shown by the red fi lling is the brew group correctly in position.
- Page 25 Troubleshooting The adjacent symbols When one of the warning messages described above fl ash alternately in the is displayed, the arrowheads in the display move in an display while the desca- anticlockwise direction. ling programme runs at intervals. Warning Cause Remedy Message While this programme...
- Page 26 Possible Possible Fault Remedy Fault Remedy Causes Causes Check the socket The coffee mix- Try different coffee When the with another The coffee is ture used is not The machine has mixtures. main switch device and insert not creamy suitable. no power supply.
- Page 27 Guarantee The device supplied by our Company is covered by a 24 month guarantee starting on the date of purchase (receipt). During the life of the guarantee any fault of the device or its accessories *) ascribable to material or manufacturing defects will be eliminated free of charge by repairing or, at our discretion, by replacing it.
- Page 28 Inhoudsopgave Algemene veiligheidsinstructies pagina Apparaatoverzicht ............3 • Lees vóór de ingebruikname van dit apparaat de Veiligheidsinstructies ..........28 handleiding uiterst zorgvuldig door en bewaar deze Overzicht van de bedieningselementen ....29 goed, samen met het garantiebewijs, de kassabon en Bedieningselementen en display .......
- Page 29 • Beweeg het apparaat niet wanneer het is gebruik is. Bedieningselementen en display • Koffi ebonen mogen alléén in het desbetreffende Bedieningsveld (15) reservoir (2) worden gevuld. In het andere geval zou het apparaat beschadigd kunnen worden. • Het eventueel vrijkomende water in het onderste gedeelte van het apparaat is géén gebrek.Bij het vrijkomende water gaat het om restwater dat bij elk kookproces naar de druipbak (10) wordt afgevoerd.
- Page 30 Voor meer informatie over de waarschuwingen verwijzen • Verwijder het deksel van het koffi ebonenreservoir (1). naar het hoofdstuk „Verhelpen van storingen“. • Vul het met koffi ebonen (ongeveer tot 250 g). • Gebruik verse koffi ebonen. Een espresso-roostering Heetwater-/stoomschakelaar (9) is hiervoor het beste geschikt.
- Page 31 • In het andere geval, wanneer de koffi e te snel en Normale kop/grote kop zonder crèmevorming doorloopt, dient u een fi jnere Druk op de toets , wanneer u tussen de instel- maalgraad in te stellen. lingen “normale kop” en “grote kop” wilt wisselen. Het Met de draaiknop kunt u de koppensymbool wordt op het display (16) weergegeven.
- Page 32 Gebruik het stoommondstuk (14) om melk voor cap- Opmerking: door één keer op de / BACK -toets puccino op te schuimen of om andere dranken op te te drukken, schakelt u over naar de programmeer- warmen. Wanneer u melk wilt opschuimen, vult u een modus van de voorinstellingen voor de “grote kop”...
- Page 33 De maximale vulhoeveelheid voor de grote kop bedraagt • Schakel over na het menupunt „Kooktijd“. Het 200 ml. Wanneer u de opgeslagen en/of een eenmalig koffi ebonen- en het koffi epoedersymbool knipperen geselecteerde instelling gebruikt, zijn 100 ml vulhoeveel- tegelijkertijd. heid vooringesteld.
- Page 34 uur is bereikt. Wanneer u opnieuw op de toets drukt, • Wacht met de reiniging totdat het apparaat helemaal verschijnt de “15-min-pijl” weer in horizontale positie, is afgekoeld. vervolgens de “30-min-pijl” enz. In het afgebeelde • Dompel het apparaat nooit in water of andere vloei- voorbeeld zijn dus 2 ½...
- Page 35 • Spoel de koffi e-uitlaat uit met heet water. • Plaats de koffi e-uitlaat weer terug. Let op de correcte Wanneer de openin- montage van de afdichting en waarborg ook dat deze gen van het zeef niet niet beschadigd is. Voer daarvoor de stappen A t/m opengaan, kunt u het C in omgekeerde volgorde uit.
- Page 36 Opmerking: de aandrijfas van de kookeenheid moet op de aandrijfas van de motor passen. Wanneer dit niet het geval is, gaat u als volgt te werk: 1. Schakel het apparaat uit met de I/O schakelaar (5). Open de servicedeur (6). 2.
- Page 37 Bij de ontkalking van het apparaat gaat u als volgt te Verhelpen van storingen werk: Terwijl een van de beschreven waarschuwingen wordt • Plaats een beker met meer dan 1l inhoudsvermogen weergegeven, bewegen de pijlen op het display tegen onder het heetwater-/stoommondstuk (14) (de druip- de klok in.
- Page 38 Mogelijk Mogelijk Storing Maatregel Storing Maatregel oorzaken oorzaken Controleer de con- De gebruikte Probeer een andere tactdoos met een koffi emelange is Bij bediening Het apparaat koffi emelange. ander apparaat en De koffi e is niet niet geschikt. wordt niet met van de netscha- steek de netsteker romig genoeg.
- Page 39 Garantie Voor het door ons geleverde apparaat verlenen wij een garantie van 24 maanden vanaf koopdatum (kassabon). Eventuele gebreken aan het apparaat of aan het toe- behoren*) die zijn ontstaan door productie- of materi- aalfouten verhelpen wij binnen deze periode kosteloos door middel van reparatie of, naar ons oordeel, door ver- vanging.
- Page 40 Indice dall’esposizione diretta ai raggi solari e dall’umidità Pagina (non immergerlo mai in sostanze liquide) e tenerlo a Schema apparecchio ............ 3 distanza da oggetti con spigoli affi lati. Non utilizzare Avvertenze di sicurezza ..........40 l’apparecchio con le mani umide. Nel caso in cui si Schema dei comandi...........
- Page 41 • L’eventuale fuoriuscita di acqua nella zona inferiore Comandi e display dell’apparecchio non costituisce un difetto. L’acqua eli- Campo di comando (15) minata è acqua residua, la quale, durante ogni bollitura, viene convogliata nella bacinella raccogligocce (10). • Anche piccoli accumuli di acqua nella zona del gruppo di bollitura e sul fondo sono dovuti all’acqua residua e non sono sintomo di mancanza di tenuta.
- Page 42 5 Messaggio di Primo utilizzo avvertimento “Recover”: (Parti dell’apparecchio Avanti il primo utilizzo sciacquare il serbatoio dell’acqua non correttamente inseri- (4) con acqua corrente. 6 „M“: Preparazione caffè con Preparare l’apparecchio impostazioni memorizzate 7 “Vapore”: L’apparecchio è nella Attenzione! Non rivolgere mai l’erogatore di acqua modalità...
- Page 43 Impostazione del grado di macinatura Caffè in grani/Caffè in polvere L’apparecchio ha un grado di macinatura caffè impostato Premere il tasto se si desidera passare tra le ex stabilimento che tiene conto delle caratteristiche impostazioni “caffè in grani“ o “caffè in polvere“. Nella medie delle miscele di caffè...
- Page 44 Produrre vapore e schiumare latte Nota: premendo una volta il tasto / BACK, si pas- sa nella modalità di programmazione delle imposta- Attenzione! Non rivolgere mai l’erogatore di acqua zioni per la “tazza grande“ (nel display lampeggiano i bollente o di vapore su sé o su altri! Pericolo di ustio- simboli “tazza grande“...
- Page 45 La quantità di riempimento massima per la tazza grande • Passare alla voce di menu “Tempo di bollitura”. I è di 200 ml. Sia nell’impiego dell’impostazione memo- simboli del caffè in grani e del caffè in polvere lam- rizzata, sia nell’impiego dell’impostazione selezionata peggiano.
- Page 46 nuovo il tasto la freccia “15 min.” appare di nuovo in • Prima di pulire, attendere che l’apparecchio si sia orizzontale, poi la freccia “30 min.” ecc. Nell’esempio raffreddato. accanto sarebbero quindi impostate 2 ore e 30 min. • Non immergere mai l’apparecchio in acqua o in altri •...
- Page 47 • Risciacquare l’erogatore caffè con acqua fresca. residui aderenti al fi ltro. Se le aperture del fi ltro non si sono • Reinserire l’erogatore caffè. Fare attenzione alla aperte bene, si può togliere il fi ltro dal suo dispositivo. Per seduta corretta della guarnizione e che non sia togliere il fi...
- Page 48 3. Ora l’albero motore viene regolato ex novo. Questa L’apparecchio funziona solo se il recipiente di raccolta procedura dura ca. 20 secondi. fondi di caffè è inserito correttamente. 4. Poi aprire lo sportello di servizio e tentare di reinserire il gruppo di bollitura. Svuotare e pulire la bacinella raccogligocce 5.
- Page 49 • Premere più volte il tasto MENU/OK/MEMORY Rimedi in caso di guasti fi nché il display visualizza “Refill“. Quando viene visualizzato uno dei messaggi di avverti- • Avviare la procedura di decalcifi cazione aprendo mento descritti, le frecce sul display si muovono in senso l’interruttore acqua calda/vapore (9).
- Page 50 Guasto Cause possibili Rimedio Guasto Cause possibili Rimedio Controllare la presa La miscela di Tentare con altre Azionando L’apparecchio con un altro appa- caffè non è Il caffè non è miscele di caffè. l’interruttore non ha corrente recchio e inserire adatta.
- Page 51 Garanzia Per l’apparecchio da noi messo in commercio ci assu- miamo una garanzia di 24 mesi dalla data di acquisto (scontrino). Durante la garanzia noi ci impegniamo ad eliminare gra- tuitamente i guasti dell’apparecchio o degli accessori*), dovuti a difetti di materiale o di fabbricazione, riparandoli o, a nostra discrezione, sostituendoli.
- Page 52 05-KAV 2836 Titel & D 52 03.12.2004, 12:10:57 Uhr...
- Page 53 05-KAV 2836 Titel & D 53 03.12.2004, 12:10:57 Uhr...
- Page 54 D-47906 Kempen/Germany · Industriering Ost 40 Telefon 02152/20 06-888 Internet: http://www.clatronic.de · email: info@clatronic.de 05-KAV 2936 Titel & D 54 03.12.2004, 12:10:58 Uhr...
Need help?
Do you have a question about the Clatronic KA-V 2936 and is the answer not in the manual?
Questions and answers