Table of Contents
Advertisement
Advertisement
Table of Contents

Subscribe to Our Youtube Channel
Related Manuals for APRILIA SCARABEO 100 - 1999


Summary of Contents for APRILIA SCARABEO 100 - 1999
- Page 1 APRILIA PART #8104150 Scarabeo 50 Scarabeo 100...
- Page 2 © 1999 aprilia s.p.a. - Noale (VE) The following precautionary warnings are The operations preceded by this used throughout this manual in order to symbol must be repeated also on convey the following messages: the opposite side of the vehicle.
-
Page 3: Removing The Inspection Cover
The user of the vehicle in these countries 100 cm model aprilia has produced this manual with the must: automatic light switching version maximum attention, in order to supply the – contact an aprilia Authorized Dealer to (Automatic Switch-on Device) user with correct and updated information. -
Page 4: Table Of Contents
SAFE DRIVE ............5 TYRES ............30 REMOVING THE EXHAUST SILENCER ..59 AUTOMATIC REMOVING THE FOOTBOARD ....60 BASIC SAFETY RULES ........ 6 LIGHT SWITCHING VERSION .....31 REMOVING THE BATTERY BOX ....60 CLOTHING ............ 9 CATALYTIC SILENCER ......32 CHECKING THE STAND ......61 ACCESSORIES ........... -
Page 5: Safe Drive
safe drive... - Page 6 The use of medicins, alcohol and drugs or Most road accidents are caused by the psychotropic substances notably increases driver’s lack of experience. To drive the vehicle it is necessary to be in the risk of accidents. NEVER lend the vehicle to beginners and, possession of all the requirements pre- Be sure that you are in good psychophysi- in any case, make sure that the driver has...
- Page 7 Rigorously observe all road signs and na- Avoid obstacles that could damage the ve- Always keep both hands on the handlebars tional and local road regulations. hicle or make you lose control. and both feet on the footboard (or on the footrests), in the correct driving posture.
- Page 8 If necessary, have the vehicle inspected by an aprilia Official Dealer, who should care- Any modification of the vehicle will result in fully check the frame, handlebars, suspen- the invalidity of the guarantee.
-
Page 9: Clothing
ONLY ORIGINALS which implies the following obligations for For only vehicles over 50 cm the owner: Before starting, always wear a correctly Any modification of the vehicle and/or the – new homologation; fastened crash helmet. Make sure that it is removal of original components can com- –... -
Page 10: Accessories
“aprilia the controls and reduce the distance from genuine accessories”. the ground and the angle of inclination in turns. - Page 11 Avoid hanging bulky, heavy and/or danger- Do not carry any bag if it is not tightly se- Do not exceed the maximum load allowed ous objects on the handlebars, mudguards cured to the vehicle. for each side-bag. and forks: the vehicle might respond more Do not carry bags which protrude too much When the vehicle is overloaded, its stability slowly in turns and its manoeuvrability...
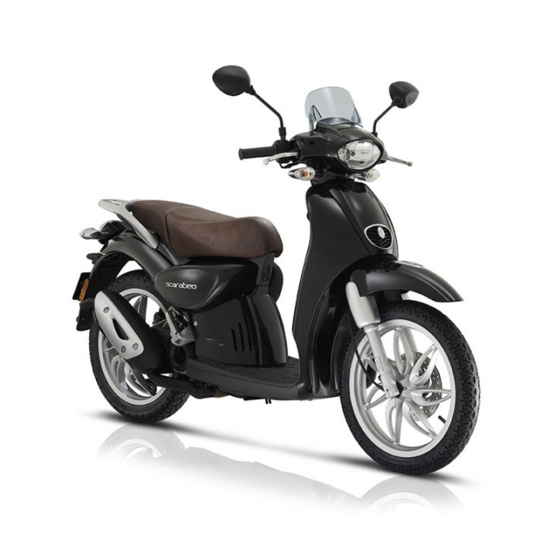
- Page 12 1) Horn 7) Saddle lock 2) Rear brake reservoir 8) Luggage rack 3) Glove compartment 9) Centre stand 4) Fuse carrier 10) Kick starter 5) Battery 11) Air cleaner 6) Passenger left footrest 12) Inspection cover (in the countries where required) use and maintenance Scarabeo 50 - Scarabeo 100...
- Page 13 9) Fuel tank 10) Passenger right footrest 4) Ignition switch/steering lock 5) Bag hook (in the countries where required) 11) Anti-theft hook (for the aprilia “Body- 6) Frame number cover Guard” armored cable use and maintenance Scarabeo 50 - Scarabeo 100...
- Page 14 1) Horn 8) Luggage rack 2) Glove compartment 9) Centre stand 3) Fuse carrier 10) Kick starter 4) Battery 11) Air cleaner 5) Crash helmet hook 12) Inspection cover 6) Passenger left footrest 13) Speed variator air cleaner 7) Saddle lock use and maintenance Scarabeo 50 - Scarabeo 100...
- Page 15 3) Fuel tank plug 9) Fuel tank 10) Passenger right footrest 4) Ignition switch/steering lock 5) Bag hook 11) Anti-theft hook (for the aprilia “Body- Guard” armored cable 6) Frame number cover use and maintenance Scarabeo 50 - Scarabeo 100...
-
Page 16: Controls On The Left Side Of The Handlebar
1) Electrical controls on the left side of the handlebar 10) Speedometer 2) Rear brake lever 11) Fuel level indicator ( ) 3) Left rear-view mirror 12) Green direction indicator warning light ( 4) Instruments and indicators 13) Blue high beam warning light ( 5) Right rear-view mirror (in the countries where required) 14) Red 2 stroke oil reserve warning light ( 6) Front brake lever... - Page 17 Description Function Direction indicator warning light It blinks when the direction indicators are on. It comes on when the ignition switch is in position “ ” and the start push button “ ” is pressed, thus checking the proper functioning of the bulb. If the light does not come on during the starting, provide for replacing the bulb.
- Page 18 NOTE The electrical parts work only when the ignition switch is in position “ ”. NOTE The lighting system works only when the motor is run- ning. 1) DIMMER SWITCH ( ) (not provided in the ver- sion) • When the light switch ( ) is in position “...
- Page 19 NOTE The electrical parts work only when the ignition switch is in position “ ”. NOTE The lighting system works only when the motor is run- ning. • 1) LIGHT SWITCH ( NOTE Before using the light switch, make sure that the dimmer switch ( ) is in position “...
- Page 20 NOTE The electrical parts work only when the ignition switch is in position “ ”. NOTE The lighting system works only when the motor is run- ning. 1) DIMMER SWITCH ( • When the light switch ( ) is in position “ ”, if the dimmer switch is in position “...
- Page 21 NOTE The electrical parts work only when the ignition switch is in position “ ”. NOTE The lighting system works only when the motor is run- ning. • 1) LIGHT SWITCH ( NOTE Before using the light switch, make sure that the dimmer switch ( ) is in position “...
-
Page 22: Ignition Switch
Position Function removal The steering It is possible is locked. to remove It is neither the key. possible to Steering start the en- lock gine, nor to switch on the lights. Neither the It is possible engine, nor to remove the lights can the key. -
Page 23: Glove Compartment
To prevent the vehicle from being stolen, it on firm and level ground. on firm and level ground. is advisable to secure it with the aprilia Insert the key in the saddle lock (1). Introduce the ignition key in the lock (3) “Body-Guard”... -
Page 24: Unlocking/Locking The Saddle
To reach the tool kit, unlock and raise the Thanks to the crash helmet hook, you no WARNING saddle, see p. 23 (UNLOCKING/LOCKING longer have to carry the crash helmet with Do not hang excessively bulky bags or THE SADDLE). you every time you park the vehicle. - Page 25 Avoid any contact of the fuel with the skin and the inhalation of vapours; do WARNING not swallow fuel or pour it from a recep- tacle into another by means of a tube. The fuel used for internal combustion engines is extremely inflammable and DO NOT DISPOSE OF FUEL IN THE EN- in particular conditions it can become VIRONMENT.
- Page 26 2 STROKE OIL WARNING Top up the 2 stroke oil tank every 500 km Oil can cause serious damage to the (312 mi). skin if handled every day and for long periods. Wash your hands carefully after using oil. Top up the 2 stroke oil tank every 400 km In case any maintenance operation has (250 mi).
- Page 27 500 km (312 mi) and successively every 12000 km (7500 mi), or every 2 years. To check the oil level and to change the oil, contact an aprilia Official Dealer. use and maintenance Scarabeo 50 - Scarabeo 100...
-
Page 28: Checking The Brake Pad Wear
For the version with rear drum (CHECKING THE BRAKE PAD WEAR). brake , the following information refers Contact an aprilia Official Dealer, who WARNING to the front disc brake only. will provide for topping up. Do not use the vehicle if the braking CAUTION system leaks fluid. -
Page 29: Checking The Shoe Wear
ADJUSTING THE BRAKE Measure the distance covered by the le- ver before the brake starts it braking ac- tion. The idle stroke at the end of the brake lever must be about 10 mm. To adjust the clearance, proceed as follows: Act on the adjuster (1). - Page 30 WARNING WARNING If the inflation pressure is too high, the Check the surface and the wear of the This vehicle is provided with tyres with in- ground unevenness cannot be damp- tyres, since tyres in bad conditions can ner tube. ened and is therefore transmitted to the impair both the grip and the controlla- WARNING...
- Page 31 WARNING WARNING The tyres must be replaced with other For this reason, it is advisable to have tyres of the type and model recom- the above mentioned operations carried The vehicles provided with the Automatic mended by the manufacturer, see p. 77 out by an Official Dealer or by a Switch-on Device can be immediately rec-...
-
Page 32: Catalytic Silencer
The catalytic vehicle is fitted with a silencer the engine. tem increases, immediately contact your with metal catalytic converter of the “plati- aprilia Official Dealer. num-rhodium bivalent” type. CAUTION This device provides for the oxidation of Do not use leaded petrol, since it caus-... -
Page 33: Disc Brakes
Component Check Page Disc brakes Check the functioning, the fluid level and make sure there are no leaks. 27, 28, 54 Check the wear of the pads. Top up, if necessary. Rear drum brake Check the functioning, the idle stroke and the control lever conditions. - Page 34 CAUTION Turn the ignition switch (3) to position “ ”. When the start push button “ ” is WARNING Lock at least one wheel, by pulling a pressed, the 2 stroke oil reserve warning brake lever (4). Exhaust gases contain carbon monox- light “...
- Page 35 If the vehicle is started with cold en- KICK START Push down the kick starter (7) with your gine, rotate the cold start lever “ ” (6) right foot, releasing it immediately. Position the vehicle on the centre stand clockwise (outwards) (pos. A). If necessary, repeat the operation until on firm and level ground.
- Page 36 STARTING WITH FLOODED ENGINE Press the start push button “ ” (5) and Before reinstalling it: at the same time rotate the throttle grip If the starting is not carried out properly or if NOTE Put a clean cloth on the cylinder, (8) moderately.
- Page 37 To leave, release the brake lever and ac- WARNING celerate by gently rotating the throttle NOTE Before departure, carefully read If you drive with a passenger, instruct grip (pos. B); the vehicle will start mov- the “safe drive” chapter, see p. 5 (SAFE him/her so that he / she does not create ing.
- Page 38 WARNING WARNING WARNING If you have to brake, close the throttle When visibility is insufficient, switch on Before beginning to turn, slow down or and put on both brakes in order to ob- the low beam even during the day, in or- brake driving at moderate and constant tain uniform deceleration, properly ex- der to make your vehicle more visible.
- Page 39 WARNING WARNING WARNING Always use the direction indicators in If the 2 stroke oil reserve warning light Pay the utmost attention to any obsta- time when you intend to change lane or “ ” comes on during the normal func- cle or variation of the road surface.
- Page 40 For the first 500 km (312 mi), keep to the following indications: WARNING 0-100 km (0-62 mi) After the first 500 km (312 mi), carry out During the first 100 km (62 mi) put on the checking operations indicated in the the brakes with caution, avoiding sharp column “After running-in”...
-
Page 41: Stopping
Rotate the key (1) and move the ignition WARNING WARNING switch (2) to position “ ”. Position the vehicle on the stand, see Park the vehicle on firm and flat ground, If possible, avoid stopping abruptly, p. 42 (POSITIONING THE VEHICLE ON to prevent it from falling down. - Page 42 CENTRAL STAND SURNAME: ..........a garage or a protected place. Seize the left grip and the rear handle NAME:............If possible, use the appropriate aprilia (1). “Body-Guard” armored cable , or an ad- Press the stand lever (2) downwards. ADDRESS:..........
- Page 43 CAUTION the ignition block, wait until the engine Ask your aprilia Official Dealer to test the and the exhaust system have cooled If not expressly indicated otherwise, for vehicle on the road after a repair or period-...
- Page 44 OPERATIONS TO BE CARRIED OUT BY THE Official Dealer (WHICH CAN BE CARRIED OUT EVEN BY THE USER) Every 4000 km Every 8000 km After running-in (2500 mi) (5000 mi) Components [500 km (312 mi)] or 8 months or 16 months Battery / electrolyte level Spark plug Carburettor - idling...
- Page 45 OPERATIONS TO BE CARRIED OUT BY THE Official Dealer Every 4000 km Every 8000 km After running-in (2500 mi) (5000 mi) Components [500 km (312 mi)] or 8 months or 16 months Variator belt Steering bearings and steering Wheel bearings Removal of deposits from the exhaust Braking systems Cylinder cooling system...
- Page 46 FRAME NUMBER The frame number is stamped on the cen- It is a good rule to write down the frame tral tube of the frame. To be able to read it, and engine numbers in the space provided it is necessary to remove the cover (1). in this manual.
-
Page 47: Air Cleaner
REMOVAL CLEANING THE AIR FILTER Position the vehicle on the centre stand Separate the grid (5) from the support Carefully read p. 43 (MAINTENANCE). on firm and level ground. (6). Check the conditions of the air cleaner and Unscrew and remove the two screws (1). Remove the filtering element (7). -
Page 48: Air Cleaner
REMOVAL CLEANING Position the vehicle on the centre stand Carefully read p. 43 (MAINTENANCE). WARNING on firm and level ground. Check the conditions of the air cleaner and Do not use petrol or inflammable sol- Unscrew and remove the two screws (1). clean it monthly or every 4000 km (2500 vents to wash the filtering element, in Move the rear brake cable (2) sidewards... - Page 49 CLEANING WARNING Carefully read p. 43 (MAINTENANCE). Carefully read p. 43 (MAINTENANCE). Do not use petrol or inflammable sol- The air cleaner should be inspected and vents to wash the filtering element, in Remove the footboard, see p. 60 (RE- cleaned every 8000 km (5000 mi), depend- order to avoid fires or explosions.
-
Page 50: Front Wheel
Position the vehicle on the centre stand Support the front wheel and manually on firm and level ground. withdraw the wheel pin (3). DISASSEMBLY Take the washer (4). NOTE Prepare a support with base measuring 200 x 200 mm, whose height CAUTION CAUTION should be 270 mm for the... - Page 51 REASSEMBLY Carefully read p. 43 (MAINTENANCE). CAUTION While reassembling the wheel, be care- ful not to damage the brake pipe, the disc and the pads. To reassemble the front wheel, proceed as follows: Spread a film of lubricating grease on the whole length of the wheel pin (2), see p.
-
Page 52: Removing The Rear Brake Caliper
Before carrying out the following opera- necessary to lock the rotation of the wheel. NOTE Use aprilia Genuine Spare Parts tions, let the engine and the silencer cool down until they reach room tem- Pull the rear brake lever (3) completely, only. - Page 53 Disassemble the rear wheel, see p. 52 CAUTION (REAR WHEEL). Moderately grease only the central part Unscrew and remove the adjuster (1). of the pin. Carefully read p. 43 (MAINTENANCE). Avoid dirting the cam or the areas WARNING around the pin seat with grease. NOTE Grease the rear brake cam pin Do not dirt the shoes and the friction...
- Page 54 To carry out a rapid checking of the wear of If the thickness of the friction material the front pads, proceed as follows: (even of one pad only) has reduced to about 1.5 mm, replace both pads. Position the vehicle on the centre stand Carefully read p.
- Page 55 (4), contact an the operation or if any part is damaged, Official Dealer, who will provide for re- contact your aprilia Official Dealer, who placing the rear brake shoes. will provide for changing the brake shoes.
- Page 56 270 mm for the and 230 mm If any slack should be noticed, contact slack, contact your aprilia Official Dealer for the your aprilia Official Dealer, to restore the to restore the optimal steering condi- optimal operating conditions. CAUTION tions.
- Page 57 CAUTION Never pull the rear brake lever after re- Carefully read p. 43 (MAINTENANCE). Carefully read p. 43 (MAINTENANCE). moving the brake caliper, otherwise the caliper pistons may go out of their Position the vehicle on the centre stand CAUTION seats, thus causing the outflow of the on firm and level ground.
- Page 58 CAUTION Handle the plastic and painted compo- Carefully read p. 43 (MAINTENANCE). Carefully read p. 43 (MAINTENANCE). nents with care and avoid scraping or damaging them. Position the vehicle on the centre stand CAUTION on firm and level ground. Remove the front handlebar cover (5), Handle the plastic and painted compo- Unscrew and remove the two screws (1).
- Page 59 Unscrew and remove the two screws (3) Unscrew and remove the screws (5) and and (4) that fasten the exhaust silencer (6). to the engine. Screw (5) and (6) driving torque: Carefully read p. 43 (MAINTENANCE). Screw (3) and (4) driving torque: 12 Nm (1.2 kgm).
- Page 60 Remove the fuse-carrier block (6) and CAUTION the start relay block (7) from the battery Do not force the lower shield, since it is Carefully read p. 43 (MAINTENANCE). box (5). fixed to the frame by means of two front Remove the inspection cover, see p.
- Page 61 Carefully read p. 43 (MAINTENANCE). Carefully read p. 43 (MAINTENANCE). Carefully read p. 43 (MAINTENANCE). The stand (1) must rotate without hindranc- The vehicle is provided with two switches: Adjust the idling after the first 500 km (312 mi) and every time it is irregular. –...
- Page 62 Start the engine. Twist the throttle grip, accelerating and To adjust the slack, proceed as follows: decelerating a few times to make sure Position the vehicle on the centre stand that it functions correctly and to check if on firm and level ground. The minimum speed of the engine (idling) the idling speed is constant.
-
Page 63: Spark Plug
To remove and clean the spark plug: Take off the spark plug cap (1). Remove all the dirt from the base of the spark plug, then unscrew it with the spanner you will find in the tool kit and extract it from its seat, taking care that neither dust nor other substances enter the cylinder. - Page 64 NOTE If you need assistance or techni- WARNING then consult an oculist without delay. cal advice, consult your aprilia Official Risk of fire. Dealer, who can ensure you prompt and If the electrolyte is accidentally swal- Keep fuel and other flammable sub- accurate servicing.
- Page 65 If necessary: Make sure that the ignition switch is in position “ ”. If the vehicle remains unused for more Carefully read p. 64 (BATTERY). Disconnect first the negative (–) and then than fifteen days, it is necessary to re- Remove the battery (partial removal), the positive cable (red) (+).
-
Page 66: Removing The Battery
COMPLETE REMOVAL Make sure that the fluid level is included between the two “MIN” and “MAX” notch- Disconnect first the negative cable (–) Carefully read p. 64 (BATTERY). es stamped on the battery side. and then the positive cable (+). Disconnect the breather pipe (3). - Page 67 CAUTION Carefully read p. 64 (BATTERY). Reassemble the battery only 5-10 min- utes after disconnecting the recharger, Remove the battery (complete removal), since the battery continues to produce see p. 66 (REMOVING THE BATTERY). gas for a short lapse of time. Prepare an appropriate battery charger.
- Page 68 In this case it is advisable to consult an aprilia Official Dealer. use and maintenance Scarabeo 50 - Scarabeo 100...
- Page 69 Carefully read p. 44 (REGULAR SERV- ICE INTERVALS CHART). WARNING Risk of fire. Keep fuel and other flammable sub- stances away from the electrical com- ponents. CAUTION Before changing a bulb, move the igni- tion switch to position “ ” and wait a few minutes, so that the bulb cools To adjust the headlight beam: down.
- Page 70 LOW/HIGH BEAM BULB PARKING LIGHT BULB Rotate the bulb socket (3) anticlockwise CAUTION and extract it out of seat. Carefully read p. 69 (BULBS). To extract the bulb socket, do not pull Slightly press the low/high beam bulb (1) The headlight contains: the electric wires.
- Page 71 Carefully read p. 69 (BULBS). To change them, proceed as follows: Unscrew and remove the two screws (5). NOTE While removing the protection screen, proceed carefully in order not to break the cog. Remove the protection screen (6). Press the bulb slightly and turn it anti- clockwise.
- Page 72 Carefully read p. 69 (BULBS). Carefully read p. 69 (BULBS). Carefully read p. 69 (BULBS) carefully. The dashboard contains: CAUTION To change the bulb, proceed as follows: – The warning light bulbs; To extract the bulb electric connector, Unscrew and remove the screw (1). –...
-
Page 73: Transport
WARNING LIGHT BULBS DASHBOARD LIGHTING BULBS WARNING NOTE Extract the bulb sockets one by Before transporting the vehicle, it is CAUTION one, in such a way as to avoid positioning necessary to empty the fuel tank and Extract the bulb sockets one by one, in them incorrectly during the reassembly. - Page 74 Carefully read p. 25 (FUEL). WARNING Risk of fire. Wait until the engine and the exhaust si- lencer have completely cooled down. Fuel vapours are noxious for your health. Before proceeding, make sure that the room in which you are working is prop- erly ventilated.
- Page 75 Clean the vehicle frequently if it used in To remove dirt and mud from the painted particular areas or conditions, such as: surfaces use a low- pressure water jet, carefully wet the dirty parts, remove mud Polluted areas (cities and industrial are- and filth with a soft car sponge impregnat- as).
-
Page 76: Installing The Battery
After a long period of inactivity of the vehi- cle some precautions are necessary to avoid any problem. Further, it is important to carry out the nec- essary repairs and a general check up be- fore the period of inactivity, since you could forget to carry them out later. - Page 77 DIMENSIONS Max. length .............. 1875 mm - 1945 mm Max. width (to the brake levers) ....... 710 mm Max. height (to the rear-view mirrors) ...... 1240 mm - 1270 mm Seat height ............... 770 mm - 765 mm Distance between centres........1245 mm - 1265 mm Min.
- Page 78 CARBURETTOR Model: – standard ............... DELL’ORTO PHBN 12 - TK 5 JT Choke tube............... Ø12 mm - Ø15.8 mm FUEL SUPPLY Fuel ..............premium grade petrol (4 Stars ) according to the DIN 51600 standard, min. O.N. 98 (N.O.R.M.) and 88 (N.O.M.M.) Fuel ............
- Page 79 IGNITION Type ................. CDI ..........14° ± 2° before T.D.C. Spark advance ..........10° ± 2° before T.D.C. to 4000 rpm; 14° over 4000 rpm Spark advance Standard spark plug ..........NGK BR7 HS - NGK BR8 HS Spark plug gap............0.5 − 0.6 mm 1800 ±...
- Page 80 Transmission oil (recommended): F.C., SAE 75W - 90. As an alternative to the recommended oil, it is possible to use high-quality oils with characteristics in compliance with or superior to the A.P.I. GL4 specifications. 2 stroke oil (recommended): GREEN HIT. Use high-quality oils with characteristics in compliance with or superior to the ISO-L-ETC++, A.P.I.
- Page 81 use and maintenance Scarabeo 50 - Scarabeo 100...
- Page 82 use and maintenance Scarabeo 50 - Scarabeo 100...
- Page 83 use and maintenance Scarabeo 50 - Scarabeo 100...
- Page 84 use and maintenance Scarabeo 50 - Scarabeo 100...
- Page 85 1) Generator 31) Front right direction indicator 2) CDI 32) Front left direction indicator 3) Spark plug 33) - 4) H.T. coil 34) Low/high beam bulb 5) Voltage regulator 35) Horn 6) Battery 36) Pick up 7) Starter 37) Fuse 8) Start relay 38) Multiple connectors 9) Front stoplight switch...
- Page 86 use and maintenance Scarabeo 50 - Scarabeo 100...
- Page 87 1) Generator 31) Front right direction indicator 2) CDI 32) Front left direction indicator 3) Spark plug 33) - 4) H.T. coil 34) Low/high beam bulb 5) Voltage regulator 35) Horn 6) Battery 36) Pick up 7) Starter 37) Fuse 8) Start relay 38) Multiple connectors 9) Front stoplight switch...
- Page 88 – Do not dispose of oil, fuel, polluting substances and components in the envi- ronment. – Do not keep the engine running if it isn’t necessary. – Avoid disturbing noises.
Need help?
Do you have a question about the SCARABEO 100 - 1999 and is the answer not in the manual?
Questions and answers