
Related Manuals for Costway HU10944


Summary of Contents for Costway HU10944
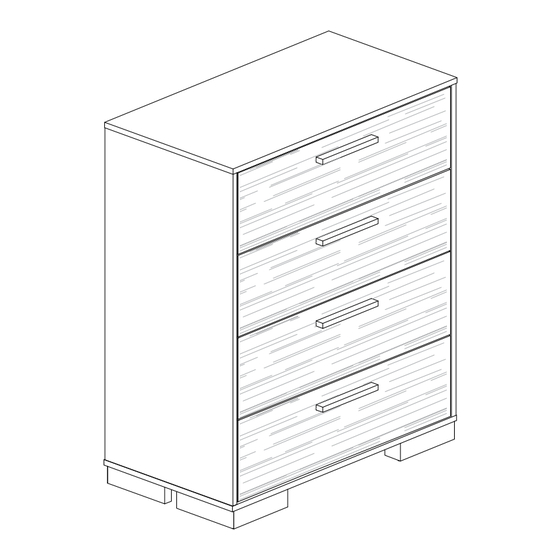
- Page 1 4-DRAWER DRESSER Commode à 4 Tiroirs HU10944 THIS INSTRUCTION BOOKLET CONTAINS IMPORTANT SAFETY INFORMATION. PLEASE READ AND KEEP FOR FUTURE REFERENCE.
- Page 2 Before You Start Please read all instructions carefully. Retain instructions for future reference. Separate and count all parts and hardware. Read through each step carefully and follow the proper order. We recommend that, where possible, all items are assembled near to the area in which they will be placed in use, to avoid moving the product unnecessarily once assembled.
- Page 4 Detail View/Vue Détaillée...
- Page 5 QTY. PART LIST/LISTE DES PIÈCES /N° /QTÉ Top Panel /Panneau Supérieur Side Panel L /Panneau Latéral G Side Panel R /Panneau Latéral D Bottom Panel /Panneau Inférieur Drawer Front /Avant du Tiroir Drawer Box Side L /Côté Gauche du Caisson de Tiroir Drawer Box Side R /Côté...
- Page 6 QTY. HARDWARE LIST/LISTE DES ACCESSOIRES /N° /QTÉ Handle /Poignée Bolt M4 x 25mm /Boulon M4 x 25 mm Metal Leg /Pied en Métal Pan Head Screw M3.5 x 12mm 16+(1) /Vis à Tête Cylindrique M3,5 x 12 mm Flat Head Screw M3.5x12mm 56+(5) /Vis à...
- Page 7 EN: Read this instruction carefully. Remove all wrapping material, staples and straps from the carton. See hardware and furniture part list for guidance. Be sure you have all wooden furniture part on a clean and a flat surface, such as carpet or rug, to prevent from being scratched.
- Page 8 X 48...
- Page 9 X 32...
- Page 13 REAR VIEW/VUE ARRIÈRE...
- Page 14 X 16 REAR VIEW /VUE ARRIÈRE...
- Page 15 REAR VIEW/VUE ARRIÈRE...
- Page 16 X 24...
- Page 18 X 12 X 20...
- Page 19 X 24...
- Page 21 FRONT VIEW/VUE AVANT...
- Page 22 COMPLETE ASSEMBLY/MONTAGE TERMINÉ...
- Page 23 16-1 EN: Attach a bracket securely to the back top rail of the cabinet using short screw provided, through the smaller hole. FR: Fixez solidement un support au rail supérieur arrière de l'armoire à l'aide de la vis courte fournie, à travers le trou le plus petit. REAR VIEW/VUE ARRIÈRE HARDWARE/ACCESSOIRE Short Screw/Vis Courte...
- Page 24 16.2 EN: Locate the other bracket on the wall over a wall stud and two inches below the mounting bracket secured to the back of cabinet. Attached to the wall stud using the long screw provided, through the smaller hole. FR: Posez l'autre support sur le mur au-dessus d'un montant mural et à...
- Page 25 16.3 EN: Place the cabinet into position so both mounting brackets are vertically in line. Lace the end of the restraint strap through the larger hole in each mounting bracket. Bring both ends together and slide the flat end through the locking end and draw it through until all slack is removed.
- Page 27 Return / Damage Claim Instructions DO NOT discard the box / original packaging. In case a return is required, the item must be returned in original box. Without this your return will not be accepted. Take a photo of the box markings. A photo of the markings (text) on the side of the box is required in case a part is needed for replacement.
- Page 28 AUS office: Truganina FRA office: Saint Vigor d'Ymonville GBR office: FDS Corporation Limited,Unit 4, Blackacre Road, Great Blakenham,Ipswich, Ip6 0FL,United Kingdom USA:cs.us@costway.com If you're having difficulty, our friendly AUS:cs.au@costway.com GBR:cs.uk@costway.com customer team is always here to help. FRA:cs.f r @costway.com...
Need help?
Do you have a question about the HU10944 and is the answer not in the manual?
Questions and answers