
Related Manuals for Yard Machines 14A9801P500

Summary of Contents for Yard Machines 14A9801P500
- Page 1 Operator’s Manual Automatic Garden Tractor IMPORTANT: READ SAFETY RULES AND INSTRUCTIONS CAREFULLY. P. O. BOX 1386, KITCHENER, ONTARIO CANADA N2G 4J1 PRINTED IN UNITED-STATES 772C0843 (01/06)
- Page 2 TABLE OF CONTENTS Content Page Content Page Finding Your Model Number Adjustments Calling Customer Support Maintenance Important Safe Operation Practices Lubrication Safety Labels Found On Your Unit Service Attachments and Accessories Off-Season Storage Slope Gauge Troubleshooting Tractor Set-Up Parts List/Pièces détachées Controls Warranty Operation...
- Page 3 SECTION 1: IMPORTANT SAFE OPERATION PRACTICES WARNING: This symbol points out important safety instructions which, if not followed, could endanger the personal safety and/or property of yourself and others. Read and follow all instructions in this manual before attempting to operate this machine. Failure to comply with these instructions may result in personal injury.
- Page 4 25. Disengage all attachment clutches, depress the 6. Keep all movement on the slopes slow and gradual. brake pedal completely and shift into neutral before Do not make sudden changes in speed or direction. attempting to start engine. Rapid engagement or braking could cause the front 26.
- Page 5 shifting into reverse. The “Reverse h. Never over fill fuel tank. Fill tank to no more Caution Mode” should not be used when than ½ inch below bottom of filler neck to children or others are around. allow space for fuel expansion. g.
- Page 6 10. Never attempt to make adjustments or repairs to nal equipment specifications may lead to improper the machine while the engine is running. performance and compromise safety!” 11. Grass catcher components and the discharge 12. Do not change the engine governor settings or cover are subject to wear and damage which could over-speed the engine.
- Page 7 SECTION 3: SLOPE GAUGE...
- Page 8 SECTION 4: TRACTOR SET-UP NOTE: WARNING: Reference to RIGHT or LEFT side of the Do NOT operate the tractor tractor in this manual is observed from operator’s without first attaching both the steering position. wheel AND the seat. Doing so could result in serious injury to the operator.
- Page 9 Quick Adjustment Seat TIRE PRESSURE NOTE: WARNING: If your seat was shipped mounted backwards Maximum tire pressure under on the seat pivot bracket, pull out the tab found on the any circumstances is 30 p.s.i. Equal tire seat stop and hold it open while sliding the seat off the pressure should be maintained at all times.
- Page 10 IMPORTANT: IMPORTANT: Be certain that the FLAT side of the After mounting the cutting deck, refer PTO/Deck belt is the side coming in contact with the to Leveling the Deck in the ADJUSTMENTS section of deck idler pulleys. this manual. Perform any adjustments, if necessary, prior to operating the tractor.
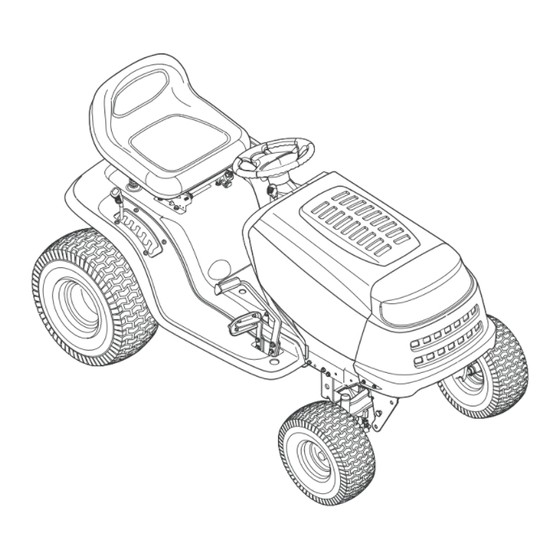
- Page 11 SECTION 5: CONTROLS A* PTO lever NOTE: Steering Wheel not shown for clarity. A* PTO (Power Take-off) Lever (Models with manual PTO) Throttle Control Lever PTO (Power Take-off) Knob (Models with electric PTO) Ignition Switch Choke Control Brake Pedal Parking Brake Button Drive Pedal Shift Lever Cruise Control Button...
- Page 12 THROTTLE CONTROL LEVER IGNITION SWITCH The throttle control lever is located on the right side of WARNING: Never leave a running machine the tractor’s dash panel. This lever controls the speed unattended. Always disengage PTO, move of the engine and, on some models, when pushed all shift lever into neutral position, set parking the way forward, the choke control also.
- Page 13 Systems Indicator Monitor On units so equipped, the ammeter measures the electrical output of the engine’s charging system. Under normal operating conditions, with the engine at full Located in the center of the tractor’s console, the throttle, the ammeter’s needle should measure a systems indicator monitor records, and displays on its positive charge.
- Page 14 CRUISE CONTROL PARKING BRAKE BUTTON BUTTON The cruise control button is To set the parking brake, fully located on the tractor dash panel depress the brake pedal and to the left of the ignition switch. push the parking brake button in. Push the cruise control button Hold the button in while taking while traveling forward at a...
- Page 15 IMPORTANT: Mowing in reverse is not recommended. Reverse Push WARNING: Indicator Use extreme caution while Button Light operating the tractor in the REVERSE CAUTION MODE. Always look down and Reverse behind before and while backing. Do not Caution Mode Stop operate the tractor when children or others are Position Position...
- Page 16 STOPPING THE ENGINE Always use the brake pedal to bring the tractor to a complete stop before shifting. If you strike a foreign object, WARNING: stop the engine, disconnect the spark plug DRIVING ON SLOPES wire(s) and ground against the engine. Refer to the SLOPE GAUGE on page 7 to help Thoroughly inspect the machine for any determine slopes where you may not operate safely.
- Page 17 WARNING: Plan your mowing pattern to Front View Pull Out Push In avoid discharge of materials toward roads, sidewalks, bystanders and the like. Also, avoid discharging material against a wall or obstruction which may cause discharged material to ricochet back toward the operator. •...
- Page 18 HEADLIGHTS On all models, the lamps turn OFF when the ignition key is moved to the STOP position. On some models, the lamps are ON whenever the tractor’s engine is running. On other models, the lamps NOTE: Never move the key into the Start position are ON whenever the ignition key is moved out of the while the engine is running.
- Page 19 measurements taken should be equal. If they’re not, proceed to the next step. • Loosen, but do NOT remove, the hex cap screw on Seat the left deck hanger bracket. See Figure 10B. • Balance the deck by using a wrench to turn the adjustment gear (found immediately behind the hex screw just...
- Page 20 Front tire toe-in can be measured as follows: Zerk Fitting Hex Nut and • Place the steering wheel in position for straight Pivot Bar (if so equipped) Lock Washer ahead travel. • In front of the axle, measure the distance horizontally from the inside of the left rim to the inside of the right rim.
- Page 21 7. Engage the tractor’s PTO. NOTE: Depending on the engine model found on your 8. Remain in the operator’s position with the cutting tractor, it may be necessary to remove the tractor’s side deck engaged for a minimum of two minutes, panel in order to replace the oil filter (if so equipped).
- Page 22 SECTION 10: SERVICE TIRES Hex Flange Nut Wood Block WARNING: Never exceed the maximum inflation pressure shown on the sidewall of the tire. The recommended operating tire pressure is 10 psi for the rear tires and 14 psi for the front tires. Refer to the tire sidewall for exact tire manufacturer’s recommended or maximum psi.
- Page 23 IMPORTANT: CAUTION: If removing the battery for any reason, Do not allow any cleaning solution to get disconnect the NEGATIVE (Black) wire from it’s terminal inside the battery. first, followed by the POSITIVE (Red) wire. When re- BATTERY FAILURES installing the battery, always connect the POSITIVE (Red) wire its terminal first, followed by the NEGATIVE Some common causes for battery failure are: (Black) wire.
- Page 24 WARNING: Be sure to shut the engine off, Support Pin remove ignition key, disconnect the spark plug wire(s) and ground against the engine to prevent unintended starting before removing the belt(s). All belts on your tractor are subject to wear and should be replaced if any signs of wear are present.
- Page 25 • Grasp the ratchet’s handle and pivot it toward the To change or replace the drive belt on your tractor, front of the tractor to relieve tension on the belt. proceed as follows: • With belt tension relieved, carefully remove the •...
- Page 26 NOTE: in the double-idler bracket has approximately Slowly rotate the pulley counterclockwise to roll 1-3/8" of travel with ten pounds of pressure applied to the belt off of it. the drive pedal. See Figure 23. • Remove the upper drive belt by pulling it up through Double-idler Bracket the battery tray opening.
- Page 27 If the machine is to be inoperative for a period longer Disconnect the negative terminal of the battery than 30 days, prepare for storage as follows. before storing the tractor. • Store unit in a clean, dry area. • Clean the engine and the entire unit thoroughly. •...
- Page 28 Style 1...
- Page 29 PART N° DE N° DE RÉF PIÈCE DE SCRIP TION DE SCRIP TION 710-0599 Hex Wash S-Tapp Scr 1/4-20 x .50 Vis autotaraudeuse à rondelle hex. 1/4-20 x 0,50 710-0642 Thd Form ing Scr. 1/4-20 x .75 Lg. Vis taraudée 1/4-20 x 0,75 lg. 710-0726 Hex Wash HD AB Tap Scr 5/16 x .75 Vis taraudée 5/16 x 0,75...
- Page 30 Models w/Manually Adjusting Seat Modèles avec siège à réglage manuelle Models w/Quick-Adjust seat Modèles avec siège à réglage facile *Parts for 42” Deck only./Pièces pour plateau de coupe de 42 pouces seulement.
- Page 31 PART N° DE N° DE RÉF PIÈCE DE SCRIP TION DE SCRIP TION 747-1130B Deck Sta bi lizer Rod Tige de sta bili sa tion du pla teau de coupe 683-04079 Lift Shaft As sem bly(42" and 46" Deck) Arbre de relevage (pla teau de coupe de 42 po et 46 po) 683-04118 Lift Shaft As sem bly (54"...
- Page 32 PART N° DE N° DE RÉF PIÈCE DE SCRIP TION DE SCRIP TION 757-04003 Seat 15.279" High, High Back-Blk Siège 15,279 po haut, dos haut - noir 757-04010 Seat 15.279" High, High Back-Blk (Troy Bilt) Siège 15,279 po haut, dos haut - noir(Troy-Bilt) 757-04011C High Back Seat YM Yel low 11.50"...
- Page 33 (for choke/pour volet) Torque to 200-450 in-lbs. Serrez à un couple de 200-450 po - lb TECUMSEH TWIN PART N° DE N° DE RÉF PIÈCE DE SCRIP TION DE SCRIP TION 710-0227 Hex AB Scr #8-18 x .50 Vis auto-taraudeuse no. 8-18 x 0,50 710-0599 Hex Wash S-Tapp Scr 1/4-20 x .50 Vis autotaraudeuse à...
- Page 34 Torque to 400-480 IN-LB/ Serrez à un couple de 400 - 480 po - lb Torque to 130-230 IN-LB/ Serrez à un couple de 130 - 230 po - lb Torque to 400-480 IN-LB/ Serrez à un couple de 400 - 480 po - lb Torque to 150-250 IN-LB/ Serrez à...
- Page 35 PART N° DE N° DE RÉF PIÈCE DE SCRIP TION DE SCRIP TION 683-04173 Lower Frame As sem bly Châssis inférieur 783-0726E RH Pivot Sup port Bracket Sup port de pivot droit 783-0727C LH Pivot Sup port Bracket Sup port de pivot gauche 783-0728 Pivot Bar Bracket Sup port de la barre de pivotement...
- Page 36 � � � Ground Wire Ref. Only/ Fil masse comme référence seulement. 42-inch Deck Plateau 46 and 54 de coupe inch Deck � de 42 po †31 Plateau de coupe de 46 et 54 po * 46” Hydrostatic models only./Modèles hydrostatique de 46 po seulement. †...
- Page 37 REF. PART N°. DE N° DE RÉF. PIÈCE DESCRIPTION DESCRIPTION 683-04173 Lower Frame Assembly Châssis inférieur 710-0607 Hex Wash HD S-Tapp Scr 5/16-18 x .50 Vis auto-taraudeuse hexagonal 5/16-18 x 0,50 710-0642 Thd Forming Scr. 1/4-20 x .75 Lg. Vis taraudée 1/4-20 x 0,75 lg. 710-0726 Hex Wash HD AB Tap Scr 5/16 x .75 Vis taraudée 5/16 x 0,75...
- Page 39 PART N° DE N° DE RÉF PIÈCE DE SCRIP TION DE SCRIP TION 712-3050 Lub Nut, 7/16-14 Écrou, 7/16-14 710-0347 Hex Screw 3/8-16 x 1.75 Vis à tête hex 3/8-16 x 1,75 783-04442 Idler Bracket Sup port de tendeur 710-0176 Hex Scr 5/16-18 x 2.75 Vis à...
- Page 40 50-inch Deck Plateau de coupe 50 po...
- Page 41 PART N° DE N° DE RÉF PIÈCE DE SCRIP TION DE SCRIP TION 16606 Re tainer Hook Brkt. Sup port du cro chet de retenue 618-04126 Spin dle As sem bly Fusée 683-0254B Deck Ad just ment Bracket w/Weld Nut Support de réglage du pla teau de coupe à...
- Page 42 (for choke/pour volet) Exhaust gasket, mounting nuts, and starter nut supplied by Kohler/ Le joint d'échappement, les écrous de montage, et l'écrou de démarreur fourni par Kohler. KOHLER V-TWIN PART N° DE N° DE RÉF PIÈCE DE SCRIP TION DE SCRIP TION 710-0227 Hex AB Scr #8-18 x .50 Vis auto-taraudeuse no.
- Page 43 notes . . .
- Page 44 notes . . .
- Page 45 MAN U FAC TURER’S LIM ITED WAR RANTY The lim ited war ranty set forth be low is given by MTD LLC with re spect to new mer chan dise pur chased and used in the United States and/or its ter ri to ries and pos ses sions, and by MTD Prod ucts Lim ited with re spect to new mer chan dise pur chased and used in Can ada and/or its ter ri to ries and pos ses sions (ei ther en tity re spec tively, “MTD”).
Need help?
Do you have a question about the 14A9801P500 and is the answer not in the manual?
Questions and answers