Table of Contents
Advertisement
Quick Links
Advertisement
Table of Contents

Subscribe to Our Youtube Channel
Related Manuals for LENCO CR-31


Summary of Contents for LENCO CR-31
- Page 1 STEREO CLOCK RADIO WITH USB/SD/MMC PLAYER MODEL: CR 31 Instruction Manual...
- Page 2 WARNING Warning: Do not touch the lens. DO NOT THROW BATTERIES IN FIRE ! PRECAUTIONS Follow the advice below for safe and appropriate operations. ON PLACEMENT • Do not use the unit in places which are extremely hot, cold, dusty, or humid. • Place the unit on a flat and even surface.
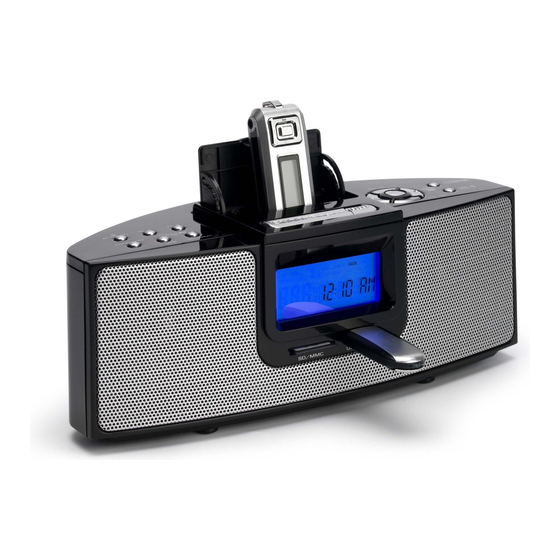
- Page 3 CONTROLS FM WIRE ANTENNA 14. VOL. UP BUTTON FUNCTION BUTTON 15. STOP BUTTON STANDBY BUTTON 16. VOL. DN BUTTON PLAY/PAUSE /USB BUTTON 17. HOUR NEXT BUTTON AL. 1 BUTTON 18. PROGRAM / CLOCK SET BUTTON PLAY/PAUSE /SD/MMC BUTTON 19. DIR. + / PRO. + BUTTON 7. AL. 2 BUTTON 20. SPEAKER AUX IN OPEN DOOR 21. AC CORD SNOOZE/DISPLAY BUTTON 22. SD/MMC PORT 10. BUZZER/MUSIC BUTTON 23. LCD DISPLAY 11. AUX. IN JACK 24. USB PORT 12. SLEEP BUTTON 25. BATTERY DOOR 13. MIN. BACK BUTTON GB 1...
-
Page 4: Power Supply
POWER SUPPLY USING HOUSE CURRENT Battery Door Before use, check that the rated voltage of your unit matches your local voltage. BATTERY BACKUP The clock time and alarm settings can be protected against power failure by a 9V battery ( not supplied ). In the event of a power failure, The display is blank, but the clock time and alarm settings are held in memory. When the power interruption ends, The display ap- pears again. ( during a power interruption, the clock To AC outlet time may gain or loss a few minutes per hour and may... - Page 5 AL. 1 AND AL. 2 At any mode, both AL. 1 or AL.2 button can be set as the real time clock is always on at any mode. Press AL. 1 or AL. 2 button, then the digit will be flashing, pressing HOUR/NEXT HOUR/NEXT and MIN./BACK and MIN./BACK and MIN./BACK button to set hour and minute digit. . To confirm, press AL. 1 or AL. 2 button, then Alarm LED lamp will be turn on. SNOOZE/DISPLAY When the alarm sounds (USB, SD/MMC, RADIO, BUZZER) at the preset time, you can turn off the sound temporarily by pressing the SNOOZE/DISPLAY button. The alarm will sound again within 6 minutes. Display of the media information by pressing SNOOZE/DISPLAY button. When USB, SD/MMC or Radio is playing, Track number or Frequency will be shown on the display for 5 seconds and it will changed to Clock Time accordingly. Snooze/ Display button can be pressed for showing the Track / Frequency again.
-
Page 6: Tuner Operation
TUNER OPERATION Tuning a RADIO Station “STEREO” icon will be lit on when receiving station is 1. When the unit is ON, press FUNCTION broadcasted in Stereo. button repeatedly until “TUNER” is shown. 2. Press the HOUR/NEXT button and MIN./BACK button as many times as required as many times as required to tune into the desired station. or , 3. Press and hold the HOUR/NEXT button and MIN./BACK and MIN./BACK button for more than button for more than for more than 1 second, scanning starts automatically and tuner stops at the first receivable broadcast station. -
Page 7: Usb/Sd/Mmc Operation
USB/SD/MMC OPERATION Connect USB/SD/MMC disk into the USB/SD/MMC Input of this system. P ress FUNCTION button repeatedly until “ USB/SD/MMC ” is shown on display . automatically The unit will start to read the media and play . The music folders, track's time and the number of tracks will be shown on the display . Press MIN./BACK button and HOUR/NEXT button to select the folder. USB display USB connector does not support connection with USB extension cable and it is not designed for communication with computer directly. -
Page 8: Maintenance
MAINTENANCE CLEANING THE UNIT Do not use volatile chemicals on this unit. Clean by lightly wiping with a soft cloth. IMPORTANT NOTE If an abnormal display indication or an operating problem occurs, disconnect the AC power cord .Wait at least 5 seconds, then reconnect the AC power cord . SPECIFICATION RADIO SECTION Tuning ranges: FM 87.5 - 108 MHz Antennas: FM Wire antenna GENERAL Output power: 2.3 W + 2.3 W Power consumption: WATTS Speaker: 3" 4 OHM Phones jack: 3.5MM Power source: AC : 230V ~ 50Hz Dimensions: Main Unit : 250 (L) x 98 (D) x 100 (H)mm Weight 1 Kgs Due to continuing improvement, the features and the design are subject to change without notice. Where to place the item : Today’s furniture is coated with a wide variety of lacquers and synthetic-coatings that are treated with an extensive range of cleaning products. Therefore, the possibility that some of these substances contain components that react adversely to the rubber feet of the item and soften them, cannot be completely excluded. The rubber feet of the appliance can cause discoloring to furniture surfaces. If necessary, place the appliance on a non-slide surface.
Need help?
Do you have a question about the CR-31 and is the answer not in the manual?
Questions and answers