Advertisement
Quick Links
Advertisement

Subscribe to Our Youtube Channel
Related Manuals for LSLIDAR CH16X1

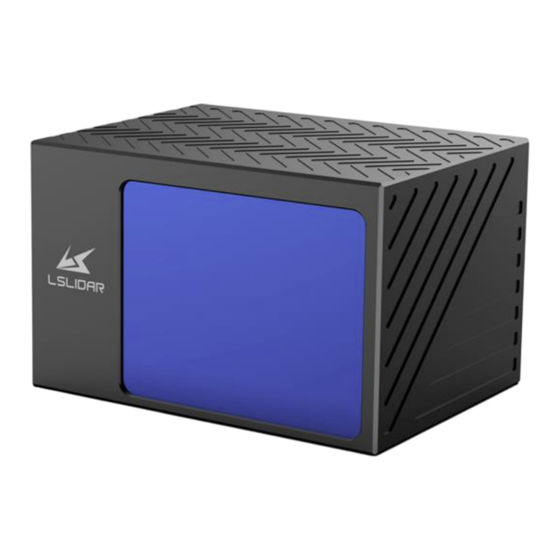
Summary of Contents for LSLIDAR CH16X1
- Page 1 CH16X1 User Manual V1.0.1 2023.02 LeiShen Intelligent System Co., LTD http://www.lslidar.com/...
- Page 2 Safety Instruction Before using the product, please read and follow the instructions of this manual carefully, and refer to relevant national and international safety regulations. ∆Attention Please do not disassemble or modify the lidar privately. If you need special instructions, please consult our technical support staff. ∆Laser Safety Level The laser safety of this product meets the following standards: ●...
- Page 3 the power supply requirements, or supply power in a humid environment may cause abnormal operation, fire, personal injury, product damage, or other property loss. Light Interference Some precise optical equipment may be interfered with by the laser emitted by this product, please pay attention when using it. Vibration Please avoid product damage caused by strong vibration.
- Page 4 TABLE OF CONTENTS 1. PRODUCT PROFILE ......................1 1.1 O VERVIEW ..........................1 1.2 M ECHANISM ........................... 1 1.3 S PECIFICATION ........................1 1.4 D IMENSIONS ........................... 2 2. ELECTRICAL INTERFACE ....................3 2.1 P OWER UPPLY ........................3 2.2 E LECTRICAL NTERFACE ......................
- Page 5 5.3.2 Configuration Package Example ................24 6. TIME SYNCHRONIZATION ..................... 25 6.1 GPS S YNCHRONIZATION ...................... 25 6.2 E XTERNAL YNCHRONIZATION ..................... 26 6.3 L IDAR NTERNAL IMING ....................... 27 7. ANGLE AND COORDINATE CALCULATION ..............27 7.1 V ERTICAL NGLE ........................
- Page 6 1.2 Mechanism The CH16X1 Hybrid Solid-State lidar adopts the Time of Flight method. The lidar starts timing (t ) when the laser pulses are sent out. And when the laser...
- Page 7 1 kg 1.4 Dimensions There are 4 mounting holes and 2 positioning holes at the bottom of CH16X1 lidar. Four M5*10 (hexagon socket head cap screws) mechanical screws with spring washers and flat washers are needed for locking and fixing the lidar. See the outline dimension drawing shown in Figure 1.2.
- Page 8 2. Electrical Interface 2.1 Power Supply The power input range of the CH16X1 lidar is 9V~36VDC. If other DC power supply is adopted, the recommended output voltage of the power supply is 12VDC, 19VDC or 24VDC. Please note that DC 9V and 36V are short-term power supply in extreme environment, which cannot be used as working voltage.
- Page 9 220VAC adapter nearby for power supply (DC long- distance power supply is not recommended). 2.2 Electrical Interface An 8-pin male connector is on the side of the CH16X1 lidar base. See the figure below. Figure 2.1 The 8-Pin Male Connector Table 2.1 Wiring Definition of the 8-Pin Male Connector...
- Page 10 Figure 2.2 The 8-Pin Cable Table 2.2 Wiring Definition of the 8-Pin Cable Color Definition Description Power+ Light blue TD_P Ethernet TX+ Blue TD_N Ethernet TX- Light orange RD_P Ethernet RX+ Orange RD_N Ethernet RX- Yellow GPS_PPS GPS sync pulse/external sync pulse White GPS_REC GPS longitude, latitude, hour minute and second...
- Page 11 3.2 Software Preparation The CH16X1 lidar can be operated under both Windows operating system and Linux operating system. Software needed is as follows: Wireshark: to capture the ARP (Address Resolution Protocol) packets. Note: Wireshark is a third-party software that you need to download by yourself.
- Page 12 ROS Drive Program (optional): to view the point cloud data under Linux operating system. This program has been pre-stored in the USB flash drive provided with the lidar. It can also be obtained from the sales or technical support personnel. No installation is required. 4.
- Page 13 “Wireshark” to capture the ARP packet of the device for analysis. For the feature identification of the ARP packet, see the figure below. Figure 4.1 Wireshark captures APR packets 4.1.2 LSCH16X1 Windows Client Interface The software interface includes menu area, tool bar area, 3D window area, data table area, etc.
- Page 14 each two grids (horizontal or longitudinal) is 10 m. And the radius of the outermost circle is 200 m. The grids and circles make it easy to view the position of the point cloud. The direction of the coordinate axis in the 3D display interface is consistent with the direction of the X-Y axis in the point cloud reference system.
- Page 15 When paused, view the previous frame; When playing, rewind (click multiple times to select 2x, 3x, 1/2x, 1/4x and 1x speed) Click to start playing after the point cloud file is loaded When playing, click to pause When paused, view the next frame; When playing, fast forward (click multiple times to select 2x, 3x, 1/2x, 1/4x and 1x speed)
- Page 16 in the picture below) number (default 2369). Step 2. When the power supply of the lidar is connected to the network cable, click to receive the lidar data in real time. Step 3. The data table contains PointID, Points_m_XYZ, Azimuth, Distance, Intensity, Laser_id, timestamp, in which PointID is the point number;...
- Page 17 2) At the same time, since Qt is adopted in the low-level software development, please create English paths when naming files and path folders. 3) Since the port number of the CH16X1 lidar can be modified through user configuration, and the lidar sends data to the host computer through the preset destination IP and port.
- Page 18 Figure 4.4 Network Connections Step 3. In the TCP/IPv4 property settings, set the IP address to the lidar's destination IP (The default destination IP of the lidar is 192.168.1.102), and the subnet mask is set to 255.255.255.0. Figure 4.5 IP Address and Subnet Mask Setting 4) Since the lidar display software needs to obtain a large number of data packets...
- Page 19 through the network in a short time, it may be considered as a malicious program by the network firewall and be prohibited. Therefore, there may be situations in which the data packet has been sent to the computer by the Wireshark software, but the point cloud display software cannot display it.
- Page 20 and select “NVIDIA Control Panel”. Step 2. Select the “Manage 3D Settings” in the NVIDIA Control Panel interface. Step 3. Click the “Program Settings” button in the Manage 3D Settings interface. Step 4. Click the “Add” button on the Manage 3D Settings interface. Step 5.
- Page 21 connected normally. If the ping is successful, then the data is received, otherwise check the hardware connection. Step 5. Use “sudo tcpdump -n -i eth0” (here eth0 is the name of the wired network device, see the device name of ifconfig wired connection display for details) to view the data packets sent by the lidar (as shown in the figure, there are 1206-byte data packets sent by the lidar to the destination, which means that the lidar data is sent normally).
- Page 22 Note 1): If the lidar destination port and motor speed are modified, please open “lslidar_ch.launch” to modify the configuration accordingly. The default data packet port is 2368, device packet port is 2369, IP address is 192.168.1.200. Note 2): If timeout appears, it means that the driver has no data reception. Please check the hardware connection.
- Page 23 UTC, 4 bytes of Timestamp and 2 bytes of Factory). 5.1.1 Format The CH16X1 lidar supports single echo mode which measures the most recent echo value and dual echo mode which measures the most recent and second recent echo values.
- Page 24 The Ethernet header has a total of 42 bytes, as shown in the table below. Ethernet Header: 42 Bytes Name Information Offset Length (byte) Destination Ethernet II Source Ethernet Type Packet Type Version, Header Length, Differentiated Services, Field, Total Internet Length, Identification, Flags, Fragment Protocol Offset, Time to Live, Protocol, Header,...
- Page 25 Reserved Reserved Year, month, day, hour, minute and second of the UTC Timestamp Timestamp (μs) Vendor 0x80 represents the CH16X1 lidar Information Factory Echo 0x1 represents single echo lidar Information 0x2 represents dual echo lidar 1) When there is a GPS device inputting PPS signal to the lidar, the timestamp is generated according to the PPS time as the cycle time, and the range of the timestamp is 0-999,999 (μs);...
- Page 26 3) When there is no synchronization device inputting PPS signal, the lidar generates timestamp with a period of 1 hour. The range of the timestamp is 0- 3,599,999,999 (μs). 5.2 DIFOP Protocol The device package outputs read-only parameters and status information such as version number, Ethernet configuration, motor speed and operating status, and fault diagnosis.
- Page 27 Header is the device packet identification header, which is fixed as 0xA5, 0xFF, 0x00, 0x5A, 0x11,0x11,0x55, 0x55, and the first 4 bytes can be used as the packet inspection sequence. The tail is fixed as 0x0F, 0xF0. 5.3 UCWP Protocol The UCWP configures the lidar's Ethernet, motor speed and other parameters, and the data of the configuration package adopts the Big-Endian mode.
- Page 28 Header is the configuration packet identification header, which is fixed as 0xAA,0x00,0xFF,0x11,0x22,0x22,0xAA,0xAA, and the first 4 bytes are used as the packet inspection sequence. The Tail of the frame is fixed as 0x0F,0xF0. 5.3.1 Configuration Parameters and Status Description Here below are the configuration parameters and status description of specific lidar information.
- Page 29 The configuration 0x0000 means to send 1 device packet every time 4 packets are sent, and other values mean 1 packet per second. The default value is 1. The lidar receives GPS signals and parses the $GPRMC information. The UTC time synchronizes with GPS.
- Page 30 The lidar extracts UTC information from the $GPRMC of the GPS as the UTC time output. There are two types of CH16X1 lidar GPS_REC interface level protocols, namely TTL level standard and RS232 level standard; the GPS_REC interface specification on the power box is SH1.0-4P female socket.
- Page 31 lidar receives data according to the TTL protocol, then a RS232 to TTL conversion module is needed. The GPS equipment is time-synchronized to mark and calculate the precise emission and data measurement time of each laser. The precise time of the lidar point cloud can be matched with the pitch, roll, yaw, latitude, longitude and height of the GPS/inertial measurement system.
- Page 32 6.3 Lidar Internal Timing When there is no GPS and other equipment to synchronize, the lidar uses 1 hour (3,600*10 μs) as the cycle. With the microsecond as the timing unit, the timing value is output as the time stamp of the data packet. At this time, there is no UTC time reference.
- Page 33 45.25°. 7.3 Distance Value Byte 4, Byte 5, and Byte 6 represent the the first echo distance value. Their data are stored in Big-Endian mode. The two high bytes are the integer part, whose unit is “cm”; and the last byte is the decimal part, whose unit is 1/256 cm. To analyze the distance value, for example: the distance value in the obtained data packet is represented by the hexadecimal number 0x02,0x18,0x32, and the first two bytes are composed of 16-bit unsigned data, that is: 0x0218, which is...
- Page 34 The timestamp and UTC time come from the same synchronization source, such as a GPS. The laser emission interval of the CH16X1 lidar is about 2.64 μs, and the measurement interval of adjacent points is 2.64 μs.
- Page 35 Revision History Rev. Release Date Revised Content Issued/Revised By V1.0.0 2022-09-26 Initial Version LS1286 Mechanical drawing V1.0.1 2023-02-14 LS1286 modified...
- Page 36 Make Safer Driving, Smarter Machine, and Better Life! Company Website: www.lslidar.com Sales Email Address: sales@lslidar.com After-Sales Email Address: support@lslidar.com; *This product information is subject to change without notice. Copyright © 2023 LeiShen Intelligent System Co., Ltd. All rights reserved.
Need help?
Do you have a question about the CH16X1 and is the answer not in the manual?
Questions and answers