Advertisement
- 1 UNFOLDING THE PRAM
- 2 ASSEMBLING AND DISASSEMBLING THE REAR WHEELS
- 3 ASSEMBLY OF FRONT SWIVELLING WHEELS
- 4 DISASSEMBLY OF FRONT SWIVELLING WHEELS
- 5 HANDLE HEIGHT ADJUSTMENT
- 6 PARKING BRAKE
- 7 ATTACHING AND REMOVING THE CARRYCOT
- 8 ASSEMBLING AND DISASSEMBLING THE SEAT
- 9 ADJUSTING THE FOOTREST
- 10 ASSEMBLING / DISASSEMBLING THE FRONT BAR
- 11 CANOPY OF THE SEAT UNIT
- 12 RESTRAINT SYSTEM
- 13 ADJUSTING THE BACKREST
- 14 BAG
- 15 RAIN FOIL
- 16 MOSQUITO NET
- 17 TO ADJUST CARRYCOT BACKREST
- 18 CARRYCOT CANOPY AND HANDLE FOR CARRYING THE CARRYCOT
- 19 ASSEMBLY AND DISASSEMBLY OF THE CAR SEAT WITH ADAPTER
- 20 FOLDING THE FRAME
- 21 WARNINGS
- 22 MAINTENANCE
- 23 Documents / Resources
UNFOLDING THE PRAM
To unfold the pram, put it flat on the ground (Fig. 1a, 1b), and pull vividly the handle up until the folding mechanism is locked (Fig. 2, 3).
NOTE! Before starting to use the pram, make sure that it has been correctly unfolded.


ASSEMBLING AND DISASSEMBLING THE REAR WHEELS
To disassemble the rear wheels, press down the button in the central part of the wheel (Fig. 4) and remove the wheels from the axle (Fig. 5). To assemble them again, press the button down and slide the wheels onto the axle till they get locked.
NOTE! Before starting to use the pram, make sure that all the wheels have been assembled correctly.

ASSEMBLY OF FRONT SWIVELLING WHEELS
Insert front set of the wheel onto the hub (Fig. 6) until it is locked in place (you will hear a clear click sound, (Fig. 7). Make sure the wheel is properly secured. Repeat the steps for the second wheel. Front wheels are equipped in a locking mechanism that can lock them to ride forward only. To lock the wheel, turn the ring of the locking mechanism outside (symbol of the locked padlock, (Fig. 8).

DISASSEMBLY OF FRONT SWIVELLING WHEELS
Press the button of the wheel locking mechanism (fig. 9) and slide the wheel off the hub (fig. 10). Repeat the steps for the second wheel.

HANDLE HEIGHT ADJUSTMENT
It is possible to adjust the pram handle height. To perform the adjustment, press down the round buttons on both sides of the handle at the upper part, and then adjust the right height (Fig. 11).

PARKING BRAKE
The pram is equipped with a rear parking brake. To engage the brake, press its lever down (Fig. 12). In order to disengage it, lift the lever.
NOTE! Before starting to push the pram, make sure that the brake has been disengaged.
NOTE! Always engage the safety brake, when you leave the pram on an inclined surface.
NOTE! The brake is not designed for slowing down. It should be engaged after the pram has been stopped completely.
NOTE! The pram is not designed for running.

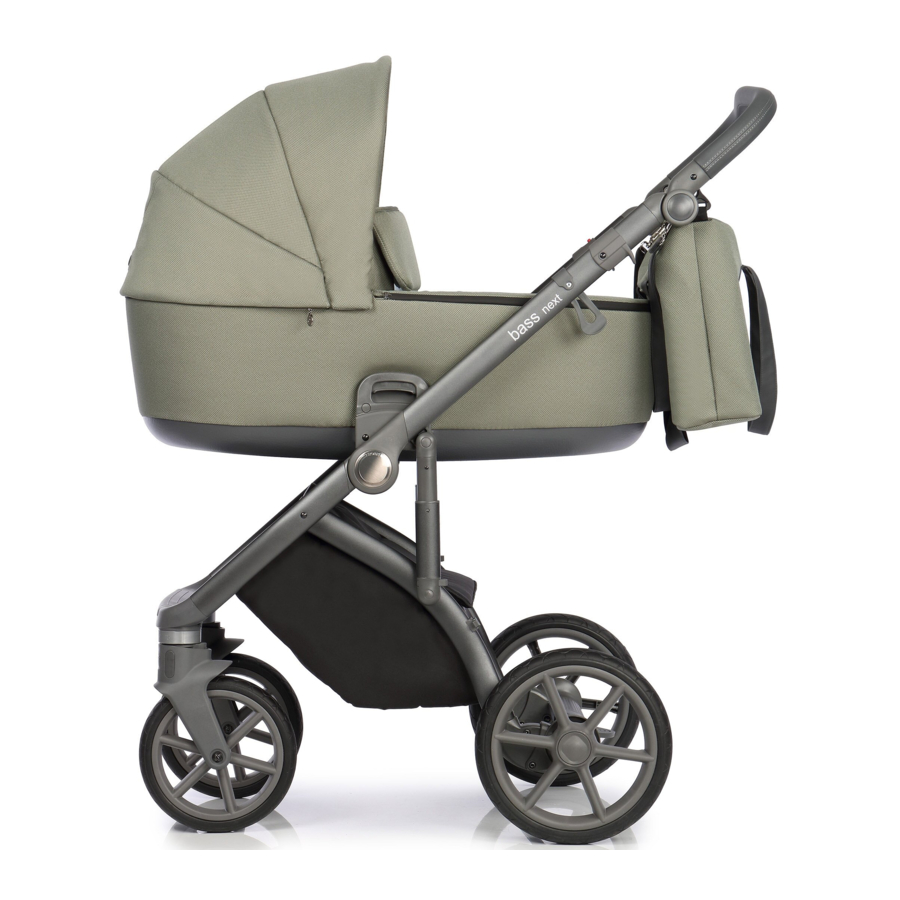
ATTACHING AND REMOVING THE CARRYCOT
In order to attach the carrycot press it into the pram frame so that the adapters on both sides of the carrycot lock onto the catches on the pram frame (Fig. 13a, 13b). They will lock in place automatically.
 ATTENTION! Make sure the carrycot is attached correctly prior to use. To remove the carrycot press the buttons on the adapters at the sides of the carrycot (Fig. 14) and pull the carrycot.


ASSEMBLING AND DISASSEMBLING THE SEAT
The seat should be assembled and disassembled the same way as for the bassinet (see ASSEMBLING AND DISASSEMBLING THE BASSINET Fig. 15). The seat may be assembled with its front and back facing the movement direction.
NOTE! Before starting to use the pram make sure that the seat has been assembled correctly.

ADJUSTING THE FOOTREST
The pram is equipped with an adjustable footrest. To move it to the right Position, press down the buttons on its both sides (Fig. 16).

ASSEMBLING / DISASSEMBLING THE FRONT BAR
The seat is equipped with a safety front bar. To assemble it, slide the plastic insets into the holes in the armrests (Fig. 17). To dismantle it, press down the buttons located on both sides on the plastic insets and pull it up (Fig. 18).
NOTE! Always use the seat equipped with the safety front bar.

CANOPY OF THE SEAT UNIT
Seat unit is equipped in the canopy. To assemble the canopy, slide its attaching mechanism to the assembly opening on both sides of the seat unit (Fig. 19). To disassemble the canopy press red buttons and take it off the openings (Fig. 20).

RESTRAINT SYSTEM
The seat is equipped with a 5-point restraint System (Fig. 21). It should be used from the moment a baby Starts to sit by itself. Unfasten the belts, by releasing the forks from the central buckle, seat the baby, adjust the length of the belts so that they fit closely to the baby's body, without oppressing it, and then fasten the forks of all the belts to the central buckle.
NOTE! Always use the restraint System, if the baby can sit by itself.

ADJUSTING THE BACKREST
The seat is equipped with a four-step adjustment of the backrest angle. To lower the backrest, pull up the plastic lever in the rear part of the backrest (Fig. 22), and then set the correct position. To lift the backrest, it is enough to push it upwards until the correct position is achieved. It will get locked automatically (Fig. 23).

BAG
The pram comes with a practical bag. It attaches to the pram handle using plastic carabiners at designated points above the handle height adjustment (Fig. 24). The bag also comes with an additional shoulder strap and a practical baby changer.

RAIN FOIL
The pram is provided with a rain foil equipped with an air hole at the baby's face height. To assemble it, put one end under the footrest or under the bassinet rear, and pull the other end onto the canopy (Fig. 25). The foil is suitable both for the deep and stroller Version.

MOSQUITO NET
The stroller is equipped with a practicable mosquito net. To assemble the mosquito net, fasten it by fasteners to the canopy of the carrycot (Fig. 26) and then stretch it over the carrycot and the canopy.

TO ADJUST CARRYCOT BACKREST
In order to change the carrycot backrest angle, place the metal element in the chosen location (Fig. 27).

CARRYCOT CANOPY AND HANDLE FOR CARRYING THE CARRYCOT
The carrycot comes with a canopy. Its frame also doubles up as a handle for carrying the seat (this is a handle for carrying the carrycot and not the entire pram).
ATTENTION! Before lifting the carrycot, position it upright (perpendicular to the ground) whilst holding it holding it by the handle. The canopy is adjustable. To position the canopy press the round plastic buttons near it's base (Fig. 28a, 28b).

ASSEMBLY AND DISASSEMBLY OF THE CAR SEAT WITH ADAPTER
To assemble the car seat for group aged 0+, first assemble the adapters. Insert each adapter properly to the right and left pocket until you hear a clear clicking sound (Fig. 29a, 29b). Next, insert the car seat on the adapters until you hear a clear clicking sound (Fig. 30). To disassemble the car seat, press two buttons below the toy bar of the car seat (Fig. 31) and lift the car seat up. To disassemble the adapters move the handle located inside the adapter and lift it up (Fig. 32).


FOLDING THE FRAME
To fold the frame, press red locking mechanism on the right side of the handle (Fig. 33) and pull plastic handles on both sides of the stroller (Fig. 34, 35).
BASS NEXT is equipped with additional SAS shock absorber system with a blockade. To lock the shock absorber, press the button with green indicator until it is red. Repeat the action on both sides of the stroller. Both shock absorbers should always be adjusted to the same position (on or off) to prevent uneven operation of the stroller.


WARNINGS

SAFETY OF THE CHILD MAY BE ENDANGERED IF THIS USER MANUAL IS NOT FOLLOWED.
KEEP THIS USER MANUAL FOR FUTURE REFERENCE
![]()
Never leave your child unattended.![]()
Use the harness when your child starts to sit by itself.![]()
Do not use other mattresses than the one supplied by the manufacturer.![]()
Prior to use of the stroller, check if folding mechanisms are secured in place.![]()
Always use the crotch strap together with the hips strap.![]()
Every load placed on the stroller's handle influences its stability.![]()
The product is not intended for use when rollerblading or jogging.![]()
The stroller is intended only for one child.![]()
The stroller is intended for children aged 0-36 months and weight up to 15 kg.![]()
Do not leave the stroller with a child on inclined surfaces, even if the brake is secured.![]()
Do not use the stroller if any component is damaged.![]()
When folding and unfolding, check if the child is in a safe distance.![]()
When adjusting the stroller, check if movable elements of the product do not touch body parts of the child.![]()
Always secure the brake when the stroller is not used.![]()
Maxim load of the basket is 3 kg.![]()
Maximum load of the bag is 2 kg.![]()
Every bag or another load on the stroller's handle influences its stability.![]()
Use only original parts, approved by the manufacturer.![]()
Do not use the stroller on steps.![]()
Store the stroller in a place unavailable for children.![]()
Maximum permitted air pressure in wheels is 0.8 bar (regardless of indications on the wheels). Higher pressure may cause damage to the rims.![]()
Check if the fixing mechanisms of the carrycot, stroller, and the car seat are properly fixed before use.![]()
Do not allow the child to play with the product. Do not rock the stroller. It may damage its structure.![]()
To avoid injuries, make sure the child is kept at distance when unfolding or folding this product.![]()
Any load on the handle, backrest or sides of the stroller may influence its stability![]()
The seat unit is not intended for children aged below 6 months.![]()
Always use the harness system.

MAINTENANCE
- The product requires periodic maintenance.
- Metal elements of the stroller may be cleaned with a wet cloth and use of a mild cleaning agent to prevent corrosion. Dry after cleaning.
- The upholstery of the stroller may be cleaned with a wet cloth and use of a mild cleaning agent. After cleaning, dry the upholstery hanging it in the place where it is not exposed to sun rays for a long time, or leave it unfolded in a well-ventilated area.
- Do not wash the elements of the upholstery in the washing machine or do not whirl it mechanically.
- Do not use bleach. Use only mild cleaning agents.
- Do not expose the product to sun rays for a long time as the upholstery and plastic components may be damaged.
- Movable components should be periodically maintained with use of agents such as WD-40.
- Check regularly location of the safety belts and other adjustable elements.
- Do not use grease in places to which sand may enter. Check regularly location of the safety belts and other adjustable elements.
- Avoid contact with salty water (sea water, sea breeze, road salt) as it may cause corrosion.
- Permitted range of temperatures for use of the stroller: from -5 to +35ºC
NOTE! Always lock the safety parking device when leaving the stroller on inclined surface.
NOTE! Parking device is not intended for slowing down. Lock it when the stroller is completely stopped.
NOTE! Parking device should be activated when putting the child in or taking the child out of the stroller.
NOTE! The stroller is not intended for running.
NOTE! Frame of the stroller is compatible with the carrycot, seat unit and the car seat delivered by the manufacturer.
NOTE! Handles for carrying the carrycot should be put outside of it when using the carrycot.
NOTE! When using the car seat on the frame of the stroller, remember that this stroller does not substitute cradle or baby cot. If the child wants to sleep, it is recommended to put it in a carrycot, cradle or baby cot.
Documents / ResourcesDownload manual
Here you can download full pdf version of manual, it may contain additional safety instructions, warranty information, FCC rules, etc.
Advertisement


Need help?
Do you have a question about the bass next and is the answer not in the manual?
Questions and answers