Advertisement
Introduction
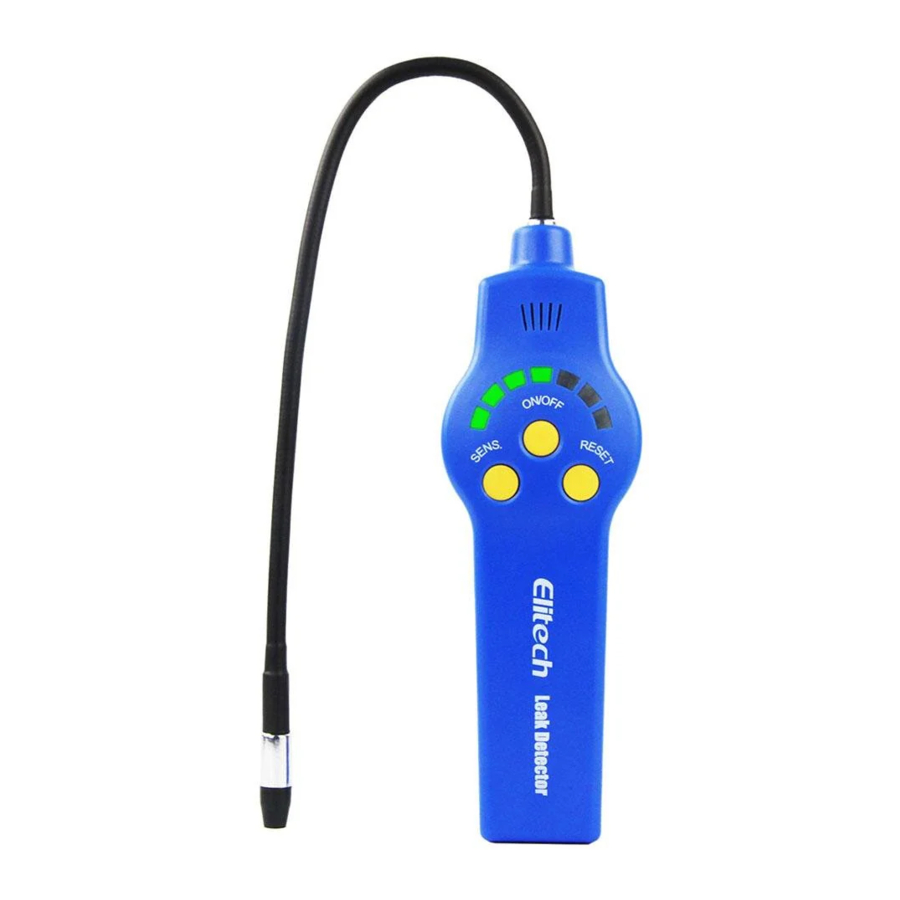
See Figure 1
The HLD-200 is the most reliable negative corona halogen leak detector at present. We integrate all our experience and customers' feedback into this product, in hope that it could provide our customer the best price, performance and reliability.
The sensitive elements adopt the advanced and reliable corona refrigerant sensor which has great sensitivity and excellent repeatability; the test program is controlled by the artificial intelligent microcomputer, with reasonable work procedure, easy and convenient to operate, complete functions and multiple self-adaptive capabilities; Dual-color LED indicator lights, with visual and clear display; smart and portable design is convenient for your mobile operation. When there is excessive refrigerant in the leak gas, this unit will automatically audio alarmed to effectively test the refrigerant leak.

Technical features
- Adopt advanced, low power consumed, eight-bit microprocessor controller
- Dual-color LED indicator lights with progressive and real time display
- Sensitivity adjustable, seven level alarming indicated by LED display
- Modular sensor, convenient for maintenance
- Seven levels audible and visual alarm
- Auto reset testing when the detector is turned on
- Battery voltage indication
Technical parameters
- Sensor type: negative corona sensor
- Ultimate sensitivity: 3 glyr
- Warm-Up Time: 5s
- Application:
Detect leaks in other systems and filling vessels. It will respond to all halogenated (including Chlorine and Fluorine) refrigerants. This includes, but is not limited to:
| CFCs | e.g. R12,R11,R500,R503 etc... | |
| HCFCs | e.g. R22,R123,R124,R502 etc... | |
| HFCS | e.g. R134a, R404a, R125 etc... | |
| Mixtures such as | AZ-50.HP62.MP39 etc.. | |
Detect Ethylene Oxide gas leaks in hospital sterilizing equipment
Detect SF-6 in high voltage circuit breakers
Detect most gases that contain chlorine, Fluorine and Bromine (halogen gases)
Detect cleaning agents used in dry cleaning applications such as perchloroethylene
- Operating Environment:
Temperature: 0°C~52°C
Humidity: <95% RH (non-condensing) - Power supply: two AA alkaline batteries
- Sensor tip life under continuous operation: more than 50 hours in normal detecting status
- Specification: 175 x 55 x 34 (mm)
- Probe length: 305mm
Operation instruction and battery replacement
Operation instruction
![]() key: press it to turn on/off the detector.
key: press it to turn on/off the detector. ![]() key: it is sensitivity adjustment key, it could adjust the sensitivity level according to the detection demands(max level: 7). LED light will indicate the level of sensitivity, meanwhile the frequency of audible alarm changes. The higher the sensitivity level it is, the faster the alarm frequency is.
key: it is sensitivity adjustment key, it could adjust the sensitivity level according to the detection demands(max level: 7). LED light will indicate the level of sensitivity, meanwhile the frequency of audible alarm changes. The higher the sensitivity level it is, the faster the alarm frequency is.![]() key: Resetthe background halogen level to "zero", any leak sources higher than this "zero" level is considered to be a leak and trigger the alarm.
key: Resetthe background halogen level to "zero", any leak sources higher than this "zero" level is considered to be a leak and trigger the alarm.
 key: press it to turn on/off the detector.
  key: it is sensitivity adjustment key, it could adjust the sensitivity level according to the detection demands(max level: 7). LED light will indicate the level of sensitivity, meanwhile the frequency of audible alarm changes. The higher the sensitivity level it is, the faster the alarm frequency is.
 key: Resetthe background halogen level to "zero", any leak sources higher than this "zero" level is considered to be a leak and trigger the alarm.
The interface and keys of halogen leak detector (Figure 2)
- Flexible probe
- Buzzer
- Leakage indicator (the first light could indicate batteries voltage)
- Power ON/OFF
- Sensitivity adjustment
- Reset
- Sensing tip
Battery Installation


To reduce the risk of igniting flammable gases in a closed atmosphere, batteries must only be replaced in an open area or closed space without flammable gas
- Battery voltage indication: Users could check the battery level in the standby mode by the battery level indicator light. Different battery level, the color of the power indicator light will change accordingly. They have relations as follow:
Green - meet requirement for normal work
Orange - low battery working state
Red - below the permitted working voltage, please replace the batteries as soon as possible - Battery replacement and installation, as shown in Figure 3:

- See Figure 3. Using a thumb to push open the battery door ocated at the bottom of the detector; then remove the door.
- Install two AA alkaline batteries into the detector, pay attention to the polarity markings on the side of the case and then place the battery door back.

Detecting method
Operation method
When the detector is turned on or off by pressing  key, all LED indicator lights are on for three seconds, and the detector will automatically reset. After auto-reset, only the first LED indicator light on the left will be on (Green, batteries fine, orange, batteries getting weak, replace as soon as possible; red indicates the batteries need to be replaced before normal detecting). At this time the beeping sounds regularly and the detector sets the atmosphere halogen evel to "zero", ready for detection.
Operation Instruction:
- Check the battery level by observing the power indicator light.
- Once turn on the detector, the default sensitivity level is level 5. You will hear rapid, but steady beep sound. The sensitivity can be adjusted by pressing
![]() , according to your requirement
, according to your requirement - Begin searching for eaks. When refrigerant is detected, a siren will be sounded, with a rate quite different from previous beep sound. And the indicator lights will progressively turn on.
- Sensitivity can be adjusted at any time during operation by pressing
![]() key. This adjustment will not interrupt detection.
key. This adjustment will not interrupt detection. - If alarm occurs before the sensing tip touches with the leakage source, press
![]() key to reset the current to 0 until there is no alarm, then you could detect again.
key to reset the current to 0 until there is no alarm, then you could detect again.
 , according to your requirement
  key to reset the current to 0 until there is no alarm, then you could detect again.
Detecting method

See Figure 4
- Visually exam the refrigeration system. The oily and dirty spots, node valves, coils, connectors, or pipelines are the areas most likely to leak gases.
- Start leak detecting at the joint at a speed of 1cm /s and the distance between sensor tip and the joint should be 1-3cm.
- When an alarm is triggered, it may indicate a leak is close by. Detect around that area again and see if the alarm is repeatable. If a leak is confirmed, pinpoint the leak source by moving slowly from no-leaking (no-alarm) area to the leaking area from different directions. Besides, you cou d also pinpoint the leak by moving the detector away from the leaking area and reset the unit, adjusting the sensitivity lower and repeating the above process. Once confirmed, mark around the leak and continue detecting the whole line of the system.
- Additional work may be needed to eliminate possible ambiguity, such as, other contaminants at the spot may also make the detector work abnormally. Please clean the leaking area with dry cloth and blow clean dry air to the leaking area and repeat step 3 above to confirm the leak.
- Leak on evaporator coil is more difficult to detect than other areas because it is difficult for sensor tip to access to the whole evaporator coil. Most evaporator coils are composed of modu es and are installed in a closed space witl fan for heat exchange. The system with the fan should be turned on for 10 seconds and then turn off the fan, wait 10-15 minutes at the evaporator, then use detector to detect the outlet of the condensate (make sure the sensor tip doesn't touch with the detect the air inside the evaporator chamber. Most halogens are lighter than the air and likely to accumulate at the highest spot in the closed space. An alarm may indicate a leak at the evaporator coil, but it is hard to repair evaporator by pinpointing the precise leak location. In most cases, the whole coil has to be replaced.
Notes before leak detecting
- In order to detect leak in a refrigeration system, the system must have normal operating pressure, or at least partially reaches to minimum 50 PSI. Low environmental temperature (lower than 59°F or 15°C) may lower the system required pressure and may make the leak ess likely to be detected. No leak detected does not mean the system does not have gas leak. Check the pressure before making the conclusion.
- Leaking areas are usually covered with contaminants such as compressor oil or dirt, be careful not to let the sensor tip in contact with these contaminants.
- This product's function is to detect halogen's relative change at the sensor tip. Pinpointing the leak source needs to manually adjust the sensitivity and reset the detector by the technician. You could follow recommendations bellow:
- In areas where the atmosphere is contaminated with halogen refrigerant, press reset key to "ignore" the leak in the background. Make sure not to move the sensor tip away from the contaminated background while resetting the detector.
- In windy area, the leaked halogen refrigerant may be quickly diluted or removed from the leak source. The technician may use a wind shield to isolate the leak area or temporarily turn off the fan.
- To avoid false alarm, prevent the sensor tip against touching any moisture or other solvent.
Maintenance
Proper maintenance is important and may extend the service life and improve the performance of your detector.

Turn the power off before replacing the sensor tip. Voltage across the tip may pose an electrical hazard.
Keep the Sensor tip clean: Use cotton cloth or dry air to clean the shield on the sensor tip if it gets contaminated. If the sensor tip itself is contaminated, soak the tip in absolute alcohol for a few minutes, and then use compressed air to blow it dry, or dry it with cloth.
Note: Never use strong solvents such as Gasoline, mineral oil, turpentine, these solvents may coat the sensor with a thin film and reduce the sensitivity of the detector and make the detector slow to respond to a leak.
Put the detector and the tip in a dry and clean place; remove the batteries if the detector is not used for a long time.
Trouble shooting
-
The device could not turn on
Possible reasons:
- The energy of batteries is too low to turn on
Solution: Please replace new batteries - The pole piece of battery connector has been oxidized
Solution: Please scrape the oxidization layer
-
The unit could not respond to a confirmed leak
Possible reason: Sensor tip is aged.
Solution: Please change a new sensor as soon as possible.
- The detector gives false alarm when there is no halogen present
Possible reason: Atmospheric composition has changed.
Solution: Please press RESET key to set the background to "zero" level, try to avoid the change of temperature or humidity.
Documents / ResourcesDownload manual
Here you can download full pdf version of manual, it may contain additional safety instructions, warranty information, FCC rules, etc.
Advertisement

Need help?
Do you have a question about the HLD-200 and is the answer not in the manual?
Questions and answers