MAJORITY Sierra Plus - Soundbar Manual
- Manual (39 pages) ,
- User manual (112 pages)
Advertisement
- 1 Box Contents
- 2 Controls and Functions
- 3 Instructions Guide
- 4 Specifications
- 5 Safety Info
- 6 Documents / Resources
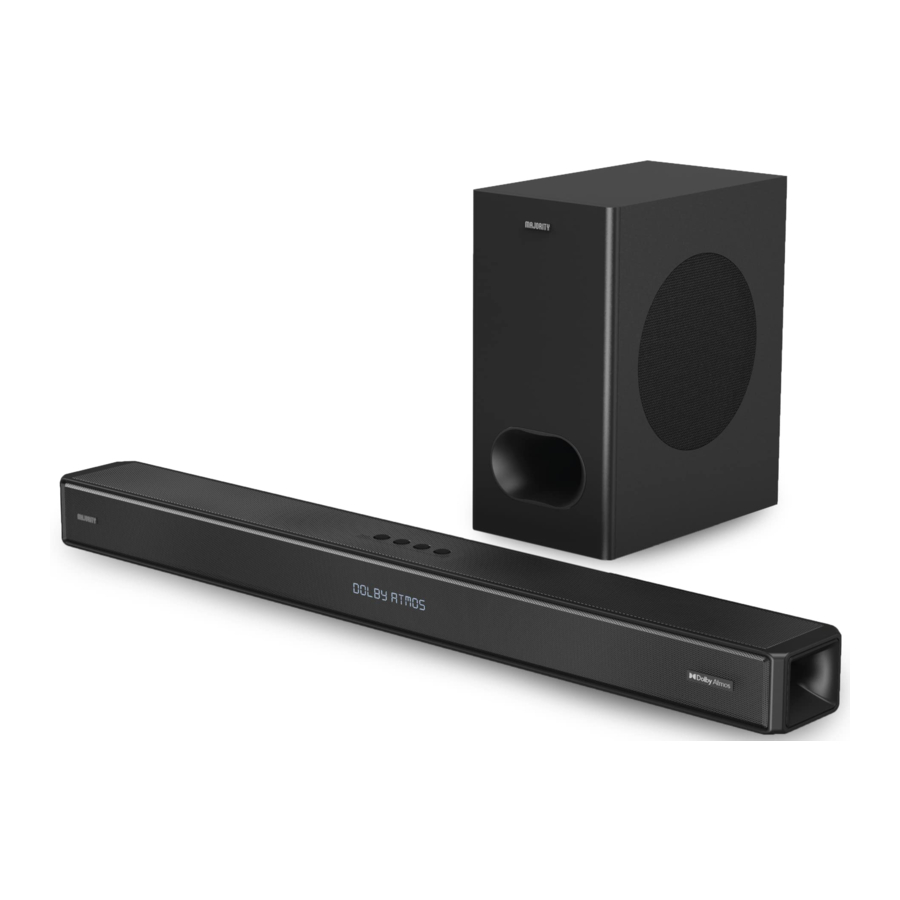
Box Contents

Controls and Functions
Front and Top View

- Display panel
- On/Off button
- Volume up
- Volume down
- Select input source
Back View

- AC in – Connect to power supply
- HDMI in 2
- HDMI in 1
- HDMI Out (ARC)
- AUX in
- Optical in
- USB in
Subwoofer Back View

- LED indicator – Indicates pairing between the soundbar and the subwoofer (make sure that both soundbar and subwoofer are connected to the power supply simultaneously, and then switch on the soundbar and subwoofer).
- PAIR button – Automatically pairs the soundbar with the subwoofer. Press and hold to reset the connection between the sound bar and the subwoofer.
- USB port – For software upgrade only.
- AC in – Connect to the power supply.
Remote Control

- Power On/Off
- Pair
- Volume Up
- Previous/Back
- Volume Down
- Music
- Treble-Up
- Treble-Down
- Mute
- Input (ARC, HDMI 1, HDMI 2, Bluetooth, AUX, USB & OPTICAL)
- Next/Skip
- Movie
- News
- Bass-Up
- Bass-Down
- 3D
Instructions Guide
 Please note all (Ref.) refer to the Controls and Functions in the above diagrams.
Mode Indicator
| Input Type | Display Indicator |
| RCA | The front display will show AUX. |
| AUX | The front display will show AUX. |
| HDMI IN | The front display will show HDMI 1 or HDMI2. |
| HDMI OUT | The front display will show HDMI ARC. |
| OPTICAL | The front display will show OPTICAL. |
| USB | The front display will show USB. |
| Bluetooth Ready | The front display will flash BLUETOOTH. |
| Bluetooth Connected | BLUETOOTH will stop flashing a connected BEEP will sound. |
| Dolby Atmos Connected | The front display will scroll "Dolby Atmos" for 3 seconds. |
| Dolby Surround Connected | The front display will scroll "Surround" for 3 seconds. |
Connecting to the Mains Supply
Ensure that the power supply voltage is within the range of 110V-240V ~ 50Hz/60Hz. Any other voltage may cause damage to the unit.
The Sierra Plus comes with a power adapter for the soundbar. Make sure to unwind the cable to its full length. Connect the plug to a mains socket by fully inserting the plug into the mains socket.
Connect the adapter to the AC power port in the back of the soundbar (Back View Ref.6).
The display panel will show „–„ to indicate it has registered a power source and is on standby mode.
Press the „POWER" button on the remote control (Remote Control Ref.1) or press and hold the „POWER" button for 3 seconds on the top of the soundbar (Front and Top View Ref.2) to turn the unit on or off.
Connecting the Soundbar and Wireless Subwoofer
Please note: The soundbar and subwoofer must be within a 10 metre range of each other in order to be successfully connected.
The subwoofer and soundbar will wirelessly connect for a surround sound experience. This allows you to place the subwoofer in the corner of the room to ensure that the sound from your TV fills the room.
To connect them, please ensure that your soundbar is switched on for the initial setup. To do this, press the „POWER" button (Front and Top View Ref.2) on the unit or the „POWER" button on the remote control (Remote Control Ref.1).
The subwoofer has an indicator light (Subwoofer Back View Ref.1)- this will flash when looking for a connection, and show a solid light when connected.
The subwoofer and soundbar should then automatically connect using a wireless Bluetooth connection.
If you are having connectivity issues, please move the subwoofer closer to the soundbar for setup. If this does not work, please press and hold the PAIR button (Subwoofer Back View Ref.2) to reset the connection between the subwoofer and the soundbar.
Using the RCA Audio Cable
You will need a TV/audio source with RCA audio output sockets and an RCA to 3.5mm AUX cable (included).
Connect the RCA stereo audio cable to your TV"s stereo RCA (L/R) audio output sockets (for help on how to locate your TV"s audio output sockets, refer to your TV"s user manual).
Connect the 3.5mm AUX end of the cable to the side of the soundbar via the AUX IN port (Back View Ref.10).
Press „INPUT" on the remote control (Remote Control Ref.10) or the unit (Front and Top View Ref.5) until „AUX" mode is selected.
Troubleshooting: If you are not receiving a picture, please ensure that the RCA cable is connected to 'OUTPUT' RCA ports on your TV.
If your TV does not have „OUTPUT" RCA ports, please use an alternative connection method.
Using the HDMI Input
You will need a TV/audio source with an HDMI High Definition Multimedia Interface HDMI cable (not included).
Connect the HDMI cable from the HDMI input on the soundbar (Back View Ref.7 & 8) to the HDMI output on your TV (for help locating your TV"s HDMI ARC output, refer to your TV"s user manual).
Press the „INPUT" button on the remote control (Remote Control Ref.10) or the „SOURCE/MODE" button on the top of the soundbar (Front and Top View Ref.5) until „HDMI1" or „HDMI2" mode is selected. The display will show „HDMI1" or „HDMI2" (Front and Top View Ref.1).
Using the native controls on your connected device, ensure the audio settings are set to ARC or HDMI Audio.
Using the HDMI ARC Output
You will need a TV/audio source with an HDMI High Definition Multimedia Interface HDMI cable (not included).
Connect the HDMI cable from the HDMI output on the soundbar (Back View Ref.9) to the HDMI input on your TV( for help on how to locate your TV"S HDMI ARC input, refer to your TV"s user manual).
Press the „INPUT" button on the remote control (Remote Control Ref.10) or the „SOURCE/MODE" button on the top of the soundbar (Front and Top View Ref.5) until „ARC" mode is selected. The display will show „ARC" (Front and Top View Ref.1).
Using the native controls on your connected device, ensure the audio settings are set to ARC or HDMI Audio.
Using the AUX/Line In Port
You will need an AUX source with an AUX audio output and an AUX audio cable (not included).
Plug one end of a 3.5mm audio input cable into the LINE port on the side of the soundbar (Back View Ref.10). Plug the remaining end of the cable into the audio output/headphone output on your MP3 player or audio device
Plug the remaining end of the cable into the audio output/headphone output on your MP3 player or audio device.
Press the „INPUT" button on the remote control (Remote Control Ref.10) or the „SOURCE/MODE" button on the top of the soundbar (Front and Top View Ref.5) to switch to „AUX" mode. The Display will show „AUX" (Front and Top View Ref.1).
Using the Optical Input
You will need an audio source with an optical audio output and a digital optical audio cable (not included).
Connect the optical cable to the optical output on the audio source and the OPTICAL port in the back of the soundbar (Back View Ref.11).
Press the „INPUT" button on the remote control (Remote Control Ref.10) or the „SOURCE/MODE" button on the top of the soundbar (Front and Top View Ref.5) to switch to „OPTICAL" mode. The display will show „OPTICAL" (Front and Top View Ref.1).
How do I set the correct audio settings for Optical Mode?
When using the soundbar in Optical mode, or when using the soundbar with a streaming app, you may experience sound issues if you have your audio settings set up incorrectly. Using the native controls on your connected device, make sure the audio settings are set to PCM or Optical Audio.
This setting can be found within your TV"s sound settings. This is most likely under „Additional Settings" within the sound menu, where you will find options for „PCM/Dolby Digital/DTS/DTS Neo 2:5" (refer to your TV"s user manual for more info).
Using the USB Input
Connect your USB stick to the USB port (Back View Ref.12) on the back of the soundbar.
Press the „INPUT" button on the remote control (Remote Control Ref.10) or the „SOURCE/MODE" button on the top of the soundbar (Front and Top View Ref.5) to switch to „USB" mode. The display will show „USB" (Front and Top View Ref.1).
Bluetooth Operation
Pairing a Bluetooth Device for the First Time
Press the „INPUT" button on the remote control (Remote Control Ref.10) or the „SOURCE/MODE" button on the top of the soundbar (Front and Top View Ref.5) to switch to „BLUETOOTH" mode. The display will show „BLUETOOTH „(Front and Top View Ref.1).
Using the native controls on your Bluetooth device, select "Majority Sierra Plus" when prompted to choose a Bluetooth device.
If you encounter issues at this stage, please refer to the user manual for your Bluetooth device.
When successfully paired and connected, a confirmation „BEEP" will issue from the unit and the indicator display will show „BLUETOOTH" (Front and Top View Ref.1). After the initial pairing, the unit will stay paired unless unpaired manually by the user, or until the device is reset.
To unpair, hold down the „PAIR" button on the remote control for 3 seconds (Remote Control Ref.2). You can now pair the soundbar with another Bluetooth device.
If your device should become unpaired or you find it is unable to connect, repeat the steps above.
Volume Control
To adjust the volume of the soundbar, press either the „Volume Up" or Volume Down" buttons on the remote control (Remote Control Ref.3/Ref.5) . Alternatively, press and hold the „Volume Up" or Volume Down" buttons on the top of the soundbar (Front and Top View Ref.3/Ref.4).
Dynamic EQ
To adjust the sound effect of the soundbar, press either the „MUSIC" (Remote Control Ref.6) „MOVIE" (Remote Control Ref. 12) „NEWS" (Remote Control Ref.13) „3D" buttons (Remote Control Ref.16) on the remote control.
Dolby Atmos
DOLBY ATMOS is only available in „HDMI IN" and „HDMI OUT" (ARC) modes. For the details of the connection, please refer to HDM! input and HDMI output.
When the Sierra receives a Dolby Atmos signal, the front display will scroll "Dolby Atmos/Dolby Surround". This scrolling display is only temporary and will last for 3 seconds. This will happen at the start of the film or the studio intro.
If you never see this scrolling message you will need to follow the guidance below to achieve Dolby Atmos.
- To play Atmos on the Sierra Plus, the player or streaming product needs to be Atmos capable. To use Dolby Atmos in HDMI 1 /HDMI 2 / HDMI ARC mode, your TV has to support Dolby Atmos.
- The UHD (Ultra-High-Definition)/Blu-ray player or TV must have the digital output settings set to Bitstream, often labelled with references to „Cinema Surround" or „Dolby".
- "The UHD/Blue-Ray disc must be Dolby Atmos-enabled". The TV may not be able to pass through the Atmos stream to the soundbar even though it is capable of processing Atmos itself.
- A workaround for this is to suggest a direct connection from the player to the soundbar. For example, if your TV or DVD player has 2 x HDMI outputs. 1 is labelled "Audio/Video". You can connect this to the TV for the picture. The second connection is labelled "Audio only". This can be connected directly to the Sierra Plus. If the player output is set to bitstream, then the Sierra Plus will output Atmos and display Atmos when it first sees the stream.
Connections

Specifications
| Soundbar | 96 x 10.8 x 8.1 cm |
| Subwoofer | 30.6 x 19 x 37 cm |
| Power | 110~240V |
| Weight | 10.15 kg |
| Speakers | Stereo |
| Sound Version | Dolby Atmos |
| AUX In | 3.5 mm |
| RCA Input | 3.5 mm |
Safety Info

Please read all instructions carefully before use.

Risk of electric shock.
Do not open.
- Read these instructions:
- Heed all warnings.
- Follow all instructions in the user manual.
- Do no clean the apparatus near or with water.
- Do not block any ventilation openings. Install in accordance with the manufacturer's instructions.
- Do not install near any heat sources such as radiators, heat registers, stoves, or other apparatus (including amplifiers) that produce heat.
- Protect the power from being walked on or pinched particularly at plugs, convenience receptacles, and the point where they exit from the apparatus.
- Only use attachments/accessories specified by the manufacturer.
- Unplug this apparatus during light storms or when unused for long periods of time.
- Refer all servicing to qualified service personnel. Servicing is required when the apparatus has been damaged in a way, such as power-supply cord or plug is damaged, liquid has been spilled or objects have fallen into the apparatus, the apparatus has been exposed to the rain or moisture, does not operate normally or has been dropped.
- No naked flame sources, such as lit candles, should be placed on the apparatus.
- Dispose of used electrical products and batteries safely according to your local authority and regulations.
Addition Warnings
The apparatus shall not be exposed to dripping or splashing and no objects filled with liquid, such as vases, shall be places on the apparatus.
Main plug is used to disconnect device and it should remain readily operable during intended use. In order to disconnect the apparatus from the main power completely, the power plug should be disconnected from the main socket outlet completely.
Battery shall not be exposed to excessive heat such as sunshine, fire or the like.
CONTACT SUPPORT
(HTTPS://WWW.MAJORITY.CO.UK/SUPPORT/)
Documents / Resources
References
Download manual
Here you can download full pdf version of manual, it may contain additional safety instructions, warranty information, FCC rules, etc.
Advertisement


Need help?
Do you have a question about the Sierra Plus and is the answer not in the manual?
Questions and answers