Panasonic Lumix DMC-LS80 Operating Instructions Manual
Panasonic lumix dmc-ls80: user guide
Hide thumbs
Also See for Lumix DMC-LS80:
- Operating instructions manual (113 pages) ,
- Instrucciones de funcionamiento (32 pages) ,
- Operating instructions manual (116 pages)
Table of Contents
Advertisement
Quick Links
Operating Instructions
Digital Camera
DMC-LS80
Model No.
Before connecting, operating or
adjusting this product, please read the
instructions completely.
For USA assistance, please call: 1-800-211-Pana (7262) or, contact us via the web at:
http://www.panasonic.com/contactinfo
For Canadian assistance, please call: 1-800-99-LUMIX (1-800-995-8649) or
send e-mail to: lumixconcierge@ca.panasonic.com
VQT1L50
P
PC
Advertisement
Chapters
Table of Contents

Related Manuals for Panasonic Lumix DMC-LS80


Summary of Contents for Panasonic Lumix DMC-LS80
-
Page 1: Operating Instructions
Before connecting, operating or adjusting this product, please read the instructions completely. For USA assistance, please call: 1-800-211-Pana (7262) or, contact us via the web at: http://www.panasonic.com/contactinfo For Canadian assistance, please call: 1-800-99-LUMIX (1-800-995-8649) or send e-mail to: lumixconcierge@ca.panasonic.com VQT1L50... -
Page 2: Before Use
Before Use Dear Customer, Carefully observe copyright laws. Thank you for choosing Panasonic! Recording of pre-recorded tapes or discs or other published or broadcast You have purchased one of the most material for purposes other than your sophisticated and reliable products on the market today. - Page 3 Panasonic FCC Note: Model No.: DMC-LS80 This equipment has been tested and Responsible party: Panasonic found to comply with the limits for a Corporation of North Class B digital device, pursuant to America Part 15 of the FCC Rules. These limits...
- Page 4 Before Use -If you see this symbol- ■ About the LCD monitor Do not press the LCD monitor with • Information on Disposal in other excessive force. Uneven colors may Countries outside the European appear on the LCD monitor and it may Union malfunction.
- Page 5 Before Use ■ About the Lens ■ When not using the camera for a long period of time • Do not press the lens or the lens barrel with excessive force. • Store the batteries in a cool and dry place •...
-
Page 6: Table Of Contents
Contents Before Use Basic Information for Your Safety ....... 2 Taking Pictures Easily Intelligent Mode) ......26 Preparation Taking Pictures in the Desired Setting Normal Picture Mode) ....28 Standard Accessories ....... 8 Photography basics Names of the Components ....... 9 –... - Page 7 Connecting to other equipment Starry sky mode ......51 Fireworks mode ......52 Connecting to a PC ........ 87 Beach mode ........52 Connecting to a PictBridge-compliant Snow mode ........52 Printer ..........90 Aerial photo mode ......52 Playing Back Pictures with a Motion Picture Mode .......
-
Page 8: Preparation
USB Connection Cable • If any of the accessories are lost, K1HA08CD0023 customers in the USA should contact Panasonic’s parts department at 1 800 833-9626 and customers in Canada should contact 1 800 99-LUMIX (1-8- 995-8649) for further information about CD-ROM ■... -
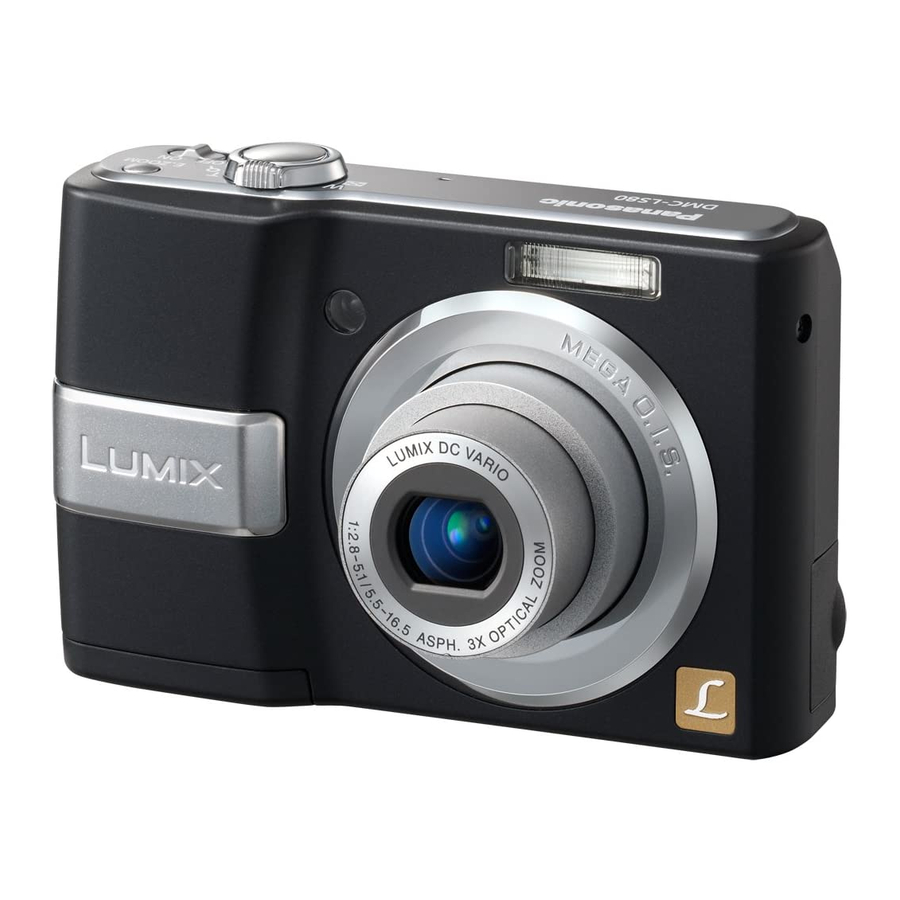
Page 9: Names Of The Components
Preparation Names of the Components [E. ZOOM] (Easy zoom) button ( P32 ) Zoom lever ( P31 ) Shutter button ( P26 , 53 ) Microphone ( P53 ) Flash ( P39 ) Self-timer indicator ( P43 ) AF assist lamp ( P66 ) AV OUT Lens part... -
Page 10: Quick Guide
Preparation Quick Guide Play back the pictures. This is the overview of the procedure to record pictures with this camera. For each operation, be sure to refer to the corresponding pages. Insert the batteries. 1 Set the recording/playback switch to [Q]. -
Page 11: About The Batteries
The camera does not turn on. The battery indication turns blue. – Data written to the built-in memory or • We recommend using Panasonic the card is damaged resulting in loss of batteries. the photographs. • Battery performance may vary greatly... - Page 12 If rechargeable batteries are to be used, • Do not store batteries in high humidity rechargeable batteries manufactured by areas or high temperatures. Panasonic are recommended. • Keep batteries away from children. • If there is dirt on the battery poles, you •...
- Page 13 Humidity: 50% when the LCD monitor is • Do not peel off or scratch the covering on Ni-MH batteries. • Using a Panasonic SD Memory Card • Read the operating instructions for the (16 MB) battery charger. •...
- Page 14 [ ] when the temperature is 0 °C (32 °F) and other recording conditions comply with CIPA standard.) Number of recordable Batteries Used pictures (Approx) Panasonic Alkaline 40 pictures batteries (20 min) (supplied or optional) Fully charged 390 pictures...
-
Page 15: Inserting/Removing The Batteries/Card (Optional)
This can damage data. We recommend using Panasonic’s SD • Memory Card/SDHC Memory Card. • Do not touch the connection terminals on the back side of the card. -
Page 16: About The Built-In Memory/The Card
Please confi rm the latest information on ■ About SD Memory Card (optional), the following website. SDHC Memory Card (optional) and http://panasonic.co.jp/pavc/global/cs MultiMediaCard (optional) (This site is in English only.) • The SD Memory Card, the SDHC •... -
Page 17: Setting Up The Clock (Turning The Camera [On] For The Fi Rst Time)
Preparation Setting Up the Clock (Turning the camera [ON] for the fi rst time) ■ Initial setting Press [MENU/SET]. The clock is not set when the camera is • When [MENU/SET] has been pressed shipped. When you turn the camera on, to complete the settings without the the following screen appears. -
Page 18: Basics Of Modes And Menus
Preparation Basics of Modes and Menus About the mode Selecting recording modes or playback mode. Recording/playback switch Recording mode Slide the recording/playback Intelligent mode switch to (up) or (down). Taking pictures easily. : Recording mode : Playback mode Normal picture mode Taking pictures in the desired setting. -
Page 19: About The Menu
Preparation About the menu This camera contains various menus to enable you to setup your own preferences for recording and playing. Displayed menu items vary depending on each mode. Setup menu (Common in recording mode / playback mode) To setup the default setting of the camera, such as the batteries, clock, etc. Recording menu (Only in recording mode) To setup the picture size, ISO sensitivity, etc. -
Page 20: Basic Settings (Setup Menu)
Preparation Basic settings ( Setup menu) Press q and select settings using Setting up the preference of battery type, clock, economy mode, etc. e/r. • The further items will be displayed Make sure to set [BATTERY TYPE]. depending on items. Press q again, and •... -
Page 21: Battery Type
Preparation Press [ ] to display menu, enter the setup menu [ ] and select the item. ( P20 ) The setting marked “q” means it is the initial setting. Select the type of batteries you BEEP have inserted. Set to select the volume of operational BATTERY TYPE sound. -
Page 22: Economy
Preparation Press [ ] to display menu, enter the setup menu [ ] and select the item. ( P20 ) The setting marked “q” means it is the initial setting. Restrict battery consumption Show images you have taken. ECONOMY AUTO REVIEW POWER SAVE Adjust how long the recorded picture If you perform no operations, the camera... -
Page 23: Reset
Preparation Press [ ] to display menu, enter the setup menu [ ] and select the item. ( P20 ) The setting marked “q” means it is the initial setting. VIDEO OUT ( P94 ) RESET (Playback mode only) The settings on the recording or the [SETUP] Set to [NTSC] or [PAL] according to the TV menu are reset to the initial settings. -
Page 24: Language
While the AV cable or USB cable is For USA assistance, please call: 1-800-211-Pana (7262) or, contact us via the web at: connected to the camera, [AUTO DEMO] http://www.panasonic.com/contactinfo is not available. For Canadian assistance, please call: 1-800-99-LUMIX (1-800-995-8649) or send e-mail to: About demonstration of jitter/movement lumixconcierge@ca.panasonic.com... -
Page 25: Lcd Monitor And Changes To The Display
Preparation LCD Monitor and Changes to the Display ■ Display in normal picture mode [ Built-in memory / Card (at the time of purchase) lights red during accessing.) • Do not do the following when the access indication lights. – Turn the camera off. -
Page 26: Taking Pictures Easily ( Intelligent Mode)
Basic Taking Pictures Easily Intelligent Mode) The camera automatically sets the D AF area appropriate settings according to the • AF area is displayed on suitable focus subject and recording condition. This mode points. (Max. 5 points) is recommended for beginners to take E Aperture value pictures easily. - Page 27 Basic ■ Change the setting a moment. This function allows easy adjustment of focus and the recorded Press [MENU/SET] to set the following picture will not be affected. recording menu, setup menu. Refer to • Be careful not to move the camera when each corresponding page for the details on you press the shutter button.
-
Page 28: Taking Pictures In The Desired Setting ( Normal Picture Mode)
Basic Taking Pictures in the Desired Setting Normal Picture Mode) This mode allows you to take pictures C The focus indication lights green. freely as more options are setup is D AF area: white green available than Intelligent mode [ E Aperture value F Shutter speed Set the camera to normal picture... -
Page 29: Photography Basics - Exposure, Focus, And Color
Basic Photography basics – exposure, focus, and color A little knowledge about exposure, focus and color will come in handy when you are having trouble with a shot. Are images dark? In normal picture mode [ ], Auto Exposure (AE) normally Exposure sets the correct exposure for you, but images may be dark if there is backlight. - Page 30 Basic ■ When you want to take a picture of a ■ Preventing jitter (camera shake) • Be careful of jittering when pressing the subject outside the AF area ( AF/AE shutter button. Lock) • The jitter alert 1 appears when the When recording a picture of people with a shutter speed is slow and the chances of composition like the following picture, you...
-
Page 31: Taking Pictures With The Zoom
Basic Taking Pictures with the Zoom ■ How the extended optical zoom Using the optical zoom / works the extended optical zoom (EZ) The extended optical zoom works by You can make people and subjects appear extracting the center of the picture and closer with the 3 times optical zoom, and expanding it for a higher telephoto effect. -
Page 32: Using The Easy Zoom Button
Basic you return the zoom lever to the optical Using the easy zoom button zoom position. Press the [E.ZOOM] button to quickly ■ When the picture size is set except at zoom. Actual zoom factors depend on the the highest resolution for each aspect pixel recording setting. -
Page 33: Using The Digital Zoom
Basic ■ Entering the digital zoom range Using the digital zoom When you rotate the zoom lever to the Further extending the zoom extreme Tele position, the on-screen zoom A maximum of 12 × zoom can be achieved indication may momentarily pause. with the 3 ×... -
Page 34: Playing Back Pictures ( Q Normal Playback Mode)
Basic Playing Back Pictures Normal playback mode) Select the normal playback mode [ ( P18 • This camera is based on the DCF The picture data on the built-in memory standards (Design rule for Camera appears when a card is not inserted. The File system) which was established by picture data on the card appears when a the Japan Electronics and Information... -
Page 35: Deleting Pictures
Basic Deleting Pictures ■ To delete [DELETE MULTI] (up to 50 Select the normal playback mode [ pictures) / [DELETE ALL] ( P18 The picture data on the built-in memory is Press [ deleted when a card is not inserted. The Press e/r to select [DELETE picture data on the card is deleted when a MULTI] or [DELETE ALL] and... - Page 36 Basic Press [ Press e to select [YES] and then press [MENU/SET] to set. (Screen when selecting [DELETE MULTI]) DELETE MULTI DELETE THE PICTURES YOU MARKED ? SELECT • When you delete all pictures, only pictures in either of the built-in memory or the card can be deleted.
-
Page 37: Advanced-Shooting
Advanced-Shooting About the LCD Monitor In playback mode Changing the information displayed 1ST DAY 1 month 10 days 10:00 JAN. 15. 2008 10:00 JAN. 15. 2008 DISPLAY E Normal display A LCD monitor (LCD) F Display with recording information Press [DISPLAY] to switch to the screen G Non-display to be used. -
Page 38: Making The Lcd Monitor Easier To See (Lcd Mode)
Advanced-Shooting Making the LCD monitor easier to Mode Uses see (LCD mode) Brightness of the LCD monitor automatically changes AUTO depending on brightness of POWER LCD the environment. Press and hold [Q.MENU] until The LCD monitor becomes quick setting screen is displayed. brighter and easier to see POWER even when taking pictures... -
Page 39: Taking Pictures Using The Built-In Flash
Advanced-Shooting Taking Pictures Using the Built-in Flash ■ Flash setting r :AUTO The fl ash is automatically activated according to the recording condition. s : AUTO/Red-eye reduction* (White) The fl ash is automatically activated according to the recording condition. Use this when you take pictures of •... - Page 40 Advanced-Shooting ■ Available fl ash settings by recording mode ■ The available fl ash range to take pictures The available fl ash settings depend on the recording mode. ISO sensitivity Available fl ash range : Available, — : Not available, : Initial AUTO 30 cm (0.98 feet) to 5.9 m...
- Page 41 Advanced-Shooting ■ The available fl ash range to take • The shutter speed will be different from that shown in the table in the following pictures in intelligent ISO are as scene modes. follows: – [NIGHT SCENERY]: ISO LIMIT Available fl ash range 1/8th of a second or 8 seconds to ISO MAX400 60 cm (1.97 feet) to 3.7 m 1/2000th of a second...
-
Page 42: Taking Close-Up Pictures (Af Macro Shooting)
Advanced-Shooting Taking Close-up Pictures Macro Shooting) • Use a tripod and the self-timer for best This mode allows you to take close-up results. pictures of the subject, e.g. when taking • When the subject is close to the camera, pictures of fl owers. the effective focus range (depth of fi... -
Page 43: Taking Pictures With The Self-Timer
Advanced-Shooting Taking Pictures with the Self-timer • When using a tripod or in other cases, Press w [ ]. setting the self-timer to 2 seconds is a convenient way to stabilize the jitter Select shutter speed using e/r caused by pressing the shutter button. or w [ ]. -
Page 44: Compensating The Exposure
Advanced-Shooting Compensating the Exposure Press e [C] to display [EXPOSURE] and press w/q to Use this function when you cannot achieve compensate the exposure. appropriate exposure due to the difference EXPOSURE of brightness between the subject and the background. Over exposed SELECT EXIT Compensate the exposure... -
Page 45: Auto Bracket Recording
Advanced-Shooting Auto Bracket Recording • The auto bracket setting is canceled if 3 pictures are taken in succession, you turn the camera off. (Same occurs in automatically changing the exposure. [POWER SAVE].) The pictures are based on the selected • You cannot use auto bracket in [STARRY compensation range after setting the SKY] and [HI-SPEED BURST] mode. -
Page 46: Scene Mode
Advanced-Shooting Scene Mode Set the recording/playback switch to ■ Scene mode help [ INFORMATION] the recording [ ( P18 ) • To see explanations about the scene When you select a scene mode to match modes, press [DISPLAY] while a scene the subject and recording situation, the mode is selected in step 2. -
Page 47: Portrait Mode
Advanced-Shooting Refer to for details on selecting a scene menu. Portrait mode The background is blurred and the person stands out with a healthier complexion. ■ Technique to make this mode more effective: Rotate the zoom lever to Tele as far as •... -
Page 48: Sports Mode
Advanced-Shooting Refer to for details on selecting a scene menu. Sports mode Night scenery mode Allows you to shoot fast moving subjects The nightscape can be recorded vividly. (e.g. outdoor sports). ■ Technique for night scenery mode • Use a tripod as the shutter may be open for as long as 8 seconds. -
Page 49: Party Mode
Advanced-Shooting Refer to for details on selecting a scene menu. Baby mode 1 Party mode Baby mode 2 Use to take pictures at wedding receptions, Adjusts the exposure and tone to bring indoor parties, etc. Both the people and out the healthy color of your baby’s skin. the background can be shot with natural The fl... -
Page 50: Pet Mode
Advanced-Shooting Refer to for details on selecting a scene menu. High sensitivity mode • The focus range is 5 cm (0.16 feet) The ISO sensitivity automatically switches (Wide)/30 cm (0.98 feet) (Tele) to Z. to between [ISO1600] and [ISO6400] when •... -
Page 51: Starry Sky Mode
Advanced-Shooting Refer to for details on selecting a scene menu. Select [ 2M], [ 2.5M] or [ ■ Setting the shutter speed Choose a shutter speed; 15, 30, or 60 seconds. 2M] using e/r and press [MENU/SET]. Press e/r to select the shutter speed, Press the shutter button fully to take then press [MENU/SET]. -
Page 52: Fireworks Mode
Advanced-Shooting Refer to for details on selecting a scene menu. Snow mode Fireworks mode Take beautiful pictures of fi reworks Exposure and white balance are adjusted exploding in the night sky. to make the white of the snow stand out. Technique for Fireworks mode ■... -
Page 53: Motion Picture Mode
Advanced-Shooting Motion Picture Mode Press the shutter button fully to Set the recording/playback switch to the recording [ ( P18 ) stop recording. • If the built-in memory or the card becomes full in the middle of Press [MODE], select recording, the camera stops recording automatically. - Page 54 Advanced-Shooting ■ When the aspect ratio setting is We recommend using Panasonic’s SD • Memory Card/SDHC Memory Card. • Depending on the type of card you are Item Picture size using, the card access indication may 30fps16:9 848 × 480 pixels 30 fps...
-
Page 55: Vacation Date Recording
Advanced-Shooting Vacation Date Recording Press r to select [SET] and then press [MENU/SET]. By setting the departure and return dates, SETUP you can record which date of the vacation you take a picture. The day of the vacation BEEP A is shown when you play a picture and GUIDE LINE TRAVEL DATE you can add it to the picture for printing... -
Page 56: Take A Picture
Advanced-Shooting Take a picture. • The travel date is calculated using the date in the clock setting and the departure date you set. If you set [WORLD TIME] to the travel destination, the travel date is calculated using the date in the clock setting and the travel 1ST DAY destination setting. -
Page 57: Displaying The Time At The Travel Destination
Advanced-Shooting Displaying the Time at the Travel Destination 2 Press w/q to select your home area and then press [MENU/SET]. If you set your home area and the travel destination area when traveling abroad etc., the local time at the travel destination area can be displayed on the screen and Toronto recorded on the pictures taken. - Page 58 Advanced-Shooting ■ Setting the travel destination area 3 Press [MENU/SET] to close the menu. (Perform steps 1, 2 and 3 on SETUP 1 Press e to select [DESTINATION] and BATTERY TYPE then press [MENU/SET] to set. CLOCK SET WORLD TIME WORLD TIME MONITOR LCD MODE...
-
Page 59: Using The [Rec] Mode Menu
Advanced-Shooting Using the [REC] Mode Menu Setting the color/hue, picture quality adjustment, etc. allows you to create wide variations on taking pictures. The menu items that can be set differ depending on the recording mode. [Q.MENU] ■ Using the [REC] mode menu Press [MENU/SET] to show the recording In shooting mode, press and hold menu, then select the item you want to... -
Page 60: [Picture Size] / [Quality]
Advanced-Shooting Press [ ] to display the [REC] mode menu and select the item to set. ( P19 ) When the aspect ratio setting is [j] [ PICTURE SIZE] / [ QUALITY] Setting a picture size and quality 3264 × 1840 pixels (6M) that matches your use of the 2560 ×... -
Page 61: [Aspect Ratio]
Advanced-Shooting Press [ ] to display the [REC] mode menu and select the item to set. ( P19 ) [ ASPECT RATIO] [ INTELLIGENT ISO] Setting the aspect ratio of Changing ISO sensitivity pictures automatically By changing the aspect ratio, you can The camera detects the movement of the select an angle of view that matches the subject and then sets the optimal ISO... -
Page 62: [Sensitivity]
Advanced-Shooting Press [ ] to display the [REC] mode menu and select the item to set. ( P19 ) [ SENSITIVITY] [ WHITE BALANCE] Setting the light sensitivity Adjusting the hue for a more natural picture ISO sensitivity represents the sensitivity of the image sensor to light. - Page 63 Advanced-Shooting Press [ ] to display the [REC] mode menu and select the item to set. ( P19 ) Auto White Balance (AWB) Setting the white balance manually ■ ■ Use of auto white balance adjustment (White set |) in inappropriate lighting conditions may Select [|] (White set) and then result in reddish or bluish pictures.
-
Page 64: [Af Mode] / [Quick Af]
Advanced-Shooting Press [ ] to display the [REC] mode menu and select the item to set. ( P19 ) [ AF MODE] / [ QUICK AF] • When using the Setting the focus method digital zoom or when you take pictures in ■... -
Page 65: [Burst]
Advanced-Shooting Press [ ] to display the [REC] mode menu and select the item to set. ( P19 ) • If you take pictures in burst mode with [ BURST] the built-in memory, it will take time to Shooting in quick succession write the picture data. -
Page 66: [Stabilizer]
Advanced-Shooting Press [ ] to display the [REC] mode menu and select the item to set. ( P19 ) [ STABILIZER] [ AF ASSIST LAMP] This feature detects jitter and Focusing in low light conditions corrects for it becomes easier Illuminating the subject with the AF assist MODE1 The stabilizer operates... -
Page 67: Advanced-Viewing
Advanced-Viewing Displaying Multiple Screens ( Multi Playback) • Depending on the recorded picture and the setting, the following icons will appear. Rotate the zoom lever towards – ] (Favorites) – ] (Motion picture) ] [W] to display multiple – ] ([BABY1] / [BABY2] mode), screens. -
Page 68: Displaying Pictures By Recording Date ( Calendar)
Advanced-Viewing Displaying Pictures by Recording Date CALENDAR) Press e/r/w/q to select a picture and then press [MENU/SET]. You can display pictures by recording date • The selected picture is displayed on the 1 using the calendar function. screen playback screen. Rotate the zoom lever towards ■... -
Page 69: Using The Playback Zoom
Advanced-Viewing Using the Playback Zoom ■ To stop using the playback zoom Rotate the zoom lever towards [ ] [W] or press [MENU/SET]. Rotate the zoom lever towards ■ To delete a picture during the [3] [T] to enlarge the picture. playback zoom Press [ Press w to select [YES]. -
Page 70: Playing Back Pictures Automatically ( A Slide Show)
Advanced-Viewing Playing Back Pictures Automatically Slide Show) Set the recording/playback switch to • The cursor displayed during the playback [ ( P18 ) playback corresponds to e/r/ Playing back pictures automatically in w/q. order. Recommended when viewing on TV screen, etc. To fi... -
Page 71: Searching By Recording Information ( Category Play)
Advanced-Viewing Searching by Recording Information Category Play) Set the recording/playback switch to Recording information Category the playback [ ( P18 ) such as scene You can perform category playback by PORTRAIT, SOFT classifying pictures according to the SKIN, SELF PORTRAIT, (PORTRAIT recording information such as scene mode NIGHT PORTRAIT,... -
Page 72: Playing Back Your Favorite Pictures
Advanced-Viewing ■ To register the category slide show If you register a category, you can easily • When one of the following operations is play back the pictures in the set category done, the category playback mode [ as a slide show ( P71 is canceled. -
Page 73: Playing Back Motion Pictures
Advanced-Viewing Playing Back Motion Pictures Press w/q to select a picture with a motion picture icon [ ] / [ • To hear audio recorded with movie, ] / [ ] / [ ] / [ recording must be played back on a and then press e to play back. -
Page 74: Using The [Playback] Mode Menu
Advanced-Viewing Using the [PLAYBACK] Mode Menu • When saving the edited picture in [TEXT STAMP], [RESIZE], [TRIMMING] and You can use various functions in playback [ASPECT CONV.], the picture will be mode to rotate pictures, set protection for saved as new fi le. Check remaining them etc. - Page 75 Advanced-Viewing Press [ ] to display the [PLAYBACK] mode menu and select the item to set. ( P74 ) Common operation ■ Press [DISPLAY] to switch text between [A] (capitals), [a] Press e/r to select [SINGLE] or Text (small case) and [&/1] (special [MULTI] and then press [MENU/ characters and numbers).
-
Page 76: [Text Stamp]
Advanced-Viewing Press [ ] to display the [PLAYBACK] mode menu and select the item to set. ( P74 ) Delete the title (for [SINGLE] only) ■ [ TEXT STAMP] In step 2 when [SINGLE] is selected, Stamping the text on your pictures delete all the texts, select [EXIT], and You can stamp the set text, date and time press [MENU/SET]. - Page 77 Advanced-Viewing Press [ ] to display the [PLAYBACK] mode menu and select the item to set. ( P74 ) Press e/r/w/q to select TEXT STAMP [SHOOTING DATE], [AGE], IT WILL BE STAMPED ON THE [TRAVEL DATE] or [TITLE] and PICTURE RESIZED TO SAVE NEW PICTURES? change the settings for the item, and then press [MENU/SET].
-
Page 78: [Resize]
Advanced-Viewing Press [ ] to display the [PLAYBACK] mode menu and select the item to set. ( P74 ) Press e to select [YES] and then [ RESIZE] press [MENU/SET]. Making the picture smaller This function is useful if you want to reduce RESIZE the fi... -
Page 79: [Trimming]
Advanced-Viewing Press [ ] to display the [PLAYBACK] mode menu and select the item to set. ( P74 ) Press the shutter button. [ TRIMMING] Enlarging a picture and trimming Press e to select [YES] and then press [MENU/SET]. Use this function when you trim TRIMMING unnecessary parts of the recorded picture. -
Page 80: [Aspect Conv.]
Advanced-Viewing Press [ ] to display the [PLAYBACK] mode menu and select the item to set. ( P74 ) Press w/q to determine the [ASPECT CONV.] horizontal position and press the Changing the aspect ratio of a shutter button to set. 16:9 picture You can convert pictures taken with a ] aspect ratio to a [... -
Page 81: [Rotate] / [Rotate Disp.]
Advanced-Viewing Press [ ] to display the [PLAYBACK] mode menu and select the item to set. ( P74 ) Rotate display ■ [ ROTATE] / [ ROTATE DISP.] (The picture is automatically rotated To display the picture rotated and displayed.) Select [ ROTATE DISP.] from This mode allows you to automatically... -
Page 82: [Favorite]
Advanced-Viewing Press [ ] to display the [PLAYBACK] mode menu and select the item to set. ( P74 ) Press w/q to select the picture [ FAVORITE] ★ then press r. Setting your favorite pictures ★ You can do the following if a mark [ has been added to pictures and they have been set as favorites. -
Page 83: [Dpof Print]
• The number of prints can be set from 0 to For more information please visit: 999. When the number of prints is set to http://panasonic.jp/dc/dpof_110/white_ “0”, DPOF print setting is canceled. e.htm Press [MENU/SET] twice to close Select [ DPOF PRINT] from playback the menu. - Page 84 Advanced-Viewing To cancel all settings ■ After the common operation. • DPOF is an abbreviation of [Digital Print Order Format]. This feature allows you to Press e to select [YES] and then write print information to media and then press [MENU/SET]. use the information on a DPOF-compliant CANCEL ALL DPOF system.
-
Page 85: [Protect]
Advanced-Viewing Press [ ] to display the [PLAYBACK] mode menu and select the item to set. ( P74 ) Multi setting/To cancel all settings ■ [ PROTECT] After the common operation. Preventing accidental erasure of Perform the same operation as in [DPOF the picture PRINT] ( P83... -
Page 86: [Copy]
(LUMIX) will be copied. (Even if the pictures were recorded with COPY a Panasonic digital camera, you may not COPY PICTURES FROM be able to copy them if they were edited BUILT-IN MEMORY TO MEMORY CARD? with a PC.) -
Page 87: Connecting To Other Equipment
Connecting to a PC • By connecting the camera to a computer, • Always use a genuine Panasonic AC you can upload your pictures, then adaptor (DMW-AC6PP: optional) and use the software on the included CD- DC coupler (DMW- DCC2: optional). - Page 88 Connecting to other equipment ■ Motion picture playback on a PC ■ Conditions under which a different folder number is used Use “QuickTime” (for Windows 2000/XP/ Vista) in the supplied CD-ROM when you In the following cases, the picture is play back motion pictures recorded on this not recorded in the same folder as the camera on your PC.
- Page 89 Connecting to other equipment switch between the built-in memory and the card, disconnect the USB connection • Do not use any other USB connection cable, insert (or remove) the card and cables except the supplied one. then connect the USB connection cable •...
-
Page 90: Connecting To A Pictbridge-Compliant Printer
• Use batteries with suffi cient battery dealer. power or the AC adaptor B and the DC coupler C. • Always use a genuine Panasonic AC adaptor (DMW-AC6PP: optional) and DC coupler (DMW-DCC2: optional). VQT1L50... - Page 91 Connecting to other equipment ■ Printing the selected picture (making Item Setting contents a single print) MULTI Multiple pictures are SELECT selected at once for Press w/q to select the picture printing. and then press [MENU/SET]. [Operation] PictBridge On the plural pictures screen, press w/q to select pictures.
- Page 92 Connecting to other equipment [ PAPER SIZE] • When you select [DPOF PICTURE], • [DPOF SET] is selectable. When you (Possible paper sizes on the camera) select [DPOF SET], refer to Settings on the printer are • Press [MENU/SET] when you wish to prioritized.
- Page 93 Connecting to other equipment • Do not disconnect the USB connection cable when the cable disconnection warning icon [K] is indicated. (Depending on the printer, the icon may not be displayed.) • If the remaining battery power becomes low while the camera and the printer are connected, the status indicator blinks and the alarm beeps.
-
Page 94: Playing Back Pictures With A Tv Screen
Connecting to other equipment Playing Back Pictures with a TV Screen ■ Playing back pictures using the AV cable (supplied) • Do not use any other AV cables except • Set the [TV ASPECT]. ( P23 ) the supplied one. •... -
Page 95: Screen Display
Others Screen Display The LCD monitor shows the status of the camera. In recording (After settings) In normal picture mode [ (Initial setting) 5 6 7 14 15 16 17 18 NATURAL R15s In recording ■ ( P49 , 50 ) Recording mode •... - Page 96 Others In playback 4 5 6 7 PLAY MOTION PICTURE 1ST DAY 10 00 DEC 1 2007 ■ In Playback Playback mode ( P18 ) Number of DPOF prints ( P83 ) Protected picture ( P85 ) Motion pictures with audio ( P53 ) Picture size ( P60 )
-
Page 97: Cautions For Use
Others Cautions for Use ■ Optimal Use of the Camera Do not use the camera near radio Take care not to drop or transmitters or high-voltage lines. knock the unit or put a lot • If you record near radio transmitters or of pressure on it. - Page 98 If you drop the batteries accidentally, inappropriate handling. Panasonic will check to see if the body of the batteries not be liable for any damage suffered and the terminals are damaged.
-
Page 99: Message Display
Others Message Display Confi rmation messages or error messages will be displayed on the screen in some cases. The major messages are described below as examples. [CURRENT BATTERY TYPE SETTING: [CANNOT BE SET ON THIS PICTURE]/ ALKALINE/Ni-MH]/[CURRENT BATTERY [CANNOT BE SET ON SOME PICTURES] TYPE SETTING: OXYRIDE] [DPOF PRINT], [TITLE EDIT], and [TEXT This message is displayed the fi... - Page 100 Others [MEMORY CARD ERROR FORMAT THIS [A FOLDER CANNOT BE CREATED] CARD?] A folder cannot be created because there The format of the card cannot be are no remaining folder numbers that can recognized by this camera. Format the be used. card again with this camera.
-
Page 101: Troubleshooting
Others Troubleshooting If you put the menu back to the settings at the time of purchase, the conditions may be improved. Carry out the [RESET] in the setup menu while the camera is in the recording mode. ( P23 ) ■... - Page 102 Others Conditions Causes The subject is not The focus range varies depending on the recording mode. focused properly. Set the proper recording mode for the distance to the subject. Is the subject out of the focus range? ( P28 , 42 ) Have you taken a picture with jitter? The subject is not focused until the shutter button is pressed halfway.
- Page 103 Others ■ Conditions Causes The LCD monitor The LCD turns off immediately after using the fl ash while it sometimes turns off recharges. although the camera is The LCD may turn off immediately after setting to recording turned on. mode while it recharges. Have you set [AUTO LCD OFF]? ( P22 ) The brightness of the...
- Page 104 Others ■ Playback Conditions Causes Pictures rotate One of the features of this unit can automatically detect when unexpectedly. you have turned the camera sideways to take a picture, then rotate that picture for you when you play it back. In some cases, the unit may detect that you have turned the camera sideways, when in fact you are facing it up or down.
- Page 105 Others ■ Connecting to a TV, computer or printer Conditions Causes The picture does not Is the camera connected to the TV correctly? appear on the television. Set the TV to video input mode. The TV screen is disturbed or displayed in monochrome.
- Page 106 Others Conditions Causes When the shutter button In dark places, the AF assist lamp ( P66 ) lights red to make it is pressed halfway, easier to focus on a subject. a red lamp turns on sometimes. The AF assist lamp Is [AF ASSIST LAMP] on the [REC] mode menu set to [ON]? does not turn on.
-
Page 107: Available Recording Time
Others Number of Recordable Pictures and Available Recording Time • The number of recordable pictures and the available recording time are an approximation. (These vary depending on the recording conditions and the type of card.) • The number of recordable pictures and the available recording time vary depending on the subjects. - Page 108 Others Aspect ratio : 2.5M EZ : 7M : 4.5M EZ Picture size (2048 × 1360 pixels) (3264 × 2176 pixels) (2560 × 1712 pixels) Quality Built-in Memory (Approx. 24MB) 16 MB 32 MB 64 MB 128 MB 256 MB Card 512 MB 1 GB...
- Page 109 Others ■ Available recording time (In Motion picture mode) Picture quality 30fps 10fps 30fps 10fps 30fps 10fps setting QVGA QVGA 16:9 16:9 2 min Built-in Memory — — 46 s — — (Approx. 24MB) 20 s 1 min 16 MB 26 s 26 s 22 s...
-
Page 110: Specifi Cations
Others Specifi cations Digital Camera: Information for your safety Power Source: DC 3 V Power Consumption: 1.5 W (When recording) 0.6 W (When playing back) Camera Effective pixels: 8,100,000 pixels Image sensor: 1/2.5˝ CCD Total pixels: 8,320,000 pixels Primary color fi lter Lens: Optical 3 ×... - Page 111 Others ISO sensitivity: AUTO/ 100 / 200 / 400 / 800 / 1600 [HIGH SENS.] mode: 1600 to 6400 Shutter speed: 8 seconds to 1/2,000th of a second [STARRY SKY] mode:15 seconds, 30 seconds, 60 seconds White balance: Auto white balance / Daylight / Cloudy / Shade / Halogen / White set Exposure (AE): Program AE...
- Page 112 Others Analog video / audio: NTSC / PAL Composite (Switched by menu), Audio line output (monaural) Terminal DIGITAL/AV OUT: Dedicated jack (8 pin) DC IN: Type1 jack (Only when using DC coupler) Dimensions: 3.77˝ (W) × 2.44˝ (H) × 1.23˝ (D) (95.7 mm (W) ×...
-
Page 113: Digital Camera Accessory System
Others Digital Camera Accessory System ■ Connecting DC coupler and AC DC coupler: AC Adaptor: adapter to the camera DMW-DCC2 DMW-AC6PP Read operating instructions on how to connect the DC coupler to the camera. • Purchase DC coupler and AC adaptor together. You cannot use either of them individually. -
Page 114: Digital Camera Accessory Order Form
VISIT YOUR LOCAL PANASONIC DEALER CALL PANASONIC’S ACCESSORY ORDER LINE AT 1-800-332-5368 [6 AM-5 PM M-F, 6 AM-10:30 AM SAT, PACIFIC TIME] MAIL THIS ORDER TO: PANASONIC SERVICE AND TECHNOLOGY COMPANY ACCESSORY ORDER OFFICE 20421 84th Avenue South Kent, WA. 98032 In CANADA, please contact your local Dealer for more information about accessories. -
Page 115: Request For Service Notice
Mail this completed form and your Proof of Purchase along with your unit to: Panasonic Camera and Digital Service Center 1590 Touhy Ave. Elk Grove Village, IL 60007... -
Page 116: Limited Warranty (For Usa Only)
Limited Warranty Coverage If your product does not work properly because of a defect in materials or workmanship, Panasonic Consumer Electronics Company or Panasonic Puerto Rico, Inc. (collectively referred to as “the warrantor”) will, for the length of the period indicated on the chart below, which starts with the date of original purchase (“warranty period”), at its option either (a) repair your product with new... - Page 117 Carry-In or Mail-In Service For Carry-In or Mail-In Service in the United States call 1-800-211-PANA(7262). For assistance in Puerto Rico call Panasonic Puerto Rico, Inc. (787)-750-4300 or fax (787)-768-2910. This warranty ONLY COVERS failures due to defects in materials or workmanship, and DOES NOT COVER normal wear and tear or cosmetic damage.
-
Page 118: Customer Services Directory
Monday-Friday 9 am-9 pm; Saturday-Sunday 10 am-7 pm, EST For hearing or speech impaired TTY users, TTY : 1-877-833-8855 Accessory Purchases Purchase Parts, Accessories and Instruction Books online for all Panasonic Products by visiting our Web Site at: http://www.pstc.panasonic.com or, send your request by E-mail to: npcparts@us.panasonic.com... -
Page 119: Précautions À Prendre
OU DE DOMMAGE, secteur (modèle DMW-AC6PP: en * N’EXPOSEZ PAS CET APPAREIL option) et coupleur c.c. (modèle DMW- À LA PLUIE, À L’HUMIDITÉ, AUX DCC2: en option) de marque Panasonic. GOUTTES OU ÉCLABOUSSURES • N’utilisez pas d’autres câbles de ET ASSUREZ-VOUS QU’AUCUN connexion USB à... - Page 120 Others Évitez d’approcher l’appareil photo de tout équipement magnétisé (four à micro-ondes, téléviseur, équipement de jeux vidéo, etc.). • Si vous utilisez l’appareil photo à proximité d’un téléviseur, les radiations électromagnétiques pourraient nuire au son et à l’image. • N’utilisez pas l’appareil photo à proximité d’un téléphone cellulaire;...
-
Page 121: Index
Others Index Access indication ........25 Date printing ........84 Aerial photo mode ........52 DC coupler .........87 AF/AE lock ..........30 Deleting pictures ........35 AF area ........... 28 Demonstration of jitter/ AF assist lamp ........66 movement detection screen....24 AF mode .......... - Page 122 Others Macro shooting ........42 REC mode menu ........59 Maintenance ........... 97 Reset ............23 Monitor ............ 21 Resize ............. 78 Motion picture mode ....... 53 Rotate ............. 81 Multi playback ......... 67 Rotate display ......... 81 Night portrait mode ......... 48 Scene menu ...........
- Page 123 Others MEMO VQT1L50...
- Page 124 QuickTime and the QuickTime logo are trademarks or registered trademarks of Apple Inc., used under license therefrom. Panasonic Consumer Electronics Company, Division of Panasonic Corporation of North America One Panasonic Way, Secaucus, NJ 07094 Panasonic Puerto Rico, Inc. Ave. 65 de Infantería, Km. 9.5, San Gabriel Industrial Park, Carolina, Puerto Rico 00985 Panasonic Canada Inc.