Advertisement
Quick Links
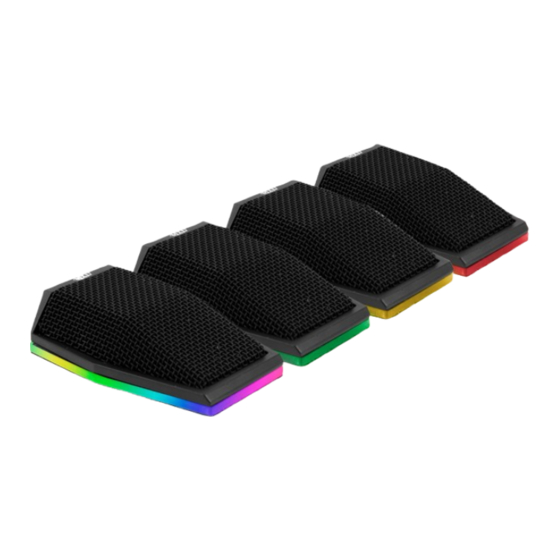
AC-404 LED
LED USB Boundary Microphone User Manual
Thank you for purchasing the MXL
neering and manufacturing. They are designed to provide you with outstanding performance and exceptional
value. For best results, please take a few moments to review this literature.
INSTALLATION/SETUP
The AC-404-LED microphone is a USB (Universal Serial Bus) device that will interface with Windows® and Mac®
computers without the need for any special drivers. The MXL AC-404-LED is compatible with USB 3, USB 2 and USB
1.1 ports. We recommend connecting your microphone directly to the computer's USB port as opposed to using a
USB hub as USB hubs can interfere with the performance of various USB devices.
The MXL AC-404-LED includes a headphone jack that accepts most headphones; however, the maximum head-
phone volume will vary by manufacturer and model so care should always be exercised when first plugging in
your headphones.
SETUP FOR USE WITH MAC®
After connecting the AC-404-LED to an unused USB port, go to: System Preferences > Sounds Icon.
To use the built-in headphone jack on the AC-404-LED as the audio output, click on the Output tab then select the de-
vice named USB Audio CODEC. You can adjust the headphone volume by moving the fader labeled Output Volume.
Next, click the Input tab and select the device named USB Audio CODEC. You can adjust the microphone volume
by moving the Input Volume slider. The gain of the microphone is very sensitive. For most applications the slider
will be set toward the left.
Your computer is now setup to use the MXL AC-404-LED USB Boundary Microphone. Some applications will require
additional settings to be changed within the program.
SETUP FOR USE WITH WINDOWS®
Connect the MXL AC-404-LED to an unused USB port on your computer. To select the MXL AC-404 LED as the de-
fault audio device, go to:
Control Panel > Sound, and select the Recording tab. Control Panel > Sound Icon
Click on the Recording tab, select Highlight the microphone icon labeled USB audio CODEC and click Set Default.
AC-404 LED studio. MXL microphones are the result of world-class engi-
®
CONTENTS
Unpack your MXL 990 Microphone package carefully and
verify that all of the following items are included:
MXL AC-404 LED
USB Boundary Mic
Mini Philips Screwdriver
Page 1
Unified Communications
USB Cable
Cleaning Cloth
Advertisement

Subscribe to Our Youtube Channel
Related Manuals for MXL AC-404 LED


Summary of Contents for MXL AC-404 LED
- Page 1 SETUP FOR USE WITH WINDOWS® Connect the MXL AC-404-LED to an unused USB port on your computer. To select the MXL AC-404 LED as the de- fault audio device, go to: Control Panel > Sound, and select the Recording tab. Control Panel > Sound Icon Click on the Recording tab, select Highlight the microphone icon labeled USB audio CODEC and click Set Default.
- Page 2 WARRANTY MXL microphones are guaranteed against defects in material and quality for one year from date of purchase. Should you encounter any issues with this unit, please contact the company you purchased it from for assistance. The original dated sales receipt will be necessary for any warranty claim.
Need help?
Do you have a question about the AC-404 LED and is the answer not in the manual?
Questions and answers
Hello, I just purchased the AC 404 microphone for a Webex meeting and when we plugged it in the microphone worked so they could hear us but the computer speakers no longer worked. Can this still be used without having to connect to the headphones, I need everyone in the room to hear the responses from those online. After Webex ended I opened up a YouTube video and the speakers worked fine with the mic connected. Any idea where I need to go to change the settings?
To ensure your computer speakers work during Webex meetings while using the MXL AC-404 LED microphone, follow these steps:
1. Set the Microphone as Default Recording Device
- Connect the MXL AC-404 LED to an available USB port.
- Open Control Panel > Sound and go to the Recording tab.
- Select USB audio CODEC (the microphone) and click Set Default.
- Adjust the microphone gain if needed by double-clicking the USB audio CODEC, selecting the Levels tab, and adjusting the slider.
2. Set Computer Speakers as Default Playback Device
- Open Control Panel > Sound and go to the Playback tab.
- Highlight your computer’s speakers and click Set Default to ensure sound output is directed to them instead of the microphone’s headphone jack.
3. Check Webex Audio Settings
- Open Webex and go to Audio Settings.
- Ensure Microphone is set to MXL AC-404 LED (USB audio CODEC).
- Ensure Speaker is set to your computer’s speakers.
Click Apply or OK for changes to take effect.
This answer is automatically generated