HP iPAQ hw6510 User Manual
Mobile messenger series
Hide thumbs
Also See for iPAQ hw6510:
- Manual (56 pages) ,
- Maintenance manual (24 pages) ,
- Introduction manual (7 pages)

Related Manuals for HP iPAQ hw6510


Summary of Contents for HP iPAQ hw6510
- Page 1 User’s Guide HP iPAQ hw6500 Mobile Messenger series Sådan kommer du i gang Aan de slag Komme i gang Aloitusopas Komma igång...
- Page 2 “as is” without warranty of any kind, including, but not limited to, the implied warranties of merchantability and fitness for a particular purpose, and is subject to change without notice. The warranties for HP products are set forth in the express limited warranty statements accompanying such products.
-
Page 3: Table Of Contents
Protecting the Screen ......1–8 Traveling with Your HP iPAQ ......1–9 2 Learning the Basics Using the Today Screen. - Page 4 HP Profiles ........5–8...
- Page 5 Manually Selecting a Network ....5–18 Configuring Your HP iPAQ for Your SIM Card ... . 5–19 Modifying the GSM/GPRS Network Settings .
- Page 6 Getting Started with GPS Navigation ....8–1 Setting Up Your HP iPAQ ......8–2 Using HP iPAQ Quick GPS Connection Utility .
- Page 7 9 Using Bluetooth Getting Acquainted with Bluetooth ..... 9–1 Understanding Terms ......9–2 Supported Services .
- Page 8 Configuring Video Format......10–8 Using HP Image Zone ......10–9 Viewing Thumbnail Photos .
- Page 9 Charging with the AC Adapter ....13–5 Charging with the HP iPAQ Cradle and AC Adapter ..13–6 Charging Over a USB Connection .
- Page 10 B Environmental Notices Battery Warning........B–1 Taiwan Battery Recycling Notice ....B–1 Disposal of Waste Equipment by Users in Private Household in the European Union .
- Page 11 Eliminación de residuos de equipos eléctricos y electrónicos por parte de usuarios particulares en la Unión Europea ..B–7 C Specifications System Specifications ......C–1 Physical Specifications .
-
Page 12: Getting To Know Your Hp Ipaq Mobile Messenger
Help and select a program. In addition, Microsoft Pocket PC Basics provides instructions on operating the HP iPAQ. To locate Pocket PC Basics, go to the Today screen and tap Start > Help > Pocket PC Basics. HP iPAQ Software... - Page 13 Inbox Receive and send Internet e-mail, Text and MMS messages in Inbox on your HP iPAQ or from your computer if ActiveSync is installed or if synchronizing with Exchange ActiveSync over air. You must have an e-mail address provided by your Internet Service Provider (ISP) or employer to send and receive e-mail.
-
Page 14: Using The Stylus
Using the Stylus Your HP iPAQ comes with a stylus that you should use to tap or write on your screen. NOTE: Use the stylus to tap and write on the screen, and use your fingers to press the Power button, application buttons on the bottom of the device, and the camera’s on-screen shutter button. -
Page 15: Setting The Date And Time
Setting the Date and Time When you turn on your HP iPAQ for the first time, you are requested to select your time zone. After setting the time zone, you still need to set the time and date on your unit. -
Page 16: Entering Owner Information
• The location time (Home or Visiting) needs to be changed. • All power to the HP iPAQ is lost, which removes all saved settings. • You perform a full reset of your HP iPAQ. SHORTCUT: From the Today screen, tap the Clock icon to set the time zone, time, and date. -
Page 17: Resetting The Unit
NOTE: Keep a record of your password in a safe place in case you forget it. If you are unable to retrieve your password, you must perform a hard reset on your HP iPAQ and will lose settings and information that are not saved in ROM. See ”Performing a Hard Reset”... -
Page 18: Performing A Hard Reset
Reset button. Aligning the Screen When the HP iPAQ is turned on for the first time, you are guided through a screen alignment process. You must realign your screen if: The HP iPAQ does not respond accurately to your taps. -
Page 19: Routine Care
Avoid exposing your HP iPAQ to direct sunlight or strong ultraviolet light for extended periods of time. • When not in use, store your HP iPAQ in a case. You can select from a wide variety of case options at www.hp.com/go/ ipaqaccessories. -
Page 20: Traveling With Your Hp Ipaq
• Take the AC Adapter and AC Charger Adapter with you. • Keep your HP iPAQ in a protective case and keep it in your carry- on luggage. • For air travel, be sure to turn off the Phone and Bluetooth. To turn off... -
Page 21: Learning The Basics
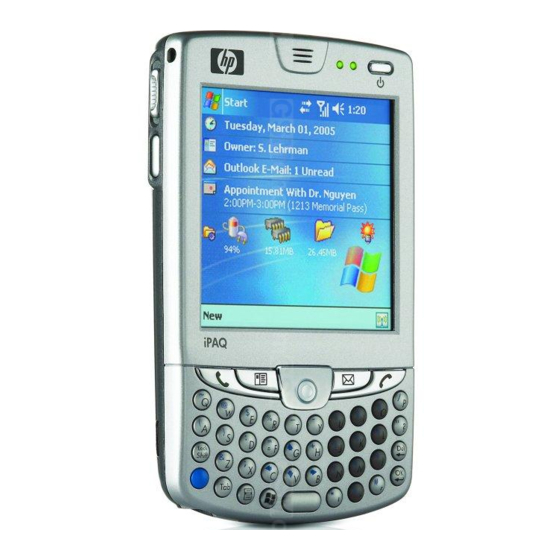
Learning the Basics Using the Today Screen When you first turn on your HP iPAQ, the Today screen displays. Also you can display it by tapping Start > Today. Use the Today screen to view: • Date and time •... -
Page 22: Navigation Bar
Navigation Bar The Navigation bar is located at the top of the screen. It displays the active program, wireless, phone and volume status, the current time, and allows you to open programs. Tap on the Start menu to select a program. Start menu Navigation Bar Tap to select a program you used... -
Page 23: Status Icons
Memory allocation settings Storage card settings Backlight settings When you first power on your HP iPAQ, the TodayPanel is set to display on the Today screen. To turn it off: In the TodayPanel, tap the Options and Today Settings icon >... - Page 24 (continued) Icon Definition Active data connection to GPRS network. Phone is powered off. Phone is powered on. Network is searching or unavailable. Phone connection unavailable or network error. Signal strength indicator for phone functions. A missed call. Tap this screen icon to view missed calls. Call Forwarding Active.
-
Page 25: Pop-Up Menus
(continued) Icon Definition Your HP iPAQ is connected to your personal computer. This icon appears in the Command bar only when there is an active connection. iPAQ Wireless icon—Tap to launch the iPAQ Wireless screen. The iPAQ Wireless screen provides a control center to turn all wireless activities on and off, and to configure their settings. -
Page 26: Customizing The Today Screen
Tap OK after you finish creating a new item. Customizing the Today Screen From the Settings Today screen, you can: • Add a picture as the background. Select information displayed on the Today screen. • • Set the order of the information. Set when to see the Today screen. -
Page 27: Customizing The Application Buttons
Customizing the Application Buttons You can change the Contacts and Messaging programs currently assigned to two of the application buttons on the bottom of the HP iPAQ. You can replace these assignments with two programs that you use the most. -
Page 28: Using Applications
Tap OK. NOTE: The next time your HP iPAQ is powered off, press one of the application buttons to test this feature. With the Keyguard feature enabled, your HP iPAQ will not power on until you press the Contacts button, and then the Messaging button on the Thumb Keyboard. -
Page 29: Installing Applications
Follow the instructions provided with the application and by the Installation Wizard to install applications from your computer. • Tap the application file in File Explorer on your HP iPAQ and follow the instructions on the Installation Wizard to install applications on your HP iPAQ. -
Page 30: Using Ipaq File Store Folder
File Explorer on your HP iPAQ. Programs and files stored in iPAQ File Store are stored in ROM and are saved if you perform a full reset of your HP iPAQ or if the battery discharges completely. -
Page 31: Using Activesync
Connecting to a Computer Connect your HP iPAQ to your computer using Microsoft ActiveSync and the HP iPAQ Cradle, a wireless infrared connection, a Wi-Fi connection or Bluetooth. For more information on using ActiveSync with Bluetooth, refer to Chapter 9, “Using Bluetooth.”... - Page 32 NOTE: To synchronize Calendar, Tasks, Contacts, and E-mail with your HP iPAQ, you must have Microsoft Outlook 98 or later installed on your personal computer. Microsoft Outlook Express does not work with the HP iPAQ and ActiveSync.
-
Page 33: Using Microsoft Exchange Activesync
AvantGo). NOTE: When you synchronize files, you can drag and drop the selected files from your computer to the synchronized folder on your HP iPAQ. If you named your HP iPAQ “PC1” when you created your partnership, then the synchronized folder is named “PC1.” When you synchronize, the files move to and from your HP iPAQ. -
Page 34: Using The Serial Infrared (Ir) Connection
Follow your computer manufacturer’s instructions to install and set up an infrared port. Remove the HP iPAQ from the cradle and line up the infrared port with the computer infrared port so they are unobstructed and within 30.5 cm (12 inches) of each other. -
Page 35: Changing Synchronization Settings
Change when your HP iPAQ synchronizes with your computer or server. • Change the type of connection from your HP iPAQ to your computer (for example, USB or infrared connections). NOTE: The HP iPAQ hw6500 Mobile Messenger series does not support synchronization with a personal computer using a serial cable. -
Page 36: Installing Programs
Follow the instructions in the Installation Wizard provided with the program. Check the screen on your HP iPAQ to see if any further steps are necessary to complete the program installation. Backing up and Restoring To help reduce the chance of losing information, you should back up information to your computer on your HP iPAQ regularly. -
Page 37: Using Activesync To Send And Receive E-Mail
Receive E-mail You can send and receive e-mail messages by synchronizing your HP iPAQ with your computer using ActiveSync. If you are using ActiveSync to send and receive e-mail messages, the name of the folder you are using is displayed at the bottom of the screen. For more information on sending and receiving e-mail using ActiveSync, from the Start menu, tap Help >... -
Page 38: Learning Input Methods
CAUTION: To avoid damaging your HP iPAQ screen, always use the stylus that comes with the HP iPAQ or an approved replacement to tap or write on the screen. If you lose or break your stylus, you can order extras at www.hp.com/go/ipaqaccessories. -
Page 39: Keyboard Components
Keyboard Components Blue Key Use this function key in conjunction with Blue symbols on the upper left of the keyboard keys to type symbols and to type numbers on the numeric keypad. ContextMenu Key Press to display a drop-down context menu when working within applications such as Calendar, Messaging, Pocket Word, Notes, and Tasks. -
Page 40: Special Keys
(continued) Keystroke Combination Action Blue Key + right arrow Scrolls right Blue Key + OK Closes program “Sticky” Keys The integrated keyboard uses a “Sticky Key” feature for the Shift and Blue (Fn) keys (known as “key modifiers”). This means that when you enter a number or symbol requiring a combination of keys to be pressed, the key modifier will stay engaged until you press the second key. - Page 41 Refer to the following table for a list of special characters. NOTE: It is recommended that you print this table for future reference. Special Character Table Original Modified Character Character à á â ä å ą ã ă æ À Á Â Ä Å Ą Ã Ă Æ ç...
- Page 42 Special Character Table (continued) Original Modified Character Character ş š ß Ş Š ß ţ Ţ ù ú û ü ű Ù Ú Û Ü Ű ý Ý ź ż Ź Ż € £ ¥ “ ' « » [ { < « ] } >...
-
Page 43: Using The On-Screen Keyboard
Using the On-Screen Keyboard Use the stylus to tap letters, numbers, and symbols on the on-screen keyboard to enter typed text directly onto the screen. NOTE: A question mark within a program indicates a Help file. Tap to open the Help file. From any application, tap the up arrow next to the Input Panel icon. -
Page 44: Writing With The Stylus And Microsoft Transcriber
NOTE: For the Letter Recognizer to work effectively, write characters between the dashed line and baseline. • If you are writing a letter like “p,” write the top portion within the dashed line and baseline, and the tail portion below the baseline. •... -
Page 45: Drawing And Writing On The Screen
b. To type numbers or symbols, write a number or symbol between the hatch marks labeled “123.” What you write will be converted to text. Drawing and Writing on the Screen Use the stylus as a pen to draw and write on the screen in the Notes program or from the Notes tab in Calendar, Contacts, or Tasks. -
Page 46: Changing Word Suggestion Options
Changing Word Suggestion Options As you type or write, the HP iPAQ suggests words for you in a box above the soft keyboard, Letter Recognizer, or Block Recognizer. NOTE: This feature is unavailable when you use the Thumb Keyboard or Transcriber. - Page 47 Tap the down arrow associated with letters and select the number of letters you want to type before a word is suggested. Tap the down arrow associated with words and select the number of words you want suggested. Tap OK. NOTE: If you do not want any words suggested, uncheck Suggest words when entering text.
-
Page 48: Using The Phone Features
SMS/MMS messages that you receive. With the exception of emergency calls, the SIM card must be inserted into the SIM slot under the battery on the back of the HP iPAQ for voice/data calls to work. To dial an emergency number from the Phone keypad, tap the emergency number appropriate for your region, and then tap Talk. -
Page 49: Inserting A Sim Card
Inserting a SIM Card To insert the SIM card into the HP iPAQ, you must first remove the battery cover and the battery from the HP iPAQ. On the back of your HP iPAQ, press down the battery cover latch 1. -
Page 50: Removing The Sim Card
Insert the SIM card into the SIM slot by aligning the notched corner on the card with the notched corner in the SIM slot, then push the SIM card into the SIM slot. Be sure to push it in all the way. NOTE: The gold side of the SIM card should be facing down when it is inserted into the SIM slot. -
Page 51: Activating Your Phone Service
If you have purchased a prepaid SIM card to use with your HP iPAQ or, if your service provider issued you a SIM card with a preset PIN, the following information is not applicable. -
Page 52: Phone Buttons And Icons
PIN Unblocking Key with your SIM card, you must contact your service provider to unlock it. If your HP iPAQ is ever stolen or lost, the PIN safeguards your phone against fraudulent use. To enable your PIN: From the Phone keypad, tap Tools >... -
Page 53: Checking Your Connection And Signal Strength
Checking Your Connection and Signal Strength After you insert the activated SIM card into your HP iPAQ, your unit connects to your service provider’s network. The powered on icon indicates that you are connected to your service provider’s network. -
Page 54: Automatic Frequency Band Selection
Navigation bar and, from the pop-up menu, tap Turn on flight mode. NOTE: Leave the phone turned on to receive calls when your HP iPAQ is powered off. You can use other programs on your HP iPAQ during a call. To quickly... -
Page 55: Hp Profiles
HP Profiles HP Profiles allows you to create system profiles for alerts, display power, and wireless settings to match your current environment or location. You can set up and name profiles to use at different times and for different functions. For example, you can set a certain Ring type or tone to be silent or vibrate when you are in a meeting, or loud when you are outdoors in a crowd. -
Page 56: Switching A Profile
Use Display to adjust backlight brightness and set a timer to turn off the backlight, if HP iPAQ is not used. Use Power to set a timer to turn off the power if HP iPAQ is not used. d. Use Wireless to keep wireless settings On or Off (Phone and Bluetooth). -
Page 57: Making A Call
• ”Making a Conference Call” Answering a Call When you receive a phone call, the HP iPAQ rings or vibrates and a message appears on the screen, giving you an option to either answer or ignore the incoming call. Tap Answer on the Phone keypad or press the green •... -
Page 58: Making A Call Using Speed Dial
From the Start menu, tap Programs > SIM Manager. SIM Manager loads the SIM data from the card. Tap and hold the contact you want to copy to your HP iPAQ and tap Copy to Contacts. Verify your contacts have been copied to your HP iPAQ by tapping Contacts and search for the added contacts. -
Page 59: Making A Call From Call History
Adjusting Phone Volume During a phone call, push the Phone volume slider on the top, left side of the HP iPAQ up (+) or down (-). NOTE: The Phone volume can only be adjusted during a phone call. Enabling the Mute Function During a call, you can mute your microphone so that the person with whom you are speaking cannot hear you, but you can still hear him or her. -
Page 60: Enabling Speakerphone Mode
NOTE: To use custom.wav, .mid, or .wma files as ring tones, use ActiveSync on your personal computer to copy the file to the My HP iPAQ\Windows\Rings folder on your HP iPAQ. Then, select the sound from the Ring tone list. -
Page 61: Taking Notes During A Call
The first speed dial location is set as a default for your voice mailbox number. When you insert your SIM card into your HP iPAQ, it sets as default the voice mailbox number of your mobile service provider. You may need to configure your phone to the Voicemail setting by dialing or setting the Voicemail dial number or password. -
Page 62: Displaying Caller Id
To use Call Waiting to answer an incoming call during a phone conversation, tap Answer to move the current phone call to Call Waiting. The phone call on Call Waiting displays on the screen. Tap Ignore if you do not want to answer the incoming call. Displaying Caller ID You can display your caller ID when placing a phone call. -
Page 63: Changing The System Volume
Select On, Vibrate, or Off to quickly change both the system and ringer volume settings. NOTE: You can also move the volume control on your HP iPAQ to quickly change the ringer settings. The volume slider is located on the top, left side of the HP iPAQ. -
Page 64: Changing Service Settings
Using International Roaming When you are planning on traveling abroad or to foreign countries, you will be able to use your HP iPAQ to call home or anywhere by first setting it up for international roaming. At least 24 hours before you go away on your trip, you need to do... -
Page 65: Changing Network Settings
• Check with your mobile phone service provider to make sure your HP iPAQ will work in the country you are going to and find out what kind of coverage you will receive. • Find out if you will need to purchase another SIM card with the... -
Page 66: Configuring Your Hp Ipaq For Your Sim Card
Network, and manually select a different network to use. NOTE: In the event you are unable to locate a network, you must reset the HP iPAQ by tapping Start > Settings > Phone > Network tab and under Network Selection, tap Automatic > Find network. -
Page 67: Editing Network Properties
• To access the GPRS Settings, from the Start menu, tap Settings > Connections tab > GSM/GPRS Manager icon. If your operator name appears in the drop-down list, it is recommended that you use that connection and, if needed, edit the default settings. -
Page 68: Editing An Internet Connection
• WAP Information Editing an Internet Connection If you tapped Internet Connection Information on the Edit properties screen: Select the connection to edit by tapping the appropriate box and tap OK. Enter a name for the connection such as the carrier name. Tap Next. -
Page 69: Creating A New Connection
Enter the following information: APN: Access Point Name of the MMS server being connected. • Name: Log on name for the MMS server. • Password: Password for the MMS server. • Tap OK. Enter the IP address and the Port number for the WAP MMS Gateway and tap Finished. -
Page 70: Failed Automatic Sim Detection
Failed Automatic SIM Detection If the SIM card is not detected by the application: • Check to see if the SIM card is present in the HP iPAQ. If it is not present, insert the SIM card and relaunch the application. •... -
Page 71: Enabling Tty Support
TTY device manufacturer’s documentation. Enabling TTY Support Before connecting the optional TTY device to the phone, you must enable TTY support in order to prepare the HP iPAQ Phone to expect a TTY device to be connected. To enable TTY support: From the Start menu, tap Phone >... -
Page 72: Disabling Tty Support
To end a phone call, press and hold the red End Call phone button on the front of the HP iPAQ. NOTE: TTY audio mode activation may not be possible while a telephone call is already in progress. -
Page 73: Managing Multiple Wireless Connections Using The Ipaq Wireless Manager
Using the iPAQ Wireless Manager The iPAQ Wireless Manager application provides a centralized control for you to manage wireless features on the HP iPAQ. The iPAQ Wireless screen has two individual power buttons to turn wireless features on and off—one at a time, and one All Off button to turn off all wireless features at the same time. -
Page 74: Power Buttons
• Green background when they are powered on and connected or associated with another HP iPAQ. NOTE: If a button does not immediately respond when tapped, it may be busy performing a task you requested. The All Off button displays: •... -
Page 75: Managing Data Connections
Managing Data Connections When you tap a data connectivity icon in the Navigation bar, it opens a drop-down connectivity box that displays the status of your wireless data connections and information about which service is connected. From this drop-down box, you can also create new connections, access wireless settings menus, and turn on or off the wireless features. -
Page 76: Making Data Connections
With Global System for Mobile Communications/General Packet Radio Service/Enhanced Data Rates for Global Evolution (GSM/ GPRS/EDGE), and Bluetooth integrated into a single HP iPAQ, you have broad coverage offering high speed access to the Internet, and to business and personal information. -
Page 77: Impact Of Data Connection When A Phone Call Is Received
For more information on this subject, refer to the Help file on your HP iPAQ by tapping Start > Help > Connections. Impact of Data Connection When a Phone Call is Received Class B mobile phones may be attached to both GPRS and GSM services, using one service at a time. -
Page 78: Setting Up A Wap Browser
Setting Up a WAP Browser Wireless Application Protocol (WAP) delivers content in a reduced format to fit the HP iPAQ screen. WAP protocol can accommodate the low memory limitations of handheld devices and the low-bandwidth limitations of a wireless-handheld connection. -
Page 79: Connecting To A Private Network
TCP/IP settings, and host name or IP address of the VPN server. From the Today screen on the HP iPAQ, tap Start > Settings > Connections tab > Connections icon > Tasks tab. Under My Work Network, tap Add a new VPN server connection. -
Page 80: Managing Your E-Mail
Entering an Internet Address With Pocket Internet Explorer and a connection to the Internet, you can view Web sites on your HP iPAQ by typing an Internet address in the Address bar. NOTE: Some Web content may require installation of additional software. -
Page 81: Using A Favorites List
Tap the Go icon. Using a Favorites List With Pocket Internet Explorer and a connection to the Internet, you can view Web sites on your HP iPAQ by selecting one from your Favorites list. To select a Web site from your Favorites list: From the Start menu, tap Internet Explorer. -
Page 82: Using Gps Navigation Getting Acquainted
However, before you can do this, you must load a map onto your HP iPAQ or memory card. Use your HP iPAQ to download one free city map from the Internet from a pre-selected list of cities in the United States, Canada, and Western Europe. -
Page 83: Setting Up Your Hp Ipaq
Setting Up Internet Access on Your HP iPAQ Now that you have completed the steps in the Getting started guide, verify you have Internet access on your HP iPAQ by visiting a web site such as www.google.com or www.yahoo.com. If you cannot access the Internet, refer to the instructions under “Accessing the Internet on Your HP iPAQ.”... -
Page 84: Verifying Date And Time On Your Hp Ipaq
Companion CD onto your personal computer. Verifying Date and Time on Your HP iPAQ Verify the correct date and time on your HP iPAQ. If the date and time are not correct, tap the Clock icon on the Today screen to adjust. -
Page 85: Downloading The Quick Gps Connection Data File
Access your Quick GPS Connection status by tapping Start > Settings > Connections > Quick GPS Connection icon If your HP iPAQ shows that the file has expired, verify the date and time on the HP iPAQ is correct and press Download Now. Tap OK to close the program. -
Page 86: Downloading A Map
NOTE: To change the volume of the vocal instructions, use the volume slider located on the top, left side of the HP iPAQ. Press up (+) or down (-) to adjust volume. Or to use an alternate method of changing the under GPS Navigation >... - Page 87 Tap Yes to confirm the map will be downloaded to the /My Documents folder in main memory on your HP iPAQ. To change the folder or save to iPAQ File Store, tap Change. If you selected Change, tap the down arrow under Location on the next screen and select iPAQ File Store or memory card if there is a memory card inserted in the HP iPAQ.
- Page 88 Programs > Get a Map & Voucher. 11. Tap X to close the application. 12. Disconnect your HP iPAQ from your personal computer and go outdoors to start GPS Navigation. Place the HP iPAQ where there is a clear view of the sky or on the dashboard of a vehicle.
-
Page 89: Accessing The Internet On Your Hp Ipaq
Accessing the Internet on Your HP iPAQ You must have Internet access on your HP iPAQ to be able to download the one free GPS city map (approximately 2 MB) and the Quick GPS Connection data file (approximately 40 KB). To do this: Place the HP iPAQ in the cradle and make sure it is connected to ActiveSync, as described in the Getting started guide. - Page 90 HP iPAQ. To set up proxy server settings on your HP iPAQ: From the Today screen on the HP iPAQ, tap Start > Settings > Connections tab > Connections icon > Tasks tab. Under My Work Network, tap Edit my proxy server >...
-
Page 91: Viewing The Main Screen
If you still cannot access the Internet, take your HP iPAQ out of the cradle and use a GPRS connection. For details, refer to Chapter 7, in the section ”Creating a GPRS/EDGE Connection.”... -
Page 92: Operating The Main Screen
Explanation Zoom In button. This button is always located in the same position. Zoom out button. This button is always located in the same position. Indicates the next highway on the current map. Your current GPS location. “Sound off” warning indicator. If this indicator is not shown, displayed instructions will be accompanied by voice instructions. -
Page 93: Using The Menu
Using the Menu The menu provides access to all Navigation functions and consists of two screens. Use the button to browse the menu screens. To open the menu, tap in the middle of the Main screen. To select an icon, tap it. NOTE: If an icon is dimmed, it is not available. -
Page 94: Setting A Destination
(continued) Option Function Plan from A to B—Without a valid GPS signal, you can still use this to calculate a route. When you want to prepare for your trip in advance and you are not in your car, this is a valuable function. -
Page 95: Adding A Favorite
NOTE: You must first tap the Navigate to... icon on the main menu to select any of the following items: Home, Favorite, Address, GPS Position, Recent destination, or Point of interest. Adding a Favorite To quickly access the addresses that you frequently use, add them to the Favorites list: Tap in the middle of the main screen to display the Options screen. -
Page 96: Using The Route Summary Screen
Tap your favorite address from the list and the main screen with the directions to the selected address displays. NOTE: To rename or delete an address from your Favorite list, on the Option screen, tap Change preferences > Maintain favorites. Tap the address to be renamed or deleted, and tap the Rename or Delete button. - Page 97 Scale bar GPS button Zoom slider Cursor position Your current GPS location Done button Options Search Cursor button button button The blinking icon (No. 4) represents your cursor position. Tap the map anywhere to place the cursor at that position. Option Function Scale bar...
-
Page 98: Switching To A Schematic View
Switching to a Schematic View Instead of viewing the main screen, you can switch to an at-a-glance schematic view to display driving instructions. To switch to the schematic view, from the Options menu, tap Change preferences > Turn Off Map display NOTE: You can also set the menu to hide the map only when you go faster than a certain speed. -
Page 99: Selecting Locations
• When a line has too much text to fit on a screen, it is abbreviated. When you tap an item and keep your finger or stylus on the screen, the item adjusts in size to show the complete text. To browse for items with a particular name, type the first few letters of the name by tapping the buttons on the Thumb keyboard. -
Page 100: Selecting Your Home Location
• Point of Interest (POI)—points of interest such as a restaurant, hotel, hospital, park, hospital, etc. Selecting your Home Location On the Options screen, tap Navigate to... • , then tap the Home icon and the main screen displays showing the way home if you have already entered your home address. -
Page 101: Selecting A Point Of Interest
Selecting a Point of Interest Tap the middle of the Main screen. Tap the Navigate to... icon, then tap Point of interest. Tap a category and then tap an item from the displayed list. Use the browser buttons to view all items displayed. If the item you are looking for is not displayed, enter the first few letters of the name at the top of the screen. -
Page 102: Setting Your Preferences
Setting Your Preferences You can customize your map screens to display different appearances such as colors, 3D displays, show or hide certain features, etc., and you can change the volume, the sound of the directional voice, or you can turn the volume off. - Page 103 Configure GPS or check your GPS signal. To configure your GPS, use backward and forward arrows to browse through the list of supported GPS HP iPAQs and select your GSP HP iPAQ, then tap DONE. Set name display—allows you to specify how you want names displayed on the Main screen.
-
Page 104: Setting Your Vocal Preference
Definition of Preference Icons (continued) Icon Preferences Use classical icons. Use modern icons. Set schematic speed—Hide the map when you exceed a certain speed and display an easier-to-view schematic design with driving instructions. Setting Your Vocal Preference To select a different voice, tap the forward and backward buttons to browse the different voices, and tap Select to select a voice. - Page 105 Navigation directions, or turn off the sound. • Use the HP iPAQ Quick GPS Connection software feature to update your HP iPAQ every two or three days for quicker GPS connection to roving satellites. Using GPS Navigation 8–24...
-
Page 106: Using Bluetooth
Terms used in this chapter • Supported Services • Bluetooth Settings • Bluetooth Manager NOTE: For more detailed help, refer to the Help files installed on your HP iPAQ. From the Start menu, tap Help > Bluetooth. Using Bluetooth 9–1... -
Page 107: Understanding Terms
Understanding Terms The following Bluetooth terms are used throughout this chapter. Term Definition Authentication Verification of a numeric passkey before a connection or activity can be completed. Authorization Approval of a connection, access, or activity before it can be completed. Bonding (Paired devices) Creating a trusted connection between your device and another. -
Page 108: Working With Bluetooth Settings
From the tabs in Bluetooth Settings, you can: • Select or add a user profile • Turn Bluetooth on and off • Enter or change your HP iPAQ Bluetooth Identification • Set your connection preferences • Enable Bluetooth services •... -
Page 109: Setting Accessibility Properties
Select either All devices or Paired devices only. CAUTION: Selecting All devices allows any device, even those unknown to you, to connect to your HP iPAQ. After they are connected, security settings for specific services apply as specified in the Bluetooth Settings. - Page 110 Tap OK to return to the iPAQ Wireless screen. NOTE: If you select Authorization required in the Service Settings, you must authorize each connection. Your HP iPAQ will then always ask you if the connection should be permitted. Secure Connections using a Passkey or Bond To establish a secure connection with another device, you can use the passkey feature or an established bond.
-
Page 111: Setting A Shared Folder
Setting a Shared Folder You can determine the folder that other devices access when they connect to your HP iPAQ. To select a shared folder: From the Today screen, tap the iPAQ Wireless icon > Bluetooth > Settings > Services tab. -
Page 112: Activating A Profile
Tap OK. Saving Bluetooth Configuration Settings in a Profile To save the HP iPAQ Bluetooth configuration settings to any profile: From the Today screen, tap the iPAQ Wireless icon in the Command bar > Bluetooth > Settings. From the General tab, tap the Profile icon. -
Page 113: Working With Bluetooth Manager
From the General tab, tap the Profile icon. Select a profile from the Add/Delete Profiles list. Tap the Rename button. Enter a new descriptive name. Tap OK. Deleting a Profile From the Today screen, tap the iPAQ Wireless icon > Bluetooth >... -
Page 114: Connecting To Other Devices
For more information, refer to ”Setting Accessibility Properties.” To pair devices: From the Today screen on the HP iPAQ, tap the iPAQ Wireless icon in the Command bar > Bluetooth > Manager. Tap Tools > Paired devices. Tap Add. -
Page 115: Establishing A Headset Connection
You can set up an ActiveSync partnership with a Bluetooth-enabled computer by first setting up your computer, then setting up your HP iPAQ. If you own an HP Evo Notebook or Desktop computer, you can use the Bluetooth Multiport Module presinstalled on that computer with your HP iPAQ. - Page 116 Using the HP Bluetooth Multiport Module for Evo Notebooks and Desktops Remove your HP iPAQ from the HP iPAQ Cradle. Turn on Bluetooth on both the HP iPAQ and the Evo computer. Right-click the Bluetooth icon in the system tray on your computer, then click Advanced Configuration.
-
Page 117: Connection Settings
11. Select the COM port that is the same as the one you wrote down earlier, and then click OK. Setting Up an ActiveSync Partnership on Your HP iPAQ To establish an ActiveSync connection: From the Today screen, tap iPAQ Wireless > Bluetooth >... -
Page 118: Establishing A Serial Connection
Bluetooth device through your HP iPAQ. Using Dial-Up Networking Service NOTE: An activated SIM card must be inserted in your HP iPAQ and the phone must be turned on before beginning this process. To connect to a device that provides phone or modem access: You must first pair the two devices. -
Page 119: Joining A Personal Area Network
NOTE: To use the HP iPAQ hw6500 Mobile Messenger series as a dial- up networking server, use the default phone number *99#. However, depending on your location, you may not need the country code or area code. -
Page 120: Creating A File Transfer Connection
• Send and receive files from a remote device • Delete and rename files on a remote device Creating a File Transfer Connection From the Today screen, tap iPAQ Wireless > Bluetooth > Manager. The first screen that displays is My Shortcuts. Tap New >... -
Page 121: Using Business Card Exchange
Tap Yes to verify you want to delete the selected file. Tap OK. Using Business Card Exchange Using the business card exchange, you can: • Set up your own business card • Send, Request, or Exchange a business card to one or more devices You must establish a default contact name to send or exchange business card information. -
Page 122: Opening A Connection
Sending, Exchanging, or Requesting Business Cards From the Today screen, tap the iPAQ Wireless icon in the Command bar > Bluetooth > Manager. Tap Tools > Business Card Exchange. Tap Send, Exchange, or Request a business card. Tap the device where you want to send, exchange, or request a business card. -
Page 123: Viewing Connection Status
Viewing Connection Status You can view: • Connection’s name • Device’s name • Connection status • Length of connection • Signal strength To view the connection status: From the Today screen, tap the iPAQ Wireless icon in the Command bar > Bluetooth > Manager. Tap and hold an active connection icon or list name, and tap Status. -
Page 124: Deleting A Shortcut
Tap a Service Selection (Generic Serial, OBEX File Transfer, or Network Access) and tap Next. When you have successfully created a connection shortcut, tap Finish. To open the new shortcut connection: • On My Shortcuts screen, tap and hold the new connection shortcut icon and tap Connect. - Page 125 10 Using the Camera Features NOTE: Camera features are included on certain HP iPAQ models. The camera features of the HP iPAQ allow you to turn your HP iPAQ into a mobile digital imaging center. You can share images through e-mail or the Web, or print from your HP iPAQ using Bluetooth.
-
Page 126: Camera Components
Camera Components On the back of the HP iPAQ are camera components that assist you in taking photos: LED adds light to close-up photos taken within two feet of the camera. Press the LED toggle on/off button on the camera screen to turn the LED on or off. -
Page 127: Taking A Photo
Taking a Photo When you launch HP Photosmart, the camera screen above appears. The camera icons displayed on the screen are explained in the table below. HP Photosmart Icons Definition Tap to access the camera settings. Tap to review images. - Page 128 To take a photo: From the Start menu, tap Programs > HP Photosmart. Locate the camera lens on the back of the HP iPAQ and frame the subject to be photographed in the digital viewfinder located on the HP iPAQ screen.
-
Page 129: Ending Your Photo Session
Taking a Video Clip From the Start menu, tap Programs > HP Photosmart. Locate the camera lens on the back of the HP iPAQ and frame the subject to be photographed in the digital viewfinder located on the HP Photosmart screen. -
Page 130: White Balance
Choose the photo quality from three compressions for the photos you snap. Higher-quality photos look better, especially at greater magnification. Lower-quality photos require less storage space on your HP iPAQ, and may take less time when sending by e-mail or infrared. -
Page 131: Flicker Filter
Fluorescent light bulbs flicker due to the alternating current. The electronic shutter on the HP iPAQ is not immune to this flickering, though the human eye is. The Flicker Filter setting is used to filter out the flickering or banding caused by fluorescent lighting. -
Page 132: Configuring File Settings
Configuring File Settings The file settings menu allows you to specify how images are named and stored on your HP iPAQ. Using the File tab settings, you can change the filename prefix of images you capture and adjust the image counter. -
Page 133: Using Hp Image Zone
View a slideshow. • Print photos. NOTE: You can find more information on using HP Image Zone in the Help files. Tap Start > Help > HP Image Zone. When you launch HP Image Zone, the following icons are displayed on the bottom of the screen. -
Page 134: Viewing Thumbnail Photos
Tap OK. HP Image Zone now displays the photos from the new file folder you selected. NOTE: To view all photos in HP Image Zone, be sure to move your scroll bar at the bottom of the screen all the way to the left and then to the right. -
Page 135: Viewing A Slideshow
Tap the Record button on the Recording toolbar. Speak into the microphone or record the sound. Tap the Stop button on the Recording toolbar when you are finished. Tap the Cassette icon on the menu bar to close the Recording toolbar. To change audio settings: In the Command bar, tap Tools >... -
Page 136: E-Mailing A Picture
Printing Photos You can print photos from HP Image Zone using a storage card, or you can use Bluetooth to print your photos if you have access to a Bluetooth- enabled printer. To print a photo from a storage card, remove the storage card from the HP iPAQ and insert into a supported printer. -
Page 137: Exiting Hp Image Zone
Exiting HP Image Zone To exit from HP Image Zone, from the Command Bar, • tap File > Exit. To minimize HP Image Zone, tap the X in the upper right corner of • the screen. HP Image Transfer Using the HP Image Transfer software and Microsoft ActiveSync version 3.8, you can automatically transfer photos and videos from your... - Page 138 For example, you can configure the images to be transferred to a subfolder with the same name as the folder on your HP iPAQ. If you are transferring images Using the Camera Features 10–14...
-
Page 139: Tips For Taking Better Pictures
NOTE: Settings on the HP iPAQ Image Transfer screen can only be changed while your HP iPAQ is connected to your desktop computer. If your HP iPAQ is not connected, you are notified that settings cannot be changed and are currently inaccessible. -
Page 140: Expansion Cards
NOTE: Expansion cards must be purchased separately and are not included with your HP iPAQ. Your HP iPAQ includes slots for an SDIO card and a mini-SD card on the right side of the device. The SDIO card slot can be used with various types of data cards and provides data exchange functionality such as Wi-Fi. -
Page 141: Installing A Secure Digital (Sd) Expansion Card
To install an SD, SDIO, or a mini-SD expansion card into the expansion slots on the HP iPAQ: Locate the two slots on the right side of the HP iPAQ. Insert the expansion card into the appropriate expansion slot and push the connection edge of the card firmly into the expansion slot until you hear a double click. -
Page 142: Removing A Secure Digital (Sd) Expansion Card
Removing a Secure Digital (SD) Expansion Card CAUTION: SD cards must first be unlocked before removal. To remove an SD expansion card from the expansion slots on the HP iPAQ: Close all applications that are using the expansion card. Remove the card from the expansion slot by slightly pushing down on the card 1 to eject it. -
Page 143: Understanding Messaging
Additional accounts can be set up on your HP iPAQ such as a Post Office Protocol 3 (POP3) or an Internet Message Access Protocol 4 (IMAP4) account. -
Page 144: Synchronizing Inbox
If you use IMAP4, the folders you create and the e-mail messages you move are mirrored on the server. Therefore, messages are available to you anytime you connect to your mail server, whether it is from your HP iPAQ or personal computer. This folder synchronization occurs whenever you connect to your mail server, create new folders, or rename/delete folders when connected. -
Page 145: Setting Up Messaging Accounts
Instead, they are sent to your HP iPAQ via your mobile phone service provider. Setting Up Messaging Accounts To set up an account on your HP iPAQ, you will create and connect to an e-mail account as well as select specific options, depending on the type of account you create. -
Page 146: Deleting An Account
Connections that use SSL allow you to send personal information safely. • To save memory, limit the number of e-mails downloaded to your HP iPAQ by lowering the number of days to display them. You can increase this number as well. Deleting an Account To delete an account: From the Start menu, tap Accounts >... -
Page 147: Receiving Attachments
Tap Accounts > Disconnect to disconnect. Once you set up your accounts, use ActiveSync to synchronize your Outlook e-mail by using a direct connection to the HP iPAQ Cradle. For more information on synchronizing using a direct connection, refer to Chapter 3, in the section ”Installing ActiveSync and Synchronizing with... -
Page 148: Text Messaging
The response will be sent the next time that you synchronize or connect to your e-mail server, and your HP iPAQ Calendar will be updated. Creating or Changing a Signature To create or change an account signature: From the Start menu, tap Messaging >... -
Page 149: Multimedia Messaging Service (Mms)
When the phone radio is turned on for the first time, the GSM/GPRS Manager application detects the mobile phone service provider and automatically populates the MMS settings on the HP iPAQ. For more information on changing settings in the GSM/GPRS Manager, refer to Chapter 5, in the section ”Modifying the GSM/GPRS Network Settings.”... -
Page 150: Replying To Or Forwarding A Message
When you receive text messages, the e-mail icon displays in the Navigation bar and the message displays on the HP iPAQ screen. If the HP iPAQ is turned off (or not currently being used), the message is stored in the Text Messaging Inbox folder. Using Messaging... -
Page 151: Sending Mms Messages
You can select to Reply, Call, Delete or Close the message after reading it. NOTE: The e-mail icon also notifies you of e-mail and MMS messages as well. Sending MMS Messages You may see the following icons displayed on the MMS Composer screens: Icon Definition... - Page 152 Creating MMS Slides To create an MMS slide: From the Start menu, tap Messaging > Accounts > MMS > New. In the Choose A MMS screen, tap the Message Type icon to create a new MMS message. Use Custom to create your own message or select from the default message list.
-
Page 153: Viewing Mms Messages
From the Start menu, tap Messaging > Accounts. Tap the account you want to use (marked by a bullet) and tap Connect. The messages on your HP iPAQ and e-mail server are synchronized: new messages are downloaded to the HP iPAQ Inbox folder, Using Messaging 12–11... - Page 154 HP iPAQ Outbox folder are sent, and messages that have been deleted from the server are removed from the HP iPAQ Inbox. Tap a message in the message list to open it. If you read a message and decided you need the full copy, tap Edit >...
-
Page 155: Managing The Battery
Your HP iPAQ is shipped with the rechargeable battery partially charged. It is recommended that you fully charge the HP iPAQ battery before setting up the unit, and recharge regularly. Your HP iPAQ uses some power to maintain files in RAM and the clock. While working at your desk, keep the HP iPAQ and AC Adapter connected through the HP iPAQ Cradle. -
Page 156: Inserting The Battery
Inserting the Battery To insert the removable/rechargeable battery in the HP iPAQ hw6500 Mobile Messenger series: First remove the battery cover of the device by pressing down on the battery cover latch 1 and sliding the cover down 2 and off of the device. -
Page 157: Removing The Battery
Removing the Battery CAUTION: Before removing the battery, use iPAQ Backup or ActiveSync to back up data on your HP iPAQ. If you need to clear the memory during the removal process, you will be able to restore the data. To prevent losing information, you can also copy user-installed applications to the iPAQ File Store folder. -
Page 158: Charging The Battery
CAUTION: Because most of the applications and data you install on your HP iPAQ are held in memory (RAM), you will need to reinstall them if the battery completely discharges or if the battery is removed from the unit for more than 15 minutes. Otherwise, when fully charged, the internal backup battery will save the user installed data for up to 15 minutes when the standard battery is removed. -
Page 159: Charging With The Ac Adapter
Charging with the AC Adapter The standard AC Adapter works in a standard electrical outlet. You can also charge your HP iPAQ in your automobile with an automobile adapter that works in your vehicle’s electrical cigarette lighter or a 12-volt power outlet. -
Page 160: Charging With The Hp Ipaq Cradle And Ac Adapter
Plug the AC Adapter into an electrical outlet 1 and connect the other end of the AC Adapter to the AC connector on the cradle 2. Slide the bottom of your HP iPAQ into the cradle 3 and push firmly to seat it. -
Page 161: Changing The Backlight Settings
NOTE: HP recommends that you power off your HP iPAQ while using the USB charging feature. If your HP iPAQ is powered on, your device will consume more current than is being supplied by the USB charging and the main battery will not be charged. During this state, the charging LED will not light since it is not charging. -
Page 162: Disabling The Application Buttons
From the TodayPanel on the Today screen, tap the Battery icon > • Advanced tab to set the HP iPAQ to turn off after a short time if it is not being used. For information on the TodayPanel, refer to the question “How Do I Use the TodayPanel to Monitor My System... -
Page 163: Checking Your Battery
HP iPAQ to AC power using the cradle or the AC adapter or insert a fully charged battery into the HP iPAQ. When the HP iPAQ turns off (due to low battery level) and does not turn on again, you have only up to 72 hours to recharge the battery before you lose data. - Page 164 CAUTION: Do not allow the battery installed in your HP iPAQ to discharge completely. Doing so will not harm your HP iPAQ or battery, but your device will lose all data not stored in File Store (ROM). Discharging the battery completely is similar to performing a hard reset.
-
Page 165: Self-Test Diagnostics
Tap No to skip the log file output. Common Problems To receive support from a qualified technical support specialist, visit the HP support Web site at www.hp.com/support. To find information on the support Web site for your specific product, be sure to have your model or product name available. - Page 166 • Be sure the HP iPAQ battery is charged. screen. • Be sure the HP iPAQ is connected to the AC Adapter and the HP iPAQ Cradle. • Reset the device by using the stylus to lightly press the Reset button.
- Page 167 • Check to see if your wireless application is turned on and you are Messaging, receiving a wireless signal. I receive an error or • Check to see if your SIM card is inserted in your HP iPAQ. the application • Limit the number of e-mail services you create. hangs.
- Page 168 Check My Documents, which is the default save location used to sent to me by receive files. another device. Try resetting your HP iPAQ. Refer to the information on Resetting Screen freezes, responds slowly, or the Unit in Chapter 1, “Getting to Know Your HP iPAQ Mobile...
-
Page 169: Activesync
HP iPAQ Cradle. to it. • Be sure your HP iPAQ is connected to the HP iPAQ Cradle, and that the cradle is connected to your computer. • Be sure your HP iPAQ is securely seated in the cradle and is making contact with the cradle connector. - Page 170 (continued) Problem Solution I cannot open e-mail Use Microsoft ActiveSync to synchronize your HP iPAQ with your in the Inbox after I computer. For more information, refer to the “Synchronizing with Your restore using Computer” section in Chapter 3, “Using ActiveSync.”...
-
Page 171: Phone
Solution Phone will not turn on. • Check to see if your SIM card is inserted in the HP iPAQ. • Be sure the battery in your HP iPAQ is charged. • If the HP iPAQ is powering on and the phone still does not turn on, contact your mobile phone service provider for help. -
Page 172: Expansion Cards
• Be sure any third party drivers are installed. • Reset the device by using the stylus to lightly press the Reset button on the bottom of the HP iPAQ. I cannot insert • Be sure the label is facing the front of the unit. -
Page 173: Bluetooth
I can see other • Be sure Bluetooth is turned on. HP iPAQs, but I • Be sure your device has been set up to allow other devices to cannot connect or connect and your service settings are enabled. -
Page 174: Gps Navigation
• If you recently lost power to your HP iPAQ or performed a hard I launch it. reset, and you did not back up your software before either of these situations occurred, your map was deleted unless it was copied to a memory card or to iPAQ File Store folder. -
Page 175: A Regulatory Notices Federal Communications Commission Notice
Regulatory Notices Federal Communications Commission Notice This equipment has been tested and found to comply with the limits for a Class B digital device, pursuant to Part 15 of the FCC Rules. These limits are designed to provide reasonable protection against harmful interference in a residential installation. -
Page 176: Canadian Notice
Low Voltage Directive 73/23/EEC • EMC Directive 89/336/EEC NOTE: CE Compliance of this product is valid only if powered with the correct HP-provided and CE marked AC adapter. If this product has telecommunication functionality, it also complies with the essential requirements of: •... -
Page 177: Notice For Italy For Use Of 2.4 Ghz Wireless Communication
Airline Travel Notice Turn off your HP iPAQ before boarding any aircraft. Federal Aviation Administration (FAA) regulations require you to have permission from a crew member to use the phone features on your HP iPAQ while the plane Regulatory Notices A–3... -
Page 178: Medical Electronic Equipment
Frequency (RF) regulations prohibit using the phone features on your HP iPAQ while the plane is in the air. Use it on the ground only with crew permission. Use of the HP iPAQ features other than the phone is at the discretion of the airline. -
Page 179: Canadian Regulatory Wireless Notice
This equipment under test has been shown to be capable of compliance for localized Specific Absorption Rate (SAR) for uncontrolled environment/ general population exposure limits specified in ANSI/IEEE Standard C95.1-1992 and had been tested in accordance with measurement procedures specified in FCC/OET Bulletin 65 Supplement C (2001) and IEEE Standard 1528-200X (Draft 6.5, January 2002). -
Page 180: Taiwanese Wireless Notice
• It is advised that a handheld microphone or telephone handset should not be used by the driver while the vehicle is moving, except in an emergency. Speak only into a fixed, neck slung or clipped-on microphone when it would not distract your attention from the road. •... -
Page 181: Battery Warning
Environmental Notices Battery Warning Because of the type of battery used in your HP iPAQ, follow local regulations regarding the safe disposal of the battery. Your vendor can advise you on local regulations, and/or the existence of any battery disposal programs in operation. -
Page 182: Bortskaffelse Af Brugt Udstyr Hos Brugere I Private Hjem I Eu
Bortskaffelse af brugt udstyr hos brugere i private hjem i EU Dette symbol på produktet eller på emballagen angiver, at dette produkt ikke må bortskaffes sammen med det øvrige husholdningsaffald. I stedet er det dit ansvar at bortskaffe dit brugte udstyr ved at aflevere det ved et autoriseret indsamlingssted med henblik på... -
Page 183: Élimination Des Appareils Mis Au Rebut Par Les Ménages Dans L'union Européenne
Élimination des appareils mis au rebut par les ménages dans l'Union européenne Le symbole apposé sur ce produit ou sur son emballage indique que ce produit ne doit pas être jeté avec les déchets ménagers ordinaires. Il est de votre responsabilité de mettre au rebut vos appareils en les déposant dans les centres de collecte publique désignés pour le recyclage des équipements électriques et électroniques. -
Page 184: Készülékek Magánháztartásban Történ Selejtezése Az Európai Unió Területén
Készülékek magánháztartásban történ selejtezése az Európai Unió területén A készüléken, illetve a készülék csomagolásán látható azonos szimbólum annak jelzésére szolgál, hogy a készülék a selejtezés során az egyéb háztartási hulladéktól eltér módon kezelend . A vásárló a hulladékká vált készüléket köteles a kijelölt gy jt helyre szállítani az elektromos és elektronikai készülékek újrahasznosítása céljából. -
Page 185: Nolietotu Iek Rtu Izn Cin Šanas Noteikumi Lietot Jiem Eiropas Savien Bas Priv Taj S M Jsaimniec B S
Nolietotu iek rtu izn cin šanas noteikumi lietot jiem Eiropas Savien bas priv taj s m jsaimniec b s Š ds simbols uz izstr d juma vai uz t iesai ojuma nor da, ka šo izstr d jumu nedr kst izmest kop ar citiem sadz ves atkritumiem. -
Page 186: Pozbywanie Siê Zu Ytego Sprzêtu Przez U Ytkowników W Prywatnych Gospodarstwach Domowych W Unii Europejskiej
Pozbywanie siê zu ytego sprzêtu przez u ytkowników w prywatnych gospodarstwach domowych w Unii Europejskiej Ten symbol na produkcie lub jego opakowaniu oznacza, e produktu nie wolno wyrzucać do zwykłych pojemników na mieci. Obowiézkiem u ytkownika jest przekazanie zu ytego sprzêtu do wyznaczonego punktu zbiórki w celu recyklingu odpadów powstałych ze sprzêtu elektrycznego i elektronicznego. -
Page 187: Odstranjevanje Odslužene Opreme Uporabnikov V Zasebnih
Odstranjevanje odslužene opreme uporabnikov v zasebnih gospodinjstvih v Evropski uniji Ta znak na izdelku ali njegovi embalaži pomeni, da izdelka ne smete odvreči med gospodinjske odpadke. Nasprotno, odsluženo opremo morate predati na zbirališče, pooblaščeno za recikliranje odslužene električne in elektronske opreme. Ločeno zbiranje in recikliranje odslužene opreme prispeva k ohranjanju naravnih virov in zagotavlja recikliranje te opreme na zdravju in okolju neškodljiv način. -
Page 188: System Specifications
Specifications System Specifications System Feature Description Processor Intel® PXA272 Processor 312MHz Operating System Windows Mobile™ 2003 Second Edition software for Pocket PC - Phone Edition SDRAM 64MB SDRAM 64MB Flash ROM Memory up to 55MB user available memory (of which 12MB is iPAQ File Store) External Power 10 watt maximum output AC Adapter, cord length (approx.) 6 ft. - Page 189 Infrared (IrDA) Serial IrDA SIR, data transfer up to 115.2 Kb per second, USB 1.1 Client - support via HP standard 22-pin cradle interface Serial RS232 - supported via HP standard 22-pin cable interface (cable to be purchased separately) SIM Card...
-
Page 190: Physical Specifications
System Feature Description LED Indicators: Charge and • Flashing green indicates your HP iPAQ is in a mobile phone Notification LED coverage area. • Flashing amber indicates an event notification on your HP iPAQ. • Solid amber indicates unit is charging. -
Page 191: Operating Environment
Operating Environment Environment Metric Temperature Operating 32° to 104° F 0° to 40° C Nonoperating -4° to 140° F -20° to 60° C Relative Humidity Operating up to 90% up to 90% Nonoperating up to 90% up to 90% Maximum Altitude Operating 15,000 ft 4,572 m... - Page 192 378871-031...