
Subscribe to Our Youtube Channel
Related Manuals for Hunter Beck 50655


Summary of Contents for Hunter Beck 50655
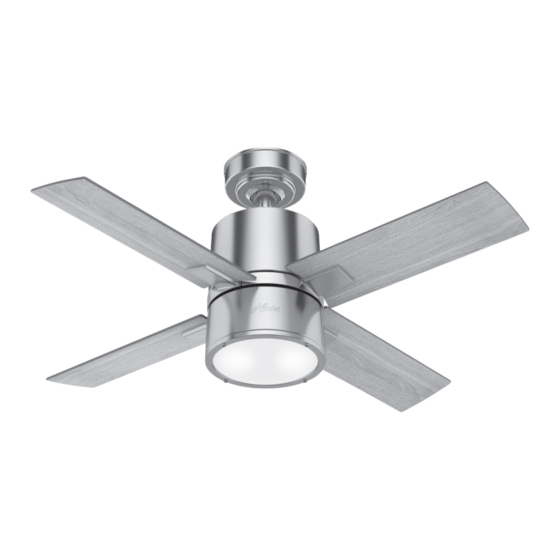
- Page 1 Beck Installation Manual Manual de instalación Installationhandbuch Manuel d’installation Manuale di installazione Εγχειρίδιο εγκατάστασης Kurma klavuzu Buku petunjuk instalasi Manual de Instalação #50655 8.4kg ±1kg ©2019 Hunter Fan Co. MB545 r092019...
- Page 2 This manual will help you install, operate, and maintain your new fan. These instructions are designed to make installation and assembly as simple and efficient as possible. Important Instructions: Keep Instructions for future use English WARNING! Be sure to read the entire manual before beginning installation and save any extra parts for future use. The mounting of the suspension system shall be performed by the manufacturer, its service agent, or suitably qualified persons.
- Page 3 Αυτό το εγχειρίδιο θα σας βοηθήσει να εγκαταστήσετε, να χειρίζεστε και να συντηρείτε τον καινούριο σας ανεμιστήρα. Οι παρούσες οδηγίες είναι σχεδιασμένες να απλοποιούν και να βελτιστοποιούν κατά το δυνατό την εγκατάσταση και τη συναρμολόγηση. Ελληνικά Σημαντικές οδηγίες: Φυλάξτε τις οδηγίες για μελλοντική χρήση ΠΡΟΕΙΔΟΠΟΙΗΣΗ! Βεβαιωθείτε...
- Page 4 2,6 m ,76 m 2,3 m STANDARD MOUNTING Standard Mounting is the most common way to mount a ceiling fan. Fan Mounting Options Blades must be more than 2.3m from the floor There are different ways to mount your ceiling fan, depending on your needs and the style of your ceiling.
- Page 5 < 34º ANGLED MOUNTING Angle Mounting is especially useful for vaulted or angled ceilings. If angle mounting, orient the ceiling plate with the arrows pointing toward the ceiling peak. MONTAJE EN ÁNGULO El montaje en ángulo es especialmente útil para techos abovedados o Si está...
- Page 6 POWER BUMPERS Turn Power OFF Make sure all four (4) bumpers are still attached. ENERGÍA TOPES La energía DESCONECTE Asegúrese de que los cuatro (4) topes estén aún acoplados. STROM PUFFER Schalten Sie den Strom Stellen Sie sicher, dass alle (4) Dämpfer nach wie vor befestigt sind. ALIMENTATION AMORTISSEURS COUPER l’électricité.
- Page 7 FOR CONCRETE CEILINGS If you have a concrete ceiling, follow steps 1-4 before proceeding to Identify the supply mains in the ceiling and drill two holes using the page 12. If you have a non-concrete ceiling, follow steps 5-8 before ceiling plate (A) as a guide for measurement and accuracy.
- Page 8 FOR CONCRETE CEILINGS Drive the M6 x 50 mm expansion anchors (A) into the holes Thread the supply mains (A) through the center hole of the until there is only approximately 10 mm of exposed anchor. ceiling plate (B). PARA UN TECHO DE CONCRETO: 3DVH©...
- Page 9 FOR CONCRETE CEILINGS $ O L J Q © W K H © $ Q F K R U© E RO W V © $ © Z L W K © W K H © R Y D O © V O R W V © L Q © W K H © F H L O L Q J © S O D W H © & © 3 XV K © W K H © & H L O L Q J © 3 O D W H © R Q W R © W K H ©...
- Page 10 FOR NON-CONCRETE CEILINGS 3ODFH© D © ¾ D W© Z D VKHU© β $ ς © R Q© E RWK© R I© W KH© Z R RG© V FUHZ V © β % ς ί© 'ULO O © W Z R © S L O R W © K R O H V © L Q W R © W K H © Z R RG© V X S S R UW © V W U XFW X UH © X V L Q J © W K H © ceiling plate (A) as a guide for measurement and accuracy.
- Page 11 FOR NON-CONCRETE CEILINGS Thread the supply mains (A)through the center hole of the 5DLV H © W K H © F H L O L Q J © S O D W H © $ © D Q G © D O L J Q © W Z R © R S S R V L Q J © R Y D O © V O R W V © Z L W K © ceiling plate (B).
- Page 12 WARNING! 7 R © U HGX F H© W K H © U LVN© R I© I LUH© H OHFWULFDO© V K R FN© R U© P RWRU© G DPDJH© G R© Q R W© O LIW© R U© F DUU\ © W K H © I DQ © E \ © W K H © O HDG© Z LUHV© 7 R © S UHYHQ W © G DPDJH© W R© W K H © ZLUHV©...
- Page 13 6O L GH © W K H © G RZ Q U RG© V O H H Y H © $ © X S © W K H © G RZ Q U RG© , Q V H U W © W K H © 5H P RY H ©...
- Page 14 6O L G H © W K H © G R Z Q U R G © E D O O © $ © X S © W K H © O H Q J W K © R I © W K H © G R Z Q U R G © , Q V H U W ©...
- Page 15 + D Q G © W L J K W H Q © W K H © G R Z Q U R G © D W © O H D V W © õ © I X O O © W X U Q V © X Q W L O © L W © DO NOT HAND TIGHTEN.
- Page 16 '2« 1 27« 3 , & . « 7 + ( « ) $ 1 « 8 3« % < « 7 + ( « & $ 1 23< « 2 5« : , 5 (6« 3X W © W K H © Z L U H V © D Q G © G R Z Q U R G © W K U R X J K © W K H © F D Q R S \ © / H W © W K H © F D Q R S \ © 3O D FH ©...
- Page 17 DOWNROD INSTRUCTIONS Shorter Downrod (A) for fans installed close to ceiling (Included) If you need a different downrod length follow these steps: Standard Downrod (B) for ceilings 2,4-3 m (8-10’) high (Included) 6 W HSV© õ © W R© U HDVVHPEOH© Z LWK © n ew pipe Longer Downrod (C) for angled ceilings or ceilings 3 m (10’) or higher (Sold Separately) INSTRUCCIONES PARA EL TUBO...
- Page 18 WARNING! 7R © D YRLG © S RVVLEOH © H OHFWULF © V K R FN © E HIRUH © Z LUL Q J © W K H © I D Q © G LVFR Q Q H FW © S RZHU © E \ © W X U Q L Q J © R II © W K H © F LUF X L W © E UHDNHUV © W R © E RW K © W K H © R X W OHW © E R [ © D Q G © L WV © D VVRFLDWHG © ZDOO ©...
- Page 19 WIRING 3X O O © W K H © V X S S O \ © P DL Q V © $ © W K U RX J K © W K H © V L G H © R I © W K H © K D Q J H U © E UDF N H W © 7K L V ©...
- Page 20 WIRING (DUWK© Z L UH© β $ ς © β JUHHQρ\ H OORZ ς © W R© W HUPLQDO© β % ς © P DUNHG© © © © © © © © © © ί © © 1HXWUDO© Z L UH© β $ ς © β EOXHς© W R© W HUPLQDO© β % ς © P DUNHG© ύ 1ύί (DUWK©...
- Page 21 WIRING / L Q H © Z L UH © $ © EURZ Q © W R © W H U PLQ D O © % © P DUN H G © / $ Q © D GGLW L RQ D O © ± / ² © W H U PLQ D O © L V © S U RY L GH G © I RU© V H S D UDW H © F RQ W U RO © R I© the light kit if a separate line is provided for that purpose.
- Page 22 WIRING 0DN H © Z L UH © F RQ Q H F W L RQ V © X V L Q J © W K H © õ S L Q © S O X J V © F RPLQ J © I URP© W K H © 3O D FH ©...
- Page 23 CANOPY WARNING! % H © V X U H© Q R © E DUH© Z LUH© R U© Z LUH© V WUDQ G V© D UH© Y LVLEOH© D IWHU© 3RV L W L RQ © W K H © F DQ R S \ © V R © W K D W © Z K H Q © O L IW H G © L Q W R © S O D FH © W K H © PDNLQ J ©...
- Page 24 / L IW © W K H © F DQ R S \ © L Q W R © S O D FH © V R © W K D W © W K H © V F UH Z © K R O H V $ © D UH © ,QVHUW©...
- Page 25 BLADES / L J K W O \ © D W W D F K © W K H © E O D G H © D U PV © W R © W K H © P RW R U© Z L W K © V F U H Z V © 3XW ©...
- Page 26 )H H G © W K H © õ S L Q © S O X J © F RQ Q H F W R U© F RPLQ J © I URP© W K H © E RW W R P© R I© 3D U W L D O O \ ©...
Need help?
Do you have a question about the Beck 50655 and is the answer not in the manual?
Questions and answers