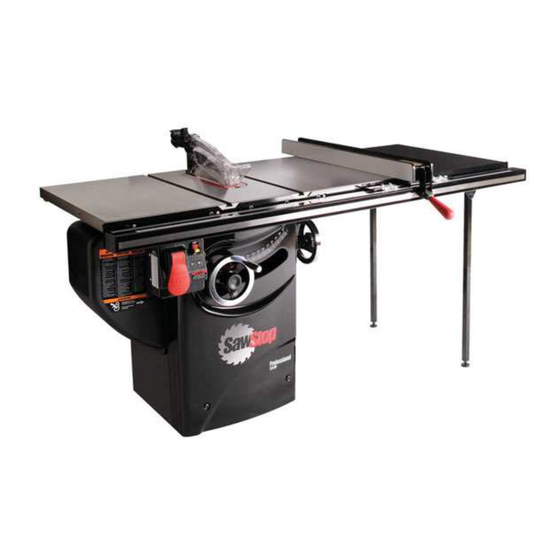
SawStop PCS31230 Owner's Manual
10” professional cabinet saw
Hide thumbs
Also See for PCS31230:
- Owner's manual (123 pages) ,
- Service procedure (3 pages) ,
- Service procedure (4 pages)

Subscribe to Our Youtube Channel
Related Manuals for SawStop PCS31230


Summary of Contents for SawStop PCS31230
- Page 1 SawStop ® 10” PROFESSIONAL CABINET SAW ™ OWNER’S MANUAL Models PCS31230, PCS31230-AU...
- Page 2 Table of Contents SawStop ®...
- Page 3 Table of Contents SawStop ®...
- Page 4 Table of Contents...
-
Page 5: No Warranty Of Safety
Warranty No Warranty of Safety does not prevent contact If You Have an Accident... - Page 6 Safety You are responsible for your own safety! WARNINGS WARNING:...
- Page 7 WARNINGS...
-
Page 8: Warning Labels
Warning Labels WARNING To avoid loss of SawStop protection during coast down, do not turn off Main Power until blade has stopped spinning. WARNING WARNING For your own safety, 1. Use the blade guard and spreader for every read the instruction manual operation for which it can be used. -
Page 9: The Sawstop Safety System
® The SawStop Safety System ® SawStop ® SawStop ® SawStop Brake Cartridge ® ® SawStop... - Page 10 ® The SawStop Safety System ® SawStop ® SawStop ® Do not SawStop ® SawStop ® SawStop ® SawStop Do not ® SawStop ® SawStop Never ® SawStop Never ® SawStop Never stack dado blades thicker than inch Do not use molding heads Never use a blade with damaged or missing teeth ®...
- Page 11 ® The SawStop Safety System Blades with depth-limiting shoulders Do not use non-conductive blades Do not ® SawStop Do not ® ® SawStop SawStop Never Never Do not Do not ® Never SawStop Never...
-
Page 12: Unpacking Your Saw
Washers, Screws, Washers, M6 (2) OWNER’S MANUAL Lock Washers, M6 (2) M6 x 12 (2) M6 (2) Model PCS31230 Switch Box Keys (2) Blade Spacing Motor Adjustment Gauge (1) Cover Hex Key, M8 (1) Hex Keys: M3 (1), M4 (1), M5 (1), M6 (1) - Page 13 Unpacking Your Saw dust port (attached to the end of the flexible hose inside of the saw) switch box assembly (connected to the saw by electrical cables) motor cover IN G us e d ca it in e wi ct an uc h ca n er at...
-
Page 14: Standing Up Your Saw
Standing Up Your Saw... - Page 15 Standing Up Your Saw If you have a Professional Cabinet Saw Mobile Base ...
-
Page 16: Assembling Your Saw
Assembling Your Saw Installing the Handwheels Mounting the Dust Port Mounting Hardware for Steps 2-3 Hardware for Step 4 Keys, Set Screws, Button Head Screws, Lock Washers, Motor 5 x 5 x 25 (2) M6 x 8 (2) M5 x 3 x 15 (3) M5 (3) Cover Hardware for Step 5... - Page 17 Assembling Your Saw Installing the Handwheels Mounting the Dust Port Mounting Hardware for Steps 2-3 Hardware for Step 4 Keys, Set Screws, Button Head Screws, Lock Washers, Motor 5 x 5 x 25 (2) M6 x 8 (2) M5 x 3 x 15 (3) M5 (3) Cover Hardware for Step 5...
- Page 18 Assembling Your Saw Installing the Handwheels Mounting the Dust Port Mounting Hardware for Steps 2-3 Hardware for Step 4 handwheel Keys, Set Screws, Button Head Screws, Lock Washers, Motor 5 x 5 x 25 (2) M6 x 8 (2) M5 x 3 x 15 (3) M5 (3) Cover Hardware for Step 5...
- Page 19 Assembling Your Saw Installing the Handwheels Mounting the Dust Port Mounting Hardware for Steps 2-3 Hardware for Step 4 Keys, Set Screws, Button Head Screws, Lock Washers, Motor 5 x 5 x 25 (2) M6 x 8 (2) M5 x 3 x 15 (3) M5 (3) Cover Hardware for Step 5...
- Page 20 Assembling Your Saw Installing the Handwheels Mounting the Dust Port Mounting Hardware for Steps 2-3 Hardware for Step 4 Keys, Set Screws, Button Head Screws, Lock Washers, Motor 5 x 5 x 25 (2) M6 x 8 (2) M5 x 3 x 15 (3) M5 (3) Cover Hardware for Step 5...
- Page 21 Assembling Your Saw Installing the Handwheels Mounting the Dust Port Mounting Hardware for Steps 2-3 Hardware for Step 4 Keys, Set Screws, Button Head Screws, Lock Washers, Motor 5 x 5 x 25 (2) M6 x 8 (2) M5 x 3 x 15 (3) M5 (3) Cover Hardware for Step 5...
- Page 22 Assembling Your Saw holes Installing the Handwheels Mounting the Dust Port Mounting Hardware for Steps 2-3 Hardware for Step 4 Keys, Set Screws, Button Head Screws, Lock Washers, Motor 5 x 5 x 25 (2) M6 x 8 (2) M5 x 3 x 15 (3) M5 (3) Cover Hardware for Step 5...
- Page 23 Assembling Your Saw Installing the Handwheels Mounting the Dust Port Mounting Hardware for Steps 2-3 Hardware for Step 4 Keys, Set Screws, Button Head Screws, Lock Washers, Motor 5 x 5 x 25 (2) M6 x 8 (2) M5 x 3 x 15 (3) M5 (3) Cover Hardware for Step 5...
- Page 24 Assembling Your Saw wood stop...
- Page 25 Assembling Your Saw wood stop Congratulations, your saw is now assembled. Note...
-
Page 26: Get To Know Your Saw
Get to Know Your Saw External Components... - Page 27 Get to Know Your Saw Internal Components...
-
Page 28: Preparing Your Saw For Use
Preparing Your Saw for Use WARNING! power cord before removing or installing the table insert on your saw. WARNING! Never operate the saw without the table insert in place. CAUTION! Do not use table inserts with metal or other electrically-conductive parts that could contact the blade. - Page 29 WARNING! Do not attempt to use saw blades made of materials that are electrically non-conductive (e.g., abrasive blades, blades with plastic hubs, etc.). The SawStop ® safety system will not allow the saw to operate if these blades are installed.
- Page 30 Preparing Your Saw for Use WARNING! before removing, installing, or adjusting the brake cartridge on your saw. Therefore, always check the spacing between the blade and the bolt...
- Page 31 Preparing Your Saw for Use...
- Page 32 Preparing Your Saw for Use ® SawStop WARNING! before removing or installing the blade guard or riving knife on your saw. WARNING! Use the blade guard and spreader for every operation for which it can be used, including all through-sawing.
- Page 33 Preparing Your Saw for Use Note Note...
- Page 34 Preparing Your Saw for Use ® SawStop ® SawStop Woodshop Dust Control WARNING! Some types of dust created by sawing, power sanding, grinding, drilling, and other construction activities contain chemicals known to cause cancer, birth defects or other reproductive toxicity or harm. Some examples of these chemicals are lead from lead-based paints, crystalline silica from bricks, cement, and other masonry products, and arsenic and chromium from chemically treated lumber.
- Page 35 Preparing Your Saw for Use WARNING! Do not connect the saw to electrical power until the saw is completely assembled and you have read and understood this entire manual. 3 hp page WARNING! This saw must be connected to a grounded wiring system, or to a system having an equipment- grounding conductor.
- Page 36 Preparing Your Saw for Use WARNING! WARNING! Make sure the saw is unplugged from the wall outlet before proceeding with the following instructions.
- Page 37 Preparing Your Saw for Use...
- Page 38 Preparing Your Saw for Use cable...
- Page 39 Preparing Your Saw for Use THERMAL CIRCUIT BREAKER GROUND Green White Black CONTACTOR COIL COIL Green CONTACTOR BOX POWER MOTOR SWITCHBOX CABLE CABLE CABLE...
-
Page 40: Using Your Saw
Using Your Saw table top to 3 handwheel CAUTION! When adjusting the height or tilt angle of the blade, reverse the handwheel slightly to release tension after reaching the limit stops. This prevents any slight twisting tilt scale handwheel... - Page 41 Using Your Saw ® ® SawStop SawStop WARNING! Never start the saw when the blade is in contact with the workpiece or any other object. “OFF” “ON” ® SawStop “READY” paddle...
- Page 42 Using Your Saw...
- Page 43 Using Your Saw SawStop System Status Codes Status System Initializing ¯ ¯ ¯ System Ready Replace Cartridge • • • • • • Coasting Down Bypass Mode On ¯ ¯ ¯ Push Start/Stop • • • • • • • • • • • •...
- Page 44 Using Your Saw Replace Cartridge Coasting Down ALWAYS MAKE SURE THE BLADE HAS COME TO A COMPLETE STOP AND THE COAST DOWN STATUS CODE HAS CLEARED BEFORE TOUCHING THE BLADE! Bypass Mode ON will not Push the Start/Stop Paddle to OFF Turn Cartridge Key to ON No Blade Rotation —...
- Page 45 Using Your Saw Contact Detected During Bypass Material Conductivity Test Overload Due to Wet Wood Note...
- Page 46 Using Your Saw ® SawStop on page shell pawl catch pawl WARNING! Use the blade guard for every operation for which it can be used, including all through-sawing.
- Page 47 Using Your Saw...
- Page 48 Using Your Saw...
- Page 49 Using Your Saw on page 32 WARNING! Use the riving knife for every operation where the blade guard cannot be used. Neither the blade guard nor the riving knife can be used when making dado cuts.
- Page 50 Using Your Saw see page head WARNING! Never make freehand cuts. Never hold or touch an unsupported piece of wood while the blade is spinning.
- Page 51 Using Your Saw WARNING! To reduce the potential for kickback and a serious injury, move the rip fence out of contact with the workpiece when cross-cutting to prevent the workpiece from binding between the rip fence and the blade.
- Page 52 Using Your Saw ® SawStop ® SawStop...
- Page 53 Using Your Saw WARNING! A rip fence must always be used when making rip cuts. Never perform a ripping operation freehand or a serious injury may result.
- Page 54 Using Your Saw to table push stick should be stored here...
- Page 55 Using Your Saw WARNING! To reduce the chance of a serious injury, always use a push stick or push block when your hand comes within 6 inches of the blade.
- Page 56 Using Your Saw Note: The saw will not start in Bypass Mode unless the brake cartridge is properly installed and all error codes are cleared. It is not possible to “override” an error by starting the saw in Bypass Mode. Note: to prevent unauthorized use of the saw in Bypass Mode, remove the Bypass Key from the saw when not in use.
- Page 57 Using Your Saw ® SawStop ® SawStop ® SawStop ® SawStop ® SawStop ® SawStop ® ® SawStop SawStop ® SawStop...
- Page 58 Using Your Saw ® ® SawStop SawStop ® SawStop hole pawl hole WARNING! Never drop or otherwise subject a brake cartridge to misuse as this may damage the brake cartridge and potentially cause the brake pawl to be released unexpectedly and result in a serious injury.
- Page 59 Using Your Saw WARNING! cord before removing or installing the brake cartridge on your saw.
- Page 60 Using Your Saw Do not place the wrench against the dust shroud because the dust shroud could break.
- Page 61 Using Your Saw WARNING! cord before removing or installing the brake cartridge on your saw. on page 30 WARNING! Always check, and if necessary, adjust the position of the brake after changing the brake cartridge or the blade. An improperly positioned brake could increase the time required to stop the blade in the event of accidental contact, or cause the brake to actuate unexpectedly if the blade comes into contact with the brake.
-
Page 62: What To Do If The Sawstop Safety System Activates
What to do if the SawStop Safety System Activates SawStop SawStop If the brake activated due to accidental contact between the blade and an operator, please return the cartridge to SawStop. WARNING! the power cord before replacing the brake cartridge on your saw. -
Page 63: Making Adjustments To Your Saw
Making Adjustments to Your Saw WARNING! the power cord before making any adjustments to your saw. steel plate... - Page 64 Making Adjustments to Your Saw...
- Page 65 Making Adjustments to Your Saw...
- Page 66 Making Adjustments to Your Saw plate of the blade rather than the tooth.)
- Page 67 Making Adjustments to Your Saw ® SawStop WARNING! the power cord before making any adjustments to your saw. NOTICE! This alignment procedure is not intuitive. Make sure you read this entire procedure before beginning and follow each step precisely. Any deviation from this procedure may create a substantial misalignment in your saw.
- Page 68 Making Adjustments to Your Saw bolt bolt...
- Page 69 Making Adjustments to Your Saw but in the opposite direction For example: if the measurement taken at 45° was +0.006 inch, then the misalignment at 0° should be adjusted to ( - 2.4) (0.006) = - 0.014 inch...
- Page 70 Making Adjustments to Your Saw WARNING! the power cord before making any adjustments to your saw. ® SawStop plate...
- Page 71 Making Adjustments to Your Saw bolt...
- Page 72 Making Adjustments to Your Saw WARNING! the power cord before making any adjustments to your saw. than 3...
- Page 73 Making Adjustments to Your Saw WARNING! the power cord before making any adjustments to your saw.
- Page 74 Making Adjustments to Your Saw...
- Page 75 Making Adjustments to Your Saw ® SawStop As shown WARNING! the power cord before making any adjustments to your saw.
- Page 76 Making Adjustments to Your Saw ledge ledge...
- Page 77 Making Adjustments to Your Saw WARNING! switch and unplug the power cord before making any adjustments to your saw. bolts...
- Page 78 Making Adjustments to Your Saw WARNING! Make sure there is at least 4 mm spacing between the riving knife and blade at all points. Contact between the blade and either the riving knife or spreader during operation may cause the brake system to be activated. between WARNING! the power cord before making any adjustments to your saw.
- Page 79 Making Adjustments to Your Saw...
- Page 80 Making Adjustments to Your Saw WARNING! the power cord before making any adjustments to your saw. with the table wood stop...
- Page 81 Making Adjustments to Your Saw loosen the two bolts that attach the blade loosen these two bolts...
- Page 82 Making Adjustments to Your Saw WARNING! the power cord before making any adjustments to your saw. bolt WARNING! It is important to maintain the correct clamping pressure on the riving knife and spreader. If the pressure is too low these important safety devices may not function properly and a serious injury could result.
- Page 83 Making Adjustments to Your Saw...
- Page 84 Making Adjustments to Your Saw WARNING! switch and unplug the power cord before making any adjustments to your saw. loosen these bolts WARNING! switch and unplug the power cord before loosen these two bolts making any adjustments to your saw. sector gear worm...
- Page 85 Making Adjustments to Your Saw WARNING! the power cord before making any adjustments to your saw. loosen these bolts threaded...
-
Page 86: Maintenance
Maintenance WARNING! the power cord before doing any maintenance on your saw. WARNING! Do not use a brake cartridge if more than a small amount of dust can be seen inside the clear housing. If sawdust becomes packed inside the housing, the brake may fail to activate or may activate more slowly, thereby resulting in a serious personal injury. - Page 87 Maintenance...
-
Page 88: Troubleshooting
Troubleshooting Problem Possible Cause(s) Solution... - Page 89 Troubleshooting Problem Possible Cause(s) Solution See pages 30 and...
- Page 90 Troubleshooting Problem Possible Cause(s) Solution...
- Page 91 33” d ” d ” ” ” ” ” ” ” deep PCS31230-AU...
-
Page 92: Professional Cabinet Saw Dimensions
2" 11 1/4" 8 3/4" 8 1/2" SawStop, the SawStop blade logo, and the configuration of this product are either registered trademarks or trademarks of SawStop, LLC. Software copyright by SawStop, LLC. All rights reserved. Protected by one or more of the following U.S. - Page 93 Professional Cabinet Saw Dimensions 29" 27" 25 7/8" 17 5/8" 9 3/8" 1 1/8" 19 3/4" 10 1/2" 6 1/2" 19 3/4" 19 1/4" 30"...
-
Page 94: Push Stick Construction
Push Stick Construction 1 1/2" 1/2"... -
Page 95: Auxiliary Fence Construction
Auxiliary Fence Construction 24" 2” (3/4” thick) 24" 5 1/2” (1/2” thick) -
Page 96: Push Block Construction
Push Block Construction 4 3/4" 5" 2" 1/2” 1/2" radius 2" 9” 9” (1/2” thick) 1/2” (1/2” thick) 3 1/2" 2" 2" 5 1/4" (3/4” thick) -
Page 97: Featherboard Construction
Featherboard Construction 4" 1/4" 1/8" 7 3/4" 24" 60°... -
Page 98: Cabinet And Table Exploded View
Cabinet and Table Exploded View ¯ ¯ ¯ • • • • • • ¯ ¯ ¯ • • • • • • • • • • • • ¯ ¯ ¯ • • • • • • ¯ ¯ ¯... -
Page 99: Cabinet And Table Parts List
Cabinet and Table Parts List PCS-001 PCS-002 PCS-003 PCS-010 PCS-013 PCS-020 PCS-021 PCS-022 PCS-023 PCS-030 PCS-031 PCS-032 PCS-033... - Page 100 Cabinet and Table Parts List...
-
Page 102: Internal Assembly Exploded View
Internal Assembly Exploded View 41 42... -
Page 103: Internal Assembly Parts List
Internal Assembly Parts List PCS31230-AU PCS-100 PCS-101 PCS-102 PCS-103 PCS-110 PCS-111... - Page 104 Internal Assembly Parts List PCS-120 PCS-121 PCS-122 PCS-123 PCS-130 PCS-131 PCS-132 PCS-133...
- Page 105 Internal Assembly Parts List...
-
Page 107: Arbor Assembly Parts List
Arbor Assembly Parts List PCS-200 PCS-201 PCS-202 PCS-203 PCS-210... - Page 108 Arbor Assembly Parts List PCS-211 PCS-212 PCS-213...
- Page 110 Blade Guard and Miter Gauge Exploded View...
-
Page 111: Blade Guard And Miter Gauge Parts List
Blade Guard and Miter Gauge Parts List PCS-220 PCS-221 PCS-222 PCS-223... -
Page 112: Literature, Hardware And Tools Parts List
Styrofoam Hardware for Step 8 OWNER’S MANUAL the edge of the table Fig. 1 top piece of Styrofoam should overhang the Models PCS31230, PCS175 Blade edge of the Styrofoam Wrench Fig. 2 Holder use the table and the... - Page 113 Accessories ® SawStop PCS-220...
- Page 114 Index...
- Page 115 Index...
- Page 116 Index...
- Page 117 Index...
- Page 118 Index...
- Page 119 Index ®...
Need help?
Do you have a question about the PCS31230 and is the answer not in the manual?
Questions and answers