Advertisement
Quick Links
Posh Solus
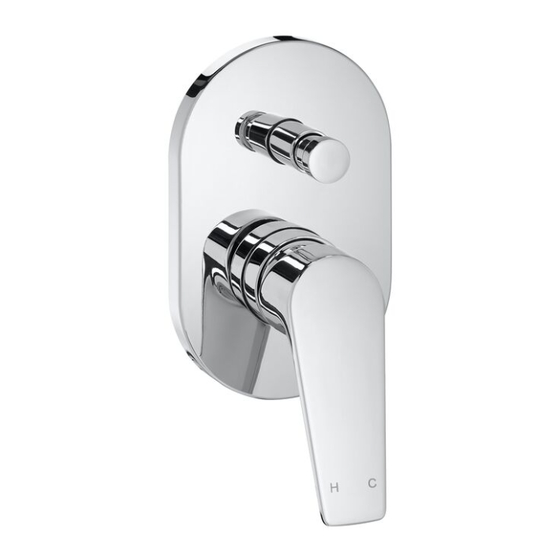
Posh Solus Mk3 Shower Bath Mixer (4*)
Posh Solus
Mixer must be installed to the requirements of AS/NZS 3500 by a qualified plumber. Your mixer comes to you
already factory assembled and tested. We do not recommend the dismantling of any internal part of the mixer.
IMPORTANT NOTE:
IMPORTANT NOTE:
The mixers are factory tested and sealed so as to give the best performance.
Mixer must be installed to the requirements of AS/NZS 3500 by a qualified plumber. Your mixer comes to
Mixer must be installed to the requirements of AS/NZS 3500 by a qualified plumber. Your mixer comes to
Installer is responsible for ensuring water connections to the mixer body are watertight.
you already factory assembled and tested. We do not recommend the dismantling of any internal part of the
you already factory assembled and tested. We do not recommend the dismantling of any internal part of the
mixer. The mixers are factory tested and sealed so as to give the best performance.
INSTALLATION REQUIREMENTS:
mixer. The mixers are factory tested and sealed so as to give the best performance.
1. Flush out new pipe work prior to connecting the new mixer.
INSTALLATION INSTRUCTIONS:
2. Mixer body (8) must be installed onto a noggin or mounting plate in the wall and be fixed using suitable
INSTALLATION INSTRUCTIONS:
mounting screws (not supplied). Provisions must be made by the installer to ensure the mixer body (8) is
1. Flush out new pipe work prior to connecting the new mixer
1. Flush out new pipe work prior to connecting the new mixer
mounted vertically level.
2. All mixers should be installed with isolating stop cocks (Arco).
3. Hot water supply must be connected to the 'HOT' marked inlet and the cold-water supply must be connec-
2. All mixers should be installed with isolating stop cocks (Arco).
ted to the 'COLD' marked inlet.
3. In some areas where the incoming water exceeds 500kpa, an approved pressure limiting device must
3. In some areas where the incoming water exceeds 500kpa, an approved pressure limiting device must
be installed. Equal pressure for hot and cold water supply is required.
4. Shower connection must be made with outlet marked with a shower symbol and bath connection must be
be installed. Equal pressure for hot and cold water supply is required.
made with outlet marked with a bath symbol (refer to exploded diagram).
4. Mixers are recommended for use on mains pressure and instantaneous systems only.
4. Mixers are recommended for use on mains pressure and instantaneous systems only.
5. Cover plate (2) is designed to sit flush when the mixer body is installed to a level finish wall.
5. When installing the mixer make sure that the cap and handle (1) are removed with the
6. After the cover plate (2) has been fitted, assemble the handle (1) using a 1.5 mm Allen key and fit the diverter
5. When installing the mixer make sure that the cap and handle (1) are removed with the
shower diverter cover plate (2).
(6) to the diverter socket
shower diverter cover plate (2).
6.
In a typical installation, the mixer is mounted on a timber/ metal noggin and secured with saddles.
NOTE:
6.
In a typical installation, the mixer is mounted on a timber/ metal noggin and secured with saddles.
Note: arrow stamped on the outlet must face up toward shower. If the mixer is to be used as a bath
Note: arrow stamped on the outlet must face up toward shower. If the mixer is to be used as a bath
•
Mixer must be installed only with pressurised hot water storage and instantaneous water systems
mixer, the pipe will need to be looped to go to the bath outlet.
mixer, the pipe will need to be looped to go to the bath outlet.
only
7. Connect mixer to hot and cold water supply.
7. Connect mixer to hot and cold water supply.
•
Tile dome and diverter tile plug must only be removed when it's time to fit the cover plate, handle
and diverter
8. Connect to bath and shower supply.
8. Connect to bath and shower supply.
9. Pressure check all connections. Leaking joints are not covered by the warranty.
SERVICING - REPLACEMENT OF CARTRIDGE:
9. Pressure check all connections. Leaking joints are not covered by the warranty.
1. Disassemble the handle (1) from the mixer body by removing the locking grub screw cap and unscrewing
10. When ready for finishing, remove the plastic cover and reassemble handle and cap (1).
10. When ready for finishing, remove the plastic cover and reassemble handle and cap (1).
the locking grub screw with a 1.5 mm Allen key.
2. Unscrew the cartridge dome (3) and use a wrench to unscrew the cartridge locknut (4).
NOTE: Do not over tighten hose tail into the mixer
NOTE: Do not over tighten hose tail into the mixer
3. Remove and replace the mixer cartridge (5). Reassemble the locknut (4), cartridge dome (3) and handle
Do not twist hose braiding to tighten hoses
Do not twist hose braiding to tighten hoses
assembly (1).
Do not use Teflon tape or thread locking compounding on any of the threaded
Do not use Teflon tape or thread locking compounding on any of the threaded
4. Test reassembled mixer for leaks.
connections
connections
CLEANING RECOMMENDATIONS
SERVICING - REPLACEMENT OF CARTRIDGE:
SERVICING - REPLACEMENT OF CARTRIDGE:
We recommend the use of soapy water or approved cleaners.
1. Call the plumber, preferably the one that installed the mixer (most problems are caused by supply
1. Call the plumber, preferably the one that installed the mixer (most problems are caused by supply
This product should not be cleaned with abrasive materials.
lines not being cleaned out properly prior to mixer installation). Remove indicator cap (1) and unscrew
lines not being cleaned out properly prior to mixer installation). Remove indicator cap (1) and unscrew
Damage caused by any improper treatment is not covered by the product warranty - refer to Warranty Condi-
the locking screw.
the locking screw.
tions.
2. Lift off lever (1) and remove dress ring and locking nut (3 & 4).
2. Lift off lever (1) and remove dress ring and locking nut (3 & 4).
Please ensure a copy of the installation instructions is left with the end user for future reference.
3. Lift out cartridge (5) and replace with new, making sure the two lugs on bottom of the cartridge sit
3. Lift out cartridge (5) and replace with new, making sure the two lugs on bottom of the cartridge sit
properly into the allocated holes at the base of the body (8).
properly into the allocated holes at the base of the body (8).
CLEANING RECOMMENDATIONS
CLEANING RECOMMENDATIONS
We recommend the use of soapy water or approved cleaners.
We recommend the use of soapy water or approved cleaners.
This product should not be cleaned with abrasive materials.
This product should not be cleaned with abrasive materials.
Damage caused by any improper treatment is not covered by the product warranty - refer to Warranty Conditions
Damage caused by any improper treatment is not covered by the product warranty - refer to Warranty Conditions
Please ensure a copy of the installation
Please ensure a copy of the installation
instructions is left with the end user for future reference
instructions is left with the end user for future reference
Mk3 Shower Bath
Mk3 Shower Bath
Installation Instructions
Installation Instructions
Mixer
Mixer
Advertisement

Related Manuals for Reece Posh Solus Mk3 9508810


Summary of Contents for Reece Posh Solus Mk3 9508810
- Page 1 Installation Instructions Installation Instructions Posh Solus Mixer Posh Solus Mk3 Shower Bath Mixer (4*) Mk3 Shower Bath Posh Solus Mixer Mk3 Shower Bath Mixer must be installed to the requirements of AS/NZS 3500 by a qualified plumber. Your mixer comes to you already factory assembled and tested.
- Page 2 Installation Instructions Posh Solus Mixer Mk3 Shower Bath EXPLODED DIAGRAM: Number Part Code Handle complete 2250686 Cover plate 2250689 Cartridge dome Cartridge locknut Cartridge 2250688 Diverter assembly 2250690 Cartridge sleeve Mixer body Max. 49 Min. 27 Rp 1/2” Rp 1/2” Rp 1/2”...
Need help?
Do you have a question about the Posh Solus Mk3 9508810 and is the answer not in the manual?
Questions and answers