Advertisement
Quick Links
k. screen Contour in PET Installation Instructions
k. screen Contour in PET Installation:
Contour in PET screens are available with various screen configurations and five different mounting bracket options. This guide has five sections, providing
instruction for the five bracket types.
Economy Undermount (Pg. 2)
Economy Clampmount (Pg. 4)
Premium Edgemount (Pg. 6)
Premium Undermount (Pg. 10)
Premium Clampmount (Pg. 13)
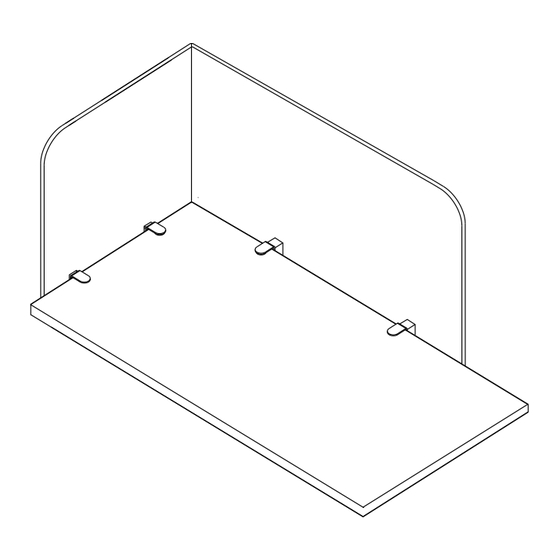
Appendix A provides bracket location dimensions for the various types of screens shown below (Pg. 16). Bracket location dimensions for Radiused Surround
Screens depend upon the width of the Top. Be sure to reference the correct table in Appendix A.
Radiused Surround Screen
J-Shaped Screen
Rectangular Surround Screen
L-Shaped Screen
DISASSEMBLY FOR RECYCLING
Materials Identification and Segregation:
Where possible plastic components are marked with ASTM recycling codes. Use these codes to identify material type for recycling. Non-marked components
should be treated as mixed plastic. Ferrous metals can be identified using a small magnet for recycling. Non-ferrous metals should be separated and recycled
separately.
To disassemble product, reverse the above installation steps
Part Number: 3AJ9036
© Knoll 2022
Page 1 of 18
Advertisement

Related Manuals for Knoll k. screen Contour in PET


Summary of Contents for Knoll k. screen Contour in PET
- Page 1 Contour in PET Installation Instructions k. screen Contour in PET Installation: Contour in PET screens are available with various screen configurations and five different mounting bracket options. This guide has five sections, providing instruction for the five bracket types.
- Page 2 Contour in PET Installation Instructions k. screen Contour in PET Installation All PET Screens with Economy Undermount Brackets, KSUJEU__ KSULEU__ KSJEU__ KSLEU__ Parts List Tools Needed: Tape Measure and pencil Power Driver with #2 Phillips Bit #8 x 1” Type #10-24 x 3/8”...
- Page 3 Contour in PET Installation Instructions PET Screens with Economy Undermount Brackets Installation, continued Economy Undermount Installation Fig. 3 Panel Preparation 5. On the exterior of the PET panel, Insert an Outer Bracket (A) into each rectangular bracket slot, oriented so the holes are in the upper por- tion of the slot.
- Page 4 Contour in PET Installation Instructions k. screen Contour in PET Installation All PET Screens with Economy Clampmount Brackets, KSUJEC__ KSULEC__ KSJEC__ KSLEC__ Parts List Tools Needed: #2 Phillips Screwdriver #2 Phillips hex bit Right-angle hex bit ratchet Outer Clamp...
- Page 5 Contour in PET Installation Instructions PET Screens with Economy Clampmount Brackets Installation, continued Attach Panel to the Top 4. With all the clamp brackets (D) attached to the panel, place the panel onto the worksurface by resting the top flange of each clamp bracket atop the worksurface (Fig.
- Page 6 Contour in PET Installation Instructions k. screen Contour in PET Installation All PET Screens with Premium Edgemount Brackets, KSUJPE__ KSULPE__ KSJPE__ KSLPE__ Parts List Tools Needed: Tape Measure and pencil Installation Guide Drill 9/64” Drill Bit #2 Phillips Screwdriver #3 Phillips Screwdriver 1/16”...
- Page 7 Contour in PET Installation Instructions PET Screens with Premium Edgemount Brackets Installation, continued Attach Brackets to Top 2. Pre-drill the marked hole locations with a 9/64” drill bit. This step must not be skipped, regardless of edgebanding material. Note: veneer edgebanding will split if not pre-drilled appropriately.
- Page 8 Contour in PET Installation Instructions PET Screens with Premium Edgemount Brackets Installation, continued Panel Preparation 4. On the exterior of the PET panel, Insert an Outer Bracket (A) into each rectangular bracket slot (Fig. 3). Warning: Do not use impact driver to tighten machine screws in Step 5.
- Page 9 Contour in PET Installation Instructions PET Screens with Premium Edgemount Brackets Installation, continued 7. Install the Cap (I) into the recess atop each Fig. 5 bracket (Fig. 5). Fig. 6 8. Install (1) 6-32 x 1/4” Extended Tip Set Screw (G) within each Desk Bracket (C/D), below the worksurface, to secure the screen’s position.
- Page 10 Contour in PET Installation Instructions k. screen Contour in PET Installation All PET Screens with Premium Undermount Brackets, KSUJPU__ KSULPU__ KSJPU__ KSLPU__ Tools Needed: Parts List Tape Measure and pencil Power Driver with #2 Phillips Bit #2 Phillips Screwdriver 1/16”...
- Page 11 Contour in PET Installation Instructions PET Screens with Premium Undermount Brackets Installation, continued Panel Preparation 4. On the exterior of the PET panel, Insert an Outer Bracket (A) into each rectangular bracket slot (Fig. 3). Fig. 3 Warning: Do not use impact driver to tighten machine screws in Step 5.
- Page 12 Contour in PET Installation Instructions PET Screens with Premium Undermount Brackets Installation, continued 7. Install the Cap (H) into the recess atop each Fig. 5 bracket (Fig. 5). Fig. 6 8. Install (1) 6-32 x 1/4” Extended Tip Set Screw (G) within each Desk Bracket (C/D), below the worksurface, to secure the screen’s position...
- Page 13 Contour in PET Installation Instructions k. screen Contour in PET Installation All PET Screens with Premium Clampmount Brackets, KSUJPC__ KSULPC__ KSJPC__ KSLPC__ Tools Needed: #2 Phillips Screwdriver Parts List 1/16” Allen Wrench Outer Inner Bracket (B) 3/8” Side Bracket (C) 1¼”...
- Page 14 Contour in PET Installation Instructions PET Screens with Premium Clampmount Brackets Installation, Continued Panel Preparation 3. On the exterior of the PET panel, Insert an Fig. 3 Outer Bracket (A) into each rectangular bracket slot. Warning: Do not use impact driver to tighten ma- chine screws in Step 4.
- Page 15 Contour in PET Installation Instructions PET Screens with Premium Clampmount Brackets Installation, Continued Attach Panel to the Top 7. With all the clamp brackets (C/D) attached to Fig. 6 the panel, place the panel onto the worksurface by resting the top flange of each clamp bracket atop the worksurface (Fig.
- Page 16 Contour in PET Installation Instructions k. screen Contour in PET Installation : Appendix A Bracket Locations: (From Edge to Centerline of Bracket) 3 rd (when required) 10.5 L-Shape Screens and J-Shape Screens Back Side Measurements may be from either corner 16.5...
- Page 17 Contour in PET Installation Instructions k. screen Contour in PET Installation: Appendix A, continued Bracket Locations: (From Edge to Centerline of Bracket) Radiused Surround Screens 10.0 Check 10.0 Dim. For Antenna Radius Corner HAT tops, or other 3" Radius Corner tops that measure 45, 51, 57, 63, 69, or 75 inches wide.
- Page 18 Contour in PET Installation Instructions k. screen Contour in PET Installation: Appendix A, continued Bracket Locations: (From Edge to Centerline of Bracket) Radiused Surround Screens 11.0 Check For Benching HAT tops used on HAT Bases, or other 3" Radius 11.0...
Need help?
Do you have a question about the k. screen Contour in PET and is the answer not in the manual?
Questions and answers