Table of Contents
Advertisement
Available languages
Available languages
Quick Links
Advertisement
Chapters
Table of Contents

Subscribe to Our Youtube Channel
Related Manuals for Man LEDD 2

Summary of Contents for Man LEDD 2
-
Page 1: Betriebsanleitung Nr. Um0972104, A
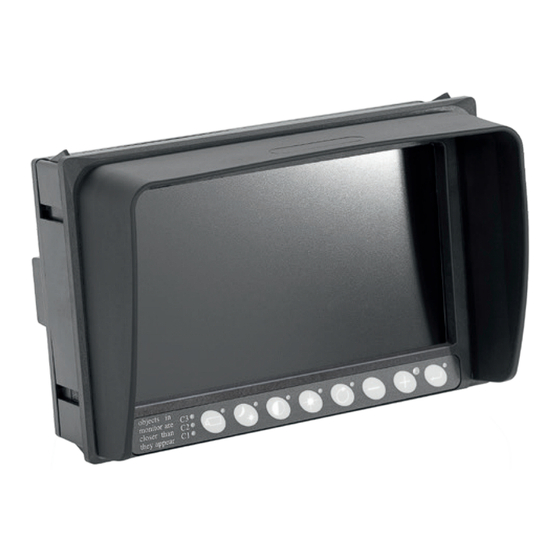
ZSB Monitor LEDD 2 Betriebsanleitung Handbuch Nr. UM0972104 A 02 Deutsch Art.-Nr: 0209430 User manual Manual No. UM0972104 A 02 English Art. No: 0209430 1/2021 MAN Original Zubehör MAN Genuine Accessories... -
Page 2: Table Of Contents
Inhalt/Einleitung Betriebsanleitung Deutsch: Siehe Seite 2 - 24. ZSB Monitor LEDD 2 English: Siehe Seite 25 - 47. Betriebsanleitung Nr. UM0972104, A 01 Inhalt Seite 1. Kurzreferenz 2. Erste Schritte 2.1. Haftungsausschluss 2.2. Beschreibung der Tastatur 2.3. Spracheinstellung für das Bildschirmmenü (OSD) 3. - Page 3 Monitor 7” LEDD 4.1.13. Kameratyp 4.1.14. Video Stndrd 4.1.15. Beleuchtung 4.1.16. Kein Luxwert (Zero Lux) 4.1.17. Stabilisator 4.1.18. Color LUT (Farbwertetabelle) 4.1.19. TIC DDE (TIC digitale Detailverbesserung) 4.1.20. Spot meter (Objektmessung) 4.1.21. Schwenken/Neigen 4.1.22. PIP/Split Screen* * Nur für Orlaco Monitore mit 4.2.
-
Page 4: Verwendete Abkürzungen
Einleitung Erkundigen Sie sich bei Orlaco, welche Sprachversionen zur Verfügung stehen. Diese Betriebsanleitung enthält Anleitungen für Benutzer. Die verwendeten Fotos und Illustrationen enthalten allgemeine Informationen und können von den Produkten, die Sie verwenden, abweichen. Wenden Sie sich bitte an Ihren Orlaco-Händler, falls Sie Fragen haben, weitere Informationen wünschen oder Änderungen vornehmen wollen, die in dieser Betriebsanleitung nicht beschrieben sind. - Page 5 Artikelnummern ORLACO Monitor 7” Diese Gebrauchsanweisung enthält Informationen zu den Betriebs- anleitungen der folgenden ORLACO- Artikelnummern. Die Artikel- nummern finden Sie auf dem Etikett auf der Rückseite der Monitore. LEDD 0209430 Rückseite Monitor 7” LEDD Details der Version Version A 01. Erstausgabe, Januar 2021. Version A 02.
-
Page 6: Kurzreferenz
1. Kurzreferenz Tastatur Nachfolgend sind die Tastenfunktionen kurz beschrieben. Für eine ausführliche Erläuterung siehe Ab- schnitte 3 und 4. Taste 1 Taste 3 Taste 5 Taste 7 Plus + Auswäh- Kamera- Option/vorheri- Kontrast auswahl ges Menü len/Einstellen objects objects monitor are monitor are closer than closer than... - Page 7 Tasten 3 und 4, Einstellen der Farbsättigung Drücken Sie gleichzeitig die Kontrast- (3) und Helligkeitstaste (4), um den Einstellmodus zu aktivieren. Stellen Sie die gewünschte Farbsättigung mit Taste den Minus- und Plus-Tasten ein. Diese Einstellung muss für jede Kamera 3 + 4 Taste einzeln vorgenommen werden.
-
Page 8: Erste Schritte
2. Erste Schritte 2.1. Haftungsausschluss objects in objects in monitor are monitor are closer than closer than they appear they appear Beim erstmaligen Einschalten des Monitors wird fünf Sekunden Tasten 1 2 3 4 5 6 7 8 lang ein Hinweis in englischer Sprache angezeigt (siehe Abbil- dung 1). -
Page 9: Tastatur
3. Tastatur Przycisk 3.1. Taste 1, Kameraauswahl objects in monitor are closer than they appear Drücken Sie einmal die Kameraauswahl-Taste (1) (siehe Abbildung 2). Tasten 1 2 3 4 5 6 7 8 Die Kamera-LED blinkt und zeigt damit an, dass die manuelle Ka- meraauswahl aktiviert ist (siehe Abbildung 3). -
Page 10: Taste 3, Einstellen Des Kontrasts
Taste Taste 3. Tastatur 3.3. Taste 3, Einstellen des Kontrasts objects in monitor are closer than they appear Zum Aktivieren des Einstellmodus (siehe Abbildung 7) drücken Sie Taste Tasten 1 2 3 4 5 6 7 8 Taste einmal die Kontrasttaste (3). Stellen Sie den gewünschten Kontrast Taste mit der Minus- und Plus-Taste ein. -
Page 11: Schnelleinstellungen
3. Tastatur 3.8. Schnelleinstellungen Im Normalbildmodus stehen folgende Schnelleinstellungen als Kurzbefehle zur Verfügung: 3.8.1. TIC-Kamera Wenn eine TIC-Kamera ausgewählt ist und Taste 2 (Abbildung 12) gedrückt wird, sind die Schnelleinstellungen für Farb-LUT und DDE aktiviert (angezeigt durch eine leuchtende Taste 2). Mit der Minus- taste (Taste 6) können die Einstellungen für die Farb-LUT (WHO, Abbildung 10 BHO, FUS, RB, I&F) ausgewählt werden (siehe Abbildung 11). -
Page 12: Verwenden Des Service-Menüs
4. Service-Menü Taste 4. Verwenden des Service-Menüs objects in objects in monitor are monitor are closer than closer than they appear they appear Zum Öffnen des Service-Menüs drücken Sie gleichzeitig die Kame- Tasten 1 2 3 4 5 6 7 8 raauswahltaste (1), die Minus-Taste (6) und die Plus-Taste (7) (siehe Abbildung 13). -
Page 13: Vertikale Markierungslinie (Vert. Mark.)
4. Service-Menü 4.1.9. Vertikale Markierungslinie (Vert. Mark.) Aktivieren Sie diese Option, um eine Referenzlinie anzuzeigen. Die Referenzlinie wird als vertikale grüne Linie angezeigt. Diese Option ist nicht bei allen RLED/LEDD-Modellen vorhanden. Siehe Abbil- dung 40 auf Seite 20. 4.1.10. Linienposition (Pos. Mark.) Stellt die vertikale Position der Referenzlinie ein. -
Page 14: Stabilisator
4. Service-Menü 4.1.17. Stabilisator Diese Option aktiviert die Stabilisatorfunktion, wenn die Kamera eine solche Funktion hat. Diese Option steht nur zur Verfügung, wenn eine AFZ-Kamera mit einem seriellen 7“-RLED/LEDD-Display verbunden ist. 4.1.18. Color LUT (Farbwertetabelle) Als Kameratyp muss TIC festgelegt sein. Wählen Sie die Farben- Abbildung 19 palette, die zur farblichen Darstellung der Temperaturen verwendet werden soll. -
Page 15: Kamera- Identifiz. (Kameraetiketten)
4. Service-Menü 4.2. Kamera- Identifiz. (Kameraetiketten) Siehe Abbildung 20. In diesem Menü können Namen für die Kame- raeingänge vergeben werden. Siehe Abbildung 21. Die Zahl der Eingänge hängt von dem eingestellten Videoschalter- typ ab (siehe Abschnitt 4.3.8. auf Seite 18). 4.3. -
Page 16: Tastatur
4. Service-Menü 4.3.3. Tastatur Dieser Menüpunkt öffnet das Tastaturmenü. Siehe Abbildung 26. Dieses Menü hat folgende drei Menüpunkte: Tastatursperre Dieser Menüpunkt öffnet das Einstellungsmenü für die Tastatur- sperre. Es ist möglich, verschiedene Funktionen zu sperren, um unerwünschte Änderungen zu verhindern. Siehe Abbildung 27. Abbildung 26 Standby-Menü: Wenn aktiviert, kann der Monitor kann nicht in den Stand-... -
Page 17: Lcd-Rücklicht (Lcd-Hintergrundbeleuchtung)
4. Service-Menü CAN-Geschwindigkeit Mit dieser Option wird die Bitrate des CAN-Bus ausgewählt. Die möglichen Optionen sind: 100, 125, 200, 250, 500 und 1000 kBit. CAN-ID einstellen Das Orlaco CAN-Protokoll besitzt eine ID (standardmäßig 0), um mehrere Monitore über einen CAN-Bus zu steuern. Diese ID ist nicht aktiv, wenn der Text blau angezeigt wird, und wird aktiv, wenn das Protokoll auf 1 eingestellt wird. -
Page 18: Scannen
4. Service-Menü 4.3.7. Scannen Diese Option öffnet das Untermenü „Kamera-Scannen“. Siehe Abbildung 31. Dieses Menü hat folgende Menüpunkte: Scan-Abfolge (Scan-Sequenz) Diese Option dient zur Auswahl der Kameras, deren Bilder der Reihe nach angezeigt werden. Abbildung 31 Scan-Intervall Mit dieser Option wird ausgewählt, wie lange ein Kamerabild angezeigt werden soll. -
Page 19: Konfiguration Externer Geräte
5. Bedienermenü Taste 4.3.11. Konfiguration externer Geräte Diese Option öffnet das Konfigurationsmenü für ein externes Gerät. Verwenden Sie diese Option nur, wenn ein Gerät mit einem eigenen OSD (Multiview, Spectrum Scanner, etc.) angeschlossen ist. Zum Verlassen des Menüs drücken Sie drei Sekunden lang auf die Taste Optionstaste (5). -
Page 20: Kameraeinstellungen
5. Bedienermenü 5.2. Kameraeinstellungen: (siehe Abbildung 39) Horizontale Markierungslinie Aktivieren Sie diese Option, um eine Referenzlinie anzuzeigen. Die Referenzlinie wird als horizontale grüne Linie angezeigt. Siehe Abbildung 40. Linienposition Stellt die vertikale Höhe der Referenzlinie ein. Der Wert 0 ent- Abbildung 39 spricht dem oberen Rand des Monitors und 100 dem... -
Page 21: Systemübersicht
6. Systemübersicht 1 Kamerasystem RLED Serial power 2 Kamerasystem Mit Y-Weichenkabel RLED/LEDD power 2-4 camera cable UM0972104 A 02... - Page 22 6. Systemübersicht 4 Kamerasystem Mit Y-Weichenkabel RLED/LEDD power 2-4 camera cable Switcher UM0972104 A 02...
-
Page 23: Menü-Übersicht
7. Menü-Übersicht Standby menu Enter Standby menu Das Display ist eingeschaltet, aber es ist kein Bild. Standby Info Software informationen. Benutzermenü Das Benutzermenü steht durch die Tastatursperre standardmäßig nicht zur Verfügung. Minus- und Plus Tasten Bedienermenü Englisch, Niederländisch, Deutsch, Französisch, Italienisch, Tschechisch, Sprache Ungarisch, Türkisch, Polnisch, Portugiesisch, Spanisch, Schwedisch, Finnisch, Dänisch und Norwegisch. -
Page 24: Häufig Gestellte Fragen
8. Häufig gestellte Fragen 1. Einstellung des Spiegels. objects in monitor are closer than they appear • Öffnen Sie das Service-Menü durch gleichzeitiges Tasten 1 2 3 4 5 6 7 8 Drücken der 3 Tasten (Kameraauswahl, Plus und Minus). •... -
Page 25: Siehe
Contents User Manual Deutsch Siehe Seite 2 - 24 ZSB Monitor LEDD 2 English Siehe Seite 25 - 47 Manual number UM0972104, Version A 01 Contents Page 1. Quick Reference 2. Getting Started 2.1. Disclaimer 2.2. Description of the Keyboard 2.3. - Page 26 Monitor 7” LEDD 4.1.13. Camera type 4.1.14. Video stndrd 4.1.15. Backlight 4.1.16. Zero Lux 4.1.17. Stabilizer 4.1.18. Color LUT (look up table) 4.1.19. TIC DDE (TIC digital detail enhancement) 4.1.20. Spot meter 4.1.21. Pan/tilt *Only for Orlaco monitors with 4.1.22. PIP/Split Screen* split screen (SP).
-
Page 27: Used Abbreviations
Introduction Check with Orlaco which language versions are available. This manual contains user instructions. Used photographs and illustrations give general information and may differ from the products you use. Contact your Orlaco dealer if you have questions, additional information, or want to make changes that are not described in this manual. - Page 28 Article numbers ORLACO Monitor 7” This manual describes the operating instructions of the following ORLACO article numbers. The article numbers can be found on the label on the back of the Monitors. LEDD 0209430 Back side Monitor 7” LEDD UM0972104 A 02...
-
Page 29: Quick Reference
1. Quick Reference Keyboard Below is a brief description of the button functions. See sections 3 and 4 for a more detailed explanation. Button 1 Button 3 Button 5 Button 7 Plus + Camera Option/previ- Contrast selection ous menu select/setting objects monitor are closer than... - Page 30 Buttons 3 and 4, setting color saturation Press the contrast (3) and brightness (4) buttons simultaneously to enable the setting mode. Set the required color saturation using the minus and plus Button buttons. This setting must be set separately for each camera. 3 + 4 Button Button 5, option/previous menu...
-
Page 31: Getting Started
2. Getting started 2.1. Disclaimer objects in monitor are closer than they appear When switching on the monitor for the first time, a disclaimer ap- Buttons 1 2 3 4 5 6 7 8 pears in English for 5 seconds (see Figure 1). Displayed text: Do not operate display functions during safety criti- cal operations. -
Page 32: Keyboard
3. Keyboard Przycisk 3.1. Button 1, camera selection objects in monitor are closer than they appear Press the camera selection button (1) once (see Figure 2). The Buttons 1 2 3 4 5 6 7 8 camera LED flashes to indicate that manual camera selection is enabled (see Figure 3). -
Page 33: Button 3. Setting The Contrast
Button 3. Keyboard Button Button 3.3. Button 3, setting the contrast objects in monitor are closer than they appear Press the contrast button (3) once to enable the setting mode (see Buttons 1 2 3 4 5 6 7 8 Figure 7). -
Page 34: Quick Settings
3. Keyboard 3.8. Quick settings When in normal image mode, the following quick settings are avail- able as shortcuts: 3.8.1. TIC camera When a TIC camera is selected and button 2 (Figure 12) is pressed, then Color LUT and DDE quick settings are enabled (indicated by illuminated button 2). -
Page 35: Using The Service Menu
4. Service menu Button 4. Using the service menu objects in objects in monitor are monitor are closer than closer than they appear they appear To open the service menu, simultaneously press the camera selec- Buttons 1 2 3 4 5 6 7 8 tion button (1), the minus button (6) and the plus button (7) (see Figure 13). -
Page 36: Vertical Marker
4. Service menu 4.1.9. Vertical marker Enable this option to show a reference line. The reference line is displayed as a vertical green line. This option is not available on all RLED/LEDD models. See Figure 40 on page 42. 4.1.10. Marker position Adjusts the vertical position of the reference line. -
Page 37: Stabilizer
4. Service menu 4.1.17. Stabilizer This option enables the stabilizer function, if the camera has one. This option is only available if an AFZ camera is connected to a serial 7" RLED/LEDD Monitor. 4.1.18. Color LUT (look up table) The camera type must be set to TIC. Select the color palette to be used to give the correct color temperature. -
Page 38: Camera Tags
4. Service menu 4.2. Camera tags See Figure 20. In this menu, names can be given to the camera inputs. See Figure 21. The number of inputs depends on the video switch type that is set (see section 4.3.8. on page 41). 4.3. -
Page 39: Keyboard
4. Service menu 4.3.3. Keyboard This option opens the keyboard menu. See Figure 26. This menu has the following 3 options: Keyboard lock This option opens the settings menu for the keyboard lock. It is possible to lock various functions in order to prevent any unwanted changes. -
Page 40: Lcd Backlight
4. Service menu CAN speed This option selects the bit rate of the CAN bus. Available options are: 100, 125, 200, 250, 500 and 1000 kbit. Set CAN-ID The Orlaco CAN protocol has an ID (default 0) to control multiple monitors via one CAN bus. -
Page 41: Scanning
4. Service menu 4.3.7. Scanning This option opens the camera scanning submenu. See Figure 31. This menu has the following options: Scan sequence This option selects the cameras from which images are to be shown in sequence. Scan interval Figure 31 This option selects how long a camera image is displayed. -
Page 42: External Device Configuration
5. Operator menu Przycisk 4.3.11. External device configuration This option opens the configuration menu for an external device. Only use this option if a device is connected that has its own OSD (Multiview, Spectrum Scanner, etc.). Exit the menu by pressing the option button (5) for 3 seconds. -
Page 43: Camera Settings
5. Operator menu 5.2. Camera settings (see Figure 39) Horizontal line mark Enable this option to show a reference line. The reference line is displayed as a horizontal green line. See Figure 40. Line position Adjusts the vertical height of the reference line. 0 corresponds to the top edge of the monitor Figure 39 and 100 to the bottom edge. -
Page 44: System Overview
6. System overview 1 camera system RLED Serial power 2 camera system With Y-split cable RLED/LEDD power 2-4 camera cable UM0972104 A 02... - Page 45 6. System overview 4 camera system With Y-split cable RLED/LEDD power 2-4 camera cable Switcher UM0972104 A 02...
-
Page 46: Overview Of Menus
7. Overview of menus Standby menu Enter Standby menu Standby Monitor is on but there is no picture Info Software information Operator menu The operator menu is not available by default due to the keyboard lock. Minus- and Plus buttons Operator menu English, Dutch, German, Language... -
Page 47: Faq
8. FAQ 1. Mirror setting. objects in monitor are closer than they appear • Open the service menu by pressing simultaneously the 3 Buttons 1 2 3 4 5 6 7 8 buttons; camera selection, plus and minus. • Choose camera settings, and press enter. •... - Page 48 MAN Truck & Bus SE Dachauer Straße 667 80995 Munchen, Deutschland Telefon +49 89 1580-0, www.mantruckandbus.com MAN Truck & Bus - Ein Unternehmen der MAN Gruppe...
Need help?
Do you have a question about the LEDD 2 and is the answer not in the manual?
Questions and answers