Advertisement
Table of Contents
Important before assembly:
Read these instructions carefully before assembling or using the product.
Please check the contents of the boxes before attempting to assemble this product. The instructions will
have a checklist of parts and fittings.
Assemble the product as close to its intended final location/room as possible.
Health & Safety:
This product or some parts of this product will be heavy. Please use an assistant when lifting.
Please keep small parts out of reach of children.
Always use on a level, even surface.
DO NOT jump on the product or any of its parts.
DO NOT use this product if any parts are missing, damaged or worn.
DO NOT use this product unless all fixings are secured.
Further instructions are on the following pages.
Please keep these instructions for future reference.
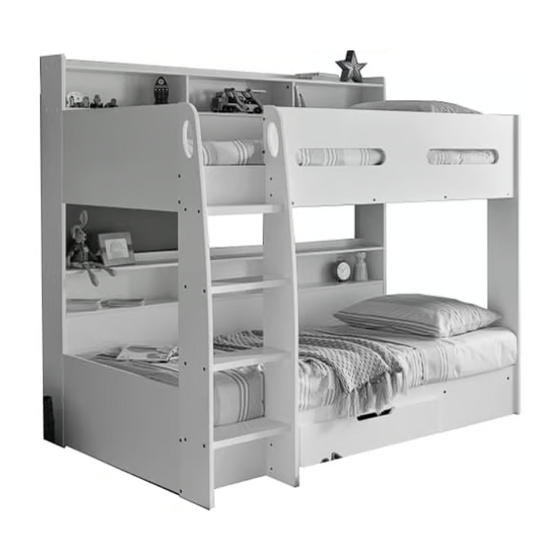
Polaris Bunk Bed
Assembly Instructions
.
.
www.happybeds.co.uk
Advertisement
Table of Contents

Related Manuals for Happybeds Polaris Bunk Bed


Summary of Contents for Happybeds Polaris Bunk Bed
- Page 1 Polaris Bunk Bed Assembly Instructions Important before assembly: Read these instructions carefully before assembling or using the product. Please check the contents of the boxes before attempting to assemble this product. The instructions will have a checklist of parts and fittings.
- Page 2 These tools are not necessary, but may help to assemble the product. Do NOT use any power tools as this may damage the frame. (Not metal) This product or some parts of this product will be heavy. Please use an assistant when lifting. Never drag or push the pieces across a hard or stone floor as this will cause damage to the joints.
-
Page 3: Part List
PART LIST Polaris Bunk Bed Carton 1 of 5 Part Name FOOTBOARD POST (LEFT) HEADBOARD POST (RIGHT) FOOTBOARD POST (LEFT) HEADBOARD POST (RIGHT) FOOTBOARD PANEL (LEFT) HEADBOARD PANEL (RIGHT) FOOTBOARD BOTTOM PANEL (LEFT) HEADBOARD BOTTOM PANEL (RIGHT) LADDER SIDE (RIGHT) - Page 4 Parts ALL PARTS ARE LABELLED WITH NUMBER ACCORDINGLY Parts (Drawers)
- Page 5 CSK C/B SCREW (M4 x 32MM) P/H RATTAN SCREW (#8 x 32MM) BED BRACKET (30 x 55 x Tl .5MM) 1 PC 62 PCS 20 PCS ® ALLEN KEY (M4 x 60MM) PY H PROFILE (3.5 x 720MM) ROUND STICKER (0.5 x 21 MM) 1 PC 82 PCS 1 PC...
- Page 7 STEP 2 DO NOT use any power tools as this may damage the bed frame and �- �-' - -�- � will invalidate any claim. Insert (F) into 01 OMM holes on Footboard Post (Left),Headboard Post (Right), Top Shelf and Bottom Shelf, tighten it up by using cross head screw driver.
- Page 8 WHEN FITTING CAMS ENSURE STARTING POSITION IS CORRECT BEFORE YOU INSERT CONNECTING BOLT 1-• TURN CLOCKWISE UNTIL SECURE. ✓ CORRECT WRONG DO NOT use any power tools as this may damage the b ed frame and will invalidate any claim. Attach and secure Divider onto Top Shelf and Bollom Shelf and insert (H),tighten it up by using a Crosshead Screw Driver.Follow it up by attaching (Q) into screw holes.
- Page 9 WHEN FITTING CAMS ENSURE STARTING POSITION IS CORRECT BEFORE YOU INSERT CONNECTING BOLT TURN CLOCKWISE UNTIL SECURE. CORRECT WRONG STEP 5 DO NOT use any power tools as this may damage the bed frame and will invalidate any claim. Attach and secure Full Guard Rail onto Bottom Shelf and insert (H), tighten it up by using a Crosshead Screw Driver.
-
Page 10: Back View
WHEN FITTING CAMS ENSURE STARTING POSITION IS CORRECT BEFORE YOU INSERT CONNECTING BOLT � TURN CLOCKWISE UNTIL SECURE. CORRECT WRONG � STEP 7 DO NOT use any power tools as this may damage the bed frame and will invalidate any claim. Attach and secure Full Guard Rail,Top Shelf, Bottom Shelf and Back �... - Page 11 STEP 8 DO NOT use any power tools as this may damage the bed frame and will invalidate any claim. Insert (L) onto Back Panel,tighten it up by using Crosshead Screw Driver.
- Page 12 WHEN FITTING CAMS ENSURE STARTING POSITION IS CORRECT BEFORE YOU INSERT CONNECTING BOLT TURN CLOCKWISE UNTIL SECURE. CORRECT WRONG STEP 9 DO NOT use any power tools as this may damage the bed frame and will invalidate any claim. Insert (H) onto Top Shelf,tighten it up by using crosshead screw driver.
- Page 13 STEP 10 DO NOT use any power tools as this may damage the bed frame and will invalidate any claim. Insert (F) into 01 OMM holes on Footboard Post (Left) and Headboard Post (Right) tighten it up by using crosshead screw driver. F �...
- Page 14 WHEN FITTING CAMS ENSURE STARTING POSITION IS CORRECT BEFORE YOU INSERT CONNECTING BOLT TURN CLOCKWISE UNTIL SECURE. CORRECT WRONG STEP 11 DO NOT use any power tools as this may damage the bed frame and will invalidate any claim. Attach and secure Footboard Panel (Left),Footboard Bottom Panel (Left),Headboard Panel (Right) and Headboard Bollom Panel (Right) onto Footboard Post (Left),Headboard Post (Right) and insert (H),tighten it up by using a Crosshead Screw Driver.Follow it up by attaching ( Q ) into screw holes.
- Page 15 STEP 12 DO NOT use any power tools as this may damage the bed frame and � will invalidate any claim. � Attach and secure Ladder Side (Right) and Ladder Slat onto Footboard Post (Left) using (C) and (D),tighten it up using (R).Follow it up attaching (Q) into screw holes.
- Page 16 STEP 13 DO NOT use any power tools as this may damage the bed frame and will invalidate any claim. Attach and secure Semi Guard Rail onto Side Rail (Top Front) by using (N) and (J),tighten it up by using Crosshead Screw Driver.
- Page 17 STEP 14 DO NOT use any power tools as this may damage the bed frame and will invalidate any claim. � Attach and secure Side Rail (Top Front),Side Rail (Bottom Front),Semi Guard Rail onto Headboard (L/R) using (C) and (D),tighten it up using (R).Follow it up attaching ( Q ) into screw holes.
- Page 18 STEP 15 DO NOT use any power tools as this may damage the bed frame and will invalidate any claim. Attach and secure Slat Support onto Side Rail(Top Front),Side Rail (Bottom Front) and Full Guard Rail,by using (E),tighten it up by using (R). �...
- Page 19 STEP 16 DO NOT use any power tools as this may damage the bed frame and will invalidate any claim. � Follow it up by attaching (C) and (D) onto Side Rail (Top Front) and Side Rail (Bottom Front),tighten it up by using (R). �...
- Page 20 STEP 17 DO NOT use any power tools as this may damage the bed frame and will invalidate any claim. Attach and secure Wooden Slat onto bed Slat Support by using (K), tighten it up by using a Crosshead Screw Driver. *Align both tightening Side Rail (Top Front),Side Rail (Bottom Front) &...
- Page 21 STEP 18 DO NOT use any power tools as this may damage the bed frame and will invalidate any claim. Attach and secure Drawer Side (Left) and Drawer Side (Right) onto Drawer Rear by using (A) and (K) tighten it up by using a Crosshead Screw Driver.
-
Page 22: Bottom View
WHEN FITTING CAMS ENSURE STARTING POSITION IS CORRECT BEFORE YOU INSERT CONNECTING BOLT TURN CLOCKWISE UNTIL SECURE. CORRECT WRONG STEP 19 DO NOT use any power tools as this may damage the bed frame and will invalidate any claim. Attach and Secure Drawer Support Base onto Drawer Rear,by using (F) and (G), tighten it up by using crosshead screw driver. - Page 23 STEP 20 Slot Drawer Base into (P) horizontally. Follow it up by slotting it vertically straight down into the body until it touches the Rear Panel. Slot in both Drawer Base horizontally into (P). Bottom View...
- Page 24 STEP 21 DO NOT use any power tools as this may damage the bed frame and will invalidate any claim. Insert (F) into 01 OMM Holes on Drawer Face,tighten it up using crosshead screw driver. WHEN FITTING CAMS ENSURE STARTING POSITION IS CORRECT BEFORE YOU INSERT CONNECTING BOLT TURN CLOCKWISE UNTIL SECURE.
- Page 25 STEP 23 Insert Drawer underneath Bed Frame. Your Polaris Bunk is now complete and ready to use.
-
Page 26: General Care And Maintenance
For more information on cleaning and product care visit: https://www.happybeds.co.uk/help-and-advice Notes In the unlikely event that you have problems putting this product together or have damaged or missing parts, please contact us by visiting: https://www.happybeds.co.uk/customer-service...
Need help?
Do you have a question about the Polaris Bunk Bed and is the answer not in the manual?
Questions and answers