
Related Manuals for Jocel JFE019165


Summary of Contents for Jocel JFE019165
- Page 1 FORNO DE ENCASTRAR HORNO ENCASTRABLE BUILT-IN OVER JFE019165 MANUAL DE INSTRUÇÕES MANUAL DE INSTRUCCIONES INSTRUCTION MANUAL...
- Page 2 Español Gracias por haber comprado el Horno de Encastre. Esperamos que pueda disfrutar de todas las funciones y características de su Horno, obteniendo así todos los resultados deseados. Le aconsejamos que lea este Manual de Instrucciones cuidadosamente antes de utilizarlo por primera vez.
-
Page 3: Consejos De Seguridad
CONSEJOS DE SEGURIDAD • No use el Horno si está descalzo. No toque el Horno con las manos o los pies mojados o húmedos. • Horno: La puerta del Horno no debe abrirse muchas veces durante el período de funcionamiento. •... -
Page 4: Cómo Utilizar
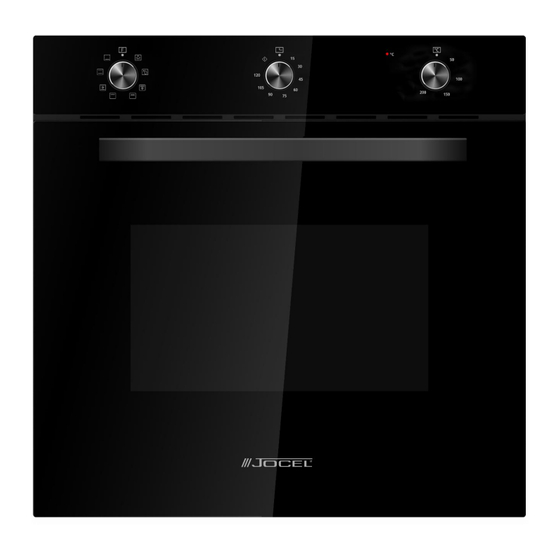
DECLARACIÓN DE CONFORMIDAD Cuando desembale el Horno, asegúrese que no haya sido dañado de ninguna forma. Si tiene dudas, no utilice el aparato y contacte con un Técnico cualificado. Mantenga los materiales tales como bolsas de plástico, espuma o clavos fuera del alcance de los niños, porque pueden ser peligrosos para ellos. - Page 5 DESCRIPCIÓN DEL PRODUTO Botón del temporizador Botón de función Botón de temperatura Símbolos Descripción de Funciones Luz del horno: permite al usuario observar el progreso de la cocción sin abrir la puerta. La luz del horno se enciende para todas las funciones de cocción.
- Page 6 ACCESORIOS Parrilla: Para platos a la parrilla, moldes de tartas o alimentos para asar o hacer a la parrilla. Rejillas laterales: Para cocinar alimentos grandes, puede quitar las rejillas laterales del horno y colocar la rejilla o la bandeja directamente sobre el suelo del horno.
-
Page 7: Pasos De Instalación
SUSTITUICIÓN DE LA LÁMPARA Para su sustitución, proceda de la siguiente forma: 1. Desconecte de la corriente eléctrica totalmente (tanto de la toma como del cuadro eléctrico) 2. Desatornille la tapa de cristal de la lámpara girándola en el sentido contrario a las agujas del reloj (tenga en cuenta que podrá... -
Page 8: Encendido Del Horno
ENCENDIDO DEL HORNO INSTALACIÓN Observaciones: 1. Solamente serán admisibles desvíos adicionales para todas las dimensiones. 2. El aparato no trae incluido como accesorios el interruptor o la toma. 3. La dimensión del gabinete está en mm. NOTA: Los accesorios incluidos, así como las especificaciones del producto adquirido pueden variar según el modelo y debido a las constantes mejoras del producto. - Page 9 QUITAR LA PUERTA DEL HORNO (OPCIONAL) Quitar los componentes de la puerta del horno. 1. Para quitar la puerta, ábrala al ángulo máximo. Luego tire la hebilla de la puerta en la bisagra hacia atrás. 2. Cierre la puerta en un ángulo de aproximadamente 30º. Sujete la puerat com una mani a cada lado.
-
Page 10: Limpieza Y Mantenimiento
RECETAS PARA MODO ECO Recetas Temperatura (℃) Nivel Tiempo (min) Precalentamiento Patatas Queso 90-100 Gratén Pastel 100-150 Carne 110-130 mechada LIMPIEZA Y MANTENIMIENTO Por una cuestión de una buena apariencia y eficiencia, debe mantener su Horno limpio. El moderno diseño de la unidad facilita el mantenimiento. Las partes del aparato que estén en contacto con los alimentos deben limpiarse regularmente. -
Page 11: Condiciones De Garantia
La garantía no cubre lesiones personales o daños causados directa o indirectamente. Esta garantía termina cuando se descubre que han sido sometidas a reparaciones, reformas o intervenciones por cualquier persona no autorizada por JOCEL. LA GARANTIA TERMINA: Si el dispositivo no ha sido instalado por un técnico calificado. -
Page 12: Declaración De Conformidad
SEDE: Rua Alto do Curro, n.º 280 4770-569 S. COSME DO VALE V.N. de FAMALICÃO Telef: 252 910 350/2 Fax: 252 910 368/9 email: jocel@jocel.pt http://www.jocel.pt DECLARACIÓN DE CONFORMIDAD Declaramos bajo nuestra responsabilidad que el aparato abajo: Aparato HORNO ENCASTRABLE... - Page 13 PORTUGUÊS CARO CLIENTE; Obrigado por ter adquirido o nosso Forno de Encastre. Esperamos que possa disfrutar de todas as funções e características do seu forno, obtendo assim todos os resultados desejados. Sugerimos que leia este Manual de Instruções cuidadosamente antes de o utilizar pela primeira vez.
-
Page 14: Dicas De Segurança
DICAS DE SEGURANÇA • Não use o forno, se estiver descalço. Não toque no forno com as mãos ou os pés molhados ou húmidos. • Forno: A porta do forno não deve ser aberta muitas vezes durante o período de funcionamento. •... - Page 15 DECLARAÇÃO DE CONFORMIDADE Quando desembalar o forno, certifique-se que este não tenha sido danificado de alguma forma. Se tiver alguma dúvida, não utilize o aparelho e contacte um Técnico qualificado. Mantenha os materiais tais como sacos de plásticos, esferovite, ou pregos fora do alcance das crianças porque estes podem ser perigosos para as mesmas.
-
Page 16: Descrição Do Produto
DESCRIÇÃO DO PRODUTO Botão de Função Botão de Temporização Botão de Temperatura Símbolos Descrição de Funções Lâmpada do forno: Permite ao usuário observar o progresso da cozedura sem abrir a porta. A luz do forno acende-se para todas as funções de cozedura. (exceto a função ECO). - Page 17 ACESSÓRIOS Grelha: Para pratos grelhados, formas de bolos ou alimentos para assar ou grelhar. Grelhas laterais: Para cozinhar alimentos grandes pode remover as grelhas laterais do forno e colocar a grelha ou tabuleiro diretamente no chão do forno. NOTA: Ao colocar o tabuleiro na base do forno, por favor NÃO utilize as funções com a resistência inferior, para evitar a acumulação de calor no fundo.
-
Page 18: Substituição Da Lâmpada
SUBSTITUIÇÃO DA LÂMPADA Para substituição, proceda da seguinte forma: 1. Desligue a corrente elétrica totalmente (tanto na tomada como no quadro elétrico) 2. Desaparafusar a tampa de vidro da lâmpada girando-a no sentido anti-horário (tenha em atenção que poderá estar bem enroscada) e substitua a lâmpada. -
Page 19: Ligação Do Forno
LIGAÇÃO DO FORNO INSTALAÇÃO Observações: 1. Somente desvios adicionais são admissíveis para todas as dimensões. 2. O aparelho não traz incluído como acessórios o interruptor ou a tomada. 3. As dimensões são em mm. NOTA: Os acessórios incluídos e as especificações do aparelho que adquiriu podem variar consoante o modelo e devido a constantes melhoramos do produto. - Page 20 REMOVER A PORTA DO FORNO (OPCIONAL) DESMONTAR OS COMPONENTES DA PORTA DO FORNO. 1. Para remover a porta, abra a porta ao ângulo máximo. De seguida, puxe a fivela da porta na dobradiça para trás. 2. Feche a porta a um ângulo de aproximadamente 30°.Segure a porta com uma mão de cada lado.
-
Page 21: Limpeza E Manutenção
RECEITAS PARA MODO ECO Receitas Temperatura (ºC) Nível Tempo (min) Pré-aquecimento Batata 90-100 NÃO Queijo Gratinado Queijo 100-150 NÃO Bolo Rolo de 110-130 NÃO carne LIMPEZA E MANUTENÇÃO Por uma questão de boa aparência e eficiência, deve manter o seu forno limpo. O design moderno da unidade facilita a manutenção. -
Page 22: Condições Gerais De Garantia
7. Esta garantia cessa no momento em que se constate terem sido efetuadas reparações, alterações ou quaisquer intervenções por pessoa não autorizada pela JOCEL. A GARANTIA CADUCA 1. Caso o aparelho não tenha sido instalado por um Técnico Credenciado 2. -
Page 23: Declaração De Conformidade
Rua Alto do Curro, n.º 280 4770-569 S. COSME DO VALE V.N. de FAMALICÃO Telef: 252 910 350/2 Fax: 252 910 368/9 email: jocel@jocel.pt http://www.jocel.pt DECLARAÇÃO DE CONFORMIDADE Declaramos sobre nossa própria responsabilidade que o aparelho indicado abaixo Aparelho FORNO DE ENCASTRE... - Page 24 ENGLISH ACKNOWLEDGMENT Thank you for purchasing our product. We hope you enjoy using the many features and benefits it provides. Before using this product, please study this entire Instruction Manual carefully. Keep this manual in a safe place for future reference. Ensure that other people using the product are familiar with these instructions as well.
-
Page 25: Safety Hints
• Do not use harsh abrasive cleaners or sharp metal scrapers to clean the oven door glass since they can scratch the surface, which may result in shattering of the glass. • The appliances are not intended to be operated by means of an external timer or separate remote-control system. -
Page 26: Declaration Of Compliance
DECLARATION OF COMPLIANCE When you have unpacked the oven, make sure that it has not been damaged in any way. If you have any doubts at all, do not use it: contact a professionally qualified person. Keep packing materials such as plastic bags, polystyrene, or nails out of the reach of children because these are dangerous to children. -
Page 27: Product Description
PRODUCT DESCRIPTION Symbol Function description Oven Lamp: Which enables the user to observe the progress of cooking without opening the door. Oven lamp will light for all cooking functions. (except ECO function). Defrost: The circulation of air at room temperature enables quicker thawing of frozen food, (without the use of any heat). -
Page 28: Shelf Placement Warning
ACCESSORIES Wire shelf : For grill, dishes, cake pan with items for roasting and grilling. Slider bracket: For cooking larger size food, these shelf support rails on the right and left sides of the oven can be removed, dishes and tray can be put on the oven floor, using functions as Radiant grilling, Double grilling, Double grill with fan. -
Page 29: Bulb Replacement
BULB REPLACEMENT For replacement, process as follows: 1. Disconnect power from the mains outlet or switch off the circuit breaker of the unit's mains outlet. 2. Unscrew the glass lamp cover by turning it counter-clockwise (note, it may be stiff) and replace the bulb with a new one of the same type. 3. -
Page 30: Connection Of The Oven
CONNECTION OF THE OVEN INSTALLATION Remark: Only plus deviations are admissible for all dimension. The cabinet don’t include the power switch or socket. The cabinet dimension is in mm. NOTE: The accessories included and specifications of the device you purchased may depend on the model and constant improvements to the product. - Page 31 REMOVING THE DOOR FROM OVEN (OPTIONAL) Removable door allows full access to entire interior of the oven for easier and quicker maintenance. 1. To remove the door, open the door to the maximum angle. Then pull the buckle at the door hinge backward. 2.
-
Page 32: Cleaning And Maintenance
RECIPES FOR ECO MODE Recipes Temperature (℃) Level Time (min) Pre-heat Potato Cheese 90-100 Gratin Cake 100-150 Meatloaf 110-130 CLEANING AND MAINTENANCE For the sake of a good appearance and reliability, keep the unit clean. The modern design of the unit facilitates maintenance to a minimum. -
Page 33: General Warranty Terms
7. This warranty terminates when it is found to have been undergoing repairs, alterations or interventions by any person not authorized by Jocel. THE WARRANTY EXPIRES 1. If the appliance has not been installed by an Accredited Technician. -
Page 34: Declaration Of Conformity
Rua Alto do Curro, n.º 280 4770-569 S. COSME DO VALE V.N. de FAMALICÃO Telef: 252 910 350/2 Fax: 252 910 368/9 email: jocel@jocel.pt http://www.jocel.pt DECLARATION OF CONFORMITY We declare on our own responsibility that the machine indicated below Product...
Need help?
Do you have a question about the JFE019165 and is the answer not in the manual?
Questions and answers