Table of Contents
Advertisement
Quick Links
Advertisement
Table of Contents

Related Manuals for Bartscher Easy Plus 550


Summary of Contents for Bartscher Easy Plus 550
- Page 1 Easy Plus 550 190096...
- Page 2 Bartscher GmbH Phone: +49 5258 971-0 Franz-Kleine-Str. 28 Fax: +49 5258 971-120 D-33154 Salzkotten Technical Support Hotline: +49 5258 971-197 Germany www.bartscher.com Version: 1.0 Date of preparation: 2024-06-12...
-
Page 3: Table Of Contents
Original instruction manual Safety ......................3 Explanation of Signal Words ..............3 Safety instructions..................4 Intended Use ................... 7 Unintended Use ..................7 General information ..................8 Liability and Warranty ................8 Copyright Protection ................8 Declaration of Conformity ................ 8 Transport, Packaging and Storage .............. - Page 4 7.2.3 Cleaning the Brew Unit When Prompted .......... 55 7.2.4 Milk System Cleaning ............... 56 7.2.5 Descaling When Prompted ............... 57 Possible Malfunctions .................. 58 Decommissioning ..................61 Disposal ....................... 62 2 / 62 190096...
-
Page 5: Safety
Safety Diese Bedi enungsanlei tung besc hrei bt di e Installation, Bedi enung und Wartung des Geräts und gilt als wic htige Inform ationsquelle und N achschl agew erk. Di e Kenntnis aller enthaltenen Sic herheits hinw eis e und H andlungs anw eisungen schafft die Vorauss etz ung für das sichere und s ac hger echte Ar beiten mit dem Gerät. D arüber hi naus müs sen die für den Ei ns atz ber eic h des Geräts geltenden ör tlichen Unfallv erhütungsv orsc hriften und allgem einen Sicherheits bestimmungen eing ehalten wer den. Dies e Bedi enungs anleitung is t Bes tandteil des Produkts und m uss i n unmittelbarer N ähe des Ger äts für das In¬s tall ations-, Bedi enungs-, W artungs- und R einigungspers onal jederzeit z ugänglich auf¬bewahrt w erden. W enn das Ger ät an eine dritte Pers on weiterg egeben wird, muss die Bedi enungsanlei tung mit ausgehändigt wer den. -
Page 6: Safety Instructions
Safety WARNING! The signal word WARNING warns against hazards that may lead to moderate or severe injuries or death if the hazards are not avoided. CAUTION! The signal word CAUTION warns against hazards that may lead to light or moderate injuries if the hazards are not avoided. , di e IMPORTANT! The signal word IMPORTANT indicates possible property damages,... - Page 7 Safety • Do not bend, pinch nor knot the power cord. • Always completely unwind the power cord. • Never place the appliance or other objects on the power cord. • Always take hold of the plug to disconnect the appliance from the power supply. •...
- Page 8 Safety Health hazard due to germs! • The tank must be regularly emptied and disinfected to eliminate the possibility of accumulation of harmful and dangerous germs. Supervised Usage only • Only supervised appliance may be used. • Always remain in an immediate vicinity of the appliance. Halten Sie Verpack ungsmateriali en und Styropor teile v on Ki ndern fern.
-
Page 9: Intended Use
Safety Intended Use As described below, every use of the appliance for a purpose differing and/or diverging from its intended standard use, is prohibited and considered to be an unintended use. The following is an intended use: – Preparation of various types of coffee beverages, for example: coffee, cappuccino, espresso, etc. -
Page 10: General Information
General information General information Liability and Warranty All information and instructions in this instruction manual account for legal regulations in force, current level of technical engineering knowledge as well as our expertise and experience, developed over the years. If special models or additional options are ordered, or state-of-the-art technical solutions were implemented, the actual scope of delivery of the appliance may, in some circumstances, differ from descriptions and numerous drawings in this instruction manual. -
Page 11: Transport, Packaging And Storage
Transport, Packaging and Storage Transport, Packaging and Storage Delivery Check Immediately upon reception, check the delivery for completeness and possible shipping damage. In the case of visible transport damage refuse to accept the appliance or accept it conditionally. Mark and note the scope of damage in shipping documents/consignment list of the shipping company and lodge a complaint. -
Page 12: Technical Data
Technical Data Technical Data Technical Specifications Automatic coffee machine Easy Name: Plus 550 190096 Art. No.: Material: plastic Grinder material: steel Number of brew unit groups: Water tank volume, in l: Number of coffee bean containers: Coffee bean container volume, in g: Programs, pre-set, individual write-over possible: Pump pressure, in bar:... - Page 13 Technical Data • ON/OFF switch • Control: touch • Indicator lights: Stand-by • Setting options: – user mode – beverage names – 4 levels of grinding thickness – amount of milk – quantity of ground coffee, accurate to a gram thanks to calibration –...
-
Page 14: Functions Of The Appliance
Technical Data – 2-stage adjustment of milk temperature setting • Cleaning program: – yes – cleaning cycles memory • Display: – size: 7.0" – advertising recordings, individually programmable playback – error messages, volume, programs, status, descaling and cleaning information • Automatic switch-off •... -
Page 15: List Of Components Of The Appliance
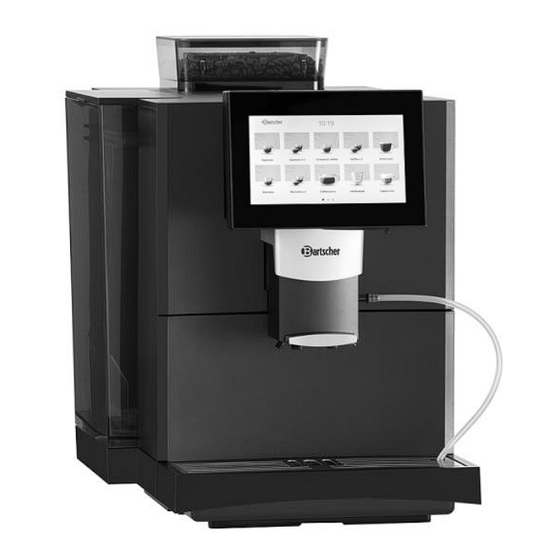
Technical Data List of Components of the Appliance 1. Water tank with the handle 2. Coffee container with cover 3. Control panel 4. USB connection 5. Dregs container 6. Cover 7. Drip grate 8. Drip tray 9. Beverage outlet 10. Housing 11. - Page 16 Technical Data User Interface The appliance is equipped with three different types of user interface: Standard, self-service and professional interface to meet the needs of different applications. Standard User Interface By touching the 'User' symbol, the preferred beverage selection can be set for different users.
- Page 17 Technical Data On-Screen Symbols Symbol Name Description User Access to user settings Logo Access to menu settings Indications for beverage pages and a Scroller current page Add products Close Close current page Warning Error message display Boiler temperature Boiler temperature indicator Brew unit position Current brew unit status Error message...
-
Page 18: Installation Instructions
Installation Instructions Menu Setting Symbols Symbol Name Description Return to the home screen and enter the Exit PIN code to re-enter the menu Return to the home screen, without Home screen entering the PIN code, to re-enter the menu Selection Item is selected or active Editing Editing of an element is allowed... -
Page 19: Installation
Installation Instructions Installation Unpacking / Positioning • Unpack the appliance, remove all external and internal packaging elements and shipment safeguards. CAUTION! Choking hazard! Prevent children from accessing package materials, for instance: plastic bags and EPS. • If the appliance is covered with a protective film, remove it. Remove the film slowly, so no glue residues are left. -
Page 20: Operation And Maintenance Instructions
Operation and Maintenance Instructions Power supply connection • Verify if technical data of the appliance (see rating plate) correspond with the local electric power grid specification. • Connect the appliance to a single, properly grounded mains socket with protective contact. Do not connect the appliance to a multi-socket. •... -
Page 21: Switching-On
Operation and Maintenance Instructions Switching-On Appliance Preparation 1. Before use, clean the appliance, observing instructions in section 'Cleaning'. 2. To safely start up the appliance, read the following indications carefully. 3. Plug the appliance into a suitable single socket. First Start-Up When the coffee machine is switched on for the first time, the start program settings may be accessed. - Page 22 Operation and Maintenance Instructions 5. Optionally input PIN code. 6. Select user interface. 8. Click ‘Complete’ to complete the 7. Configure the control panel display settings. Filling with Coffee Beans 1. Remove the coffee bean container 2. Fill the coffee bean container with cover.
- Page 23 Operation and Maintenance Instructions 3. Reinstall the coffee bean container lid. CAUTION Never put any objects into the coffee bean container or the grinder. Otherwise splinters may be ejected, which may lead to injury. NOTE! Never pour ground coffee into the coffee bean container. Do not pour any liquids into the coffee bean container.
- Page 24 Operation and Maintenance Instructions ATTENTION! The water tank can only be filled up to the MAX mark. Do not fill the water tank with hot water, as this may damage the coffee machine. Connecting Milk Hose 1. Connect the milk hose to the milk 2.
-
Page 25: Preparing Beverages
Operation and Maintenance Instructions Preparing Beverages Beverage Preparation with Standard User Interface When the coffee machine is switched on, the start program settings may be accessed. Proceed the following way: 1. Place a suitable cup under the 2. Touch the symbol of your beverage beverage outlet. - Page 26 Operation and Maintenance Instructions Beverage Preparation with Self-Service User Interface 1. Place a suitable cup under the 2. Touch the symbol of your beverage beverage outlet. of choice. The selected beverage is prepared. Interrupt beverage preparation by touching 'Stop'. Process bar Touch 'Order' to select the next desired beverage Changing parameters during beverage...
- Page 27 Operation and Maintenance Instructions Beverage Preparation with Professional User Interface 1. Place a suitable cup under the 2. Touch the symbol of your beverage beverage outlet. of choice. The selected beverage is prepared. Status indicator Interrupt beverage preparation The queue function can be used when one beverage is being prepared and another beverage is selected in the meantime.
- Page 28 Operation and Maintenance Instructions Grinding Coarseness Setting 1. Remove the cover of the ground coffee compartment to access the grinding thickness adjustment. 2. Set the grinding thickness of choice using the key provided. The grinding thickness can be set to 4 levels.
-
Page 29: Settings
Operation and Maintenance Instructions Settings 6.3.1 Program Settings Menu Access 1. Touch the logo symbol in the upper 2. Enter the PIN code and touch the left corner. 'Complete' key. If no PIN code has been assigned, you can confirm directly with the 'Complete' key. - Page 30 Operation and Maintenance Instructions Program Settings Menu Overview Maintenance Rinsing Cleaning Descaling Common functions Beverages Beverage settings Beverage selection display System Water Maintenance Accessory ON/OFF Reset supply Control User Home Beverage Advertising Advanced panel interface screen preparation settings User Administrator PIN Maintenance PIN Maintenance rights code...
-
Page 31: Maintenance Menu
Operation and Maintenance Instructions 6.3.2 Maintenance menu Cleaning Menu Overview Maintena Rinsing Cleaning Descaling Common functions Brew unit rinsing Brew unit Screen cleaning with cleaning tablet Milk frother rinsing Milk system Restarting the cleaning appliance Rinsing the Switching the external milk hose appliance OFF Rinsing Brew unit rinsing... - Page 32 Operation and Maintenance Instructions Cleaning Brew unit cleaning with tablet Perform the brew unit cleaning program immediately when the message 'Brew unit cleaning with tablet' appears on the screen. Cleaning tablets are required for cleaning. The total cleaning time is approximately 10 minutes.
-
Page 33: Beverage Menu
Operation and Maintenance Instructions Common functions Screen cleaning After touching the 'Screen cleaning' field, the appliance will be locked for 15 seconds. Now use a cloth to clean the screen surface. Restarting the appliance Restart the appliance by touching the 'Restart' field. - Page 34 Operation and Maintenance Instructions Beverage settings Inputting settings for 'Overview' 1. Beverage icons change Change the beverage icon after clicking the edit symbol. The image uploaded from the USB stick can be used as the beverage icon. 2. Beverage name change Change the name of the beverage after clicking the edit symbol.
- Page 35 Operation and Maintenance Instructions 5. Adding a new beverage Click 'Add' to select the new beverage to be added from the pop-up list. After adding to the menu list, change and delete the name and symbol of a new beverage. Recipe Settings Example: Latte Macchiato recipe When the Latte Macchiato icon is touched, this takes you to the recipe page,...
- Page 36 Operation and Maintenance Instructions Changing recipe parameters Click on a recipe to change the recipe parameters. The range of values to be set must correspond to the limitations of the software. Deleting a recipe Open the recipe page and click the 'Delete' field.
- Page 37 Operation and Maintenance Instructions Recipe parameters that can be added Coffee Parameter Setting values Remarks Pre-brewed amount 0–30 ml Default setting: 25 ml Coffee amount 15–240 ml Default setting: 150 ml Single brewing yes or no Default: yes process Brewing times 1–4 times Default setting: 1 time Hot milk...
- Page 38 Operation and Maintenance Instructions Beverage display There are two types of beverage display: grid layout and menu cards. Grid layout Menu cards Grid layout The parameters for the grid layout are set as follows: Parameter Setting values (Standard/Self-service) Remarks Column 2x1 3x1 4x1 5x1 3x2 4x2 5x2...
-
Page 39: System Menu
Operation and Maintenance Instructions Second level list 6.3.4 System Menu System Menu Overview System Water Maintenance Accessory Switching Reset connection Water supply Rinsing Water filter Automatic Beverage mode Switching OFF reset Water hardness Cleaning Automatic Factory switch-off after settings reset time setting ON/OFF Descaling... - Page 40 Operation and Maintenance Instructions Water supply mode / Water hardness Water Supply Select the appropriate water supply mode. The standard setting is supply from the water tank. Water hardness This is where you set the degree of water hardness for the appliance. Standard setting: 15°...
- Page 41 Operation and Maintenance Instructions Cleaning Parameter setting for cleaning the brew unit with tablets, as shown below: Parameter Setting values Remarks ≥0 cups Cleaning the brew unit Default setting: with tablets according to 350 cups the warning** ≥0 cups Compulsory brew unit Default setting: cleaning after clogging 450 cups...
- Page 42 Operation and Maintenance Instructions Accessories (not included in the delivery) Water filter 1. If a water filter is not being installed, select 'Not connected'. 2. If a water filter is to be installed or replaced, select 'Connected'. 3. Here, select the type of water filter and the required absorption capacity.
- Page 43 Operation and Maintenance Instructions Automatic switching-off after the set time Here you can set the time for automatic switching-off, e.g. 9:15. ON/OFF switch 1. Select the 'Active' option. 2. To switch the screen off, hold down the ON/OFF switch for 3 sec. 3.
-
Page 44: Control Panel
Operation and Maintenance Instructions 6.3.5 Control Panel Usage Scenarios Selection of the user interface displayed on the screen. For a detailed introduction to each user interface displayed on the screen, refer to the section 'User Interfaces'. Home screen User function Options: Active or Inactive 1. - Page 45 Operation and Maintenance Instructions Service number Options: Active or Inactive 1. Select the 'Active' option. The service number is displayed in the lower right corner of the screen. 2. To prevent the service number from being displayed, select 'Inactive'. The service number must be saved by a service technician in the service settings.
- Page 46 Operation and Maintenance Instructions Adjusting the beverage Options: Active or Inactive 1. If 'Active' is selected, beverage recipes can be adjusted by touching the left and right arrow keys while the beverage is in production. 2. If 'Inactive' is selected, beverage recipes cannot be adjusted when the beverage is in production.
- Page 47 Operation and Maintenance Instructions Advertising Stand-by When the appliance is in Stand-by mode, video advertisements can be set up. Advertising resources can be loaded from a USB stick. Parameter Setting values Remarks Stand-by time 0–100 seconds Default setting: 60 sec. Cycle type Infinite loop, automatic exit Default setting: OFF...
- Page 48 Operation and Maintenance Instructions NOTE! Video requirements: MP4 format; aspect ratio: 4:3; recommended resolution: 890x700; video bit rate less than 3,000 kbps and 100 MB; image formats: PNG, JPG, JPEG; recommended resolution: 890 x 700. Advanced settings Date Local date setting Time zone Local time zone setting Time...
- Page 49 Operation and Maintenance Instructions Maintenance level PIN code Set the maintenance level PIN code, which consists of 4 digits. Entering a valid PIN code will enable viewing the assigned privileges of the maintenance level. Maintenance level PIN rights Maintenance level PIN rights can be set here.
- Page 50 Operation and Maintenance Instructions Beverages Quick search Data can be viewed by 1 week, 1 month, 3 months, current date, half year, year and all. The view of data from a specific time can be customised. Data can be presented in two ways: tables and graphs.
-
Page 51: Cleaning And Maintenance
Cleaning and Maintenance Help Display of appliance information Here you can see information about the appliance, including: Ctr version (PCB software) HMI version (screen software) Android version Calibration version Appliance serial number Information on the IMEI number of the appliance Available screen memory Software update via USB stick The appliance software can be updated via a USB stick. -
Page 52: Cleaning
Cleaning and Maintenance Cleaning Cleaning Frequency Overview Frequency Activity Cleaning type Brew unit rinsing automatically or manually Milk frother rinsing automatically or manually Daily Drip tray emptying manually (or as Emptying dregs container manually needed) Screen cleaning manually Milk frother cleaning manually Brew unit cleaning manually... -
Page 53: Daily Cleaning
Cleaning and Maintenance 7.2.1 Daily Cleaning Rinsing the brew unit / milk frother / external milk hose 1. The frequency of the automatic rinsing can be set in the menu / maintenance settings. Rinsing then takes place automatically when the pre-set condition is reached, at the latest when the appliance is switched off. - Page 54 Cleaning and Maintenance 3. Wash the dregs container 4. Dry the dregs container and put it thoroughly with fresh water. back in the appliance. Drip Tray cleaning NOTE! The drip tray should be cleaned at least once a day or as needed 1.
- Page 55 Cleaning and Maintenance 3. Wash the drip tray thoroughly with 4. Dry the drip tray and place it back in fresh water. the appliance. ATTENTION! The two metal plates at the back of the drip tray must be cleaned and kept dry, otherwise the 'Empty drip tray' message will be displayed incorrectly.
-
Page 56: Weekly Cleaning
Cleaning and Maintenance 7.2.2 Weekly Cleaning Milk frother manual cleaning 1. Pull down the milk frother. 2. Disassemble the milk frother. 3. Wash the individual components of 4. Reassemble the milk frother the milk frother in fresh water. components and install it anew. ATTENTION! Assemble the milk frother correctly after cleaning. -
Page 57: Cleaning The Brew Unit When Prompted
Cleaning and Maintenance Manual cleaning of the brew unit The brew unit clogs if coffee beans are ground too finely. We recommend cleaning the brew unit weekly with a brush. 1. Switch the appliance off and pull the plug out. 2. -
Page 58: Milk System Cleaning
Cleaning and Maintenance 3. Touch the ‘Confirm’ key to carry out the cleaning. 4. Perform each step according to the message displayed on the screen. NOTE! If the cleaning of the brew unit with the tablet is not carried out in time, the unit will be blocked at the end of the mandatory cleaning period and you will not be able to use the unit again until the cleaning process has been completed. -
Page 59: Descaling When Prompted
Cleaning and Maintenance 4. Touch the 'Confirm' key to start cleaning. 5. Perform each step according to the message displayed on the screen. WARNING! When cleaning and descaling, a hot cleaning or descaling solution flows from the outlet. Therefore, never put your hands under the outlet during cleaning and descaling. -
Page 60: Possible Malfunctions
Possible Malfunctions 3. Touch the ‘Confirm’ key to carry out descaling. 4. Perform each step according to the message displayed on the screen. WARNING! When cleaning and descaling, a hot cleaning or descaling solution flows from the outlet. Therefore, never put your hands under the outlet during descaling. - Page 61 Possible Malfunctions Display message Possible solution Insert the water tank Make sure that the water tank is installed correctly or place it back in the appliance. Fill the water tank Pour water into the water tank Attach the drip tray Set the drip tray aside Empty drip tray Empty the drip tray...
- Page 62 Possible Malfunctions Error Code Messages ATTENTION! A message with an error code is automatically displayed when the entire system is affected by an error. If serious problems occur, restart the appliance. 1. Switch off the appliance using the ON/OFF switch if the appliance is to be restarted.
-
Page 63: Decommissioning
Decommissioning Decommissioning Preparations for decommissioning 1. Clean the appliance observing indications in section 'Cleaning and Maintenance'. 2. After emptying, clean the coffee bean container. 3. Clean the beverage outlet and the milk hose manually. 4. Clean the brew unit manually with a brush. 5. -
Page 64: 10 Disposal
Disposal 10 Disposal Electrical Appliance Electric appliances are marked with this symbol. Electrical appliances must be disposed of and recycled in a correct and environmentally friendly manner. You must not dispose of electric appliances with household waste. Disconnect the appliance from the power supply and remove power cord from the appliance.
Need help?
Do you have a question about the Easy Plus 550 and is the answer not in the manual?
Questions and answers