
Subscribe to Our Youtube Channel
Related Manuals for TANBead Maelstrom Switch 8


Summary of Contents for TANBead Maelstrom Switch 8
- Page 1 Maelstrom Switch 8 TAN Bead Nucleic Acid Extractor User Manual (Non-Sterile) 039.M17RU.E01 Rev V1.0...
-
Page 2: Table Of Contents
Introduction ..................6 Instrument Overview ..............10 Instrument Specification............... 17 Installation & Get started............. 18 Software Applications………………..........27 Technical Support ……..…….………………………..…………………. 51 Cleaning and Maintenance …………………………………………. 52 Disposal ....................52 Patent ....................53 About Manufacturer ..............53 TANBead Instrument Warranty Policy…………………………. 54... - Page 3 About Manual The label on the instrument, User Manual, and other packaging material may contain following symbols: Catalog number Temp limit Serial number Keep dry Keep away from sunlight Manufacturer Biologic risks The date of manufacture Research Use Only Non-sterile Humidity limit Instructions for Use Biologic risks...
- Page 4 ⚫ Use a power cord that meets your country’s standard. In case of any questions, contact your local distributor for assistance. ⚫ Maelstrom Switch 8 operates within the voltage range from 100 Volts to 240 Volts. ⚫ Do not use the instrument with a damaged power cord or a loose socket.
- Page 5 About Instrument Caution ⚫ Never attempt to remodel the instrument without the permission from the manufacturer. Doing so may lead to a fire or an electric shock. ⚫ Do not subject the instrument to any impacts and do not knock it. Doing so may cause malfunctions.
-
Page 6: Introduction
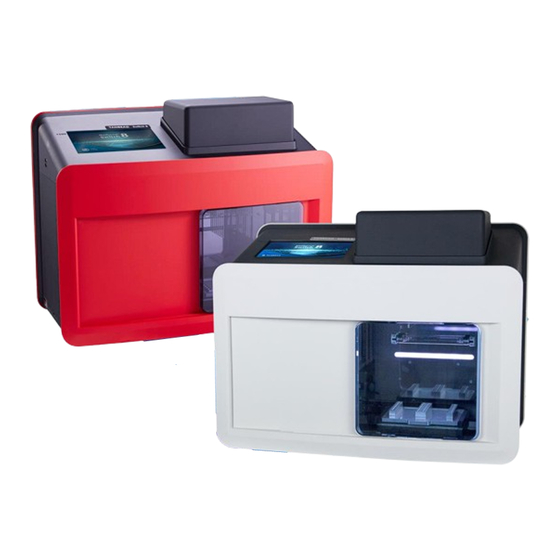
1. Introduction About Maelstrom Switch 8 is an automated nucleic acid platform designed for Flexible Applications. Specialized spin tips enable mixing efficiency of magnetic beads. With intuitive interface and compatible with most representative brands reagent kits. Maelstrom Switch 8 realized the full automation by transforming routine operations into a walk-away solution. - Page 7 Switch 8 in a location that meets the following criteria: ⚫ Choose a location with good air circulation. ⚫ Place Maelstrom Switch 8 on the table that can bear at least 20 kg. ⚫ Do not use Maelstrom Switch 8 in a location where is with huge temperature and humidity variability.
- Page 8 ⚫ Under a normal condition, sound pressure level from Maelstrom Switch 8 does not exceed 80dB and does not cause a hazard. Please contact technical support for assistance in case of a higher sound pressure level.
- Page 9 1. Introduction Safety Requirements ⚫ The device has passed the tests and conformed to the standards of 61010-1:2010+A1:2016 (Edition 3.1) 6010- 1:2010+A1:2019, “Safety requirements for electrical equipment for measurement, control, and laboratory use - Part 1: General requirements”. ⚫ The device has passed the tests and conformed to the standards of IEC 61010-2-101:2018 with IEC 61010-1:2010 + A1:2016 and EN 61010-2-101:2017 with EN 61010-1:2010 + A1:2019, “Safety requirements for electrical equipment for measurement, control...
-
Page 10: Instrument Overview
2. Instrument Overview ① USB port ② Touch screen ③ Top lid ④ Door lid ⑤ Power switch ⑥ DC Power inlet... - Page 11 2. Instrument Overview ① Fixed motor module ② Guide rail ③ UV light ④ LED light ⑤ Loading position...
- Page 12 2. Instrument Overview Accessory Following accessories may vary region-to-region. Power cord Magnetic separator Power adapter...
- Page 13 2. Instrument Overview Compatible Gearbox Sets (A) Open Platform model (Gray) Gearbox Heating Plate CH 4 Gearbox Ø7.5(A) 24 Heating Plate F CH 8 Gearbox Ø3.5(A) 96 Heating Plate F CH16 Gearbox Ø3.5(A)
- Page 14 2. Instrument Overview (B) TANBead Platform model (Red) Gearbox Heating Plate CH 4 Gearbox Ø4.2(B) 24 Heating Plate CH 8 Gearbox Ø2.2(B) 96 Heating Plate CH16 Gearbox Ø2.2(B)
- Page 15 2. Instrument Overview Consumables Maelstrom Switch 8 uses specially designed for optimal processing. Used with provided or compatible spin tip assembled box and deep well plates is a must. If applied with other types of consumables may damage the instrument and compromise the warranty.
- Page 16 2. Instrument Overview (B) TANBead Platform model (Red) Spin Tips LV 96 Deep Well Plate 24 Spin Tip LV Holder 16 Base B 24 Deep Well Plate 6 Tube B 24 Deep Well Plate LV Base Spin Tips Assembled Box...
-
Page 17: Instrument Specification
O/P: DC 24V, 8.3 A Spin Speed 500~3,000rpm 7” touch screen Display UV Light UV-C Application Open to leading brands based on TANBead: pre-filled plate, pre-filled Reagents magnetic beads single tube, bottle format Customized program or assisted Program TANBead Built-In Programs from TANBead Channels... -
Page 18: Installation & Get Started
Installation & Get Started Please note that this instrument weight is around 20kg, it is highly recommended to have 2 individuals or above to handle when taking it out from the box and be sure to work safety. Step 1: Install the System Take out the instrument from the box, 2 or more individuals is highly recommended. - Page 19 Installation & Get Started (B) : Push gearbox to left side (C) : Make sure gearbox is attached firmly...
- Page 20 Installation & Get Started (D) : Install the heating plate 96 or 24 wells accordingly Keep heating plate horizontal during installation. The heating plate surface may be hot during operation and change. Use caution to avoid risk of burns.
- Page 21 Installation & Get Started • Step 5: Apply Power Cord • Apply with the power cord and adapter. Please note that this instrument is compatible with AC 100-240V power only. Using wrong power source will lead to malfunction or damage. •...
- Page 22 Installation & Get Started • Step 8: Edit Program Refer to section 5. to “Edit” the protocols for your reaction kits. • • Step 9: Run Program • Tap on “Run” and select present program to Run the extraction. And press on “ “...
- Page 23 Installation & Get Started • Select with “L” for left part of plate or “R” for the right. And press on “ “ to proceed. Refer to the container type to choose “Auto-plate” or “Auto- Tube” and click on “ “...
- Page 24 Installation & Get Started • As the warning window pops, make sure to applied with correct spin tip assemble box onto the heating plate. And Press on “Yes” to pick up the tip. “ No” to return previous page. • After pick up the spin tip, warning window pops up again. Make sure to replace with prepared reaction plate into the chamber.
- Page 25 Installation & Get Started • After heating up, the program will begin automatically. • After the program finished, press on “Report” to review the procedures. As close the report, request window pops. Select desire lane to “Eject” the spin tip before return to main menu.
- Page 26 5. Software Applications Start USB COM Port = STM32 Virtual COM Port Baud Rate = 115200 Data Bit = 8 Stop Bit = 1 Parity Bit = None By using \n – It prints a new line WELL After power on the instrument, it takes seconds for system ready. Please input a User Code 222 to access the system.
-
Page 27: Software Applications
5. Software Applications • After entering the home page, system will detect the type of gearboxes and display with different interface accordingly as followed. Also, the function of each icon will be different. CH 4 Gearbox ø 7.5(A) for 4 channels gearbox CH 8 Gearbox ø... - Page 28 5. Software Applications General commends: Press Toolbar to use following function. ① ② ④ ③ Back to Home Screen Turn on/off LED Get the version information Update software and firmware ...
- Page 29 5. Software Applications “Home Screen” on the Maelstrom Switch 8 is used for following functions. While applying with different gearboxes, display will be different accordingly. Home Screen (CH 8 Gearbox as Example) ③ ① ② Change User Current Temperature ...
- Page 30 5. Software Applications Edit: Edit protocols. ② ① ③ ④ ⑤ Tap to enter the “Edit” function to manipulate the programs or create own protocols for relative reagent kits. In case of applying different gearboxes, programs should be created individually. Notice: As saved with 12 step/6 step programs, program name will be recognized and renamed as “12_”...
- Page 31 5. Software Applications Edit: Edit the running protocols. Edit: Edit protocols. CH 8 Gearbox as example for instruction: 06 Steps Program ① ② ③ ④ ⑤ 12 Steps Program Number: Program number for saving Program: Name of the protocol. ...
- Page 32 5. Software Applications Edit: Edit the running protocols. Edit: Edit protocols. Preview of protocols ① ② ③ Preview of the protocols and enter with related settings. Name: Tap to select the buffer name of each steps. Volume: Tap to enter the volume of each sample wells. ...
- Page 33 5. Software Applications Edit: Edit protocols. Edit: Edit protocols. Detail protocol setting: ① ② ③ ④ ⑤ Preview of the protocols and tap on displayed digits to enter with related settings as followed. Tap on “Delete” to delete the steps, “Copy”...
- Page 34 5. Software Applications Edit: Edit protocols. Copy: Copy the selected program number to the desired position. Delete: Delete the selected program number. Import/Export: Programs can be imported or exported into CSV format through a USB drive. File format is shown as below.
- Page 35 5. Software Applications Eject Tip(s) Display different by the gearbox usage as below, but the function icon will be the same. While eject the spin tip, preferable to apply with empty reaction plate. Please use correct consumables that is compatible with the installed gearbox. CH 8 Gearbox ①...
- Page 36 5. Software Applications Eject Tip(s) Please use correct consumables that is compatible with the installed gearbox. CH 4 Gearbox CH16 Gearbox...
- Page 37 5. Software Applications Run a protocol Choose “Run” icon to start to run the protocols. Switch 8 has an impressively large store of 100 programs. Choose program that in line with your reagent kit. Type in key words in search box to look for programs if needed. Number indicated with “06_”...
- Page 38 5. Software Applications Run a protocol Review with the setting program by scrolling up or down. And press on “ “ to proceed. For CH8 Gearbox with 6 steps program, user can choose to run with “Left” or “Right” region of the deep well plate. But other types of gearbox or 12 steps program don’t.
- Page 39 5. Software Applications Run a protocol Press a circle(A1~H1) to input sample ID by using 1-D barcode ①barcode or ②manual type in. A circle turns yellow when inputs sample ID successfully. Then it moves to next sample ID automatically. E.g. A1→B1, B1→C1 etc. Press arrow to proceed next page.
- Page 40 5. Software Applications Run a protocol According to the applying plate format, choose “Auto-Plate” or “Auto-Tube” to proceed. Please check above information is correct such as Date, Program No., File Name etc. Press “ ” icon to execute the program. Or press on “...
- Page 41 5. Software Applications Run a protocol After press on “ “, warning windows pops. Make sure to apply with correct spin tip assemble box into the system and click on “Yes” to proceed. “No” to back to previous page. Mount Tip ②...
- Page 42 5. Software Applications Run a protocol After picking up the spin tips, make sure to replace the spin tip assemble box with prepared reaction plate. Click on “Yes” to proceed or “No” if the plate is not ready. Program will start when the temperature reaches the set value.
- Page 43 5. Software Applications Run a protocol Running Status: ① ② ③ Realize following symbols is highly recommended. It helps you acknowledge protocol status. Current Step Start Time, Estimated Time, Pause Time PV refers to the actual temperature. SV is really the set value. ...
- Page 44 5. Software Applications Run a protocol Mix :This step is to mix beads and reagents Collection : This step is used for collecting the magnetic beads from the wells of the plate, press Pause or Stop. Maelstrom Switch8 is not action immediately until finish collection.
- Page 45 5. Software Applications Run a protocol As the program finished, press “Report” to review the result. Spin tip should be ejected to finish the whole procedures. Select desire lane to eject the spin tip other than the lane with magnetic bead.
- Page 46 5. Software Applications Reports : Manage history data. Please press the square(s) to delete data or export data to USB.
- Page 47 5. Software Applications UV lamp : Switch the UV lamp on/off. Set UV light, then press the light bulb to start. Please close the door before turn on the UV light, running time is recommended over 5 minutes.
- Page 48 5. Software Applications Setting: Basic Parameters can be set through setting function, including User management, Language, and Time. User Management: Operator authority can be set through this function. Language: To change the UI language format Time: change of the time setting for the instrument. ...
- Page 49 5. Software Applications 12 Step Program As applied with CH 8 Gearbox, there have special program allowed users to edit with freely process within 12 lanes on the reaction plate, called “12 step program”. As enter the “Edit” section (refer to Page.
- Page 50 5. Software Applications After enter the editing interface, in 12 step program (A), the “Well” lane can be chosen freely from lane 1 to 12. However, in 06 step program (B), lane 1 and 7 was bonded, and so as 2 and 8, 3 and 9…etc.
-
Page 51: Technical Support
Taiwan Advance Nanotech Inc. provides post-sale services call number at +886-3-3167568 or via email: service@tanbead.com for assistance. Please provide this instrument serial number when you talk to our technician, that will solve the problems efficiently and answer your... -
Page 52: Cleaning And Maintenance
⚫ To clean the magnetic rods, wipe with a soft cloth dampened with pure water. Do not use alcohol solvent. ⚫ If the magnetic rods cannot be cleaned, please contact TANBead (service@tanbead.com) for technical assistance. 8. Disposal The decision whether to dispose of a potentially contaminated medical device is usually made by the owner in consultation with appropriate federal, state, and local authorities. -
Page 53: Patent
9. Patent Patent List US09616398B2 EP2937136 Canada CA2862946 Japan JP6151735B2 Korea KR101696517B1 China CN104971638B Taiwan TWI526245B WIPO WO2016127292 10. About Manufacturer ⚫ Manufacturer:Taiwan Advanced Nanotech Inc. ⚫ Legal Manufacturer:6F., No. 188, Wenhe Rd., Guishan Dist., Taoyuan City 333, Taiwan (R.O.C) ⚫... -
Page 54: Tanbead Instrument Warranty Policy
This warranty sheet covers the Nucleic Acid Extractors manufactured by Taiwan Advanced Nanotech Inc. (Hereinafter referred to as TANBead). TANBead warrants that under normal use conditions, this product will not have any material or manufacturing defects for one year from the date of purchase. If any defect is found within the warranty period, TANBead will repair or replace the product free of charge.
Need help?
Do you have a question about the Maelstrom Switch 8 and is the answer not in the manual?
Questions and answers