Table of Contents
Advertisement
Advertisement
Chapters
Table of Contents
Troubleshooting

Related Manuals for Morbark 1415

Summary of Contents for Morbark 1415
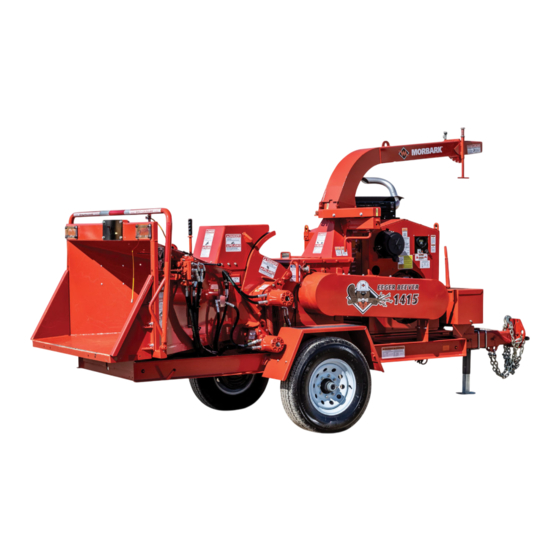
- Page 1 OEM LITERATURE EEGER BEEVER 1415 (S/N: 73467)
- Page 2 Best Practices Guidance Bulletin 6/13 ULSD…Not Your Same Old Diesel Fuel Anymore What “You” Need to Know About Static Electricity Risk During Refueling EPA Regulation Overview for Be Aware of Static Electricity Risk Clean Air Diesel During Refueling U.S. Environmental Protection Agency (EPA) Ultra Low Sulfur Diesel (ULSD) Fuel Hazard regulations require a major reduction in the sulfur content of diesel fuels and emission levels from...
- Page 3 Important Changes in Diesel Fuel What is Basic Bonding and Formulation Grounding? Why is it Important During Refueling? What You Need to Know About Static Electricity Risk Bonding: The removal of sulfur and other compounds in Ultra Low Sulfur Diesel (ULSD) fuel decreases its A properly bonded fuel delivery system has an conductivity and increases its ability to store static electrically conductive and unbroken connection...
- Page 4 Interstate Batteries’ Limited Warranty (effective on batteries purchased May 1, 2012, or later) This limited warranty applies unless you return your battery within 30 days of purchase. Important: Keep this Limited Warranty and sales receipt in glove compartment. Read CaRefuLLy: This limited warranty contains mandatory and binding individual arbitration and class-action waiver provisions, and other provisions that limit your legal rights.
- Page 5 Warranty exclusions and Limitations of Remedy This limited warranty does not cover batteries that are merely discharged, or that are damaged due to abuse, neglect, misuse, fire, accident, colli- sion, explosion, freezing, theft, overcharging, alteration, improper installation, use of special additives, unauthorized attempt to repair, or failure to keep the battery properly maintained.
- Page 6 Addendum A added 3/15/2019 per NACD Revised Torque Engagement Value per NACD 6/28/2019 (Rev B)
- Page 58 LIMITED NACD GENERAL WARRANTY, LIMITATIONS OF REMEDIES AND LIMITATIONS OF OTHER WARRANTIES North American Clutch & Driveline warrants all assembled products and parts to the original customer. For Power Take-Off products and parts, such warranty shall extend for a period of twenty-four (24) months from the date of original shipment by NACD to the original customer, but not to exceed twelve (12 months of service or one thousand five hundred (1,500) hours of service, whichever occurs first.
- Page 59 17.0 ADDENDUM A NACD Clutch Engagement Torque Settings Clutch Size & Type Engagement Torque (Measured at Cross Shaft) Ball 24547-703 / 7.5 SP 83-93 ft-lbs (112-126 Nm) 24547-603 / 10.0 SP Ball 140-165 ft-lbs (190-224 Nm) 110-165 ft-lbs (150-224 Nm) 24547-103 / 11.5 SP Bronze 24547-203 11.5 DP Bronze...
- Page 61 LOR Digital Controller (LDC) Manual ID: 80001-MAN-LDC-39253-643 Manual Type: Operator LOR Manufacturing Company, Inc. October 2020...
-
Page 63: Table Of Contents
Contents Read this before using this system ....... . Intended Use ......... . . Cleaning . - Page 64 October 2020 LOR Digital Controller (LDC) Adjust Sub-Menu ........Autofeed Settings .
- Page 65 List of Tables General Specifications ........User Interface .
- Page 67 List of Figures Device Parts ......... Device Parts .
- Page 69 LOR Digital Controller (LDC) October 2020 Thoroughly read and understand all information presented in this manual before using this prod- uct. Notice: The information contained in this manual is subject to change without notice. LOR Manufacturing shall not be liable for errors contained herein or for consequential damages in connection with the furnishing, performance, or use of this material.
- Page 70 October 2020 LOR Digital Controller (LDC) Revision Date Description Initials 08 October 2020 Initial Creation B.S. LOR Manufacturing Company, Inc.
- Page 71 LOR Digital Controller (LDC) October 2020 Please note that the information in this manual is specific to the following part numbers only. • 39253-643 LOR Manufacturing Company, Inc.
-
Page 72: Read This Before Using This System
October 2020 LOR Digital Controller (LDC) Read this before using this system • Always keep this manual readily available for future reference • Make sure the area is safe to operate equipment before turning power on • If you encounter any problem or malfunction, call your equipment dealer immediately •... -
Page 73: Mounting And Accessories
LOR Digital Controller (LDC) October 2020 Caution Operators must wear all OSHA required Personal Protective Equipment (PPE) when operating this system Mounting and Accessories Mounting To mount the system follow the cutout diagram below. 3.5000 4X Ø0.2000 FOR USE WITH #10-32 FASTENER Ø4.0000 3.5000... -
Page 74: Cautions And Warnings
October 2020 LOR Digital Controller (LDC) Cautions and Warnings Warning: Before welding on the Machine, ensure that all connectors are disconnected from the system. Failure to do so could result in damage to the system itself or its components. Caution: Improper operation of these controls could cause damage to equipment. Do not allow anyone to operate this equipment before completely reading this manual. -
Page 75: Specifications
LOR Digital Controller (LDC) October 2020 Specifications Table 2: General Specifications Weight 8 oz Operating Temperature -4–158°F (-20–70°C) Ingress Protection IP 67 Voltage Supply 9–32 VDC Current Consumption Outputs OFF - 50mA (12 VDC) 30mA (24 VDC) CAN Protocol J1939 Table 3: User Interface 400 ×... -
Page 76: Input Specifications
October 2020 LOR Digital Controller (LDC) Table 4: Input Specifications Minimum Signal Voltage 2 VAC Resistive Inputs Number Signal Range 0–1,000Ω Table 5: Output Specifications PWM Outputs Number Up to 6 Type High Side Switching (Hydraulic Solenoids, Horns, Lights, Relays, etc.) Max Load 3.5 A Continuous PWM Frequency... -
Page 77: Symbol Definitions
LOR Digital Controller (LDC) October 2020 Symbol Definitions Symbol Definition Caution Symbol: Visual cue to use caution Direct Current Symbol Throttle Decrease Throttle Increase Set/Enter Menu Engine RPMs Engine Hours Battery Voltage Autofeed Mode Hydraulic PSI LOR Manufacturing Company, Inc. - Page 78 October 2020 LOR Digital Controller (LDC) Symbol Definition Coolant Temp fuel rate Actual Load Message(s) Drum Speed Clutch Fault Timer Enabled Clutch Fault Timer Disabled Diesel Exhaust Fluid (DEF) LOR Manufacturing Company, Inc.
-
Page 79: Parts Identification
LOR Digital Controller (LDC) October 2020 Parts Identification Figure 2: Device Parts LOR Manufacturing Company, Inc. -
Page 80: Parts Identification
October 2020 LOR Digital Controller (LDC) Table 7: Parts Identification Description Bezel Feed Back LEDs: Red–Shutdown (J1939) Green–Output #1/Feed Forward Blue–Output #2/Feed Reverse Amber–Caution/Warning (J1939) Display Cancel Button Down/Decrease Button Up/Increase Button Set/Enter Button Regen Force Button Throttle Decrease Throttle Increase Regen Inhibit Button Mounting Hole (x4) Programming Port... -
Page 81: Dpf Indicators
LOR Digital Controller (LDC) October 2020 DPF Indicators Symbol Definition Indicates elevated soot loading of the DPF of >80%. This indicator turns off once an active regeneration has been initiated. Anytime the automatic regeneration is inhibited. This can be from the operator controlled regeneration force/inhibit input switch or via setting the configuration in the ECM. -
Page 82: Using The System
October 2020 LOR Digital Controller (LDC) Using the System Information Pages The pages in this section can be accessed by utilizing the up and down buttons on the LDC. LOR Manufacturing Company, Inc. -
Page 83: Splash Screen
LOR Digital Controller (LDC) October 2020 Splash Screen Upon powering the system on the LDC will briefly display the Splash Screen (3). This screen contains: PN: 39253-643_1.4 Figure 3: Splash Screen Number Description Logo Part Number and Software Revision LOR Manufacturing Company, Inc. -
Page 84: Main
October 2020 LOR Digital Controller (LDC) Main This screen displays basic operating information. This screen contains: x1000 Figure 4: Main Screen Number Description Engine Size Clutch Type... -
Page 85: Engine Info
LOR Digital Controller (LDC) October 2020 Engine Info This screen displays information related to the Engine. This screen contains: ° F ... -
Page 86: Machine Info
October 2020 LOR Digital Controller (LDC) Machine Info This screen displays information related to the different machine processes. To change the Autofeed Mode press the “Set” button to cycle through the different modes. Caution When using the ”Autofeed Off” mode, Feed Forward will be active continuously. Refer to OEM Documentation for manual operation of the feed system. -
Page 87: Clutch Info
LOR Digital Controller (LDC) October 2020 Clutch Info This screen displays information related to the Machine’s Clutch. Note This page will ONLY display when the system is setup with a Centrifugal Clutch. ... -
Page 88: Menu System
October 2020 LOR Digital Controller (LDC) Menu System To access the menu system of the LDC press the “Menu” button. Once in the main menu you can access the following sub-menus: • System • Measure • Adjust • Preferences To enter any of the sub-menus in this section utilize the “Up” and/or “Down” buttons to highlight the options and press the “Set”... -
Page 89: Engine
LOR Digital Controller (LDC) October 2020 Engine Identification This screens provides the make, model, and serial number of the Machine’s engine. Faults This screen allows the user to select between “Active” or “Previously Active” faults. Once a choice is made the user will be presented with a list containing the faults. This list can be navigated by utilizing the “Up”, “Down”, and “Set”... -
Page 90: Outputs
October 2020 LOR Digital Controller (LDC) • +5 VREF (mV) • RPM Down (mV) • RPM Up (mV) • Drum Speed (RPM) Outputs This screen shows the status of the LDC’s Outputs. The following parameters are displayed on this screen. •... -
Page 91: Preferences Sub-Menu
LOR Digital Controller (LDC) October 2020 Preferences Sub-Menu This menu allows users to change from Metric to Imperial units as well as turn the Backlight on or off. LOR Manufacturing Company, Inc. -
Page 92: Troubleshooting
October 2020 LOR Digital Controller (LDC) Troubleshooting The following provides common troubleshooting steps that can be followed in the field. LOR Manufacturing Company, Inc. - Page 93 LOR Digital Controller (LDC) October 2020 No Power Check Fuses Replace Fuses Fuses Good Installed Correctly Reinstall Fuses Check Connections Tighten Con- Connections Good nections Check Voltage Correct Volt- Voltage/Continuity age Issues Correct Contact Support Problem Corrected Operate Normally LOR Manufacturing Company, Inc.
- Page 94 October 2020 LOR Digital Controller (LDC) Outputs Not Functioning Change Autofeed Mode to Factory Select correct Autofeed Correct Autofeed Mode Check Volt- age at coils Contact Support Voltage Correct Contact Support Problem Corrected Operate Normally LOR Manufacturing Company, Inc.
- Page 95 LOR Digital Controller (LDC) October 2020 Over Load Condition Check Coil Resistance Repair or Re- Resistance Correct place Coil Check Diode Suppression Good Diode Add or Repair Suppression Diode Suppression Check for Short Repair or Replace Short Present Component Contact Support Problem Corrected Operate Normally LOR Manufacturing Company, Inc.
- Page 96 October 2020 LOR Digital Controller (LDC) Open Load Condition Check Receiver Connections Ensure Connec- Connections Good tions are Secure Check Continuity Repair or Re- Continuity Good place Bad Wire Contact Support Problem Corrected Operate Normally LOR Manufacturing Company, Inc.
- Page 97 LOR Manufacturing Company, Inc. 7131 West Drew Road Weidman, MI 48893 USA info@lormfg.com +1-866-644-8622...
- Page 99 Introduction This manual is designed to provide information for you to understand, use, maintain, and service your trailer running gear system. Your axles are manufactured by Dexter. Since 1960, Dexter’s experience in the design, testing, and manufacturing of trailer axles has resulted in the most complete product line in the industry.
- Page 100 Introduction Important Safety Notice ......................4 Getting Started - Setup and Adjustment ................4 Braking Systems - Electric Electric Brakes ........................5 Features ..........................6 Parking Brake Option ....................6 Self Adjusting Feature ....................6 Brake Controllers .......................7 Typical Trailer Wiring ....................10 How to Use Your Electric Brakes Properly ..............11 Trailer Wire Size Chart ....................11 Synchronizing Your Trailer Brakes ................12 General Maintenance Electric Brakes ................13...
- Page 101 Bearing Lubrication - Oil ..................52 Recommended Wheel Bearing Lubrication Specifications ........53 Seal Inspection and Replacement ................55 Bearing Adjustment and Hub Replacement ..............56 Typical E-Z Lube After Spring 2002 .................57 ® E-Z Lube Lubrication ....................57 ® Nev-R-Lube Drums/Bearings ...................59 ® Drum Removal ......................60 Bearing Inspection ....................60 Nev-R-Lube Bearing End Play Inspection ..............61...
-
Page 102: Important Safety Notice
Important Safety Notice Appropriate service methods and repair procedures are essential for the safe, reliable operation of all running gear as well as the personal safety of the individual doing the work. This manual provides general directions for performing service and repair work with tested, effective techniques. Following these guidelines will help assure reliability. -
Page 103: Electric Brakes
Electric Brakes The electric brakes on your trailer are similar to the drum brakes on your automobile. The basic difference is that your automotive brakes are actuated by hydraulic pressure while your electric trailer brakes are actuated by an electromagnet. With all of the brake components connected into the system, the brake will operate as follows: Retractor Spring Primary Shoe... -
Page 104: Features
Features Electrically actuated brakes have several advantages over other brake actuation systems. 1. They can be manually adjusted at the controller to provide the correct braking capability for varying road and load conditions. 2. They can be modulated to provide more or less braking force, thus easing the brake load on the towing vehicle. -
Page 105: Brake Controllers
Brake Controllers Electric brake controllers provide power to the magnets to actuate the trailer brakes. Dexter offers a state-of-the-art inertial controller called the Predator . This controller features a patented accelerometer design which senses ® the deceleration of the towing vehicle and sends a proportional voltage to the electric trailer brakes. - Page 106 Dexter Electric Brakes Wired in parallel. Breakaway Battery Provides power to actuate trailer brakes in the event of trailer breakaway. Breakaway Switch Switches battery power to brakes if breakaway occurs.
- Page 107 Controller Electric brake controller provides power to the magnets to actuate the trailer brakes. Battery Connect controller directly. Connector Used to connect and disconnect trailer and tow vehicle. (Always ground trailer brakes through connector).
-
Page 108: Typical Trailer Wiring
Typical Trailer Wiring Double Stop & Left Turn Signal Filament To Terminal #5 Bulb Yellow Auxiliary Circuit License Tail & White #1 Common Ground Terminal #7 Running Lights #3 To Tail Running & Green Grey Terminal #3 Auxiliary Circuit License Lights Terminal #8 #5 Stop &... -
Page 109: How To Use Your Electric Brakes Properly
How to Use Your Electric Brakes Properly Your trailer brakes are designed to work in synchronization with your tow vehicle brakes. Never use your tow vehicle or trailer brakes alone to stop the combined load. Your brake controller must be set up according to the manufacturer’s recommendations to ensure proper synchronization between the tow vehicle and the trailer. -
Page 110: Synchronizing Your Trailer Brakes
Synchronizing Your Trailer Brakes To ensure safe brake performance and synchronization, read the brake controller manufacturer’s instructions completely before attempting any synchronization procedure. CAUTION Before road testing, make sure the area is clear of vehicular and pedestrian traffic. Failure to brake safely could result in an accident and personal injury to yourself and/or others. -
Page 111: General Maintenance Electric Brakes
General Maintenance - Electric Brakes Brake Adjustment Dexter electric brakes that have a self adjusting feature require no manual adjustment. Brakes not equipped with this feature can be adjusted by using the following procedure: Brakes should be adjusted (1) after the first 200 miles of operation when the brake shoes and drums have “seated, ”... -
Page 112: Brake Cleaning And Inspection
Brake Cleaning and Inspection Your trailer brakes must be inspected and serviced immediately if a loss of performance is indicated. With normal use, servicing at one year intervals is usually adequate. With increased usage, this work should be done more frequently as required. -
Page 113: Magnets
Magnets Your electric brakes are equipped with high quality electromagnets that are designed to provide the proper input force and friction characteristics. Your magnets should be inspected and replaced if worn unevenly or abnormally. As indicated below, a straightedge should be used to check magnet condition. For best results, the magnet should be flat. -
Page 114: Shoes And Linings
Shoes and Linings A simple visual inspection of your brake linings will tell if they are usable. Replacement is necessary if the lining is worn to 1/16" or less. Shoes contaminated with grease or oil, or abnormally scored or gouged should also be replaced. -
Page 115: Introduction To Troubleshooting
Introduction to Troubleshooting Proper brake function is critical to the safe operation of any vehicle. If problems are encountered with your trailer braking system, the following guide can be used to find the causes and remedies for some of the more common problems. If you are unsure or unable to resolve the problem, please contact your nearest repair facility for professional assistance. -
Page 116: Troubleshooting Chart - Electric
Troubleshooting SYMPTOM CAUSES REMEDIES Open Circuits Find & Correct Severe No Brakes Adjust Brakes Underadjustment Faulty Controller Test & Correct Short Circuits Find & Correct Grease or Oil on Clean or Replace Magnets or Linings Clean & Correct Corroded Connections Cause of Corrosion Worn Linings Replace... - Page 117 Troubleshooting SYMPTOM CAUSES REMEDIES Wrong Magnet Correct Lead Wire Color Adjust Incorrect Adjustment Grease or Oil on Clean or Replace Linings or Magnets Brakes Pull to One Side Broken Wires Find & Repair Find & Repair Bad Connections Adjust Underadjustment Improper Correct Synchronization...
-
Page 118: How To Measure Voltage
How to Measure Voltage System voltage is measured at the magnets by connecting the voltmeter to the two magnet lead wires at any brake. This may be accomplished by using a pin probe inserted through the insulation of the wires. The engine of the towing vehicle should be running when checking the voltage so that a low battery will not affect the readings. -
Page 119: Magnet Amperes Chart
Magnet Amperes Chart Brake Amps/ Four Magnet Size Magnet Brakes Brakes Brakes Ohms 7" x 1 1/4" 10.0 15.0 10" x 1 1/2" 12.0 18.0 10" x 2 1/4" 12.0 18.0 12" x 2" 12.0 18.0 12 1/4" x 2 1/2" 12.0 18.0 12 1/4"... - Page 120 Finding the cause of a short circuit in the system is done by isolating one section at a time. If the high amperage reading drops to zero by unplugging the trailer, then the short is in the trailer. If the amperage reading remains high with all the brake magnets disconnected, the short is in the trailer wiring.
-
Page 121: Hydraulic Brakes
Hydraulic Brakes Dexter offers several varieties of hydraulic trailer brakes. Your vehicle may be equipped with drum brakes or disc brakes. The hydraulic brakes on your trailer are much like those on your automobile or light truck. The hydraulic fluid from a master cylinder or actuation system is used to actuate the wheel cylinder which, in turn, applies force against the brake shoes and drum. -
Page 122: Hydraulic Drum Brake Operation
Hydraulic Drum Brake Operation Duo-Servo The duo-servo brake uses a dual piston wheel cylinder to apply the brakes. This type of brake is typically used in an electric/hydraulic, vacuum/hydraulic, or air/ hydraulic system. A description of operation of this brake is as follows: When the brakes are applied, the double-acting wheel cylinder moves the primary and secondary shoes towards the drum. -
Page 123: Self-Adjusting Mechanism For 12 1/4" Brakes
Another variation is called a “free backing” brake which is commonly used on trailers with a surge hitch system. When backing with a surge brake hitch, normal brakes are applied through the surge mechanism and if there is more brake force on the trailer than the tow vehicle can override, no backing is possible. - Page 124 The internal parking brake lever of 10" and 12" Dexter brakes, which is mounted to the secondary shoe, transfers applied cable force through a parking strut which is attached to the primary shoe. This transferred load generates a spreading force between the primary and secondary shoes. The shoes move toward the drum until contact is made.
-
Page 125: Hydraulic Disc Brakes
Hydraulic Disc Brakes Dexter manufactures two types of disc brakes, the floating caliper and the fixed caliper brake. With both styles, the disc brake uses friction pads astride a ventilated rotor which is attached to the wheel hub. When the brake is actuated, the pads are pressed against the sides of the rotor causing drag to slow the rotating disc. -
Page 126: Actuation Systems
Actuation Systems To effectively operate your hydraulic trailer brakes we recommend the Dexter electrically controlled hydraulic brake actuation device (also referred to as E/H brake actuator), controlled by the Predator DX2 electronic brake controller. ® These high performance hydraulic power modules will supply pressurized brake fluid to your trailer brakes in proportion to the amount of braking effort called for by the towing vehicles’... -
Page 127: Troubleshooting Guide
Scan to view E/H Actuator Installation video Troubleshooting Guide Brakes are slow to respond 1. Re-bleed the trailer brakes and actuator. 2. If the trailer is equipped with drum brakes, readjust the drum brakes to the brake manufacture’s recommended running clearance. 3. - Page 128 Breakaway test procedure - do not leave the breakaway switch pulled for more than two minutes during any of the steps outlined below 1. Pull the breakaway switch on the trailer. 2. If the unit runs and builds pressure, that indicates the actuator is functioning properly.
-
Page 129: General Maintenance - Hydraulic Brakes
General Maintenance - Hydraulic Brakes Drum Brake Adjustment - Manual Most Dexter 12 1/4" hydraulic brakes have a self adjusting feature. If manual adjusting is required, use the following procedure: Brakes should be adjusted (1) after the first 200 miles of operation when the brake shoes and drums have “seated, ”... -
Page 130: Wheel Cylinders
Wheel Cylinders Inspect for leaks and smooth operation. Clean with brake cleaner and flush with fresh brake fluid. Hone or replace as necessary. Brake Lines Check for cracks, kinks, or blockage. Flush with fresh brake fluid. Bleed system to remove all air. Replace as necessary. Shoes and Linings A simple visual inspection of your brake linings will tell if they are usable. -
Page 131: Hardware
Hardware Check all hardware. Check shoe return spring, hold down springs, and adjuster springs for stretch or wear. Replace as required. Service kits are available. Instructions for Brake Caliper Kit 3.5K Hydraulic Disc Brakes Notice to Buyer It is recommended that all brakes be replaced at the same time to ensure balanced braking performance. -
Page 132: Instructions For Brake Rotor Kit - 3.5K Disc Brakes
Installing the new brake caliper 1. First, inspect the brake assembly for grooves, flaking, cracks, heat checking, thickness variation, insufficient rotor thickness, and look to see that the mounting hardware is straight. Replace any component as needed (or desired) per manufacturer recommendations. 2. - Page 133 CAUTION Do not lift or support the trailer on any part of the axle or suspension system. Never go under any trailer unless it is properly supported on jack stands which have been rated for the load. Improperly supported vehicles can fall unexpectedly and cause serious injury or death. 2.
-
Page 134: Instructions For Brake Rotor Kit - 6K Or 8K Disc Brakes
Instructions for Brake Rotor Kit 6K or 8K Hydraulic Disc Brakes Notice to Buyer It is recommended that all brakes be replaced at the same time to ensure balanced braking performance. Remove the old brake rotor 1. Jack up trailer and secure on adequate capacity jack stands. Follow trailer manufacturers recommendations for lifting and supporting the unit. -
Page 135: Instructions For Brake Hub/Rotor Kit - 7K Disc Brakes
Installing the new brake rotor 1. First inspect the brake assembly for grooves, flaking, cracks, heat checking, thickness variation, insufficient rotor thickness, and look to see that the mounting hardware is straight. Replace any component as needed (or desired) per manufacturer recommendations. 2. - Page 136 Remove the old brake rotor 1. Jack up trailer and secure on adequate capacity jack stands. Follow trailer manufacturers recommendations for lifting and supporting the unit. CAUTION Do not lift or support the trailer on any part of the axle or suspension system.
-
Page 137: Instructions For Brake Pad Kit - 6K, 7K Or 8K Disc Brakes
4. Ensure spindle nut retainer is in place. Install new grease or oil cap with rubber plug, and torque as shown on cap. 5. Remount the caliper assembly onto the caliper attaching bracket. It may be necessary to push the piston into the calipers to obtain enough clearance. - Page 138 CAUTION Do not lift or support the trailer on any part of the axle or suspension system. Never go under any trailer unless it is properly supported on jack stands which have been rated for the load. Improperly supported vehicles can fall unexpectedly and cause serious injury or death. 2.
- Page 139 Note: Use two lug nuts to secure rotor against the hub face when reassembling the new pads. After the pads are assembled remove the lug nuts. 3. Install the new brake pads by sliding them in one at a time between the caliper pistons and the rotor.
-
Page 140: Instructions For Brake Caliper Kit - 6K, 7K Or 8K Disc Brakes
Instructions for Brake Caliper Kit 6K, 7K or 8K Hydraulic Disc Brakes Notice to Buyer It is recommended that all brakes be replaced at the same time to ensure balanced braking performance. Remove the old brake calipers 1. Jack up trailer and secure on adequate capacity jack stands. Follow trailer manufacturers recommendations for lifting and supporting the unit. - Page 141 2. Assemble the new caliper assembly. Note: Use two lug nuts to secure rotor against the hub face when reassembling the calipers. After the brake is assembled, remove the lug nuts. 3. One caliper will be used on the inboard side, with the hydraulic line fitting adapter installed on the top side of the piston boss.
- Page 142 7. Reconnect the brake actuation system. Refer to your Operation Maintenance Service Manual for proper operation. 8. Bleed and flush brake system per your actuation systems Operation Maintenance Service Manual. 9. Remount the wheel. Refer to your Operation Maintenance Service Manual for proper wheel nut torque procedures.
-
Page 143: Introduction To Troubleshooting
Introduction to Troubleshooting Proper brake function is critical to the safe operation of any vehicle. A properly installed vacuum/hydraulic, electric/hydraulic, or air/hydraulic system should not require any special attention with the exception of routine maintenance as defined by the manufacturer. If problems occur, the entire tow vehicle/trailer braking system should be analyzed by a qualified mechanic. -
Page 144: Troubleshooting Chart - Hydraulic
Troubleshooting SYMPTOM CAUSES REMEDIES Broken or Kinked Repair or Replace Brake Line Severe No Brakes Adjust Brakes Underadjustment Malfunctioning Troubleshoot System Actuation System Manual-Adjust Brakes Brake Adjustment Automatic-Make Several Not Correct Reverse Stops Excessively Worn Replace Shoe Brake Linings and Lining Install Correct Incorrect Lining Shoe and Lining... - Page 145 Troubleshooting SYMPTOM CAUSES REMEDIES Adjust Underadjustment Lack of Lubrication Lubricate Noisy Brakes Broken Brake Replace Components Components Hydtrbl.eps 2/22/94 Incorrect Brake Correct Components Loose, Bent or Broken Replace Components Brake Components Locking Brakes Underadjustment Adjust Out-of-Round Drums Machine or Replace Incorrect Tire Inflate Evenly on Both Pressure...
-
Page 146: Hubs/Drums/Bearings
Hubs/Drums/Bearings Dexter offers several types of bearing arrangements and lubrication methods. • Dexter’s standard wheel bearing configuration consists of opposed tapered roller bearing cones and cups, fitted inside of a precision machined cast hub. This method of using tapered roller bearings requires that a minimal amount of axial end play be provided at assembly. -
Page 147: Hub Removal - Standard Bearings
Hub Removal - Standard Bearings Whenever the hub equipment on your axle must be removed for inspection or maintenance the following procedure should be utilized. 1. Elevate and support the trailer unit per manufacturers’ instructions. CAUTION You must follow the maintenance procedures to prevent damage to important structural components. -
Page 148: Bearing Inspection
than .015", then the drum surface should be re-machined. If scoring or other wear is greater than .090” on the diameter, the drum must be replaced. When turning the drum surface, the maximum rebore diameter is as follows: • 7" Brake Drum-7.090" diameter •... - Page 149 If any pitting, spalling, or corrosion is present, then the bearing must be replaced. The bearing cup inside the hub must be inspected. IMPORTANT: Bearings must always be replaced in sets of a cone and a cup. CAUTION Be sure to wear safety glasses when removing or installing force fitted parts.
-
Page 150: Bearing Lubrication - Grease
Bearing Lubrication - Grease CAUTION Do not mix Lithium, calcium, sodium or barium complex greases due to possible compatibility problems. When changing from one type of grease to another, it is necessary to ensure all the old grease has been removed. Along with bearing adjustment, proper lubrication is essential to the proper function and reliability of your trailer axle. -
Page 151: Recommended Wheel Bearing Lubrication Specifications
Recommended Wheel Bearing Lubrication Specifications Grease Thickener Type Lithium Complex Dropping Point 215°C (419°F) Minimum Consistency NLGI No. 2 Additives EP , Corrosion & Oxidation Inhibitors Viscosity Index 80 Minimum Approved Grease Sources Chem Arrow Arrow 2282 Chevron Texaco Chevron Ulti-Plex Grease EP #2 Texaco Starplex Moly MPGM #2 Citgo Lithoplex MP #2... - Page 152 SAE 90, SAE 80W-90, SAE 75W-90 Approved Oil Sources Ashland Oil Valvoline DuraBlend CITGO Petroleum Co. CITGO Premium Gear Oil MP Mystik JT-7 Mystik Power Lube Conoco Universal Gear Lubricant 80W-90 Exxon Company USA Gear Oil GX 80W-90 Industrial Oils Unlimited Super MP Gear Oil 80W-90 Kendall Refining Co.
-
Page 153: Seal Inspection And Replacement
Note: The convenient lubrication provisions of the E-Z Lube and the oil ® lubrication must not replace periodic inspection of the bearings. Seal Inspection and Replacement Whenever the hub is removed, inspect the seal to assure that it is not nicked or torn and is still capable of properly sealing the bearing cavity. -
Page 154: Bearing Adjustment And Hub Replacement
5. Orient the seal properly. Many oil bath seals will be marked AIR SIDE on the side of the seal to facing out of the hub after installation. 6. Install new seal into place using a seal driver or seal installation tool of proper size. -
Page 155: Typical E-Z Lube After Spring 2002
For E-Z Lube axles using the new nut retainer: ® 1. After placing the hub, bearings, washers, and spindle nut back on the axle spindle in reverse order as detailed in the previous section on hub removal, rotate the hub assembly slowly while tightening the spindle nut to approximately 50 Ft. - Page 156 4. When the new clean grease is observed, remove the grease gun, wipe off any excess, and replace the rubber plug in the cap. 5. Rotate hub or drum while adding grease. Note: The E-Z Lube feature is designed to allow immersion in water. ®...
-
Page 157: Nev-R-Lube ® Drums/Bearings
Nev-R-Lube Drums/Bearings ® Dexter’s Nev-R-Lube bearings are comprised of opposed tapered roller bearing ® cones sealed inside of a precision ground, one piece double cup arrangement. These bearings are designed with a small amount of axial end play. This end play is essential to the longevity of the bearings service life. -
Page 158: Drum Removal
Drum Removal Whenever the hub equipment on your axle must be removed for inspection or maintenance, the following procedure should be utilized. 1. Elevate and support the trailer unit per manufacturer’s instructions. CAUTION Do not lift or support the trailer on any part of the axle or suspension system. -
Page 159: Nev-R-Lube ® Bearing End Play Inspection
CAUTION Do not lift or support the trailer on any part of the axle or suspension system. Never go under any trailer unless it is properly supported on jack stands which have been rated for the load. Improperly supported vehicles can fall unexpectedly and cause serious injury or death. 2. -
Page 160: Bearing Replacement And Drum Installation
Resultant Tilt Value Bearing Size End Play 35 MM .005" axial .003" / per inch 42 MM .006" axial .005" / per inch 50 MM .008" axial .004" / per inch It is important to note that most mounted tires will deflect fairly easily when enough hand pressure is applied while shaking the tire. - Page 161 5. Install “internal” snap ring into hub. 6. Clean and inspect spindle shaft. Apply a light coating of anti-seize lubricant to the spindle shaft prior to assembling drum. 7. Install drum assembly onto spindle (Do Not Force). 8. Install steel washer onto spindle end. 9.
-
Page 162: Axle & Suspension Installation
Axle & Suspension Installation Responsibility for proper axle alignment lies with the axle installer. The axle must be installed so that it will be parallel to the drive axle(s) of the tractor. This will allow good vehicle control when cornering, longer tire wear, and it will eliminate dog tracking. -
Page 163: Suspension Systems
Suspension Systems The suspension systems incorporated into Dexter axles are designed to provide the trailer owner three basic functions: 1. Attach the axle to the trailer 2. Dampen the effects of road shock 3. Cushion the cargo or load All Dexter suspension systems are available in single and multiple axle configurations. -
Page 164: Grease Lubricated Suspension Bushings
Grease Lubricated Suspension Bushings Dexter offers a variety of optional heavy duty attaching parts kits for double eye leaf spring suspensions up to 8,000 lb. axle capacity. The kits contain extra heavy shackle links, bronze bushings for the spring eyes, and suspension bolts and equalizers equipped with grease fittings to provide a convenient means to lubricate all the pivot points including the rubber E-Z Flex equalizer center... -
Page 165: Inspection And Replacement
Inspection and Replacement All the components of your suspension system should be visually inspected at least every 6,000 miles for signs of excess wear, elongation of bolt holes, and loosening of fasteners. Whenever loose or replaced, the fasteners in your suspension system should be torqued as detailed in the charts below. - Page 166 CAUTION Do not lift or support the trailer on any part of the axle or suspension system. Never go under any trailer unless it is properly supported on jack stands which have been rated for the load. Improperly supported vehicles can fall unexpectedly and cause serious injury or death. 2.
-
Page 167: Torflex ® Suspension
1. With both axles blocked up, remove the spring eye bolt, shackle bolt, and equalizer bolt from the equalizer to be repaired or replaced. 2. Take the equalizer to suitable work surface and remove the worn bushings using a suitable drift punch. 3. -
Page 168: Airflex ® Suspension
resistance in the rubber cords. This action provides the same functions as conventional sprung axles with several operating advantages including independent suspension. Except for periodic inspection of the fasteners used to attach the Torflex ® axle to the vehicle frame, no other suspension maintenance is required on Torflex axles. - Page 169 Note: Lifting the trailer with air system pressurized will overextend the air bags and can result in damage to the air bags. CAUTION Do not lift or support the trailer on any part of the axle or suspension system. Never go under any trailer unless it is properly supported on jack stands which have been rated for the load.
-
Page 170: Wheels
Wheels Wheel Selection Wheels are a very important and critical component of your running gear system. When specifying or replacing your trailer wheels it is important that the wheels, tires, and axle are properly matched. The following characteristics are extremely important and should be thoroughly checked when replacement wheels are considered. -
Page 171: Torque Requirements
CAUTION Do not attempt to repair or modify a damaged wheel. Even minor modifications can cause a dangerous failure of the wheel and result in personal injury or death. Torque Requirements In June of 2004, Dexter ceased production of trailer wheels. If your vehicle is equipped with Dexter steel wheels manufactured before that date, the following wheel torque information will be applicable. -
Page 172: Wheel Torque Requirements
3. The tightening of the fasteners should be done in stages. Following the recommended sequence, tighten fasteners per wheel torque requirements diagram. 4. Wheel nuts/bolts should be torqued before first road use and after each wheel removal. Check and re-torque after the first 10 miles, 25 miles, and again at 50 miles. -
Page 173: Maximum Wheel Fastener Torque
TORQUE SEQUENCE 4 BOLT 5 BOLT 6 BOLT 8 BOLT Maximum Wheel Fastener Torque The wheel mounting studs used on Dexter axles conform to the SAE standards for grade 8. The maximum torque level that can be safely applied to these studs is listed in the following chart: Stud Size Maximum Torque... -
Page 174: Tires
Tires Before mounting tires onto the wheels, make certain that the rim size and contour is approved for the tire as shown in the Tire and Rim Association Yearbook or the tire manufacturers catalog. Also make sure the tire will carry the rated load. -
Page 175: Tire Wear Diagnostic Chart
Tire Wear Diagnostic Chart Wear Pattern Cause Action Adjust pressure to Center Wear Over Inflation particular load per tire catalog Adjust pressure to Edge Wear Under Inflation particular load per tire catalog Make sure load doesn’t Loss of camber or Side Wear exceed axle rating. -
Page 176: Replacement Parts/Kits
Replacement Parts/Kits Electric Brake Magnets Nut Torque Magnet Kit Number Wire (Ft. Lbs.) Brake Size (one magnet per kit) Color Brake Mounting 7" x 1 1/4" K71-057-00 White 45-70 10" x 1 1/2" K71-104-00 Green 45-70 10" x 2 1/4" K71-104-00 Green 45-70... -
Page 177: Brake Shoe Replacement Kits
Brake Shoe Replacement Kits Shoe and Lining Replacement (1 Brake) Brake Size Electric Hydraulic 7" x 1 1/4" (2.2K) K71-045-00 7" x 1 3/4" (2.5K) K71-466-00 10" x 1 1/2" (3.0K) K71-046-00 Nev-R-Adjust (3.0K) K71-701-00 K71-702-00 ® 10" x 2 1/4" (3.5K) K71-047-00 K71-267-00 Nev-R-Adjust... -
Page 178: Bearing Replacement Chart
Bearing Replacement Chart Brake Dexter Kit Industry Part # Axle Size Size Bearings Number Cup/Cone Capacity 7" x 1 1/4" 4 or 5 Inner K71-306-00 L44610/L44649 Bolt Outer K71-306-00 L44610/L44649 10" x 1 1/2" 4 or 5 Inner K71-307-00 LM67010/LM67048 2.8K Bolt Outer... -
Page 179: Storage
Storage Storage Preparation If your trailer is to be stored for an extended period of time or over the winter, it is important that the trailer be prepared properly. 1. Remove the emergency breakaway battery and store inside, out of the weather. -
Page 180: After Prolonged Storage - Inspection Procedures
After Prolonged Storage Inspection Procedure Before removing trailer from jack stands: 1. Remove all wheels and hubs or brake drums. Note which spindle and brake that the drum was removed from so that it can be reinstalled in the same location. 2. -
Page 181: Trip Preparation Checklist
Trip Preparation Checklist There are a number of simple rules to follow in caring for your trailer axle assembly that can add to its life and in the case of some of these rules, you may be protecting your own life as well. Using the following checklist before starting a trip with your trailer is highly recommended. -
Page 182: Maintenance Schedule
Maintenance Schedule 3 Months or 6 Months or 12 Months or Item Function Required Weekly 3,000 Miles 6,000 Miles 12,000 Miles Brakes Test that they are operational. At Every Use Adjust to proper operating • Brake Adjustment clearance (not required with Nev- R-Adjust ®... -
Page 183: Limited Warranty
Dexter Axle Limited Warranty What Products Are Covered All Dexter Axle Company (“Dexter”) trailer axles, suspensions, and brake control systems manufactured on or after September 1, 2016, excluding Dexter 6000 series Manufactured Housing Axles. Additional exclusions include the following brands: UFP by Dexter, AL-KO (IAC), Titan Brakes and Actuators by Dexter, and BrakeRite by Dexter products, which are covered under separate warranties. - Page 184 What You Must Do In order to make a claim under these warranties: 1. You must be the original purchaser of the trailer in which the sprung suspension axles or Torflex axles or components were originally installed. ® 2. You must promptly notify Dexter after detection of any defect, but in any case within the applicable warranty period of such defect, and provide us with the axle or applicable component serial number and any substantiation of such defect which may include, but is not limited to, the return of part(s)
- Page 185 Limitations 1. In all cases, Dexter reserves the right to fully satisfy its obligations under the Limited Warranties by refunding the lesser of the original purchase price and the then-current list price of the defective axle (or, if the axle has been discontinued, of the most nearly comparable current product).
-
Page 186: Axle Identification
Axle Identification In the unlikely event that you should require service assistance from Dexter, please have the lot (serial) number of the axle available when you call. On all axles produced after April 2001, this nine digit number can be found near the center on the rear side of the axle beam. - Page 187 Dexter Online Parts Store From magnets and seals to complete brake and hub kits, Dexter offers a complete line of genuine replacement parts for your trailer. Most products are available in-stock and ready to ship within 24 hours direct to you from the factory. With dedicated customer support and quick turnaround, the Dexter Online Parts Store helps keep your trailer going.
-
Page 188: Dexter Video Gallery
Dexter Video Gallery In keeping with our continual commitment to industry safety and the development of innovative products, please feel free to view our ongoing video gallery at www. dexteraxle.com/resources/videos or scan the following QR codes. We are confident these videos will help educate and promote the Dexter product line that you, as our customer, are investing in. - Page 189 Service Record Date Service Performed Mileage -91-...
- Page 190 Service Record Date Service Performed Mileage -92-...
- Page 191 Service Record Date Service Performed Mileage -93-...
- Page 192 Notes -94-...
- Page 193 Notes -95-...
- Page 194 Notes -96-...
- Page 195 Genuine Dexter axles and components are available nationwide from our plant locations listed below or through our network of distributors. Check our web site for the distributor nearest you. Plant 52 Plant 52 Plant 51 Plant 51 Dexter Headquarters Dexter Headquarters Plants 12, 13, 39, 61 Plants 12, 13, 39, 61 Plant 25...
- Page 196 www.dexteraxle.com 2900 Industrial Parkway East Elkhart, IN 46516 Phone: 574-295-7888 Fax: 574-295-8666 ISO 9001:2015 Certified 2018.06 © 1990 - 2018 Dexter Axle Company. LIT-001-00...
- Page 197 MORBARK, LLC. 8507 South Winn Road Winn, Michigan 48896 Tel: #989-866-2381 Fax: #989-866-2280 www.morbark.com WINN, MICHIGAN 39510-309 18 13/16”W x 8 13/16” H USED ON MORBARK SERVICE TRUCKS...
Need help?
Do you have a question about the 1415 and is the answer not in the manual?
Questions and answers