
Subscribe to Our Youtube Channel
Related Manuals for KinAn XU0104


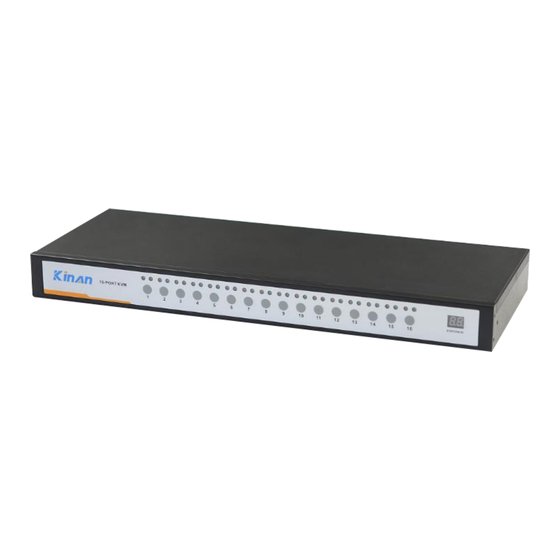
Summary of Contents for KinAn XU0104
- Page 1 Rack Mount KVM Switch (4 Port / 8 Port / 16 Port) User Manual www.kinankvm.com @all right reserved Shenzhen Kinan Technology Co., Ltd Printing date: 2023/01 Version: V2.3...
-
Page 2: Table Of Contents
4 Port/ 8 Port /16 Port User Manual Contents Overview ......................2 Descriptions ......................2 Features ........................ 2 Hardware Installation ................... 3 Rack Mounting ...................... 3 Appearance ......................4 KVM Rear View ..................... 4 Installation Instruction ..................5 Opening the Console .................... 6 LED Instructions .................... -
Page 3: Overview
4 Port/ 8 Port /16 Port User Manual Overview Descriptions KVM switch is a control device which controls multiple computers from a single console (keyboard, video and mouse), as many as 512 computers can be controlled from the original console. There is no better way to save space, time and money than with a KVM switch installation. -
Page 4: Hardware Installation
4 Port/ 8 Port /16 Port User Manual Hardware Installation Rack Mounting Make sure all the computers and external device are shut down before installation. Put the KVM switch in place, screw the brackets to the two sides of the KVM to install the KVM in the standard 19”... -
Page 5: Appearance
4 Port/ 8 Port /16 Port User Manual Appearance 1-1.2 KVM Rear View Support USB console Daisy-chain in CONSOLE DC+12V Daisy-chain in CONSOLE DC+12V Daisy-chain in PC16 PC15 PC14 PC13 PC12 PC11 PC10 CONSOLE DC+12V 1-1.3 Table 1.1 Explanation Ground connecting screws Power adapter socket Local console KVM controlled port... -
Page 6: Installation Instruction
4 Port/ 8 Port /16 Port User Manual Installation Instruction 1. Make sure the KVM switch has been connected to the ground. 2. Connect local control keyboard, mouse and monitor to the KVM switch. 3. Connect one port of KVM signal cable to the computer (make sure the keyboard, mouse and VGA cables are correctly connected), connect the other port to the KVM port. -
Page 7: Opening The Console
4 Port/ 8 Port /16 Port User Manual Opening the Console The KVM makes two “beep” sounds and the LED flashes two times after power on. Then below window appears for you to input user name and password. The default password is “blank”, double click to 【Enter】 the OSD main menu to operate the KVM. -
Page 8: Osd Operation
4 Port/ 8 Port /16 Port User Manual OSD Operation Double click the right button of the mouse or double click hotkey【Scroll Lock】 to invoke below OSD main menu. You can customize the OSD hotkeys; find more details in OSD function instructions. -
Page 9: Osd Functions
4 Port/ 8 Port /16 Port User Manual OSD Functions Menu Keys Submenu/explanation Set User Login-Set User login account and password Set accessible-Set access permissions BRC Mode -monitor multiple computers at the same time Load Default-reset the menu to the original factory default settings All-Lists all the ports on the installation Power On-lists only powered on ports that have attached... -
Page 10: F1-Adm
4 Port/ 8 Port /16 Port User Manual F1-ADM ⚫ Menu Overview Operating instructions 1)Press【F1】or 【←】 【→】enters the F1 submenus. 2)Press 【↑】 【↓】moves the highlight bar to select the submenu. 3)Press 【Enter】 selects and exits ADM menu. 4)Press【Esc】cancels the operation and exits ADM menu. - Page 11 4 Port/ 8 Port /16 Port User Manual 2. Set Accessible—press 【 Enter 】 to select Set Accessible, then below menu appears(diagram 4-1.3): 4-1.3 Menu Explanation Full access function to the station and can do any FULL operation to the ports Read only function, you can only read the port but you VIEW can’t operate it if set this function.
- Page 12 4 Port/ 8 Port /16 Port User Manual 3. BRC Mode - Press【Enter】to enter the BRC mode (see below diagram 4-1.6). Enter the main menu, press【F7】 to add or delete a port that need broadcast function. When BRC mode is effect, a speaker symbol appears in QV column. (see below diagram 4-1.7). While BRC mode is in effect, we can synchronously operate multiple computer ports, but the mouse is not function normally.
-
Page 13: F2-Scan
4 Port/ 8 Port /16 Port User Manual F2-Scan ⚫ Menu Overview Operating instructions 1)Press【F2】or 【←】 【→】enters the F2 submenus. 2)Press 【↑】 【↓】moves the highlight bar to select the submenu. 3)Press【Enter】selects and exits Scan menu. 4)Press【Esc】cancels the operation and exits SCAN menu. ⚫... -
Page 14: F3-Set
4 Port/ 8 Port /16 Port User Manual F3-Set ⚫ Menu Overview Operating instructions 1) Press【F3】or 【←】 【→】enters the F3 submenu. 2) Press 【↑】 【 ↓】 moves the highlight bar to select the submenu. 3) Press 【 Enter】 selects and exits Set menu. 4) Press【Esc】cancels the operation and exits Set menu. - Page 15 4 Port/ 8 Port /16 Port User Manual OSD Hotkey Operation Operating instruction Press【F3】and move the highlight bar with【↓】 to select “OSD Hotkey” submenu . Press 【Enter】and below screen appears: KVM default hotkey:【Scroll Lock】 3.Select the“【Ctrl】 【Ctrl】 +【KVM Hotkey】 “ and press【Enter】, and then the 【Ctrl hotkey is availablein this hotkey mode, themouse hotkey can't enter the OSD menu.
-
Page 16: F4-Tool
4 Port/ 8 Port /16 Port User Manual F4-Tool ⚫ Menu Overview Operating instructions 1) Press【F4】or 【←】 【→】enters the F4 submenus. 2) Press 【 ↑ 】 【 ↓ 】 moves the highlight select submenu. 3) Press【Enter】selects and exits Tool menu. 4) Press 【... -
Page 17: F6-Edit Port Name
4 Port/ 8 Port /16 Port User Manual ⚫ Select the port with 【↑】 【↓】 key; F6-Edit Port Name ⚫ Press F6 and key in the new name or modify the old one, then press Enter to save the name and exit editing. - Page 18 4 Port/ 8 Port /16 Port User Manual Setting OSD default values Settings Default values 【Scroll Lock 】 【Scroll Lock 】 OSD hotkey 【 Enter】 Original ADM user name 【 Enter】 Original ADM password Port display duration 5 seconds Bank No.+Port No.+port name Port display mode Port name SYSTEM...
-
Page 19: Usb Keyboard Emulation
4 Port/ 8 Port /16 Port User Manual USB keyboard emulation Mac keyboard The PC compatible (101/104 keys) keyboard can emulate the functions of the Mac keyboard. The emulation mappings are listed in the below table: PC Keyboard MAC Keyboard [Shift] Shift [Ctrl]... -
Page 20: Sun Keyboard
4 Port/ 8 Port /16 Port User Manual Sun keyboard The PC compatible (101/104 keys) keyboard can emulate the functions of the Sun keyboard when the control key [L_Win] is used in conjunction with other keys. The corresponding functions are shown in the below table: PC Keyboard Sun Keyboard L_Win&L_Alt... -
Page 21: Appendix
4 Port/ 8 Port /16 Port User Manual Appendix Specifications (USB Console) Model XU0108 XU0108 XU0116 Port Selection Computer Connections Select buttons, OSD menu monitor 1*HDB-15 Female(blue) Console keyboard 2 * USB type A mouse Connector KVM port (HDB-15 Female(yellow) Cascade port 1*HDB-15 Female(yellow) Switch... -
Page 22: Faq
4 Port/ 8 Port /16 Port User Manual 1. The KVM console doesn’t work when I connect and use the console for the first time. Solutions: 1)Power off the KVM and disconnect the monitor, keyboard and mouse. 2) Disconnect all the signal cables connected to the KVM. 3)Disconnect all the signal cables connected to the PC, especially those cables with USB port. - Page 23 4 Port/ 8 Port /16 Port User Manual 5. Bad display quality of PC screen. Solutions: 1)Check the signal cables, make sure they are connected. 2)Reset the monitor’s display settings. 6.When I switch to one port, the keyboard and mouse do not work. Solutions: 1)Make sure you have exited the OSD menu.
Need help?
Do you have a question about the XU0104 and is the answer not in the manual?
Questions and answers