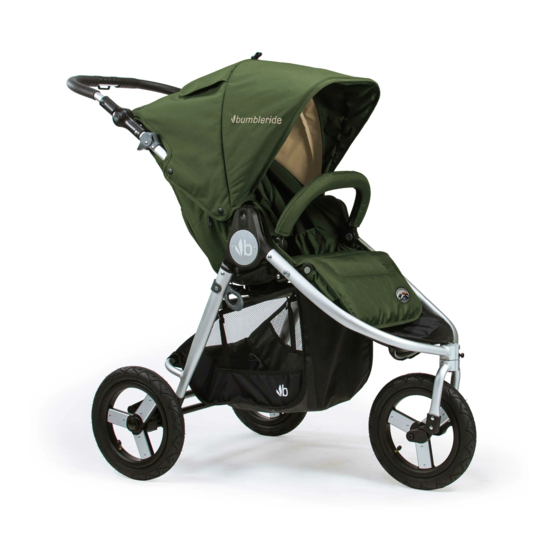
Bumbleride Indie Owner's Manual
Hide thumbs
Also See for Indie:
- User manual ,
- Owner's manual (34 pages) ,
- Assembly & maintenance manual (33 pages)

Related Manuals for Bumbleride Indie


Summary of Contents for Bumbleride Indie
- Page 1 Indie owner’s manual manual de instrucciones manuel d’instructions IMPORTANT-READ CAREFULLY AND KEEP FOR FUTURE REFERENCE...
- Page 2 En Bumbleride, nuestro objetivo es Nuestro objetivo con Indie es darle At Bumbleride, our goal is to make Our aim with Indie is to give you propulsar el cambio para que los un coche todo terreno que sea gear for parents to get out and do...
-
Page 3: Table Of Contents
18 Using infant mode / Uso del modo infantil / Utilisation du mode bébé C’ e st notre promesse Bumbleride. Le Bumbleride Indie est co forme 20 Folding Indie / Cómo plegar Indie / Plier Indie Tout ce que nous faisons à un aux normes ASTM F-833-21, impact sur la planète. -
Page 4: What's In The Box? / Incluido En La Caja / Ce Que Contient La Boîte
What’s in the box Incluido en la caja / Ce que contient la boîte? Indie frame Estructura Indie Cadre Indie Wrist strap* Correa para la muñe corroie de poignet Pump* Bomba Pompe *In the cargo basket wheels En el bolsillo de la cesta... -
Page 5: Opening The Frame / Cómo Abrir El Marco / Ouverture Du Cadre
Opening the frame Cómo abrir el marco / Ouverture du cadre Release the autolock by levering it away from the stroller and pull up on the handlebar at the same time. Suelte el bloqueo automático Place the stroller as shown with the handlebar on top. alejándolo del cochecito y tire hacia arriba del manillar Coloque el cochecito como se muestra con el manillar en la parte superior. -
Page 6: Attaching The Wheels / Fijación De Las Ruedas / Fixation Des Roues
Attaching the wheels Fijación de las ruedas/Fixation des roues Thread the nut onto the axle bolt and tighten using the tools provided. Coloque la rueda delantera entre las horquillas. Deslice el eje trasero Slide the rear wheels into the hacia las ruedas y la horquilla. rear axle tube. -
Page 7: Using The Sun Canopy / Colocación De La Capota / Utilisation Des Pare-Soleil
Using the sun canopy Uso de las marquesinas solares / Utilisation des auvents solaires For more coverage reach To attach the sun canopy slide canopy ratchets onto the housing inside the canopy to pull out extended visor. located on the inside of the frame. Push the ratchets down until they notch in place. -
Page 8: Attaching Wrist Strap/ Colocación De La Correa De Muñeca / Fixation De La Dragonne
Attaching wrist strap Using the brake Colocación de la correa de muñeca / Fixation dragonne Cómo usar el freno / Futilisation du frein Retrieve the wrist strap from the cargo Press down on the brake basket pocket. Feed the loop end of pedal to engage. -
Page 9: Using The Harness / Usando El Arnés / Utilisation Du Harnais
Using the harness Usando el arnés / Utilisation du harnais Undo the Velcro pocket at the top of the seat back to access matching slots on the seat back support. Turn the buckle sideways and push it through the slot. Open the five point safety harness by pressing the button Deshaga el bolsillo Velcro en el... -
Page 10: Using Infant Mode / Uso Del Modo Infantil / Utilisation Du Mode Bébé
Using infant mode Uso del modo infantil / Utilisation du mode bébé Unsnap the fabric tongues from under the footrest. Desenganche las lengüetas de Infant mode will allow you to safely transport infants under 6 months old. tela de debajo del reposapiés. El modo bebé... -
Page 11: Folding Indie / Cómo Plegar Indie / Plier Indie
Folding Indie Cómo plegar Indie / Plier Indie Fold the handle forward. Pliegue la manija hacia adelante. Rabattez la poignee vers Begin by raising the seat back and folding down the footrest. l’avant. Comience levantando el respaldo del asiento y plegando todas las barras del parachoques y los reposapiés. -
Page 12: Adding Air To The Tires / Cómo Agregar Aire A Las Ruedas / Ajouter De L'air Aux Pneus
30psi/ 2bar. The tire should feel firm but with some give. Despliegue el mango de la bomba Indie tires have inner tubes and e infle el neumático 30 psi (2 bar). El will occasionally need air added. neumático debe sentirse firme pero You will find the pump in the con algo de ceder. -
Page 13: Cleaning Instructions / Instrucciones De Limpieza / Instructions De Nettoyage
Pour obtenir des instructions sur le retrait du tissu, rendez- plegar, guardar o viajar con el carrito, ajuste el manillar para que las ruedas vous sur www.bumbleride.com/support. no toquen y frote el asa de corcho. Cuando esté doblado, no deje el mango de corcho en agua estancada.Al plegar, guardar o viajar con el carrito, ajuste el... - Page 14 Bumbleride en www.bumbleride.com/support El armazón de su cochecito Bumbleride viene con una garantía de 3 años y un vida de servicio al cliente amigable. El marco de tu Bumbleride es Garantizado contra defectos de fabricación por un período de 3 años a partir de la fecha de compra.
- Page 15 Asegúrese siempre de que los niños estén a una dis- The Bumbleride Indie complies with ASTM F-833-21, SOR/2016-167 and tancia segura al abrir y cerrar la coche. El Bumbleride Indie cumple con las EN 1888-1/2:2018 safety standards. normas de seguridad ASTM F-833-21, SOR/2016-167 y EN 1888-1/2:2018.
- Page 16 être affecté si vous ne suivez pas ces instructions. Toujours s’assurer que les enfants sont à une distance sécuritaire lors de l’ o uverture et de la fermeture de la poussette. Le Bumbleride Indie est conforme aux normes de sécurité ASTM F-833-21, SOR/2016-167 et EN 1888-1/2:2018.
Need help?
Do you have a question about the Indie and is the answer not in the manual?
Questions and answers