Table of Contents
Advertisement
Quick Links
Advertisement
Table of Contents

Subscribe to Our Youtube Channel
Related Manuals for Drucker Diagnostics DASH Apex Series


Summary of Contents for Drucker Diagnostics DASH Apex Series
- Page 1 DASH APEX 6, 12, and 24 Operator’s Manual...
-
Page 2: Table Of Contents
ABLE OF ONTENTS Symbols..................................1 Caution Warning Statements ............................2 Model Description ............................... 4 Features ..................................4 Intended Use ................................4 Warranty ..................................4 How To Video Links ..............................5 Initial Setup .................................. 5 Quick Start ................................... 6 Settings ..................................7 Operation .................................. -
Page 3: Symbols
Denotes conformity to specific UK directives and regulations. FDA LISTED FDA Listed Denotes that the product has been properly listed with the FDA. Denotes conformity to quality standards and quality management ISO Certification systems. Drucker Diagnostics – Customer Service: +1-814-692-7661 – CustomerService@DruckerDiagnostics.com | Page 1... -
Page 4: Caution Warning Statements
Electrical Safety protection is provided by properly connecting the centrifuge to earth ground. Use only the manufacturer provided line cord and ensure that it is connected to a properly grounded power receptacle. Failure to do so will result in an electrical hazard. Drucker Diagnostics – Customer Service: +1-814-692-7661 – CustomerService@DruckerDiagnostics.com | Page 2... - Page 5 WARNING: Do not make modifications to or remove any hardware from rotor without prior authorization from Drucker Diagnostics. WARNING: Only use Drucker Diagnostics components in this centrifuge. Due to the lack of the possibility of human exposure, all Drucker centrifuges and accessories sold by Drucker Diagnostics, Inc.
-
Page 6: Model Description
General purpose laboratory centrifuge, intended for the density-based separation of fluids through centripetal acceleration. ARRANTY Drucker Diagnostics warranties that this centrifuge is free from defects in workmanship and parts for 2 years. Drucker Diagnostics – Customer Service: +1-814-692-7661 – CustomerService@DruckerDiagnostics.com... -
Page 7: How To Video Links
Turn on the power switch on the back of the centrifuge Be sure the electrical outlet is always accessible as the line cord is the means of emergency Disconnection! DASH Apex 6 DASH Apex 12 DASH Apex 24 Drucker Diagnostics – Customer Service: +1-814-692-7661 – CustomerService@DruckerDiagnostics.com | Page 5... -
Page 8: Quick Start
To re-enable cycle selection, open lid, then press and hold the Unlock Cycle Selection UNLOCK button for 5 seconds. Three beeps will confirm that cycle selection is now unlocked. Drucker Diagnostics – Customer Service: +1-814-692-7661 – CustomerService@DruckerDiagnostics.com | Page 6... -
Page 9: Settings
3,000 (PSTII/SSTII Cycle Tube Type G-Force (RCF) Custom cycles, if desired: NOTE: Timer starts when speed reaches 90% of set speed. Deceleration time is not included in cycle time. Drucker Diagnostics – Customer Service: +1-814-692-7661 – CustomerService@DruckerDiagnostics.com | Page 7... -
Page 10: Operation
Move to speed setting mode by pressing the UNLOCK button. o Press the START button once for each 100 rpm. o Press the UNLOCK button to exit setting mode. Drucker Diagnostics – Customer Service: +1-814-692-7661 – CustomerService@DruckerDiagnostics.com | Page 8... -
Page 11: Balancing Loads
When loading only 3 tubes, they must be of equal weight. Buckets can be placed around the rotor in any of the rotor loading configurations shown. Each bucket must be loaded symmetrically with tubes as above. Drucker Diagnostics – Customer Service: +1-814-692-7661 – CustomerService@DruckerDiagnostics.com | Page 9... -
Page 12: Care And Preventative Maintenance
Drucker Diagnostics – Customer Service: +1-814-692-7661 – CustomerService@DruckerDiagnostics.com | Page 10... -
Page 13: Troubleshooting
Check the setting by following the instructions in the section on the desired value Changing Cycle Settings. If the preset is not the desired length, follow the procedure on the same page to change the run preset time. Drucker Diagnostics – Customer Service: +1-814-692-7661 – CustomerService@DruckerDiagnostics.com | Page 11... - Page 14 Clicking noise during braking gets loud o Make sure that the screw in the center of the rotor is tight. Lid does not stay up o Tighten the center screw on the lid hinge. Drucker Diagnostics – Customer Service: +1-814-692-7661 – CustomerService@DruckerDiagnostics.com | Page 12...
-
Page 15: General Specifications
5 °C to 40 °C Humidity Maximum relative humidity 80% for temperatures up to 31 °C, decreasing linearly to 50% relative humidity at 40 °C Overvoltage Category Pollution Degree Drucker Diagnostics – Customer Service: +1-814-692-7661 – CustomerService@DruckerDiagnostics.com | Page 13... - Page 16 5 °C to 40 °C Humidity Maximum relative humidity 80% for temperatures up to 31 °C, decreasing linearly to 50% relative humidity at 40 °C Overvoltage Category Pollution Degree Drucker Diagnostics – Customer Service: +1-814-692-7661 – CustomerService@DruckerDiagnostics.com | Page 14...
- Page 17 31 °C, decreasing linearly to 50% relative humidity at 40 °C Overvoltage Category Pollution Degree Use only with approved accessories from the original manufacturer. A complete list of accessories is available at www.DruckerDiagnostics.com. Drucker Diagnostics – Customer Service: +1-814-692-7661 – CustomerService@DruckerDiagnostics.com | Page 15...
-
Page 18: Calculating The G-Force
1200 1350 5000 3550 3750 2900 1200 1250 1400 5100 3700 3900 3000 1300 1350 1500 5200 3850 4000 3100 1350 1400 1650 5300 4000 3200 1450 1500 1750 Drucker Diagnostics – Customer Service: +1-814-692-7661 – CustomerService@DruckerDiagnostics.com | Page 16... -
Page 19: Replacement Parts
75/100mm Tube Holder, Black (Pack of 6) 02-006-1-0067K Kit, D/H 12/24 Green LED PCBA Replacement 00-100-100-010 12/24 Series Soft Button & Spacer Replacement Kit 00-100-100-005 Replacement Grommet & Bushing Kit Drucker Diagnostics – Customer Service: +1-814-692-7661 – CustomerService@DruckerDiagnostics.com | Page 17... -
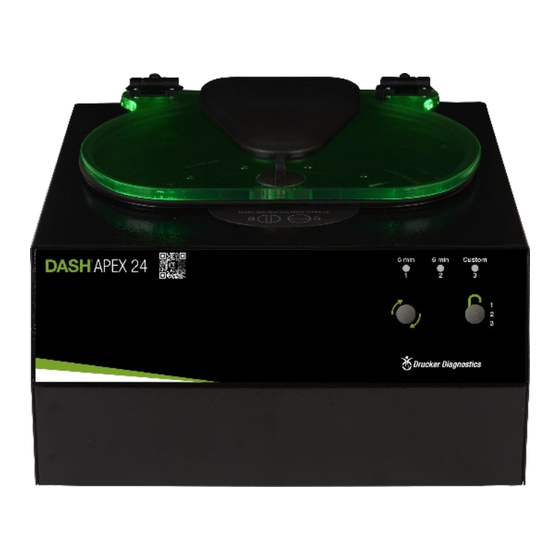
Page 20: Dash Apex 24
12/24 Series-Soft Button & Spacer Replacement Kit 00-100-100-005 Replacement Grommet & Bushing Kit REVIOUS ANUAL EVISIONS To access previous manuals, please click the relevant link below: Revision G Revision H Revision I Drucker Diagnostics – Customer Service: +1-814-692-7661 – CustomerService@DruckerDiagnostics.com | Page 18... - Page 21 This operator’s manual is part number 03-0-0002-0120 Rev. J Product Family: DASH Apex Series (Apex 6, Apex 12, Apex 24) Complies with UL61010-1/CSA C22.2 No. 61010-1 and IEC61010-2-020 Protected by U.S. Patents #6,811,531, #D718,463, & #D734,489. Other Patents Pending FDA LISTED INSTRUCTIONS FOR DISPOSAL OF WEEE BY USERS IN THE EUROPEAN UNION This product must not be disposed of with other waste.
Need help?
Do you have a question about the DASH Apex Series and is the answer not in the manual?
Questions and answers