Table of Contents
Advertisement
Quick Links
Advertisement
Table of Contents

Related Manuals for Titan Attachments RDBLGRPv2b


Summary of Contents for Titan Attachments RDBLGRPv2b
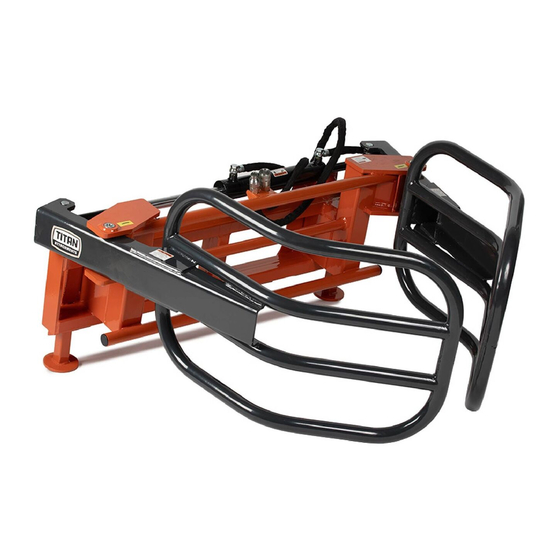
- Page 1 ROUND BALE GRIPPERS RDBLGRPv2b, 3PTRDBLGRPv2b 191659, 191669 Operator’s Manual Read the Operator’s Manual entirely. When you see this symbol, the subsequent instructions and warnings are serious follow without exception. Your life and the lives of others depend on it!
-
Page 2: Important Safety Information
IMPORTANT SAFETY INFORMATION THESE ARE STANDARD PRACTICES THAT MAY NOT APPLY TO THE PRODUCTS DESCRIBED IN THIS MANUAL. SAFETY AT ALL TIMES Thoroughly read and understand the instructions given in this manual before operation. Refer to the “Safety Label” section, read all instructions noted on them. Do not allow anyone to operate this attachment who has not fully read and comprehended this manual and who has not been properly trained in the safe operation of attachment. -
Page 3: For Your Protection
BE AWARE OF SAFETY ALERT WORDS – A signal word designates a degree or level of hazard seriousness. The signal words are: DANGER: Indicates imminently hazardous practices. A situation that, if not avoided, will result in death or severe injury. The signal word is limited to the most extreme situation, typically for machine components that, for functional purposes, cannot be guarded. -
Page 4: Transport Machinery Safely
Flashing warning lights and we recommend turn signals whenever driving on the public • road. TRANSPORT MACHINERY SAFELY Comply with state and local laws. • The maximum transport speed for implement is 20 mph, DO NOT EXCEED. Never travel at •... -
Page 5: Wear Protective Equipment
WEAR PROTECTIVE EQUIPMENT Wear protective clothing and equipment appropriate for the job. Avoid loose-fitting • clothing. Prolonged exposure to loud noise can cause hearing impairment or hearing loss. Wear • suitable hearing protection such as earmuffs or earplugs. Operating equipment safety requires the full attention of the operator. Avoid wearing •... -
Page 6: Safety Labels
SAFETY LABELS Your Bale Grabber comes equipped with all safety labels in place. They were designed to help you to safety operate your attachment. Read and follow their directions. Decal: Warning-Before operating Decal: Warning – High pressure fluid hazard Decal: Warning-Pinch point or crushing hazard This shows the grease position. -
Page 7: Using This Manual
The RDBLGRPv2b attaches to your skid steer, track loader, or tractor front mounted loader equipped with a universal quick attach hitch. The 3PTRDBLGRPv2b attaches to a tractor 3- points hitch. -
Page 8: Hydraulic Outlets
This bale grabber is designed to attach to skid steers, track loaders, or tractor frontend loaders. The following requirements below must be met: HITCH TYPE RDBLGRPv2b……………………………………………………………………Skid steer quick attach (meets ISO 24410) 3PTRDBLGRPv2b……………………………………………………………. Tractor 3-Points hitch. Hydraulic pressure rating (Maximum) ………………………….3500 psi HYDRAULIC OUTLETS Skid steer/track loader………………………………………………….1 male &... -
Page 9: Section 1: Assembly And Setup
SECTION 1: ASSEMBLY AND SETUP Packing Description 1. Remove and check. Remove the packing, check goods without defect and omission. Figure 1-1: Your New Bale Grabber as It Is Shipped to You Figure 1-2: The Bale Grabber and Accessory in Package 2. - Page 10 The detailed description of bale grabber RDBLGRPv2b frame and fittings Figure 1-3: Bale Grabber RDBLGRPv2b Frame and fittings List The detailed description of bale grabber 3PTRDBLGRPv2b frame and fittings Figure 1-4: Bale Grabber WD70D Frame and fittings Table 1-3: Bale Grabber 3PTRDBLGRPv2b Frame and fittings List...
- Page 11 The detailed description of hydraulic cylinder and fittings Figure 1-5: Hydraulic Cylinder and Fittings Table 1-4: Hydraulic Cylinder and Fittings List...
-
Page 12: Installation
INSTALLATION The installation section will guide you to finish the final assembly of your new bale grabber easily. The installation wizard is applicable to RDBLGRPv2b and 3PTRDBLGRPv2b models. 1. TOOL REQUIRED 27-30 Spanner, Long-nose plier 2. ASSEMBLY Cut all zip ties and disassemble shipping crate. - Page 13 Note - Loosen 2pcs of the hollow bolts to release the pressure in the cylinder. That will make the cylinder flexible and easy to install. Figure 1-7: Installing Wheel Frame and Fittings Item 1: Grab arm weldment L (1pc); Item 2: Cylinder pivot pin (2pc); Item 3: Bale grabber frame weldment (1pc);...
-
Page 14: Section 2: Operating
Do not operate lift and/or tilt controls while someone is near the power machine and/or implement. The RDBLGRPv2b Bale Grabber is designed for attaching to skid steers, tractor loaders equipped with a universal quick attach hitch that meets SAE. Refer to Figure 2-1:... -
Page 15: Equipment Clearances
1. Check for and remove any debris in the front loader and Bale Grabber hitch point areas before hooking-up to the attachment. 2. Drive slowly up to the attachment’s hitch plate (#3) while making sure the loader’s quick attach hitch is parallel with the attachment’s top angle bars (#5). 3. - Page 16 the ground. 6. Fully extend and retract tilt cylinders while watching for interferences between the power machine and Bale Grabber. Make sure hydraulic hoses are long enough and do not become pinched or stretched through the full range of tilt motion. 7.
- Page 17 with grab arms close to the top as shown in Figure 2-4. d. See Figure 2-6: Avoid lifting large bales by the arm tips. Instead, slowly drive forward until the grab arm are fully around the bale, and the mainframe is against the bale as shown in Figure 2-5.
- Page 18 Figure 2-6: Incorrect Large Bale Containment Transport Round Bales 1. Check to make sure the Bale Grabber has a good grip on the bale. If it does not, release the bale and recapture it in a more secure location. Check the grip as follow: 2.
-
Page 19: Section 2: Maintenance & Lubrication
RELEASE ROUND BALES 1. Be sure to read and understand all safety alerts under the “Safety information “section. 2. Stop in front of the desired location to release the bale. 3. If releasing the bale on its side, tilt the hitch forward until the bale is horizontal. 4. -
Page 20: Lubrication Points
7. Store attachment on a level surface in a clean, dry place. Inside storage will reduce maintenance and make for a longer Bale Grabber life. LUBRICATION POINTS... - Page 21 SECTION 4: SPECIFICATION & CAPACITIES...
-
Page 22: Section 5: Troubleshooting
SECTION 5: TROUBLESHOOTING... -
Page 23: Section 6: Appendix
SECTION 6: APPENDIX Bolt Torque The tables shown below give correct torque values for various bolts and cap screws. Tighten all bolts to the torques specified unless otherwise noted. Check tightness of bolts periodically, using bolt torque chart as a guide. - Page 24 PARTS DIAGRAM/EXPLODED VIEW Bale Grabber RDBLGRPv2b Part List...
- Page 25 Bale Grabber RDBLGRPv2b Part List...
- Page 26 Bale Grabber 3PTRDBLGRPv2b Part List...
- Page 27 Bale Grabber 3PTRDBLGRPv2b Part List...
- Page 28 ACKNOWLEDGEMENT OF RISK AND RELEASE OF LIABILITY The use of any equipment, including this one, involves the potential risk of injury. Apart from any warranty claim that might be presented for a claimed defect in material or workmanship of the product, you accept and assume full responsibility for any and all injuries, damages (both economic and non- economic), and losses of any type, which may occur, and you fully and forever release and discharge Titan, its insurers, employees, officers, directors, associates, and agents from any and all claims,...
- Page 29 NEED HELP? CONTACT US FIRST. 1-800-605-7595 info@palletworks.com www.palletforks.com © 2024 Titan Brands...
Need help?
Do you have a question about the RDBLGRPv2b and is the answer not in the manual?
Questions and answers