
Subscribe to Our Youtube Channel
Related Manuals for Binatone RCFM-1875


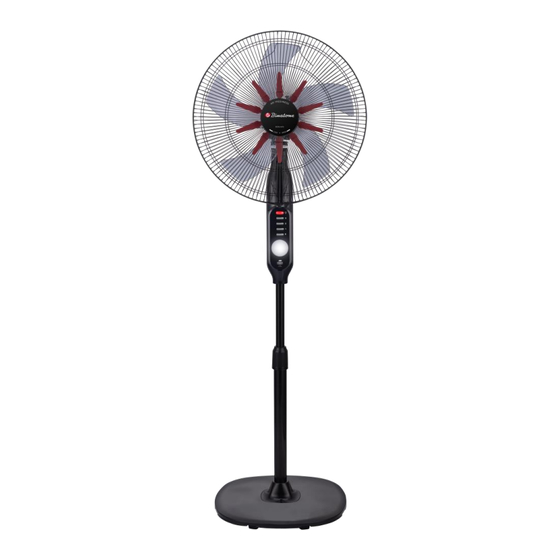
Summary of Contents for Binatone RCFM-1875
- Page 1 ENGLISH RECHARGEABLE FAN WITH LITHIUM-ION BATTERY To get the best results from your Binatone product please read these instructions carefully. RCFM-1875...
- Page 2 & value products available in the market today. Our commitment lies solely in delivering high quality, affordable products. Our international team is constantly pursuing every effort to make products not just ‘appliances’ but ‘lifestyle improvements’. Check out all the latest Binatone products at: www.binatonelifestyle.com...
-
Page 3: Important Safeguards
✓ Use this appliance only for its intended use – as described in this manual. ✓ Do not insert fingers, pencil or other articles through the slots during operation. ✓ The use of accessory attachments not included, recommended or sold by Binatone is prohibited and may cause damage, fire, electric shock or injury. -
Page 4: Specification
SPECIFICATION AC/DC adaptor Power: AC 100-240V~ 50Hz 0.8A Max Model YR288A-01352500 (for use with RCFM-1875) Battery: DC 11.1V 6000mAh Lithium-Ion type Charging time: Approx. 7-9 hours DC Battery duration (fully charged): High speed fan: Approx. 5-6 hours Low Speed Fan: Approx. -
Page 5: Setup Instructions
SETUP INSTRUCTIONS Battery Connection For safety - this item is shipped with the battery disconnected - to connect it : 1. On the rear of the motor housing - remove the screw at the top edge of the battery cover 2. - Page 6 Head Unit - Fan Blade & Protection Grille Assembly A. Motor housing B. Motor Shaft C. Rear Grille D. Plastic Nut E. Fan Blade F. Lock Nut G. Front Grille & Diffuser H. Trim Ring I. Badge Cover • Place the rear grille (C) on the motor housing (A) •...
- Page 7 SETUP INSTRUCTIONS continued Base Assembly - Telescopic Tube to Base • Place the base (O) on the floor • Insert the telescopic tube (M) into the recess on the top of base (O) • Secure using washer (P) & screw (Q) provided •...
- Page 8 Head Unit to Base Assembly • Undo the height adjustment knob (N) & pull the upper telescopic tube (M) upwards. • Tighten the height adjustment nut (N). Caution: The height adjustment knob (N) must be fully tightened before assembling the motor section to the pedestal stand assembly.
- Page 9 OPERATING INSTRUCTIONS AC/DC function Connect the supplied AC/DC adaptor to a 230V~ outlet. Connect the supplied AC/DC adaptor wire to the power input socket on the rear panel of the stand fan. All fan functions can be used, and the internal battery will be charged. When AC power supply fails or is disconnected - the fan will automatically continue operation from the built-in battery.
- Page 10 5. Fan head tilt The head tilt angle can be adjusted – carefully rotate the motor housing up or down - until the fan is angled as required - a series of clicks will be heard. Battery charging We recommend keeping the AC/DC adaptor connected when the fan is in regular use, to keep the battery fully charged.
- Page 11 AIR FRESHNESS The Air Freshness module can be used as an Air Freshener or as a Mosquito Repellent by soaking the provided sponge pads with appropriate liquids. We recommend that the sponge pads are sprayed/soaked with appropriate liquid, depending on operation mode. The sponge pad should be thoroughly wet but not dripping wet before inserting to your fans Air Freshness module.
-
Page 12: Care And Cleaning
CARE AND CLEANING This appliance requires little maintenance. We recommend dust is cleaned from the fan blade and protective grilles every few months, to keep it operating optimally. After use and before cleaning, ensure the fan is OFF and the blades have come to a complete stop. -
Page 13: Battery Replacement
BATTERY REPLACEMENT The battery installed in this product can be replaced. A replacement battery (part number 21700 6000mAh) may be obtained from your local Binatone Service Centre or directly through www.binatonelifestyle.com 1) Disconnect all power input to the fan 2) Remove the screw (24) securing the battery cover (23) -
Page 14: Service & Customer Care
SERVICE & CUSTOMER CARE There are no user serviceable parts inside this appliance. If the power cord or plug are damaged it must, for safety reasons, be replaced by Binatone or an authorised Binatone repairer. If you need help with: •... -
Page 15: Warranty
This is a domestic product – warranty does not cover products that have been used for commercial purposes. BINATONE at its option, will repair or replace a product found to be defective during the warranty period. Should this product become defective by reason of improper workmanship or material defect during the specified warranty period, BINATONE will repair or replace the same effecting all necessary part replacements. - Page 16 Please consider recycling this instruction manual responsibly Binatone Lifestyle Appliances • LONDON • HONG KONG • DUBAI • LAGOS • ACCRA • Rev 1 (230922)
Need help?
Do you have a question about the RCFM-1875 and is the answer not in the manual?
Questions and answers