Table of Contents
Advertisement
Quick Links
Advertisement
Table of Contents

Subscribe to Our Youtube Channel
Related Manuals for PIAB piCOBOT Electric UR RS-485


Summary of Contents for PIAB piCOBOT Electric UR RS-485
- Page 1 piCOBOT® Electric UR e-series RS-485 Electrical vacuum gripper...
- Page 2 This manual is available in the following languages at piab.com The original manual is written in English. English Français Deutsch Italiano Polski Português (Brasil) Русский Español Svenska Copyright © 2024 Piab AB Specifications subject to change without notice.
-
Page 3: Table Of Contents
4.4. Pneumatic installation ....................... 19 4.4.1. Pneumatic diagram ....................19 4.5. Software Installation ......................20 5. Operation ............................. 21 5.1. Operation with Piab URCap ....................21 5.2. Interface ..........................21 5.3. Menu overview piCOBOT® Electric UR ................23 5.4. Menu settings ........................24 6. - Page 4 6.4.1. Vacuum level ......................29 6.4.2. Sensor calibration ....................29 6.4.3. Pressure unit ......................29 6.4.4. Vacuum cycle counter ..................... 29 6.4.5. System Temperature ....................29 6.4.6. Service menu ......................29 6.4.6.1. Time running ....................29 6.4.6.2. Average RPM ....................29 6.4.6.3.
-
Page 5: Introduction To The Manual
Introduction to the manual 1. Introduction to the manual 1.1. About the manual • The responsible party for the production site must ensure that this manual will be read and understood. • The section on safety should be studied extra carefully. •... -
Page 6: Target Group
Introduction to the manual 1.3. Target group This manual, especially the section about safety, shall be read by all staff who will perform any type of work with the product or equipment: • Installation personnel • Operating personnel • Service and maintenance personnel •... -
Page 7: Safety Instructions
2. Safety instructions 2.1. Disclaimer Piab AB is not responsible for installation and operation of piCOBOT® Electric in a robot system. The required steps must be undertaken in supervision and approval by authorized integrators. Piab AB is not responsible for safety of a complete robot system with piCOBOT® Electric installed. The required steps must be undertaken in supervision and approval by authorized integrators. -
Page 8: Operation
Safety instructions 2.3.2. Operation Important Wear eye protection when operating piCOBOT® Electric. Important Wear ear protection when operating piCOBOT® Electric. 2.3.3. Maintenance Warning Prior to any maintenance work, turn off or disconnect the electrical power supply and ensure that the motor of the pump has cooled down. Warning Hot motor surface can cause severe injuries, ensure the pump has cooled down prior to disassembly. -
Page 9: Misuse
Safety instructions • The product is intended to be used in on/off operation, turning the vacuum on and off for every opera- tional cycle. • The piCOBOT® Electric is an end-of-arm tooling on collaborative robots, used for gripping and holding objects. -
Page 10: Introduction To The Picobot® Electric
SWEDEN 3.2. Identification label Each unit is identified by a label with identification information. For any communication with Piab AB or service centers always refer to the label information and state both the Product code and Serial number. 3.3. Compliance... -
Page 11: For Use With Ur E-Series
Electric UR is intended to be used with Universal Robots (UR) e-series of cobots (UR5e, UR10e, UR16e). It uses RS-485 serial communication and the Piab URCap software for operation and control. piCOBOT® Electric UR e-series RS-485 Page 11 of 44... -
Page 12: Overview
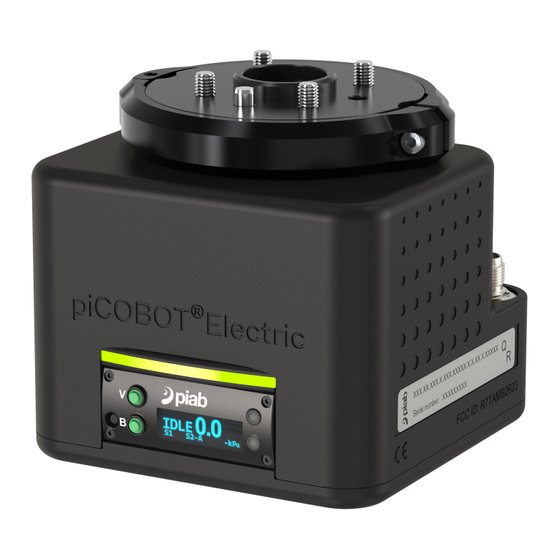
Introduction to the piCOBOT® Electric 3.5. Overview Figure 1. External overview of piCOBOT® Electric. Position Description Note Adapter plate Adapter plate for robot Clamp ring OLED display and select buttons See Interface section Vacuum port with mesh filter G1/4" Female Electrical connection Connector M12 8-pin Male LED light strips... - Page 13 Description Note Cover Cover screws 4 x M5 Hex 4 mm Baseplate Piab membrane pump Vacuum generator E1 and E2 Non-return valves The pump has 4 non-return valves in total. Membrane The pump has 2 membranes, only 1 is shown in the internal overview figure above.
-
Page 14: Installation
Installation 4. Installation Warning • Do not install or operate your piCOBOT® Electric if damaged during transport, handling, or use. A damaged product may result in bursting and cause injury or property damage. • Before using the product, read the safety instructions to ensure a safe product opera- tion. - Page 15 Installation Figure 3. Adapter plate is attached to a robot with 4 screws and a guiding pin. Fasten the piCOBOT® Electric to the adapter plate with the clamp ring. Lock the closed clamp ring with an M4 screw using a Hex key (3 mm). Do not overshoot the maximum torque of 0.7 Nm. Figure 4.
- Page 16 Installation Figure 5. Lock the clamp ring. Mount a gripping tool, such as a suction cup, foam gripper or adjustable gripper to the piCOBOT® Electric, either directly on the tool side or via the tool changer mounted between the piCOBOT® Electric and the gripping tool.
- Page 17 Installation Figure 7. Adjustable gripper attached to the piCOBOT® Electric. Figure 8. Tool changer attached to the piCOBOT® Electric. piCOBOT® Electric UR e-series RS-485 Page 17 of 44...
-
Page 18: Electrical Installation
Installation Figure 9. Adjustable gripper attached to the piCOBOT® Electric via the tool changer. The Tool side of the piCOBOT® Electric has two different mounting interfaces (A and B), this enables fastening different grippers or suction cups: A - G1/4" Female B - Interface 30x40 mm, 4 x M5. -
Page 19: Pneumatic Installation
Installation Figure 10. Guide notch on the electrical connector. Correct and incorrect cable arrangement. 4.4. Pneumatic installation Warning Use filters in dusty environments When working in environments with dust, dirt and larger particles that could jam the pump and cause impaired performance or reduced lifetime, use piCOBOT® Electric with gripping tools, such as suction cups or grippers, that are equipped with filters. -
Page 20: Software Installation
Installation 4.5. Software Installation See the separate URCap manual for how to install and use Piab's software plugin (URCap v1.7) for UR robots. Page 20 of 44 piCOBOT® Electric UR e-series RS-485... -
Page 21: Operation
There are two buttons, one OLED screen and two LEDs in green and blue on the piCOBOT® Electric. As soon as the piCOBOT® Electric is turned on, the Piab logo is shown and shortly after the default screen (see picture below, showing the status IDLE with 0.0 -kPa vacuum). The real time vacuum level reading is displayed here when vacuum is achieved. - Page 22 Operation The information in the bottom of the display shows, from left to right, the setpoint status Part Present (PP); Energy Saving (ES) level achieved; and the vacuum unit. The top left section in the display will show status conditions, e.g. when and which Energy Saving function or which Release type is active and in action. The output signals and status conditions can represent different selectable features, for more info see the Menu overview and Menu setting on the coming pages.
-
Page 23: Menu Overview Picobot® Electric Ur
Operation 5.3. Menu overview piCOBOT® Electric UR piCOBOT® Electric UR e-series RS-485 Page 23 of 44... -
Page 24: Menu Settings
Operation 5.4. Menu settings Parametrization Parametrization Menu name Preset Range Unit Comment value Part Present setpoint PP setpoint 40 [12] 0…100 [0...30] -kPa [- Normally used as inHg] Part present lev- Part Present hysteresis PP hysteresis 2 [0.6] 2…10 [0.6...3] -kPa [- inHg] Part Secured setpoint... - Page 25 Operation Configuration Function Menu name Preset Configuration Comment value Factory reset Factory reset Confirm See corresponding chapter Function. Energy Saving type ES type Setpoint Disabled See corresponding chapter Function. Setpoint Release type Release type External See corresponding chapter Function. Self Adhesion Con- SAC activation Enabled Disabled...
- Page 26 Confirm Display membrane service countdown Show countdown Disabled Enabled Piab lock (for Piab developers only) Piab lock Internal only BACK - Back exits the service menu and returns to the top menu. Page 26 of 44 piCOBOT® Electric UR e-series RS-485...
-
Page 27: Functions
Functions 6. Functions 6.1. Switched vacuum levels: PP, PS and ES Switched signals are standard “digital sensor feedback signals” using a target value and a hysteresis to be defined. The signals are transmitted to the control system through the RS-485 process data. The operation of the switched signals is according to the figure below. -
Page 28: Time To Energy Saving
Functions Design recommendation - Running with an unnecessarily deep ES setpoint level will force the ejector to operate much longer during the evacuation cycle than needed. Therefore, the setting of ES shall be done with the required vacuum level margins for PP and PS in mind. 6.1.3.2. -
Page 29: Self Adhesion Control (Sac)
Functions 6.3. Self Adhesion Control (SAC) Self Adhesion Control (SAC) automatically removes “unwanted” vacuum with short actuations of the release valve if the vacuum ON signal has not been activated. SAC duration is the time for one release actuation (in millisecond). SAC setpoint: Low value = sensitive system for very light handled object, but at the risk of "ghost"... -
Page 30: Reset Membrane Service Countdown
Functions 6.4.6.4. Reset membrane service countdown After replacement of membranes, the membrane service countdown timer should be reset to zero. 6.4.6.5. Show membrane service countdown The device display shows a warning and a countdown starting from when 100 hours remains to membrane service. -
Page 31: Maintenance
• An overall inspection of the piCOBOT® Electric must be performed on a regular basis with a duration depending on the application characteristics. • All maintenance must be performed in compliance with this manual, including safety instructions. • Only authorized integrators, or Piab AB, shall perform repairs. • Only use original spare parts. 7.1. Preventive maintenance... -
Page 32: Spare Parts
Maintenance 7.2. Spare parts Position Item number Quantity Description ® 0247361 piCOBOT Electric Service Kit: Membranes (x2), non-return valves (x4), screws 3.5x12 mm (x2 pieces) 0123110 Mesh filter 0246697 Cable M8 8-pin Female Angled (elbow) to M12 8-pin Female Straight 7.3. - Page 33 Maintenance Use the top of the handle of a screwdriver to push the non-return valve back into the center hole of the membrane lid. Attach the membrane with the T15 screw, recommended torque: 0.6 Nm. Make sure that the screw is inserted into the hole of the pump piston.
-
Page 34: Replacing The Vacuum Filter
Maintenance Attach the safety cover to the baseplate with four M5 screws, the recommended torque is 1.6 Nm. 7.4. Replacing the vacuum filter The base plate contains a mesh filter, that can be replaced. Use a screwdriver or equivalent to pull the mesh filter out from the vacuum port. Use the end of a 10 mm hose to push the new vacuum filter inside the base plate of piCOBOT®... -
Page 35: Troubleshooting
6.1 Motor stalled Motor Contact Piab's customer sup- The motor should not stall and if this er- port ror appears, please contact Piab customer support for further actions. piCOBOT® Electric UR e-series RS-485 Page 35 of 44... -
Page 36: Accessories
Suction cup BX35P Polyurethane 30/60 with filter, G1/4” male, with mesh filter ® 9914199 Suction cup piGRIP with Bag lip Silicone, G1/4” male, with mesh filter See piab.com Other suction cups with G1/4" Female fitting are available 9979763 Foam gripper 140x140x10 mm, PCOF.140.140.N114.CV07.DM 9979764 Foam gripper 140x140x10 mm, PCOF.140.140.N114.FR6.DM... -
Page 37: Technical Data
Description Unit Value Installation Total weight (with gripping tools) g [oz] See the configurable datasheet, available on piab.com, for the weight of the particular config- uration. piCOBOT® Electric weight (including adapt- g [oz] 1100 [38.8] er plate) Maximum payload kg [lb] 16 kg [35.2 lb]... -
Page 38: Vacuum Performance
Technical Data 8.1. Vacuum performance Vacuum Flow Vacuum Flow Maximum current 1100 mA Maximum current 1100 mA Vacuum level (-kPa) Vacuum level (-inHg) Figure 12. Vacuum flow Figure 13. Vacuum flow (Imperial units) Evacuation Time Evacuation Time Maximum current 1100 mA Maximum current 1100 mA Vacuum level (-kPa) Vacuum level (-inHg) -
Page 39: Efficiency
Technical Data 8.3. Efficiency Efficiency (Suction power/power consumption) Efficiency (Suction power/power consumption) Maximum current 1100 mA Maximum current 1100 mA Vacuum level (-inHg) Vacuum level (-kPa) Figure 18. Efficiency of piCOBOT® Electric: Figure 19. Efficiency (Imperial units) suction power versus robot power consumption. piCOBOT®... -
Page 40: Dimensions
Dimensions 9. Dimensions 9.1. Adapter plates Page 40 of 44 piCOBOT® Electric UR e-series RS-485... - Page 41 Dimensions piCOBOT® Electric UR e-series RS-485 Page 41 of 44...
-
Page 42: Warranty
Warranty 10. Warranty The Seller gives its Customers a five-year warranty from the receipt of the Products for vacuum pump Prod- ucts (excluding vacuum pumps with electronics/controls, electro-mechanical vacuum pumps, accessories, and controls). The Seller gives its Customers a one-year warranty from the receipt of the Products for all other Products (i.e. -
Page 43: Recycling And Disposal
Recycling and disposal 11. Recycling and disposal Environmental aspects are considered in the development process of Piab’s products to make sure that a minimal environmental footprint is used. Piab AB is certified with ISO-14001:2015. Piab AB also complies with: • RoHS2 (2011/65/EU) •... - Page 44 +33 (0)16-430 82 67 +33 (0)16-430 82 67 +46 (0)8-630 25 00 +46 (0)8-630 25 00 +55 (0)11-449 290 50 +55 (0)11-449 290 50 +86 21 5237 6545 +86 21 5237 6545 info-france@piab.com info-france@piab.com info-sweden@piab.com info-sweden@piab.com info-brasil@piab.com info-brasil@piab.com info-china@piab.com info-china@piab.com...
Need help?
Do you have a question about the piCOBOT Electric UR RS-485 and is the answer not in the manual?
Questions and answers