Table of Contents

Related Manuals for Growatt SPA TL BL-UP Series


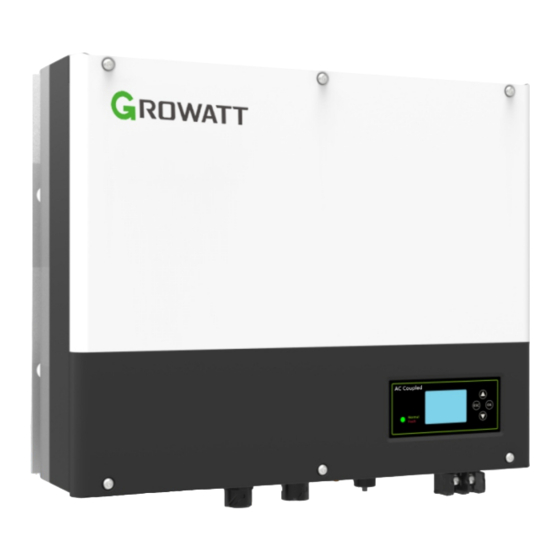
Summary of Contents for Growatt SPA TL BL-UP Series
- Page 1 Download Manual Shenzhen Growatt New Energy Co., Ltd. 4-13/F, Building A, Sino-German (Europe) Industrial Park, Hangcheng Blvd, Bao'an District, Shenzhen, China +86 755 2747 1942 service@ginverter.com www.ginverter.com GR-UM-334-A-02...
-
Page 2: Table Of Contents
Contents 1 Overview ....................1 1.1 Preface..........................1 1.2 Target Group ........................1 1.3 Product Description....................... 1 1.4 Safety instructions......................3 2 Safety ....................... 4 2.1 Intended use........................4 2.2 Safety precautions ......................5 2.3 Symbols on the SPA inverter ..................6 3 Product Description................ - Page 3 6.5 Country setting ......................48 6.5.1 Selecting the country standard ................48 6.5.2 Guidance on selecting the country standard for SPA TL BL-UP series inverters................48 6.5.3 Country standard table.................... 49 6.5.4 Regional power grid setting ..................49 6.5.5 Checking the firmware version, region, country/area and power quality response mode ..................
-
Page 4: Overview
Personnel who will operate the equipment should possess the local/national required qualifications. The SPA TL BL-UP series inverters can be paired with two types of batteries: the lithium battery or the lead-acid battery. Customers can select the appropriate type based on their needs. -
Page 5: Safety Instructions
AC-coupled Inverter type; otherwise, the SPA would fail to work normally. 2. Read this manual carefully before installation. Growatt shall not be held liable for Battery any device damage caused by failure to follow instructions specified in this manual. -
Page 6: Safety Precautions
2.2 Safety precautions 2.3 Symbols on the SPA inverter Symbol Description DANGER Risk of high voltages which might lead to electric shocks Risk of high voltage! Ø Operations marked with these symbols should be performed by professional personnel only. Ø Keep children, people with disabilities and non-professionals away from the Risk of burns due to hot surface equipment. -
Page 7: Product Description
3 Product Description 3.2 Label Explanation 3.1 LED indicator and function buttons Marks of SPA Mark Description Explanation Push buttons Allow you to set parameters on the screen Green light on SPA runs normally Red light on Fault state SPA status indicator Green light blinking 1.Alarm state Red light blinking... -
Page 8: Size And Weight
230 a.c.V Nominal frequency 50/60 Hz 3.4 Highlights of the SPA inverter Battery data The Growatt SPA inverter stands out with the following features: Ø All-in-one design, maximizing self-consumption. Support the backup and peak Battery voltage range 42-59 d.c.V shaving functions. -
Page 9: Inspection Upon Delivery
Ø To avoid device damage caused during movement, please transport the inverter properly.The total weight of the SPA inverter can be up to 27 kg. Growatt SPA series and accessories as follows: Grid EPS Load ATS-S Grid Figure 4.1... -
Page 10: Installation
5 Installation H. The installation location should be readily accessible for disconnecting means. 5.1 Basic installation requirements I. To ensure optimal operation of the inverter and facilitate ease of operation, please A. Ensure that the installation surface meets the load-bearing requirement for reserve enough space around the inverter. -
Page 11: Installation Instructions
5.3 Installation instructions Functions 5.3.1 System configuration Crimp the RJ45 connector The SPA inverter uses two types of sensors: wired current sensor and meter sensor. Before installing the sensor, please beware that: Strip cables If the wired current sensor is selected, it is recommended that the cable connecting the wired current sensor be shorter than 15 m;... -
Page 12: Installation Of Spa
5.3.2 Installation of SPA 1. Determine the installation position on the wall, ensure that it is suitable for the weight and dimensions of the inverter. 2. Use the paperboard (installation guide) to determine the hole positions, ensuring that the paperboard is level. 3. - Page 13 Step 2: Route the stripped cables through the locking nut, sealing ring and threaded sleeve, insert them into the connection terminal in accordance with the marks on the connection terminal, and secure the connection by tightening the screws. You can pull the cables gently to ensure that the cables are secured in place.
- Page 14 Step 4: Push or rotate the connector to the terminal on the inverter until both are The recommended wiring diagrams are as follows: secured tightly. Then install the protective cover onto the EPS connector and tighten it Diagram A with the screwdriver. The inverter side SPA Inverter AC GRID...
-
Page 15: Connecting The Battery Terminal
(If you have purchased the Growatt lithium battery, the battery cable is delivered in the original package). 8. Connect the positive pole (+) of the battery cable to the positive battery terminal on the inverter, and the negative pole to the negative battery terminal (-). -
Page 16: Connecting The Ct Terminal
CT1/MERTER1 Figure 5.23 Note: Figure 5.21 1. The meter and CT cannot be installed at the same time. Please set the sensor model when selecting CT or electric meter. For details, please refer to Section 6.3.3. 2. If the cable is not used, e.g. the CT cable, please do not remove the filler plug from Note: the cable support sleeve. -
Page 17: Connecting The Meter Terminal
1.The meter and CT cannot be installed at the same time. Please set the sensor model when selecting CT or electric meter. For details, please refer to Section 6.3.3. 2. The meter must be purchased from Growatt. Meters of other brands would fail to communicate with the SPA inverter. -
Page 18: Connecting To The Rs485 Port For Communication With The Lithium Battery
Note: Note: 1. If you are using a lead-acid battery, you do not need to install this communication 1. If you are using a lead-acid battery, you do not need to install this communication cable. cable. 2. The CAN battery communication and 485-2 battery communication can't be installed 2. -
Page 19: Connecting The Dry Contact Port
5.4.8 Connecting the dry contact port Description DRMs Power Control The dry contact is used to communicate with external devices (such as remote start of the water heater). The wiring steps are as follows: DRM1/DRM5 1.Unscrew the swivel nut from the cable gland. 2.Thread the swivel nut over the cable. -
Page 20: Grounding The Inverter
6.2.1 Normal mode In normal mode, the SPA can operate in the on-grid mode, or supply backup power during 1. Growatt SPA & SPA TL BL-UP series inverters are all single-phase a grid outage. inverters. If installed in Australia or New Zealand, the inverter must not be used as part of a three-phase system. -
Page 21: Fault Mode
6.2.2 Fault mode 6.3 Display and button The SPA's smart management system monitors the system in real time. In case that 6.3.1 LCD display area any exception is detected, such as a system fault or an inverter fault, the LCD screen will display the fault information with the LED indicator turning red. -
Page 22: Led And Button Instruction
6.3.2 LED and button instruction Line A display: 1. Standby: the SPA is in standby mode. No fault is detected, but the operating requirements are not met. 2. Normal: the SPA is operating properly. 3. Checking: the SPA is performing self-check. If no fault is detected, it will switch to the normal mode;... -
Page 23: Setting The Working Mode
Note: In the "Basic Parameter" menu, you can press "Enter" for over 1s to access the setting 1. Press "Down" to move to the next item, and "Up" to the previous one. menu: 2. The work mode is displayed in accordance with the actual operating status. Press “enter”... - Page 24 2.In the "EPS" menu, you can press "Enter" for 1s to access the setting menu: 3. In the "Priority" menu, you can press "Enter" to access the setting menu: Press “enter”key to If you need to enable AC If battery first is charging function,you make sure choosen...
-
Page 25: Single-Phase Export Limitation Configuration
4.In the "ExportLimit (Export Limitation)" menu, you can press "Enter" to access the 6. In the "RS485" menu, you can press Enter to select the RS485 communication setting menu: Press “enter” key more Press “enter” than 1 seconds to make sure to make sure WorkMode WorkMode... -
Page 26: Communication
6.4.2 Monitoring 6.3.5.2 Setting guide (1) Long press “enter” to access the "WorkMode" configuration page from the home You can monitor the SPA operating status via connecting to the RS485 communication page for operating mode settings. port on the SPA. (2) Press “down”... -
Page 27: The 485-1/485-2 Port
Growatt inverters have been designed to comply with relevant safety standards of devices. different country. in the SPA TL BL-UP series, you can select the corresponding country standard on the LCD screen. Note: For compliance with AS/NZS 4777.2:2020, installers will need to select cthe country standard following instructions in Section 6.5.3 or 6.5.4 and then select Region... -
Page 28: Country Standard Table
The Volt-Watt and Volt-Var settings became mandatory for some of the DNSPs response mode (Distribution Network Service Providers) as of December 2019 in Australia. All Growatt inverters come with the capability of Volt-Watt and Volt-Var settings. WorkMode WorkMode Region , country /region and Input&... -
Page 29: Resetting The Country, Region And Power Quality Response Mode
2. Connect to the battery. 3. Turn on the AC circuit breaker and then the battery switch. Reset Country 4. If the LED indicator turns green, it indicates that the SPA inverter has been successfully powered on. Growatt General Password Set parameter Advanced 7.2 Powering off the SPA system... -
Page 30: Notes On The Installation Environment, Maintenance And Cleaning
8 Notes on the installation environment, maintenance and Note: 1. Prior to removal of any cover for maintenance or repair, turn off cleaning the switch on the AC and DC sides. 2.All operations mentioned above should be performed by qualified and professional personnel. -
Page 31: Fault Removal
Error Message Description Suggestion Growatt products have gone through strict tests and inspections before delivery. As with all electrical devices, there are residual risks despite careful construction. Should Grid frequency fault. 1. Check if the AC frequency is within the you encounter any problems, you can visit www.ginverter.com to check the Q&A... - Page 32 1. Check the warning information referring to range, please contact Growatt support. the lithium battery user manual. BMS report warning Warning:XXX 2. Please contact Growatt support if the 1. Restart the inverter. problem persists after restart. Error 604 EPS Volt Low 2.
-
Page 33: Decommissioning
AC connection Single phase 10.4 Disposing of the SPA inverter Stand alone(AC power) Growatt SPA &SPA TL BL-UP 3000VA Do not dispose of the product together with the household waste but in Rated output apparent power accordance with the disposal regulations for electronic waste... -
Page 34: Torque
Model Model SPA 3000TL BL-UP SPA 3000TL BL-UP Specifications Specifications Continuous charging / Noise emission (typical) ≤ 25 dB(A) 3000/3000 W discharging power Altitude 2000m Type of Battery Lithium /Lead-acid Self-Consumption Efficiency Cooling concept Natural Max. efficiency 97.2% Relative humidity 100% Euro weighted efficiency Features... -
Page 35: Appendix
The following table lists the optional accessories for the SPA Inverter. If you need to purchase any of them, you can contact Growatt or your dealer. The P/N is for reference only and it is subject to change without notice. -
Page 36: Contact Us
13 Contact us If you have technical problems concerning our products, please contact Growatt Service Line or your dealer. To provide you with the necessary support, please have the following information ready: 1. The serial number of the SPA inverter 2.
Need help?
Do you have a question about the SPA TL BL-UP Series and is the answer not in the manual?
Questions and answers