Table of Contents
Advertisement
Quick Links
Advertisement
Table of Contents

Related Manuals for JUSHA E320AG


Summary of Contents for JUSHA E320AG
- Page 2 8A, Block 1, Nanjing International Service Outsourcing Mansion, No. 301 Hanzhongmen Street, Nanjing City, Jiangsu Province, 210036 Ch Tele: 025-83305050 Fax: 025-58783273 Visit us at the website: www.jusha.com.cn © Nanjing Jusha Display Technology Co., Ltd. 2021. All rights reserved. Published by Nanjing Jusha Display Technology Co., Ltd. Ⅰ...
-
Page 3: Table Of Contents
CONTENTS CONTENTS 1. Manual instructions ................2 1.1 About this manual ................2 1.2 Explanation of symbols ...............2 1.3 Safety information ...............3 2. Overview ....................5 2.1 Packing list ...................6 2.2 Front view and keypad ..............7 2.3 The backside view of the monitor ..........8 3. -
Page 4: Manual Instructions
For any further questions about this manual, you are welcome to contact Nanjing JUSHA Display Technology Co., Ltd. Explanation of symbols This manual and product use the symbols below. - Page 5 Gives information of the Authorized European representatives Compliance ROHS instruction Waste Electrical and Electronic Equipment Directive (WEEE) 2002/96/EC Waste disposal should comply with local regulations. Recommend to refer the User Manual Manufacturer information JUSHA trademark Product serial number Don’t touch...
-
Page 6: Safety Information
Manual instructions *This monitor complies with these standards only when a medical grade power supply is used. Power supply is specified as a part of me equipment. Safety information Read all the important safety information before installing and operating your monitor. About the environment ... - Page 7 Please contact JUSHA for technical support. Repairing is limited to trained engineers. Do not try to repair or disassemble the product by yourself.
-
Page 8: Overview
Plug the monitor and the devices under interference into different power sockets. 2. Overview Thank you for using JUSHA endoscopic surgery professional monitors. JUSHA endoscopic surgery professional medical monitor is designed for endoscope host, ICU display, operation room to display high-quality video and images. - Page 9 Desiccant Notice: 1. Please only use the original accessories supplied with the monitor. JUSHA is not responsible for any technical problems caused by using Third-party accessories. 2. Packing list is for reference only, different models need to match different packing list, Please refer to the packing list in the product box.
-
Page 10: Front View And Keypad
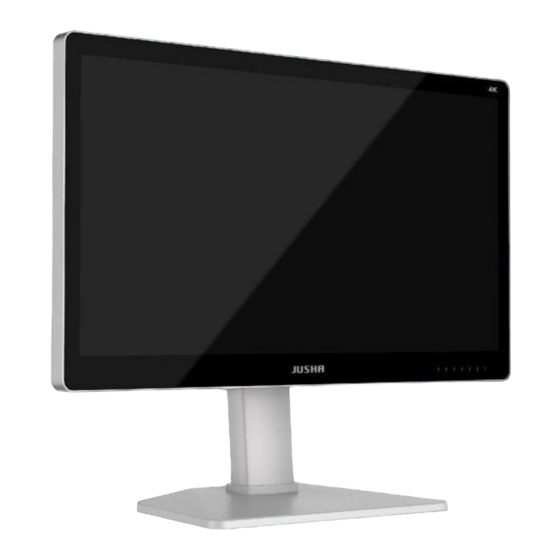
Overview Front view and keypad P2.1 Front view P2.2 The front keypad Decrease the value of the menu option Left key Increase the menu option value Right key or go to the next menu level 1.Open the User menu Menu key 2.Exit the User menu Selects the previous menu item Up key... -
Page 11: The Backside View Of The Monitor
Overview Indicates the monitor operating status 1.Lights up in white, indicates monitor in, power-on state 2.Touch Power Key,lights up in Power Key orange, indicates monitor in power-on standby 3.Light off, indicates monitor in power-off status The backside view of the monitor P2.3 Backside of monitor... - Page 12 Overview P2.4 interface definition Connectors description: DC power switch DC power input DC 5V-OUT Program upgrade interface DVI output DVI input HDMI1.4 input HDMI2.0 input DP input 11 SDI1 input SDI1 output 13 SDI2 input SDI2 output 15 SDI3 input SDI3 output 17 SDI4 input SDI4 output...
-
Page 13: Monitor Installation
1. Plug one side of the signal wire into monitor’s back interface, and the other side into endoscopic host’s interface, then Tighten the screws. E320AG supports wall design, which should withstand the force of 13kg at least. 2. Connect to the operating room grounding system through the PE ground which is on the back of the monitor. - Page 14 Monitor installation Country/Area USA/Canada EU (except U.K) Plug Shape ANSI/UL 817 DIN VDE 0620- Standard CSA-C22.2 BS1363/BS546 1:2010 No.21 Standard 120V 230V 230V Country/Ara Brazil Japan Korea Plug Shape Standard NBR14136 JIS 8303 KSC8305:2002R Voltage 220V 110V 220V Country/Area Denmark Singapore China Plug Shape...
-
Page 15: Monitor Settings
Monitor settings Turn on the monitor Turn the power on, the power indicator will turn white, and the monitor's screen will display the JUSHA boot screen, indicating that the monitor is running. Warning The product has the memory function that can automatically record the shutdown mode after the user's last use. - Page 16 Monitor settings 2. The left icon represents the main menu information. 3. The right side represents the submenu and submenu options.
- Page 17 Monitor settings...
- Page 18 Monitor settings P4.1 Signal source selection menu...
- Page 19 Monitor settings The structure of user menu and functional specification: Parameter Menu page Menu Factory operations default Backlight 0-100 specificatio Contrast 0-100 Brightness 0-100 GAMMA1.8 GAMMA2.0 Curve GAMMA2.0 GAMMA2.2 GAMMA2.4 GAMMA2.6 DICOM 6500K Image 7500K 6500K 9300K Color USER Sharpness 0-100 Temperature 0-100...
- Page 20 Monitor settings Auto Input color Auto format YPbPr BT2020 SRGB Auto Gamut Standard Auto Mode 1 Mode 2 Mode 3 Mode 4 User mode Mode 1 Mode 5 Mode 6 Simplified Language Simplified Chinese English Chinese Mirror Menu lock Factory reset HDMI1 SetUp HDMI2...
-
Page 21: Operate Osd Menu
Monitor settings Botton Left Botton Right Window 1 Resolution information Channel select Window 2 Resolution information Channel select Window 3 Resolution information Channel select Information Window 4 Resolution information Channel select Working time of Time Display backlight Operate OSD menu 4.5.1 Call out menu When the product is turned on, press any key to call navigation menu, and press... - Page 22 Monitor settings 4.5.4 Adjust Contrast Operations are as follows: 1. Press any key to call navigation menu, and press to call out menu and by default,【Image】page is displayed. 2. Press to call out menu to enter Image submenu page. 3. Move cursor to [Contrast] by pressing 4.
- Page 23 Monitor settings 4.5.7 Color temperature selection Operations are as follows: 1. Press any key to call navigation menu, and press to call out menu and by default,【Image】page is displayed. 2. Press to call out menu to enter Image submenu page. 3.
- Page 24 Monitor settings Operations are as follows: 1. Press any key to call navigation menu, and press to call out menu and by default,【Image】page is displayed. 2. Press to call out menu to enter Image submenu page. 3. Move cursor to [Saturation] by pressing 4.
- Page 25 Monitor settings menu and by default,【Image】page is displayed. 2. Move cursor to [Display Setting] by pressing 3. Press to enter Display Setting submenu page. 4. Move cursor to [Amplification Setting] by pressing 5. The user may, as necessary, select different amplification modes by pressing Options: OFF, 5%, 10%, 15% and 20%;...
- Page 26 Monitor settings 2. Press to move cursor to [Display Setting]. 3. Press to enter submenu setting interface. 4. Move cursor to [User Mode] by pressing 5. User may switch over user modes, and mode 1, 2, 3, 4, 5 and 6 are optional.
- Page 27 Monitor settings 5. User may switch over key lock by pressing Option: ON, OFF. Default value: OFF. 4.4.20 Factory reset Operations are as follows: 1. Press any key to call navigation menu, and press to call out menu and by default,【Image】page is displayed. 2.
-
Page 28: Hot Key
Monitor settings 4.4.23 Dimensions of secondary picture Operations are as follows: 1. Press any key to call navigation menu, and press to call out menu and by default,【Image】page is displayed. 2. Press to move cursor to [Multi-window Setting]. 3. Press to enter the multi-window setting submenu interface. - Page 29 Monitor settings 4.6.2 Curve hot key Operations are as follows: 1. Press any key to call navigation menu, and Press to call out Curve Selection menu. 2. Press to switch colortemp options: Gamma1.8, Gamma2.0, Gamma2.2, Gamma2.4, Gamma2.6 and DICOM. 3. Press to exit menu.
- Page 30 Monitor settings Operations are as follows: 1. Press any key to call out navigation menu, and Press to call out Multi-Window Selection menu. 2. Press to switch Multi-Window options: Off, PIP, PBP1, PBP2, Triple and Quad. 3. Press to confirm the Multi-Window selected. 4.
-
Page 31: Important Information
Air pressure: 700hPa ~ 1060hPa Environment for Temperature: -20° C ~ 60° C transportation and Humidity: 5% ~ 90%,no condensation storage Air pressure: 200hPa ~ 1060hPa CCC、CE Certification standards Notice: The specifications of JUSHA products are subject to change without notice. -
Page 32: Safety Standards
Important information Safety standards Safety standards for JUSHA-ES42: IEC 60601-1: 2012. the Medical Display Safety EN 60601-1:2013 standards GB4943.1-2011 CCC、CE Authentication Declaration of ROHS Conformity Electromagnetic compatibility EMC for JUSHA-ES42: IEC 60601-1-2: 2014. Electromagnetic EN 60601-1-2:2015 compatibility GB/T9254-2008 GB17625.1-2012 Warning:Warning: Display requires special precautions regarding EMC and need to be installed, put into service and used according to the following information. -
Page 33: Guidance And Manufacturer's Declaration
30 cm (12 inches) to any part of the E320AG, including cables specified by the manufacturer. Otherwise, degradation of the performance of this equipment could result. - Page 34 Important information EMI Compliance Table (Table 1) Table 1 - Emission Phenomenon Compliance Electromagnetic environment CISPR 11 Professional healthcare facility RF emissions Group 1, Class B environment Harmonic IEC 61000-3-2 Professional healthcare facility distortion Class D environment Voltage fluctuations IEC 61000-3-3 Professional healthcare facility and flicker Compliance...
- Page 35 Important information 1970 2450 2400-2570 Pulse modulation 217Hz, 28V/m 5240 5500 5100-5800 Pulse modulation 217Hz, 9V/m 5785 Table 4 – Input a.c. power Port Immunity test levels Basic EMC Phenomenon Professional healthcare facility standard environment Electrical fast ± 2 kV IEC 61000-4-4 transients/burst 100kHz repetition frequency...
-
Page 36: Declarations
Therefore, please consult your seller whether he/she provides relevant maintenance service. JUSHA will neither take any responsibility not authorize anyone to take any responsibility for product distribution and its use. Please read carefully the related documents, operation instruction and labels on package before you apply the product so that you can use and maintain the product properly. - Page 37 JUSHA keeps patents, copyright and its exclusive right and all information in this manual including JUSHA all designs and related materials. Anyone cannot plagiarize JUSHA design or copy its product to sell or use without the company’s explicit authority.
-
Page 38: After-Sale Service Declaration
Notice: The user must contact and get permission from JUSHA before sending back the product for repairs. To avoid the damage and/or loss during transit, the user must deliver the product in its original package or other adequate package with an equal degree of protection to the local distributor. -
Page 39: Contact Information
Contact information 7. Contact information Nanjing JUSHA Display Technology Co., Ltd. Address: 8A, Block 1, Nanjing International Service Outsourcing Mansion, No.301 Hanzhongmen Street, Nanjing City, Jiangsu Province, 210036 China Tel: 0086-25-83305050 Fax: 0086-25-58783273 Web: www.jusha.com.cn...
Need help?
Do you have a question about the E320AG and is the answer not in the manual?
Questions and answers