
Subscribe to Our Youtube Channel
Related Manuals for Tony Ray's AeroModel DFS Kranich


Summary of Contents for Tony Ray's AeroModel DFS Kranich
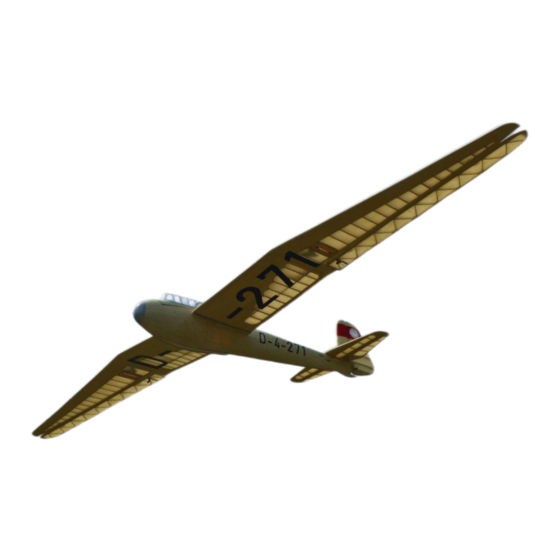
- Page 1 DFS Kranich Building Instructions Specifications Wingspan 60 in / 1498mm Wing Area 16.2 sq dm Flying weight 320g-350g Fuselage length 645mm Scale 1 / 12 Requires RC transmitter with at least 3 channels 5g mini servos x 4 © Sebastian Hansen...
- Page 2 INDEX BEFORE YOU BEGIN ------------------------------------------------------------------------------------------P.3 KIT INVENTORY ------------------------------------------------------------------------------------------------P.4 ASSEMBLY-Rudder ---------------------------------------------------------------------------------------P.5-P.6 ASSEMBLY-Horizontal Tail ----------------------------------------------------------------------------P.7-P.12 ASSEMBLY-Center Wing Section -------------------------------------------------------------------P.13-P.17 ASSEMBLY-Outer Wing Section ---------------------------------------------------------------------P.18-P.25 ASSEMBLY-Fuselage I ----------------------------------------------------------------------------------P.26-P.32 ASSEMBLY-Fuselage II ---------------------------------------------------------------------------------P.33-P.38 ASSEMBLY-Electronics --------------------------------------------------------------------------------P.39-P.42 © Sebastian Hansen...
-
Page 3: Before You Begin
BEFORE YOU BEGIN Tips and Tricks 1. Read through the manual before you begin, thus you will have an overall idea of what to do. 2. Check all parts in the scope of delivery list. If you find any serious defects or missing parts, please contact Tony and Sebastian directly. - Page 4 KIT INVENTORY Wood Sheets Scope of Delivery 1.5mm Balsa 1mm balsa 2.5mm balsa 1mm Plywood 1.5mm Plywood Hardware Parts Scope of Delivery Blister PVC canopy (Front) Blister PVC canopy (Behind) PVC Tube (Outer diameter: 6mm, Inner diameter: 4mm) Carbon Tube (Outer diameter: 4mm, Inner diameter: 3mm) Plastic Hinges Mini paper hinges M2 x 20 Screws...
- Page 5 Part1. Rudder Step 1 Step 2 Step 3 Step 4 Step 5 Step 6: Balsa Strips: 1 x 3 mm (cross section) © Sebastian Hansen...
- Page 6 Step 7 Step 8 Step 9 Step10 Step 11 Step 12 © Sebastian Hansen...
-
Page 7: Part2. Horizontal Tail
Part2. Horizontal tail Step 1 Step 2 Step 3 Step 4: Attention: When installing, Side A should be touched on T4, the installation direction in the picture is wrong! Step 5 Step 6: Make sure the ribs are perpendicular to the bottom part. ©... - Page 8 Step 7 Step 8 Step 9 Step 10 Step 11 Step 12 © Sebastian Hansen...
- Page 9 Step 13 Step 14 Step 15 Step 16: Fill the gaps with leftover wood. Step 17 Step 18: Carefully sand the edges. © Sebastian Hansen...
- Page 10 Step 19 Step 20: Make sure the ribs are perpendicular to E3. Step 21 Step 22 Step 23 Step 24 © Sebastian Hansen...
- Page 11 Step 25 Step 26 Step 27 Step 28 Step 29 Step 30 © Sebastian Hansen...
- Page 12 Step 31 Step 32: Make the other side using the same way. Step 33 Step 34: According to the drawing, bend a steel wire with a diameter of 0,8 mm into the shape shown in the picture. Builder’s note: Step 35 ©...
- Page 13 Part3. Center Wing Section Step1: Balsa Strips: 1,5 x 4 mm (cross section) Step2 Step3: Step4: Strips: 1,5 x 4 mm The wing has a small sweep angle. Construct the wing strictly according to the drawings. Part W2 and W3 are not perpendicular to the ribs. Note here: R8 and the ground are at an angle of 81°, not perpendicular Step5 Step6:...
- Page 14 Step7: Strips 1,5 x 1,5 mm. Step8: Use a sharp knife to roll and cut the PVC pipe 2-3 times and then break the pipe to get a smooth cut. Length: 80 mm. Length 100 mm. PVC Tube (Outer diameter: 6 mm, Inner Diameter: 4 mm) Step9 Step10 Step11...
- Page 15 Step13 Step14 Step15 Step16: Cover the bottom first. Step17: Step18: If the wood chip needs to be bent, please moist the outside of the curved surface with water. Use rubber bands to temporarily fix the wood chips and the wing. This method can effectively bond the leading edge of the wing. Polish the front edge of WC1 into a bevel in advance.
- Page 16 Step19: Then install WC2. Step20 Step21: Step22: Use the same method to install WC1 UP. Polish the back edge of WC2 into a bevel. Step23: Then install WC2UP. Step24: Balsa strips: 1 x 3 mm © Sebastian Hansen...
- Page 17 Step25: Install the balsa strips. Step26: Carefully polish the edges. Step27 Step28 Builder’s note: Step29: Use the same method to make the other side. © Sebastian Hansen...
- Page 18 Part4. Outer Wing Section Step1 Step2: Balsa Strips: 1,5 x 4 mm. Step3 Step4: Balsa Strips: 1,5 x 4 mm. Balsa Strips: 1,5 x 1,5 mm. Step5 Step6 © Sebastian Hansen...
- Page 19 Step7: Step8: Balsa strips: 1,5 x 1,5 mm. Carefully remove the wing from the drawing. Step9 Step10 Step11 Step12 © Sebastian Hansen...
- Page 20 Step13 Step14 Step15 Step16 Step17: Cover the bottom side first. Step18: Polish the front edge of the WC4 into a bevel in advance. © Sebastian Hansen...
- Page 21 Step19: Then install the WC5A and WC5B. Step20 Step21 Step22: Polish the back edge of WC5A into a bevel. Step23: Step24: Then install the WC5UP A and WC5UP B. Each wing needs 3 pcs of W25, thickness: 2,5 x 2 pcs (installed above W16B) Thickness: 1 mm x 1 pcs (installed below W16B). ©...
- Page 22 Step25 Step26 Step27: Step28: Use the same method to make the other side. Carefully polish the leading edge and tip of the wing. Step29: Step30: The plugs come from the 1.0 mm plywood sheet. The marked section is the outer side. In this step use epoxy glue to connect plug and wing. ©...
- Page 23 Step31: Step32: Attention: Before cover the wings you need to install the servo extension cord in advance. In this step do not use glue to stick outer wing and inner wing, here is just pre-assembly, showing the installation position. Step33 Step34 Step35 Step36...
- Page 24 Step37: Step38 The part AL23 is 1mm higher than the aileron frame. Step39 Step40: Balsa Strips 1 x 3 mm. Balsa Strips 1 x 1 mm. Step41: Polish the edges of the ailerons. Step42: Polish the edges of the ailerons. ©...
- Page 25 Step43 Step44 Builder’s note: Step45 © Sebastian Hansen...
- Page 26 Part5. Fuselage I Step 1 Step 2 Step 3: Step 4 Please ensure that the bulkhead is perpendicular to the surface of the drawing. Step 5 Step 6 © Sebastian Hansen...
- Page 27 Step 7 Step 8: Splice parts FS before installation. Step 9 Step 10: Strips: 1,5 x 1,5 mm. Step 11 Step 12: Mini Magnet: 1 x 3 mm. © Sebastian Hansen...
- Page 28 Step 13: Bend part F26 along the dotted line. Step 14 Step 15 Step 16: Please leave a gap of 1 mm. Step 17 Step 18: Length 28 mm. PVC Tube (Outer diameter 6 mm, Inner Diameter 4 mm). © Sebastian Hansen...
- Page 29 Step 19: Step 20 Carbon Tube (Outer Diameter: 4 mm, Inner Diameter: 3 mm). Length 110 mm. Length 90 mm. Step21: Step 22: Remove this corner. Make a simple wing mounting fixture. You can use wood sheets, cardboard and other materials. Step 23: Step 24: Use the same method to make the other side of the fuselage (please make sure it is symmetrical).
- Page 30 Step 25: Step 26 Please be careful in this step. You can fix the left and right sides of the fuselage with small clips first, then use glue to bond them. Step 27 Step 28 Step 29: C Step 30 ut off the corner in order to install the horizontal tail smoothly.
- Page 31 Step 31: Fill the gap with scraps. Step 32: Use a small piece of scrap (2,5 mm balsa) to install under the F19 to accept the screws. Step 33: Remove the support part. Step 34: Mini magnet: 1 x 3 mm. Please pay attention to the magnet polarity.
- Page 32 Step 37: Step 38 Before Installation, bend C2 along the dotted line. Step 39 Step 40 Step 41: The marked section is the front end. Step 42 © Sebastian Hansen...
- Page 33 Part6. Fuselage II Step 1 Step 2: Please moisten the outside of the curved surface with water. Step 3 Step 4 Step 5 Step 6 © Sebastian Hansen...
- Page 34 Step 7 Step 8 Step 9 Step 10 Step 11 Step 12 © Sebastian Hansen...
- Page 35 Step 13: Step 14: Strips: 1,5 x 8 mm. Use leftover wood chips (1 mm balsa) to fill this place. Step 15 Step 16 Step 17 Step 18 © Sebastian Hansen...
- Page 36 Step 19 Step 20: Strips: 1 x 3 mm balsa. Step21 Step 22 Step 23 Step 24: Polish the back edge of the CC6 into a bevel. © Sebastian Hansen...
- Page 37 Step 25 Step 26: Before overall polishing, please use paper tape to protect the side wall of the fuselage to prevent it from being polished by mistake. Step 27 Step 28: Carefully cut off the excess edges. Step 29 Step 30 ©...
- Page 38 Step 31 Step 32 Step 33 Step 34: M2 x 20 Screws. Builder’s note: Step 35 © Sebastian Hansen...
- Page 39 Part7. Electronics Step1: ES9251 Servo. Step2: Carefully cut the covering material. Step3: Appropriate amount of CA Glue. Step4 Step5 Step6 © Sebastian Hansen...
- Page 40 Step7: Heat shrink tube here. Step8: ES 9051 Servo. Steel push rod (diameter 0,8 mm) Step9 Step10: Make a note here. Step11: Step12: Use drills with a diameter of 0,8 mm Please make sure to bond the Horn symmetrically. to drill holes at 8 mm inte ©...
- Page 41 Step13 Step14: Example of cable connection. Steel cable, 0,3 mm diameter. Copper casing. Step15: Step16 Step17: Step18 Note It is recommended to use a torsion spring structure for the elevator, so that the steel cable structure on the upper surface of the elevator can be omitted. ©...
- Page 42 Builder’s note: Step19: Decorative sheet of the hole. Please refer to the installation drawing to debugging center of gravity. Thank you! © Sebastian Hansen...
Need help?
Do you have a question about the DFS Kranich and is the answer not in the manual?
Questions and answers