Table of Contents

Subscribe to Our Youtube Channel
Related Manuals for SPX APV TPM+

Summary of Contents for SPX APV TPM+
- Page 1 O P E R AT I N G M A N UA L TPM+ M I X E R F OR M N O.: L 3 8 1 6 4 1 U K R E V I S I O N : 0 1 / 2 0 1 3 R E A D A N D U N D E R S TA N D T H I S M A N UA L P R I O R TO O P E R AT I N G O R S E R V I C I N G T H I S P R O D U CT.
- Page 3 The conformity of the mixers is guaranteed. Authorised person for the documentation: SPX Flow Technology Rosista GmbH, Frank Baumbach, Zechenstr. 49, D-59425 Unna February 20, 2012 Manager Research and Development...
-
Page 5: Table Of Contents
381641 ISS T 09.08 Contents: Warnings, side 13 Introduction, page 14 1.1 The TPM+ mixer program, page 14 1.2 The TPM+ mixer, options and extra accessories, page 14 1.3 Identification of mixer, page14 1.4 Motor identification, side 14 Installation, page 15 2.1 Placing and pipe connections, page15 2.2 Powder, page 15 2.3 Electrical connections, page15... -
Page 7: Warnings, Side
381641 ISS T 09.08 Warnings Read the instructions carefully before installing and using the mixer. If in doubt, contact your nearest APV dealer. Check that the motor and motor control unit are correctly specified, especially in operating environments where there may be a risk of explosion. -
Page 8: Introduction
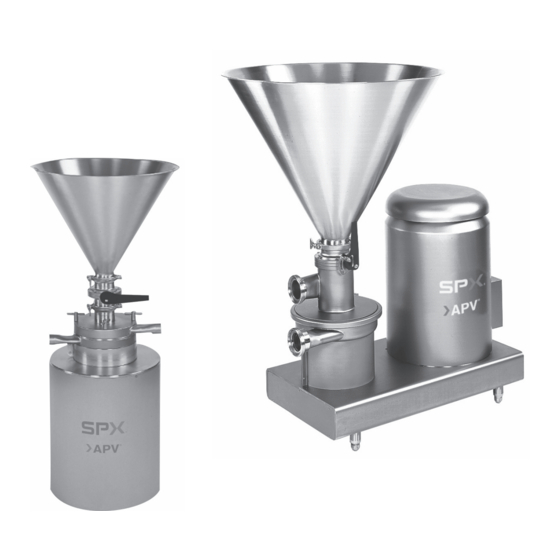
381641 ISS T 09.08 772476 ISS Z 04.98 Introduction The TPM+ programme The TPM+ powder mixer programme consists of the TPM+ 1 and the TPM+ 2. This manual deals with the standard version of the TPM+1 and TPM+ 2, and their accessories. Mixers in the 3A version with NEMA motors, and any special versions, are described on additional pages in the spare parts section. -
Page 9: Installation
381641 ISS T 09.08 381325 ISS T 11.98 Installation Placing and pipe connections When placing, allow sufficient space around the mixer for piping, operation and maintenance. Position the mixer so the suction pipe is as short as possible and there is a gradient down to the suction connection. Keep the number of valves, bends and T-pieces on the suction side of the mixer to a minimum. -
Page 10: Startup And Operation
381641 ISS T 09.08 381623 ISS Q 11.98 Startup and operation Before use Before starting to use the mixer, remove and clean the supply pipe. The mixer housing should also be opened and checked, and any foreign bodies should be removed. Before opening the mixer housing, the power supply should be switched off. -
Page 11: Maintenance
381641 ISS T 09.08 Maintenance General Always keep the outside surfaces of the mixer clean and dry. Make sure too that the area around the mixer is clean and tidy. Regularly check the mixer and the electric motor for any abnormal noise, heat development or vibrations. -
Page 12: Dismantling And Assembly
381641 ISS T 09.08 381624 ISS Q 11.98 Dismantling and assembly Dismantling in general 1. Switch off the power supply to the motor. Fig. 5 2. Remove the supply and discharge pipes 3. Make sure that the mixer housing is emptied of fluid. If the mixer is used for hazardous products, observe the local regulations for personal protection when working with these products. -
Page 13: Type Tpm+1 - Pump Shaft And Motor
381641 ISS T 09.08 381625 ISS Q 11.98 381644 ISS Q 11.98 Dismantling and assembly TPM+ 1 Pump shaft and motor 1. Loosen the screws on the pump shaft and the shaft can be pulled Fig. 6 off. See Fig. 6 2. -
Page 14: Type Tpm+2 - Dismantling Of Mixer Part
381641 ISS T 09.08 381626 ISS Q 11.98 Dismantling and assembly TPM+ 2 - fig 8 Dismantling of Mixer part Fig. 8 1. Remove the clamping ring (Pos. 2) connecting the hopper (Pos. 1) with the butterfly valve (Pos. 3). 2. -
Page 15: Type Tpm+2 - Motor And Drive Unit, Dismantling
381641 ISS T 09.08 381627 ISS Q 11.98 381628 ISS Q 11.98 381629 ISS Q 11.98 381630 ISS Q 11.98 Dismantling and assembly TPM+ 2 Fig. 9 Motor and drive unit Dismantling - Remove the motor shroud and the endplate on the bottom plate. - Loosen the nuts on the belt tightener and remove the screws attaching the motor to the bottom plate see fig. - Page 16 381641 ISS T 09.08 381631 ISS Q 11.98 Dismantling and assembly Outside shaft seal Fig. 14 Dismantling Skrue - After removing the mixer housing, remove the rotor ring of the seal with the O-ring from the shaft, and the stator ring with the O-ring from Tætningshus the seal housing on the mixer housing.
-
Page 17: Technical Data
381641 ISS T 09.08 Technical data Noise level Sound pressure and sound power measurements have been carried out in accordance with ISO 3743 Grade 2 and ISO 3746 Grade 3. Tolerance + 3 dB. Sound pressure and sound power level for TPM+ (dB) (Watt) TPM+1... -
Page 18: Spare Parts
381641 ISS T 09.08 Spare parts Spare part numbers for the TPM+ mixers are shown on the following spare parts drawings and part lists. - TPM+ 1, complete without accessories - TPM+ 2, complete without accessories - Shaft seal, complete - Level sensor accessory - Vibrator accessory Recommended stocks of spare parts... - Page 20 85-862 Bydgoszcz, Poland P: (+48) 52 525 9900 F: (+48) 52 525 9909 SPX reserves the right to incorporate design and material changes without notice or further obligation. Design features, materials of construction and dimensional data, as described in this bulletin, are provided for your information only and should not be relied upon unless confirmed in writing.
- Page 21 S PA R E PA R T S L I S T TPM+ M I X E R F OR M N O.: L 4 5 3 1 4 3 U K R E V I S I O N : 0 1 / 2 0 1 3 R E A D A N D U N D E R S TA N D T H I S M A N UA L P R I O R TO O P E R AT I N G O R S E R V I C I N G T H I S P R O D U CT.
- Page 38 85-862 Bydgoszcz, Poland P: (+48) 52 525 9900 F: (+48) 52 525 9909 SPX reserves the right to incorporate design and material changes without notice or further obligation. Design features, materials of construction and dimensional data, as described in this bulletin, are provided for your information only and should not be relied upon unless confirmed in writing.
Need help?
Do you have a question about the APV TPM+ and is the answer not in the manual?
Questions and answers