Table of Contents
Advertisement
Available languages
Available languages
Quick Links
Advertisement
Chapters
Table of Contents

Related Manuals for Comunello MOWIN AF-800


Summary of Contents for Comunello MOWIN AF-800
- Page 1 AF-800 ISTRUZIONI D’USO E DI INSTALLAZIONE INSTALLATION AND USER’S MANUAL INSTRUCTIONS D‘UTILISATION ET D‘INSTALLATION BEDIENUNGS- UND INSTALLATIONSANLEITUNG INSTRUCCIONES DE USO Y DE INSTALACIÓN INSTRUÇÕES DE INSTALAÇÃO E UTILIZAÇÃO...
-
Page 2: Table Of Contents
INDICE CARATTERISTICHE DEL PRODOTTO DATI TECNICI COLLEGAMENTI ELETTRICI COLLEGAMENTO CON NEUTRO IN SCHEDA COLLEGAMENTO CON NEUTRO DALL’IMPIANTO UTILIZZO DELLA CENTRALE IMPIANTO TIPO UTILIZZO VIA FILO UTILIZZO VIA RADIO GESTIONE CON RADIOCOMANDI PROGRAMMAZIONE DEI RADIOCOMANDI CANCELLAZIONE DEI RADIOCOMANDI PROGRAMMAZIONI AVANZATE CONFIGURAZIONE DEI TEMPI DI MANOVRA CONFIGURAZIONE DEI PULSANTI VIA FILO CONFIGURAZIONE DEL MODO DI FUNZIONAMENTO CON I COMANDI FILARI RESET AI PARAMETRI DI FABBRICA... -
Page 3: Caratteristiche Del Prodotto
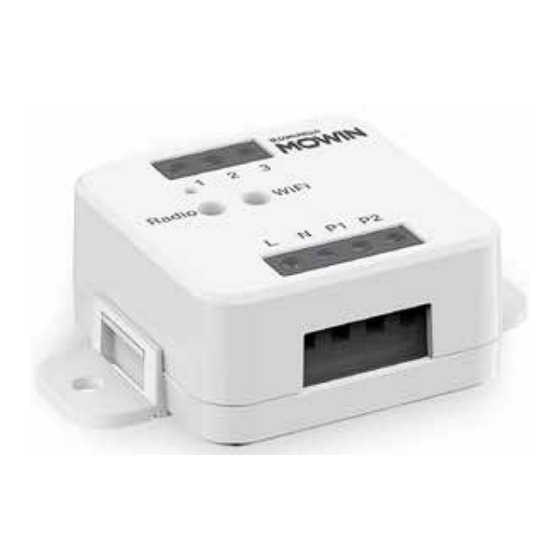
1 CARATTERISTICHE DEL PRODOTTO 1.1 DATI TECNICI Alimentazione (Input) 230Vac Tipo di carico (Output) Motori 230V con finecorsa integrato Potenza massima del carico (Output) 500W Numero di trasmettitori programmabili Frequenza ricevitore RF 433,920MHz Grado di protezione IP20 Temperatura di funzionamento -20°... -
Page 4: Collegamento Con Neutro In Scheda
2.1 COLLEGAMENTO CON NEUTRO IN SCHEDA OUT 230V max 500W OP C CL P1 P2 P1 P2 GLI INGRESSI FILARI POSSONO ESSERE IMPOSTATI COME: • Monopulsante/Bipulsante, vedi paragrafo 7.3 • Funzionamento automatico/uomo presente, vedi paragrafo 7.4... -
Page 5: Collegamento Con Neutro Dall'impianto
2.2 COLLEGAMENTO CON NEUTRO DALL’IMPIANTO OUT 230V max 500W OP C CL P1 P2 P1 P2 GLI INGRESSI FILARI POSSONO ESSERE IMPOSTATI COME: • Monopulsante/Bipulsante, vedi paragrafo 7.3 • Funzionamento automatico/uomo presente, vedi paragrafo 7.4... -
Page 6: Utilizzo Della Centrale
3 UTILIZZO DELLA CENTRALE 3.1 IMPIANTO TIPO Il sistema può essere pilotato da pulsante filare, trasmettitore. L’impianto può funzionare anche con solo comandi radio. CONTROL UNIT RADIOTRANSMITTER CONFIGURATION See paragraph 4 3.2 UTILIZZO VIA FILO Una volta collegato il pulsante questo è già attivo con funzione Apre/Stop/Chiude. 3.3 UTILIZZO VIA RADIO Per comandare il motore via radio si deve disporre di trasmettitori compatibili e quindi fare la procedura di associazione,vedi paragrafo 4. -
Page 7: Cancellazione Dei Radiocomandi
4.2 CANCELLAZIONE DEI RADIOCOMANDI Con questa procedura si possono eliminare dalla memoria dei trasmettitori programmati. PASSO 1 Mantenere premuto il tasto P1 (circa 8 secondi) fino a che il led comincia a lampeggiare di colore rosso. AZIONE : Pressione lunga tasto P1 : Lampeggia rosso ELIMINAZIONE DEL SINGOLO TRASMETTITORE ELIMINAZIONE DI TUTTI I TRASMETTITORI... -
Page 8: Programmazioni Avanzate
5 PROGRAMMAZIONI AVANZATE 5.1 CONFIGURAZIONE DEI TEMPI DI MANOVRA Default: 60 secondi Con questa procedura si configura il tempo di manovra in apertura e chiusura (tempo massimo impostabile 180 secondi). PASSO 1 Fare delle pressioni brevi del pulsante P2. Ad ogni pressione il led cambia colore: verde/giallo/magenta/verde... Smettere di premere quando il led è... -
Page 9: Configurazione Dei Pulsanti Via Filo
5.2 CONFIGURAZIONE DEI PULSANTI VIA FILO Default: Mono pulsante Con questa procedura è possibile selezionare la funzione degli ingressi “P1” e “P2 ATTENZIONE: i dispositivi collegati devono essere pulsanti PROOCEDURA PASSO 1 Fare delle pressioni brevi del pulsante P2. Ad ogni pressione il led cambia colore: verde/giallo/magenta/verde... Rilasciare il tasto quando il led è... -
Page 10: Reset Ai Parametri Di Fabbrica
ACTION: Short press of P2 button LED: The led Flash quicly and turns off 6 DICHIARAZIONE DI CONFORMITÀ Fratelli Comunello S.p.A. dichiara che il prodotto AF-800 è conforme ai requisiti delle Direttive europee. Il testo completo della dichiarazione di conformità e disponibile al link: https://www.comunello.com/media/products/frameautomation/accessori/af_800/files/comunello-frameautomation-af_800-02-... - Page 11 NOTES...
- Page 12 INDEX PRODUCT FEATURES TECHNICAL DATA CONNECTION DIAGRAMS CONNECTION DIAGRAM WITH NEUTRAL FROM CONTROL UNIT CONNECTION DIAGRAM WITH NEUTRAL FROM THE ELECTRICAL SYSTEM USE OF THE CONTROL UNIT TYPICAL INSTALLATION USE VIA WIRE USE VIA RADIO MANAGEMENT WITH REMOTE CONTROL RADIO PROGRAMMING DELETION OF REMOTE CONTROL ADVANCED PROGRAMS CONFIGURATION OF MANEUVER TIMES...
- Page 13 1 PRODUCT FEATURES 1.1 TECHNICAL DATA Power supply (Input) 230Vac Load type (Output) 230Vac motor with built-in limit switches Max power load (Output) 500W N° of programmable transmitters RF receiver frequency 433,920MHz Protection rating IP20 Working temperature -20° +55° Box dimensions 52x43x21 mm P1 Key P2 Key...
- Page 14 2.1 CONNECTION DIAGRAM WITH NEUTRAL FROM CONTROL UNIT OUT 230V max 500W OP C CL P1 P2 P1 P2 FILAR INPUTS CAN BE SET TO: • Mono/Bi Button, see paragraph 7.3 • Automatic/man-present operation, see paragraph 7.4...
- Page 15 2.2 CONNECTION DIAGRAM WITH NEUTRAL FROM THE ELECTRICAL SYSTEM OUT 230V max 500W OP C CL P1 P2 P1 P2 FILAR INPUTS CAN BE SET TO: • Mono/Double Button, see paragraph 7.3 • Automatic/man-present operation, see paragraph 7.4...
- Page 16 3 USE OF THE CONTROL UNIT 3.1 TYPICAL INSTALLATION The system can be controlled by a wired push button, radio commands. The installation can operate with only radio controls. CONTROL UNIT RADIOTRANSMITTER CONFIGURATION See paragraph 4 3.2 USE VIA WIRE Once connected, the button is already active with Open/Stop/Close function.
- Page 17 4.2 DELETION OF REMOTE CONTROL These procedures let you delete from the memory transmitters that have already been programmed. STEP 1 Hold the receiver button P1 down (about 8 seconds.) until the LED begins to Flash. ACTION: Hold button P1 down LED: Flashes red DELETION OF SINGLE TRANSMITTER DELETION OF ALL TRANSMITTER SAVED STEP 2a...
- Page 18 5 ADVANCED PROGRAMS 5.1 CONFIGURATION OF MANEUVER TIMES Default: 60 seconds This procedure is used to set the opening and closing manoeuvre time (maximum time that can be set 180 seconds). STEP 1 Make short pressures of the P2 button. Each time the LED changes colour green/yellow/magenta/green...
- Page 19 5.2 WIRED INPUT SETTING Default: Mono button This procedure lets you select the function of inputs “P1” (terminal 3) and “P2” (terminal 4). WARNING: the connected devices must be buttons. PROCEDURE STEP 1 Make short pressures of the P2 button. Each time the LED changes color: green/yellow/magenta/green...
- Page 20 ACTION: Short press of P2 button LED: The led Flash quicly and turns off 6 DECLARATION OF CONFORMITY Fratelli Comunello S.p.A. declares that the AF-800 product complies with the requirements of the European Directives. The complete text of the declaration of conformity is available at the link: https://www.comunello.com/media/products/frameautomation/accessori/af_800/files/comunello-frameautomation-af_800-02-...
- Page 21 NOTES...
- Page 22 TABLE DES MATIÈRES CARACTÉRISTIQUES DU PRODUIT DONNÉES TECHNIQUES BRANCHEMENTS ÉLECTRIQUES CONNEXION AVEC LE NEUTRE DE LA CARTE CONNEXION AVEC LE NEUTRE DU SYSTÈME UTILISATION DE LA CENTRALE INSTALLATION TYPE UTILISATION PAR FIL UTILISATION PAR RADIO GESTION AVEC RADIOCOMMANDES PROGRAMMATION DES RADIOCOMMANDES ANNULATION DES RADIOCOMMANDES PROGRAMMATION AVANCÉE CONFIGURATION DES TEMPS DE MANŒUVRE...
-
Page 23: Caractéristiques Du Produit
1 CARACTÉRISTIQUES DU PRODUIT 1.1 DONNÉES TECHNIQUES Alimentation (entrée) 230Vac Type de charge (sortie) Moteurs 230V avec interrupteur de fin de course intégré Puissance de charge maximale (sortie) 500W Nombre d'émetteurs programmables Fréquence du récepteur RF 433,920 MHz Degré de protection IP20 Température de fonctionnement -20°... -
Page 24: Connexion Avec Le Neutre De La Carte
2.1 CONNEXION AVEC LE NEUTRE DE LA CARTE OUT 230V max 500W OP C CL P1 P2 P1 P2 LES ENTRÉES CÂBLÉES PEUVENT ÊTRE RÉGLÉES COMME SUIT : • Mono-bouton/Double-bouton, voir paragraphe 7.3 • Fonctionnement automatique/présence d'un homme, voir paragraphe 7.4... -
Page 25: Connexion Avec Le Neutre Du Système
2.2 CONNEXION AVEC LE NEUTRE DU SYSTÈME OUT 230V max 500W OP C CL P1 P2 P1 P2 LES ENTRÉES CÂBLÉES PEUVENT ÊTRE RÉGLÉES COMME SUIT : • Mono-bouton/Double-bouton, voir paragraphe 7.3 • Fonctionnement automatique/présence d'un homme, voir paragraphe 7.4... -
Page 26: Utilisation De La Centrale
3 UTILISATION DE LA CENTRALE 3,1 INSTALLATION TYPE Le système peut être contrôlé par un bouton filaire ou un émetteur. Le système peut également fonctionner uniquement avec des radiocommandes. CONTROL UNIT RADIOTRANSMITTER CONFIGURATION See paragraph 4 3.2 UTILISATION PAR FIL Une fois le bouton connecté, il est déjà... -
Page 27: Annulation Des Radiocommandes
4.2 ANNULATION DES RADIOCOMMANDES Cette procédure permet d'effacer de la mémoire les émetteurs programmés. ÉTAPE 1 Appuyez sur le bouton P1 et maintenez-le enfoncé (environ 8 secondes) jusqu'à ce que la LED commence à clignoter en rouge. ACTION : Appuyez longuement sur le bouton P1 : Clignote en rouge ÉLIMINATION D'UN SEUL ÉMETTEUR ÉLIMINATION DE TOUS LES ÉMETTEURS DE... -
Page 28: Programmation Avancée
5 PROGRAMMATION AVANCÉE 5.1 CONFIGURATION DES TEMPS DE MANŒUVRE Par défaut : 60 secondes Cette procédure permet de configurer le temps de manœuvre d'ouverture et de fermeture (temps maximum réglable 180 secondes). ÉTAPE 1 Appuyez brièvement sur le bouton P2. À chaque pression, la LED change de couleur : vert/jaune/magenta/vert... Arrêtez d'appuyer lorsque la LED est verte. -
Page 29: Configuration Des Boutons Par Fil
5.2 CONFIGURATION DES BOUTONS PAR FIL Par défaut : Bouton Mono Cette procédure permet de sélectionner la fonction des entrées « P1 » et « P2 » ATTENTION : les dispositifs connectés doivent être à bouton-poussoir PROCÉDURE ÉTAPE 1 Appuyez brièvement sur le bouton P2. À chaque pression, la LED change de couleur : vert/jaune/magenta/vert... Relâchez le bouton lorsque la LED est jaune. -
Page 30: Réinitialisation Des Paramètres D'usine
ACTION : Brève pression sur le bouton P2..LED : Le voyant clignote rapidement et s'éteint 6 DÉCLARATION DE CONFORMITÉ Fratelli Comunello S.p.A. déclare que le produit AF-800 est conforme aux exigences des directives européennes. Le texte complet de la déclaration de conformité est disponible sur le lien : https://www.comunello.com/media/products/frameautomation/accessori/af_800/files/comunello-frameautomation-af_800-02-... - Page 31 NOTES...
- Page 32 INHALTSVERZEICHNIS PRODUKTMERKMALE TECHNISCHE DATEN ELEKTRISCHE ANSCHLÜSSE ANSCHLUSS MIT NEUTRALLEITER AUF KARTE ANSCHLUSS MIT SYSTEM-NEUTRALLEITER VERWENDUNG DER STEUEREINHEIT TYPISCHE ANLAGE VERWENDUNG VERKABELT VERWENDUNG ÜBER FUNK VERWALTUNG MIT FUNKSTEUERUNG PROGRAMMIERUNG DER FUNKSTEUERUNGEN LÖSCHUNG DER FUNKSTEUERUNGEN ERWEITERTE PROGRAMMIERUNG KONFIGURIERUNG DER MANÖVERZEITEN KONFIGURATION DER VERDRAHTETEN TASTEN KONFIGURATION DER BETRIEBSART MIT VERDRAHTETEN BEFEHLEN RESET AUF WERKPARAMETER KONFORMITÄTSERKLÄRUNG...
-
Page 33: Produktmerkmale
1 PRODUKTMERKMALE 1.1 TECHNISCHE DATEN Stromversorgung (Input) 230Vac Lasttyp (Output) 230V Motoren mit integriertem Endschalter Maximale Lastleistung (Output) 500 W Anzahl von programmierbaren Sendern RF-Empfängerfrequenz 433,920 MHz Schutzgrad IP20 Betriebstemperatur -20° +55° Abmessungen des Gehäuses 52x43x21 mm P1 Key P2 Key 45mm 22mm 2 ELEKTRISCHE ANSCHLÜSSE... -
Page 34: Anschluss Mit Neutralleiter Auf Karte
2.1 ANSCHLUSS MIT NEUTRALLEITER AUF KARTE OUT 230V max 500W OP C CL P1 P2 P1 P2 DIE VERDRAHTETEN EINGÄNGE KÖNNEN WIE FOLGT EINGESTELLT WERDEN: • Einzeltaste/ Doppeltaste, siehe Abschnitt 7.3 • Automatikbetrieb/Person anwesend, siehe Abschnitt 7.4... -
Page 35: Anschluss Mit System-Neutralleiter
2.2 ANSCHLUSS MIT SYSTEM-NEUTRALLEITER OUT 230V max 500W OP C CL P1 P2 P1 P2 DIE VERDRAHTETEN EINGÄNGE KÖNNEN WIE FOLGT EINGESTELLT WERDEN: • Einzeltaste/ Doppeltaste, siehe Abschnitt 7.3 • Automatikbetrieb/Person anwesend, siehe Abschnitt 7.4... -
Page 36: Verwendung Der Steuereinheit
3 VERWENDUNG DER STEUEREINHEIT 3,1 TYPISCHE ANLAGE Das System kann mit einem verdrahteten Taster oder Sender bedient werden. Die Anlage kann auch nur über eine Funksteuerung bedient werden. CONTROL UNIT RADIOTRANSMITTER CONFIGURATION See paragraph 4 3.2 VERWENDUNG VERKABELT Sobald der Taster angeschlossen ist, ist er bereits mit der Funktion Öffnen/Stop/Schließen aktiv. 3.3 VERWENDUNG ÜBER FUNK Um den Motor über Funk zu steuern, müssen Sie kompatible Sender haben und dann das Kopplungsverfahren durchführen, siehe Abschnitt 4. -
Page 37: Löschung Der Funksteuerungen
4.2 LÖSCHUNG DER FUNKSTEUERUNGEN Mit diesem Verfahren können programmierte Sender aus dem Speicher gelöscht werden. SHRITT 1 Die Taste P1 drücken und gedrückt halten (ca. 8 Sekunden), bis die LED rot zu blinken beginnt. AKTION : Langes Drücken der Taste P1 : Blinkt rot ELIMINIERUNG DES EINZELNEN SENDERS ELIMINIERUNG ALLER AUSGANGSSENDER... -
Page 38: Erweiterte Programmierung
5 ERWEITERTE PROGRAMMIERUNG 5.1 KONFIGURIERUNG DER MANÖVERZEITEN Voreinstellung: 60 Sekunden Mit dieser Prozedur wird die Zeit für die Öffnungs- und Schließmanöver konfiguriert (maximal einstellbare Zeit 180 Sekunden). SHRITT 1 Mehrmals kurz auf die Taste P2 drücken. Bei jedem Druck ändert die LED ihre Farbe: grün/gelb/magenta/grün... Nicht mehr drücken, wenn die LED grün leuchtet. -
Page 39: Konfiguration Der Verdrahteten Tasten
5.2 KONFIGURATION DER VERDRAHTETEN TASTEN Voreinstellung: Einzeltaste Mit diesem Verfahren können Sie die Funktion der Eingänge "P1" und "P2" auswählen ACHTUNG: die angeschlossenen Geräte müssen Taster sein VERFAHREN SHRITT 1 Mehrmals kurz auf die Taste P2 drücken. Bei jedem Druck ändert die LED ihre Farbe: grün/gelb/magenta/grün... Die Taste loslassen, wenn die LED gelb leuchtet. -
Page 40: Reset Auf Werkparameter
AKTION: Kurzes Drücken der Taste P2 LED: Die LED blinkt schnell und schaltet sich aus 6 KONFORMITÄTSERKLÄRUNG Fratelli Comunello S.p.A. erklärt, dass das Produkt AF-800 mit den Anforderungen der europäischen Richtlinien übereinstimmt. Der vollständige Text der Konformitätserklärung ist unter folgendem Link verfügbar: https://www.comunello.com/media/products/frameautomation/accessori/af_800/files/comunello-frameautomation-af_800-02-... - Page 41 ANMERKUNGEN...
- Page 42 ÍNDICE CARACTERÍSTICAS DEL PRODUCTO DATOS TÉCNICOS CONEXIONES ELÉCTRICAS CONEXIÓN CON NEUTRO EN TARJETA CONEXIÓN CON NEUTRO DESDE EL SISTEMA USO DE LA CENTRAL INSTALACIÓN TIPO USO POR CABLE USO VÍA RADIO GESTIÓN CON RADIOMANDO PROGRAMACIÓN DE LOS RADIOMANDOS CANCELACIÓN DE LOS RADIOMANDOS PROGRAMACIONES AVANZADAS CONFIGURACIÓN DE LOS TIEMPOS DE MANIOBRA CONFIGURACIÓN DE LOS BOTONES VÍA CABLE...
-
Page 43: Características Del Producto
1 CARACTERÍSTICAS DEL PRODUCTO 1.1 DATOS TÉCNICOS Alimentación (Input) 230Vac Tipo de carga (Output) Motores 230V con final de carrera integrado Potencia máxima de la carga (Output) 500W Número de transmisores programables Frecuencia receptor RF 433,920 MHz Grado de protección IP20 Temperatura de funcionamiento -20°... -
Page 44: Conexión Con Neutro En Tarjeta
2.1 CONEXIÓN CON NEUTRO EN TARJETA OUT 230V max 500W OP C CL P1 P2 P1 P2 LAS ENTRADAS CON CABLE PUEDEN SER CONFIGURADAS COMO: • De un botón/Doble botón, véase párrafo 7.3 • Funcionamiento automático/hombre presente, véase párrafo 7.4... -
Page 45: Conexión Con Neutro Desde El Sistema
2.2 CONEXIÓN CON NEUTRO DESDE EL SISTEMA OUT 230V max 500W OP C CL P1 P2 P1 P2 LAS ENTRADAS CON CABLE PUEDEN SER CONFIGURADAS COMO: • De un botón/Doble botón, véase párrafo 7.3 • Funcionamiento automático/hombre presente, véase párrafo 7.4... -
Page 46: Uso De La Central
3 USO DE LA CENTRAL 3,1 INSTALACIÓN TIPO El sistema puede ser piloteado por botón con cable, transmisor. El sistema puede funcionar incluso con un solo mando de radio. CONTROL UNIT RADIOTRANSMITTER CONFIGURATION See paragraph 4 3.2 USO POR CABLE Una vez conectado el botón este ya está... -
Page 47: Cancelación De Los Radiomandos
4.2 CANCELACIÓN DE LOS RADIOMANDOS Con este procedimiento se pueden eliminar de la memoria de los transmisores programados. PASO 1 Mantenga presionada la tecla P1 (aproximadamente 8 segundos) hasta que el led comienza a parpadear de color rojo. ACCIÓN : Presión larga tecla P1 : Parpadea de rojo ELIMINACIÓN DE CADA TRANSMISOR ELIMINACIÓN DE TODOS LOS TRANSMISORES... -
Page 48: Programaciones Avanzadas
5 PROGRAMACIONES AVANZADAS 5.1 CONFIGURACIÓN DE LOS TIEMPOS DE MANIOBRA Por defecto: 60 segundos Con este procedimiento se configura el tiempo de maniobra en apertura y cierre (tiempo máximo configurable 180 segundos). PASO 1 Realice presiones breves del botón P2. En cada presión el led cambia de color: verde/amarillo/magenta/verde... -
Page 49: Configuración De Los Botones Vía Cable
5.2 CONFIGURACIÓN DE LOS BOTONES VÍA CABLE Por defecto: De un botón Con este procedimiento es posible seleccionar la función de las entradas "P1" y "P2 ATENCIÓN: los dispositivos conectados deben ser pulsados PROCEDIMIENTO PASO 1 Realice presiones breves del botón P2. En cada presión el led cambia de color: verde/amarillo/magenta/verde... -
Page 50: Reset A Los Parámetros De Fábrica
ACCIÓN: Presión breve del botón P2 LED: El led realiza parpadeos rápidos y se apaga 6 DECLARACIÓN DE CONFORMIDAD Fratelli Comunello S.p.A. Declara que el producto AF-800 es conforme a los requisitos de las Directivas europeas. El texto completo de la declaración de conformidad está disponibles en el enlace: https://www.comunello.com/media/products/frameautomation/accessori/af_800/files/comunello-frameautomation-af_800-02-... - Page 51 NOTAS...
- Page 52 ÍNDICE CARATERÍSTICAS DO PRODUTO DADOS TÉCNICOS LIGAÇÕES ELÉTRICAS LIGAÇÃO COM O NEUTRO NA PLACA LIGAÇÃO COM O NEUTRO DO SISTEMA UTILIZAÇÃO DA CENTRAL SISTEMA TÍPICO UTILIZAÇÃO POR FIO UTILIZAÇÃO POR RÁDIO GESTÃO COM COMANDOS POR RÁDIO PROGRAMAÇÃO DOS COMANDOS POR RÁDIO EXCLUSÃO DOS COMANDOS POR RÁDIO PROGRAMAÇÕES AVANÇADAS CONFIGURAÇÃO DOS TEMPOS DE MANOBRA...
- Page 53 1 CARATERÍSTICAS DO PRODUTO 1.1 DADOS TÉCNICOS Alimentação elétrica (entrada) 230Vac Tipo de carga (saída) Motores 230 V com fim de curso integrado Potência máxima de carga (saída) 500 W Número de transmissores programáveis Frequência recetor RF 433,920 MHz Grau de proteção IP20 Temperatura de funcionamento -20°...
- Page 54 2.1 LIGAÇÃO COM O NEUTRO NA PLACA OUT 230V max 500W OP C CL P1 P2 P1 P2 AS ENTRADAS FILARES PODEM SER DEFINIDAS COMO: • Botão único/botão duplo, veja o parágrafo 7.3 • Funcionamento automático/homem morto, veja o parágrafo 7.4...
- Page 55 2.2 LIGAÇÃO COM O NEUTRO DO SISTEMA OUT 230V max 500W OP C CL P1 P2 P1 P2 AS ENTRADAS FILARES PODEM SER DEFINIDAS COMO: • Botão único/botão duplo, veja o parágrafo 7.3 • Funcionamento automático/homem morto, veja o parágrafo 7.4...
- Page 56 3 UTILIZAÇÃO DA CENTRAL 3.1 SISTEMA TÍPICO O sistema pode ser pilotado por um botão filar, transmissor. O sistema também pode funcionar só com comandos rádio. CONTROL UNIT RADIOTRANSMITTER CONFIGURATION See paragraph 4 3.2 UTILIZAÇÃO POR FIO Uma vez ligado o botão este já está ativo com a função Abrir/Stop/Fechar. 3.3 UTILIZAÇÃO POR RÁDIO Para comandar o motor por rádio é...
- Page 57 4.2 EXCLUSÃO DOS COMANDOS POR RÁDIO Com este procedimento pode-se apagar da memória os transmissores programados. PASSO 1 Mantenha a tecla P1 pressionada (cerca de 8 segundos) até que o LED comece a piscar a vermelho. AÇÃO : Pressão longa na tecla P1 : Pisca a vermelho ELIMINAÇÃO DO TRANSMISSOR INDIVIDUAL ELIMINAÇÃO DE TODOS OS TRANSMISSORES...
- Page 58 5 PROGRAMAÇÕES AVANÇADAS 5.1 CONFIGURAÇÃO DOS TEMPOS DE MANOBRA Padrão: 60 segundos Com este procedimento configura-se o tempo de manobra na abertura e fecho (tempo máximo definível 180 segundos). PASSO 1 Faça pressões breves no botão P2. A cada pressão o LED muda de cor: verde/amarelo/magenta/verde... Deixe de pressionar quando o LED estiver verde.
- Page 59 5.2 CONFIGURAÇÃO DOS BOTÕES POR FIO Padrão: Botão único Com este procedimento é possível selecionar a função das entradas “P1” e “P2” ATENÇÃO: os dispositivos ligados devem ser botões PROCEDIMENTO PASSO 1 Faça pressões breves no botão P2. A cada pressão o LED muda de cor: verde/amarelo/magenta/verde... Solte a tecla quando o LED estiver amarelo.
- Page 60 AÇÃO: Pressão breve no botão P2 LED: O LED Pisca rapidamente e apaga-se 6 DECLARAÇÃO DE CONFORMIDADE A Fratelli Comunello S.p.A. declara que o produto AF-800 está conforme aos requisitos das Diretivas europeias. O texto completo da declaração de conformidade está disponível no link: https://www.comunello.com/media/products/frameautomation/accessori/af_800/files/comunello-frameautomation-af_800-02-...
- Page 61 NOTAS...
- Page 62 NOTAS...
- Page 63 NOTAS...
- Page 64 FRATELLI COMUNELLO S.P.A. AUTOMATION DIVISION Via Cassola, 64 - C.P. 79 36027 Rosà, Vicenza, Italy Tel. +39 0424 585111 Fax +39 0424 533417 info@comunello.it www.comunello.com...
Need help?
Do you have a question about the MOWIN AF-800 and is the answer not in the manual?
Questions and answers