Advertisement
Advertisement
Table of Contents

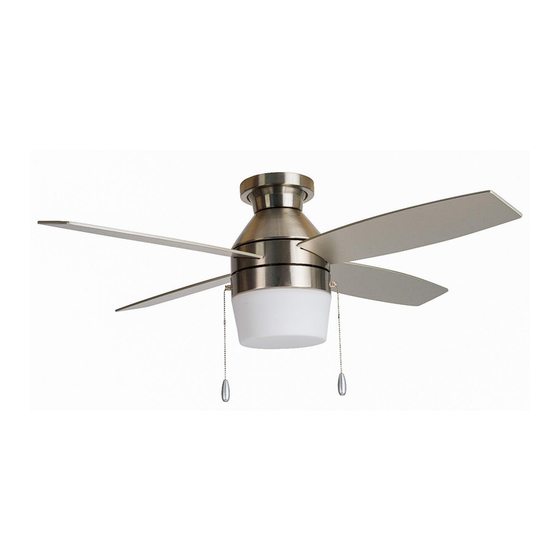
Summary of Contents for Patriot Lighting Primo Hugger 21400
- Page 1 42” Primo Hugger Ceiling Fan Owner’s Manual Model #21400 Item # 355-1600...
-
Page 2: Safety Instructions
SAFETY INSTRUCTIONS WARNING: • To avoid risk of electrical shock, be sure to shut off power at the main fuse or circuit breaker panel box before installing or servicing this fixture. Turning off the electrical power by using the light switch only is not sufficient to prevent electrical shock hazard. •... -
Page 3: Package Contents
PACKAGE CONTENTS HARDWARE KIT OWNER’S MANUAL PART DESCRIPTION QUANTITY PART DESCRIPTION QUANTITY Ceiling Mounting Bracket Light Kit Housing Canopy Trim Ring LED Bulbs Canopy Mounting Screws Light Kit Housing Screws Upper Motor Housing Light Kit Glass Blades Hardware Kit Blade Screws and Washers Owner’s Manual IMPORTANT REMINDER: You must use the parts provided with this fan for proper installation and safety. -
Page 4: Hardware Kit Contents
HARDWARE KIT CONTENTS PART DESCRIPTION QUANTITY Wire Connectors for House Wiring Blade screws Fiber Blade Washers Machine Screws and Lock Washers 2 each Wood Screws and Washers 2 each Balance Kit Pull Chain Extensions and Fobs NOTE: For your convenience some extra hardware may be included. The quantity listed above is the number required for installation. - Page 5 DIMENSION REFERENCE A: 12.9 in. B: 7.4 in. C: 8.0 in. D: 6.2 in. NOTE: Make sure blades are at least 30 inches from any wall or obstruction and at least 7 feet above the floor.
- Page 6 ASSEMBLY INSTRUCTIONS 1. Turn OFF the electrical power at the main fuse or circuit breakers. NOTE: Before continuing installation, confirm that the power is still turned off at the main circuit breaker or by removing the correct fuse. Turning the power off using a wall switch is not sufficient to prevent electrical shock.
-
Page 7: Wiring The Fan
ASSEMBLY INSTRUCTIONS 4. Utilizing one of the holes in the top ring of the upper motor housing, hang the housing from the mounting hook as shown. This will allow for hands- free wiring of the fan. 5. WIRING THE FAN: Use the supplied wire connectors to connect the fan wires to the power supply wires according to the wiring diagram and... - Page 8 ASSEMBLY INSTRUCTIONS 6. SECURING THE MOTOR HOUSING: Remove the motor housing body from the bracket hook and swing the fan up into place onto the ceiling bracket. Note: When swinging the fan up onto the bracket, be sure that the mounting hook does not interfere with any wiring.
-
Page 9: Installing The Blades
ASSEMBLY INSTRUCTIONS 7. INSTALLING THE CANOPY TRIM RING The trim ring provides a decorative design touch to the top canopy and hides the mounting screws. Using both hands, push the trim ring up to the top of the canopy where it meets the ceiling. - Page 10 ASSEMBLY INSTRUCTIONS Fig. A CONNECTING THE LIGHT KIT -- Position the light kit housing under the fan. Connect the light kit wiring harness by lining up the two 9-pin plug connectors and inserting one into the other. Line up the color-coded corners to insure proper alignment.
- Page 11 ASSEMBLY INSTRUCTIONS 10. INSTALLING THE LIGHT KIT GLASS – Position the glass bowl to line up with the bottom of the light kit. While holding the glass up to the bottom of the light kit, turn the glass clockwise until the notch in the glass slips into the light kit channel.
-
Page 12: Reverse Switch
OPERATING INSTRUCTIONS REVERSE SWITCH Use the fan reverse switch, located on the side of the light kit housing, to optimize your fan for seasonal performance. Using a ceiling fan will allow you to raise your thermostat setting in summer and lower your thermostat setting in winter without feeling a difference in your comfort. -
Page 13: Troubleshooting
TROUBLESHOOTING FAN DOES NOT START: • Check the circuit breaker and confirm the power is ON. • Make sure the wall switch is ON. • Pull the pull chain to make sure it is on. Typical pull chain operation is 1 pull –... -
Page 14: Limited Lifetime Warranty
If your Patriot Lighting Ceiling Fan motor fails at any time during the lifetime of the original purchaser due to defects in material or workmanship, we will provide a replacement part free of charge.


Need help?
Do you have a question about the Primo Hugger 21400 and is the answer not in the manual?
Questions and answers