Table of Contents
Advertisement
Quick Links
INTENDED FOR USE BY PROFESSIONAL EQUIPMENT OPERATORS
OPERATING
INSTRUCTIONS
READ AND UNDERSTAND BEFORE
OPERATING THIS EQUIPMENT
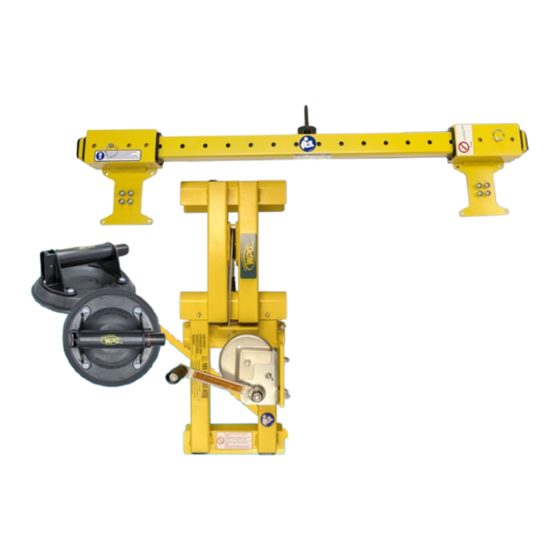
LADDER LIFT
(ladder not included)
Model numbers:
LL185: Hand cups not included
LL185WC: Includes 2 hand cups (N4000 or N4950)
Original Instructions © Wood's Powr-Grip Co., Inc.
Rev 0.0/4-24
1
908 W. Main • P.O. Box 368
Laurel, MT USA 59044
(1) 800-548-7341
(1) 406-628-8231
www.wpg.com
LL185(WC): #35041
Advertisement
Table of Contents

Related Manuals for WPG LL185


Summary of Contents for WPG LL185
- Page 1 (1) 406-628-8231 www.wpg.com READ AND UNDERSTAND BEFORE OPERATING THIS EQUIPMENT LADDER LIFT (ladder not included) Model numbers: LL185: Hand cups not included LL185WC: Includes 2 hand cups (N4000 or N4950) Original Instructions © Wood’s Powr-Grip Co., Inc. Rev 0.0/4-24 LL185(WC): #35041...
- Page 2 Rev 0.0/4-24 LL185(WC): #35041...
-
Page 3: Table Of Contents
Interpreting Red-Line Indicators ..................21 Lifting and Controlling a Load ...................21 Watching Red-Line Indicators ...................23 Releasing a Load .......................23 Lowering a Lifter .......................23 ..............24 FTER SING THE ADDER Storing the Ladder Lift ......................25 Transporting the Ladder Lift....................25 Rev 0.0/4-24 LL185(WC): #35041... - Page 4 REPLACEMENT PARTS................34 ................34 ADDER INCH ARTS ................34 ERTICAL IFTER ARTS REGISTRATION AND LIMITED WARRANTY ..........35 WPG P ...............35 EGISTER THIS RODUCT ..............35 BOUT THE IMITED ARRANTY Obtaining Warranty Service or Repair Service..............35 WINCH MANUFACTURER’S INFORMATION ...........36 Rev 0.0/4-24 LL185(WC): #35041...
-
Page 5: Specifications
15" x 17¼" x 11" [38 cm x 44 cm x 28 cm] Dimensions Pulley Unit 4½" x 15½" x 11" [11 cm x 39 cm x 28 cm] Dimensions Ladder ANSI Type IAA, rated to 375 lbs [170 kg] capacity Requirements Rev 0.0/4-24 LL185(WC): #35041... -
Page 6: Ertical Ifter Pecifications
(for N4950 hand cups) 1..Specifications apply to lifters using WPG 8" [20 cm] hand cups. If another model of hand cup is used, consult the manufacturer for specifications. The maximum structural capacity of this lifter is 185 lbs [85 kg], regardless of capacity ratings for any hand cups that may be installed. - Page 7 SPECIFICATIONS Note: VL2MAN is shown with hand cups and optional Adjustable Center Arm. Rev 0.0/4-24 LL185(WC): #35041...
-
Page 8: Safety
Do not exceed the Maximum Do not position a loaded or unloaded Load Capacity or lift loads the lifter over people. Ladder Lift is not designed for Do not touch the vacuum release (see “INTENDED USE”). controls during a lift. Rev 0.0/4-24 LL185(WC): #35041... -
Page 9: Operating Features
EATURES Features shown here are underlined on their first appearance in each section following. PULLEY LIFTING HOOK WIRE ROPE HAND WINCH PULLEY ASSEMBLY WINCH ASSEMBLY For information about specific parts, see “L ”. ADDER INCH ARTS Rev 0.0/4-24 LL185(WC): #35041... -
Page 10: Ertical Ifter Eatures
ADJUSTABLE CENTER ARM (OPTIONAL) HAND CUP w/ VACUUM PAD COTTERLESS HITCH PIN SLIDING HAND CUP MOUNT LIFT POINT For information about specific parts, see “V ” and/or any separate instructions ERTICAL IFTER ARTS for Product Options. Rev 0.0/4-24 LL185(WC): #35041... -
Page 11: Assembly
(fig. 1C). Note: The winch handle assembly includes a spacer (arrow in fig. 1D) instead of the spring designated as item E in the manufacturer’s provided illustration (see “WINCH MANUFACTURER’S INFORMATION”). Rev 0.0/4-24 LL185(WC): #35041... - Page 12 (figs. 2A and inset, and 2B). 2.2) Crank the hand winch counterclockwise (fig. 2C), to slacken the wire rope until the winch unit can be positioned on the ladder. Rev 0.0/4-24 LL185(WC): #35041...
- Page 13 (fig. 2E). 2.5) Remove the cotterless hitch pin that secures the lifting hook (fig. 2F), so the hook can be lowered to attach the vertical lifter. Rev 0.0/4-24 LL185(WC): #35041...
- Page 14 (see “T ”). OVE THE 1..For example, the base of a 24-foot [731-centimeter] extended length ladder should be 6ˈ [182 cm] from the building. Rev 0.0/4-24 LL185(WC): #35041...
-
Page 15: T O Assemble The Vertical Lifter
(see “Installing/Removing the Optional Adjustable Center Arm”). Attach a WPG hand cup (N4000 or N4950) to each sliding hand cup mount: 2.1) Remove the 4 hand cup screws from the corners of the cup handle’s base. -
Page 16: Installing/Removing The Optional Adjustable Center Arm
1..To support the maximum load dimensions, the center arm must be installed on the lifter. To support smaller dimensions, the center arm may be removed, provided that load overhang can be minimized sufficiently (see “L ”). HARACTERISTICS Rev 0.0/4-24 LL185(WC): #35041... -
Page 17: Intended Use
1..A “single piece” of material includes curtainwall assemblies, unitized glazing systems and similar construction units. 2..Vacuum pads made from a heat-resistant rubber compound can enable you to lift loads with higher surface temperatures. Contact WPG or an authorized dealer for more information. -
Page 18: Inadvertent Loading
Dispose of the ladder winch and vertical lifter in compliance with all local codes and applicable regulatory standard (see Service Life in “V ”). ERTICAL IFTER PECIFICATIONS 1..N4950 hand cups are eligible for our Hand Cup Exchange Program. However, N4000 hand cups are not eligible. Rev 0.0/4-24 LL185(WC): #35041... -
Page 19: Operation
(uppermost) pads near the top edge, to maximize stability. Make sure all pads will fit on the load and will be loaded evenly (fig. 2A). Consult the Per-Pad Load Capacity. Rev 0.0/4-24 LL185(WC): #35041... - Page 20 Note: If the lifter has an adjustable center arm, repeat these steps for the cup mount on it, too (fig. 3D). Caution: Do not position mounts in a way that the vacuum pads make contact with one another. Rev 0.0/4-24 LL185(WC): #35041...
- Page 21 (see “Watching Red-Line Indicators”). Repeat this with all hand cups in use. 1..Although a vacuum pad may become distorted during shipping or storage, this condition should correct itself with continued use. Rev 0.0/4-24 LL185(WC): #35041...
-
Page 22: T O Attach The Lifting Hook To A Load
(figs. 2B-C). Always use locking pin to secure restraining latch on lifting hook before lifting load. Then reinsert the locking pin, to secure the restraining latch (fig. 2D). Rev 0.0/4-24 LL185(WC): #35041... -
Page 23: T O Lift And Move The Load
“clicks” that indicate the automatic brake is properly engaged. 1..The winch requires a minimum load of 50 lbs [23 kg] for the automatic braking feature to work correctly (see “WINCH MANUFACTURER’S INFORMATION”). Rev 0.0/4-24 LL185(WC): #35041... - Page 24 Forcing the winch could result in injury or damage to the Ladder Lift or the load. Identify the source of the resistance and resolve it before continuing. Rev 0.0/4-24 LL185(WC): #35041...
-
Page 25: Watching Red-Line Indicators
Note: Follow the same safety guidelines as when raising a load (see “Lifting and Controlling a Load”). Crank the hand winch counterclockwise (fig. 1B) to lower the lifter. Make sure to lower an unloaded lifting hook the same way. Rev 0.0/4-24 LL185(WC): #35041... -
Page 26: After Using The Ladder Lift
Retract the wire rope until the assemblies contact each other (fig. 6A). Caution: Prevent the wire rope from contacting the ground during this step. 1..For extension ladders, it is acceptable to use the ladder winch to retract the extension beforehand. Rev 0.0/4-24 LL185(WC): #35041... -
Page 27: Storing The Ladder Lift
(fig. 1A) and store them in a clean, dry location. Transporting the Ladder Lift Secure all Ladder Lift components in their original shipping containers with the original shipping materials or equivalent. Rev 0.0/4-24 LL185(WC): #35041... -
Page 28: Inspections And Tests
2..The Periodic Inspection is also required whenever the Ladder Lifte has been out of service for 1 year or more. Keep a written record of all Periodic Inspections. If necessary, return the device to WPG or an authorized dealer for repair (see “REGISTRATION AND LIMITED... -
Page 29: Testing
6) Watch the red-line vacuum indicators: All of them must remain hidden for 5 minutes. If not, the load is not compatible with this lifter. Contact WPG for more information. 7) Lower the load after 5 minutes or whenever any red-line indicator begins to appear. -
Page 30: Operational Tests
1..The material should have either a flat surface or no more curvature than the lifter is designed for, if any. 2..An equivalent simulation may also be used. Contact WPG for more information. 3..A “qualified person” has successfully demonstrated the ability to solve problems relating to the subject matter and work, either by possessing a recognized degree in an applicable field or a certificate of professional standing, or by possessing extensive knowledge, training and experience. - Page 31 Never use lifter with hand cup stress damage, and repair or replace that has failed test. components as necessary to successfully pass the test. 7) Prepare a written report of the test and keep it on file. Rev 0.0/4-24 LL185(WC): #35041...
-
Page 32: Maintenance
1..A “qualified person” has successfully demonstrated the ability to solve problems relating to the subject matter and work, either by possessing a recognized degree in an applicable field or a certificate of professional standing, or by possessing extensive knowledge, training and experience. Rev 0.0/4-24 LL185(WC): #35041... -
Page 33: Pad Cleaning
Do not drag rope, especially through dirt, mud or water. 1..A brush with bristles that do not harm rubber can help remove contaminates clinging to sealing edges. If these cleaning methods are not successful, contact WPG or an authorized dealer for assistance. Rev 0.0/4-24... -
Page 34: Daily Inspection
1..A “qualified person” has successfully demonstrated the ability to solve problems relating to the subject matter and work, either by possessing a recognized degree in an applicable field or a certificate of professional standing, or by possessing extensive knowledge, training and experience. The qualified person must keep a written of the Periodic Inspection. Rev 0.0/4-24 LL185(WC): #35041... -
Page 35: And Inch Aintenance
Operating with a damaged pulley puts it at risk of failing, causing a jam that cannot be cleared or damaging the wire rope. ADDER AINTENANCE Refer to the ladder manufacturer’s instructions about ladder maintenance. Rev 0.0/4-24 LL185(WC): #35041... -
Page 36: Replacement Parts
Cotterless Hitch Pin ‒ 3/8" x 3" (for Center Arm option) 10003 Machine Screw ‒ 1/4-20 x 3/4" (for Sliding Hand Cup Mounts) 8 / 12 ERVICE ONLY WITH IDENTICAL REPLACEMENT PARTS WPG.COM AVAILABLE AT OR THROUGH AN AUTHORIZED DEALER Rev 0.0/4-24 LL185(WC): #35041... -
Page 37: Registration And Limited Warranty
For customers in the U.S. and Canada: Go to the page at wpg.com and click the applicable link. Alternatively, you may contact the WPG Technical Service Department (see contact information below). For customers in all other localities: Contact the WPG Technical Service Department (see contact information below) or your dealer for assistance. -
Page 38: Winch Manufacturer's Information
WINCH MANUFACTURER’S INFORMATION Rev 0.0/4-24 LL185(WC): #35041... - Page 39 WINCH MANUFACTURER’S INFORMATION Rev 0.0/4-24 LL185(WC): #35041...
- Page 40 WINCH MANUFACTURER’S INFORMATION Rev 0.0/4-24 LL185(WC): #35041...
- Page 41 WINCH MANUFACTURER’S INFORMATION Rev 0.0/4-24 LL185(WC): #35041...
- Page 42 WINCH MANUFACTURER’S INFORMATION Rev 0.0/4-24 LL185(WC): #35041...
- Page 43 WINCH MANUFACTURER’S INFORMATION Rev 0.0/4-24 LL185(WC): #35041...
Need help?
Do you have a question about the LL185 and is the answer not in the manual?
Questions and answers