Advertisement
Available languages
Available languages
Quick Links
Advertisement

Related Manuals for Giona Holding SMART VSXL 35

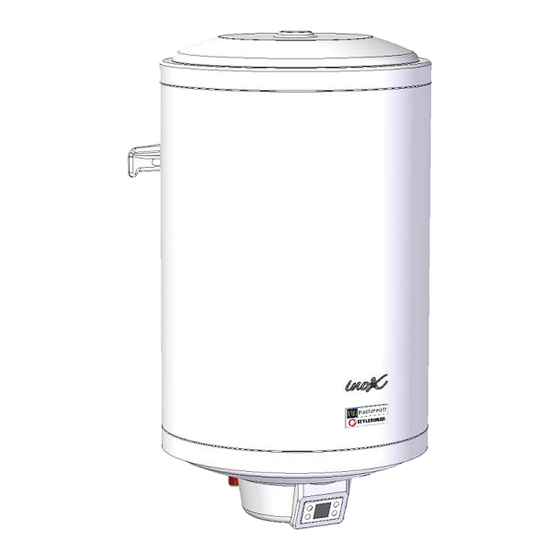
Summary of Contents for Giona Holding SMART VSXL 35
- Page 2 - 2 -...
- Page 3 - 3 -...
- Page 4 • • • • • • • • - 4 -...
- Page 5 • • • • • • • - 5 -...
- Page 6 • • • • • • • • - 6 -...
- Page 7 - 7 -...
- Page 8 Per la prima installazione del termostato intelligente consultare la scheda tecnica. Dopo l'installazione e la prima accensione, il dispositivo si imposta automaticamente nella modalità manuale. Il termostato può funzionare sia con che senza l'app mobile però per un’ esperienza d’utilizzo più completa ti consigliamo di collegare il tuo smartphone. ON/OFF CAMBIA MODALITA’...
- Page 9 - 9 -...
- Page 10 - 10 -...
- Page 11 ATTENZIONE! Il riscaldatore non deve essere esposto a temperature inferiori a 2°C. - 11 -...
- Page 12 Figura 8 – Avviso - 12 -...
- Page 13 NOTA: il "Menu Impostazioni" non è disponibile quando si utilizza la connessione Internet e il telecomando. Per favore usa questo sezione quando sei connesso alla rete Wi-Fi domestica. - 13 -...
- Page 14 NOTA: Se desideri essere in grado di controllare a distanza lo scaldabagno, assicurati che il tuo modem Wi-Fi sia connesso a Internet. - 14 -...
- Page 15 - 15 -...
- Page 16 - 16 -...
- Page 17 - 17 -...
- Page 18 - 18 -...
- Page 19 Modalità Manuale L'icona indica che sei in modalità Manuale (Fig. 19).Selezionare il pulsante centrale per aprire il menu a tendina e selezionare la temperatura desiderata.(Fig. 20). - 19 -...
- Page 20 Modalità Eco L'icona indica che sei in modalità Eco (Fig. 21). In questa modalità, la temperatura viene impostata automaticamente e mantenuta a 55°C. Il set point non può essere modificato. - 20 -...
- Page 21 Modalità Smart L'icona indica che sei in modalità Smart. Le Informazioni sulla fase di apprendimento e di lavoro appariranno sotto il nome dello scaldacqua. La fase di apprendimento fa il conto alla rovescia delle ore necessarie e ti informa con questo messaggio: "Tempo record rimanente X giorni Y ore"(esempio "'Tempo record rimanente 5 giorni 22 ore) (vedi Fig.
- Page 22 NOTA: il "Menu Impostazioni" e la funzionalità "Reset Smart" è utilizzabile solo quando si è connessi alla rete Wi-Fi domestica. NOTA: il tempo di registrazione rimanente viene visualizzato in remoto solo nel caso in cui il dispositivo mobile fosse connesso al termostato durante la fase di registrazione - 22 -...
- Page 23 Modalità Timer L'icona indica che sei in modalità Timer (vedi Fig. 25). In questa modalità, puoi creare i tuoi piani di consumo settimanali personalizzati. A tale fine, attenersi alla seguente procedura: Passare al menu di impostazione, selezionare Piani e scegliere il piano desiderato. Per passare direttamente al piano attivo: selezionare il pulsante per impostare/indicare la temperatura impostata dell'acqua e verrà...
- Page 24 Selezionare ''Da'' per aprire l'orologio e immettere un punto di partenza per il riscaldamento. Selezionare l'ora desiderata nel primo e i minuti nel secondo orologio (Fig. 27 e Fig.28). Nella sezione ''A'' ripetere questo processo per selezionare l'ora in cui interrompere il riscaldamento. In ''Setpoint'' il menu a discesa ti consentirà...
- Page 25 Verrà visualizzata la schermata ''Piano'' con la panoramica dei dati selezionati del "Periodo di piano" e del piano di consumo di acqua calda (Fig.29). Se lo preferisci,nella sezione ''Nome piano'' è possibile rinominarlo e assegnare un nome a tutti i piani personalizzati (ad esempio ''Piano weekend'').
- Page 26 - 26 -...
- Page 27 - 27 -...
- Page 28 - 28 -...
- Page 29 W01 - SENSORE SUPERIORE DIFETTOSO Il sensore di temperatura Spegnere l'alimentatore e quindi accenderlo di nuovo. superiore è difettoso Se l'avviso si ripete, chiamare il servizio per sostituire il termostato W02 - SENSORE INFERIORE DIFETTOSO Il sensore di temperatura più Spegnere l'alimentatore e quindi accenderlo di nuovo.
- Page 30 WI-FI BIANCO - EST non è connesso Verificare se il dispositivo si trova Il dispositivo non è fuori dalla portata del router Wi-Fi nell'intervallo del router Wi-Fi Parametri di rete errate (nome utente o password) Controllare nome utente e password ORANGE WI-FI - Connesso al router ma senza Internet Il router Wi-Fi non ha accesso a Internet Controllare l'accesso a Internet...
- Page 31 NOTA: assicurati che la tua rete Wi-Fi domestica salvata abbia una connessione Internet. Anche,controlla se il tuo router funziona correttamente e la sua distanza dallo scaldabagno. - 31 -...
- Page 32 • • • • • • - 32 -...
- Page 33 - 33 -...
- Page 34 - 34 -...
- Page 36 - 36 -...
- Page 37 - 37 -...
- Page 38 • • • • • • • • - 38 -...
- Page 39 • • • • • • • - 39 -...
- Page 40 • • • • • • • • - 40 -...
- Page 41 Please check the technical data sheet before first installation of the smart thermostat . After installation and first use, the device automatically sets in manual mode. The thermostat can operate either than also without mobile app , for better experience we recomend you to connect your smartphone. ON/OFF CHANGE MODE INCREASE TEMPERATURE (MANUAL)
- Page 42 - 42 -...
- Page 43 - 43 -...
- Page 44 WARNING! The heater has not to be exposed to temperatures lower than a 2°C. - 44 -...
- Page 45 Figura 8 – Avviso - 45 -...
- Page 46 NOTICE: the "settings Menu" is not available when you use Internet connection and remote control. Please use this section when you are connected to domestic Wi-Fi network. - 46 -...
- Page 47 WARNING: is you wish to be able to remotely control the water heater, be sure your Wi-Fi modem is connected to Internet. - 47 -...
- Page 48 - 48 -...
- Page 49 - 49 -...
- Page 50 - 50 -...
- Page 51 - 51 -...
- Page 52 Manual menu Picture shows you are in manual mode (picture 19). Select the central button to open menu and select the wished temperature (picture 20). - 52 -...
- Page 53 Eco mode The pictutre shows you are n Eco mode (picture 21). Temperature mode is automatically set and hold at 55°C. The set point can not be changed. - 53 -...
- Page 54 Smart mode The picture shows it is in Smart mode. The Information on learning phase and work will appear under the name of the water heater. Learning phase counting down the hours needed and inofrms you with the following meessage: "Record time remaining X days Y hours"(for example "'Record time remaining 5 days 22 hours (see picture 22).
- Page 55 NOTE: the "set Menu" and "Reset Smart" function can be used only when you are connected to the domestic Wi-Fi net. NOTE: the record remaining time is remote shown only if the mobile device is connected to the thermostat during the recording phase - 55 -...
- Page 56 Timer mode The picture shows the Timer mode (see picture 25). In this mode, you can create your own weekly customized consumption plans. According to this, fulfil the following procedure: Move to set menu, select plans and choose the desired plan. To move directly to the active plan: select the button to set/indicate the water set temperature and you will see picutre ''Plan period'' (picture26).
- Page 57 Select ''from'' to open the clock and enter a starting point for heating. Select the wished hour in the first and and the minutes in the second clock (picture. 27 and picture .28). In the section ''A'' repeat this process to select the time you wish to stop the heating. In ''Setpoint'' menu choose the wished temperature in heating time.
- Page 58 Screen 'Plan'' will appear with all the selected datas of the “period plan” and hot water consumption plan (Piture29). If wished, it is possible to rename it under the section “plan name” and give a new name to all the customized plans (for ex.
- Page 59 - 59 -...
- Page 60 - 60 -...
- Page 61 - 61 -...
- Page 62 W01 – UPPER SENSOR FAULTY The upper temperature Switch off the power supply than turn it on back again. sensor is faulty If warning occurs again, call the service to replace the thermostat W02 – LOWER SENSOR FAULTY The lower temperature Switch off the power supply than turn it on again.
- Page 63 WHITE WI-FI - EST is not connected Check if the device is in the range of the The device is out of reach of Wi-Fi router Wi-Fi router Wrong network parameters (user name or password) Check user name and password ORANGE WI-FI –...
- Page 64 NOTE: please ensure your domestic Wi-Fi net has Internet connection. Check also that your router is working properly and its distance from the water heater. - 64 -...
- Page 65 • • • • • • - 65 -...
- Page 66 - 66 -...
- Page 67 - 67 -...
- Page 68 - 68 -...
- Page 69 - 69 -...
- Page 70 BT 2014/35/EU EMC 2014/30/EU PED 4.3.2014/68/CE...
Need help?
Do you have a question about the SMART VSXL 35 and is the answer not in the manual?
Questions and answers