Table of Contents
Advertisement
Quick Links
Advertisement
Table of Contents

Related Manuals for Ubert CONVEX RT6 CC Series


Summary of Contents for Ubert CONVEX RT6 CC Series
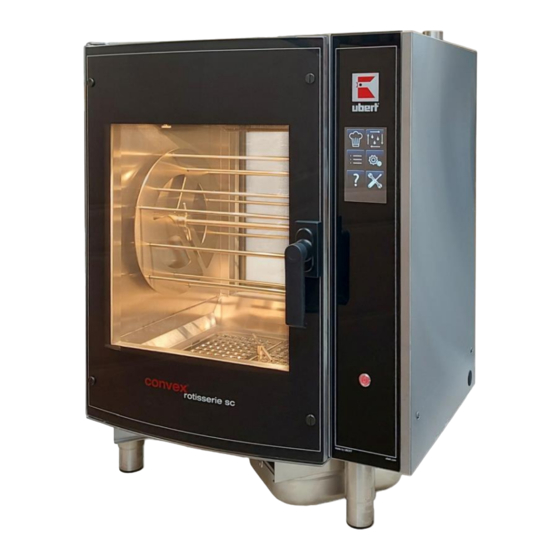
- Page 1 Operating Manual Rotisserie CONVEX RT6XX CC-series with Computer Control...
-
Page 3: Table Of Contents
Contents 1 Contents Contents ........................... 3 Important References ....................... 4 Fundamental Safety Notes ....................4 Warranty and Liabilities ...................... 5 Symbols and Notes ......................5 Copyright ..........................5 Special safety references ....................6 Product Information ........................8 Special Features......................... 8 Operation Methods ...................... -
Page 4: Important References
The Rotisseries CONVEX are built exclusively for the preparation of food only. Any other use of the unit is only allowed after consulting UBERT GASTROTECHNIK GMBH. Damages which result out of wrong use UBERT GASTROTECHNIK GMBH cannot be held responsible. Part of the due use is also: •... -
Page 5: Warranty And Liabilities
Help to use all functions at your unit optimally 2.4 Copyright The copyright on this operating manual remains with the company UBERT GASTROTECHNIK GMBH. This operating manual is intended only for the operator and his staff. It contains instructions and references which neither completely nor partially are to: •... -
Page 6: Special Safety References
Important References 2.5 Special safety references 2.5.1 Safety devices • Before operating the unit all protective devices as well as all removable parts must be installed correctly and be fully workable. • Protective devices may only be removed: • After stand still and •... - Page 7 • Do not perform any changes, extensions or conversions to the unit without the manu- facturer’s permission, especially welding work at supporting parts. • For all conversions a written permission of the company UBERT GASTROTECHNIK GMBH is necessary. • Change all parts of the unit, which are in improper condition.
-
Page 8: Product Information
Product Information 3 Product Information 3.1 Special Features • Compact design • Air humidification / steam injection • Revolving- und full load grilling • Core temperature probe • Computer controlled • Clear-type display • Double glass door • Self-diagnostic error detection system •... -
Page 9: Technical Data
Product Information 3.3 Technical Data 3.3.1 Dimensions (all measures in [mm]) RT606CC: ConvexUserManualRT6XXCC.docx printed: 07/2023 Subject to change! - Page 10 Product Information RT608CC: ConvexUserManualRT6XXCC.docx printed: 07/2023 Subject to change!
- Page 11 Product Information RT616CC: ConvexUserManualRT6XXCC.docx printed: 07/2023 Subject to change!
- Page 12 Product Information CKT2000CC: ConvexUserManualRT6XXCC.docx printed: 07/2023 Subject to change!
- Page 13 Product Information 3.3.2 Weight Type Net weight (in kg) RT 606CC app. 148 RT 608CC app. 228 RT 616CC app. 456 CKT 2000CC app. 425 3.3.3 Electrical ratings Type Electrical connection [EA] Nominal Power RT 606CC 380V, 3 Ph N, 50-60Hz 7.5kW RT 608CC 380V, 3 Ph N, 50-60Hz...
-
Page 14: Installation And Starting The Operation
4.3 Electrical connection Note! In general, only service technicians of the company: UBERT GASTRO- TECHNIK GMBH or service technicians of your responsible service partner are al- lowed to perform electrical connection and other service! All national and local rules and regulations concerning electricity, fire protection and similar have to be consid- ered. -
Page 15: Tap
Installation and starting the operation 4.4 Tap Note! In general, all Installation and service work has to be done by an authorized service technician! The following regulations have to be observed: DIN EN 1717 (alt DIN 1988, Part4, technical regulations for drinking water installation/TRW. •... -
Page 16: Operation
Operation 5 Operation Following position and function of all components are specified and explained, which are important for the operation of CONVEX CC Rotisseries. 5.1 General functions 5.1.1 Switch the rotisserie on / off To operate the rotisserie, press the ON/OFF switch at the bottom end of the operation panel. The controller will start, showing the manufacturer logo and will boot into the home screen. -
Page 17: Operation Of Rotisseries Equipped With Computer Control
Operation 5.2 Operation of rotisseries equipped with computer control 5.2.1 Operating panel • Computer control The controller is used to control the complete cooking process automatically, including cooking time period, cooking temperature and cooking end time. • Main switch to switch the rotisserie ON and OFF: •... -
Page 18: Explanation Of The Computer Control (Overview)
Operation 5.3 Explanation of the computer control (overview) The computer control offers 6 keys on the home menu that represent the main sections: In the coocing section, you can: - select from and run various predefined cooking programs - select and run a boost program (if enabled) - use the manual mode (if enabled) to cook the products without predefined settings In the cleaning section, you can:... - Page 19 Operation 5.3.1 Cooking section To operate the rotisserie via the computer control, press the ON/OFF switch. The controller will start, showing the manufacturer logo and will boot into the home screen. 5.3.1.1 Cooking section / manual operation mode: Once the controller is ready, press the cooking sction key and then the manual key to start the manual operation mode.
- Page 20 Operation 5.3.3 Programming section Once the controller is ready, press the programming section key Enter the access code (factory default is 1965) and confirm You can choose between: New to create a new cooking program Change to change an existing cooking program Copy (to copy an existing cooking program Move to move an existing cooking program to a different location in the list Delete (to delete an existing cooking program from the list)
- Page 21 Operation 5.3.4 User parameter section In the user parameter section you can adjust various personal preferences like: - Select the language. - Enter a new accesss code (factory default is 1965). - Adjust date and time of the real time clock. - Enable or disable a wire connected core temp.probe.
-
Page 22: Operation, Handling And Cleaning Of Wrt Probes (Optinal Accessory)
Operation 5.4 Operation, handling and cleaning of WRT probes (optinal accessory) Activate the probe charger To activate the probe charger (cradle), open the magnetic rear cover and remove the protective shield from the charger battery. To verify the status of the charger battery, press the push button. - Page 23 Operation Loading the WRT probe To load the built-in, re-chargeable battery of the WRT probe, place the probe in the cradle by inserting the tip of the probe first and then the black handle. Once fully loaded, the re-chargeable battery lasts at least 24 hours.
- Page 24 Operation Identification of probes To identify each probe when operating more than one probe with your rotisserie, probe clips are available. Place the clips onto the probe, adjacent to the ceramic handle. Cleaning and maintenance of the WRT probe Make sure to clean the WRT probes after every use.
-
Page 25: Rotisserie Assembly For Operation
Operation 5.5 Rotisserie assembly for operation 5.5.1 Guiding plates assembly Place the grid plates at the bottom of the oven chamber oven chamber. Note, that the cut out corre- sponds to the sprinkler arm. 5.5.2 Shaft assembly • Install Shaft into drive hub. See picture below. Round Pin Slotted 5.5.1 Disk assembly... - Page 26 Operation 5.5.2 Spit assembly into rotisserie 5.5.2.1 Angle Spit • For mounting chickens horizontally and without piercing chicken. • Mount spit into holes as shown below. Be sure recessed rings on end of shafts drop into hole in disk. Position shaft recess into disk holes 5.5.2.2 Double Spits •...
-
Page 27: Product Mounting And Loading
Operation 5.6 Product mounting and loading 5.6.1 Angle spits for mounting the chickens horizontally • Insert the spit through the holes in both ends of the chicken while holding the spit angle down and the chicken breast towards you. See picture below. •... -
Page 28: Maintenance
Maintenance 6 Maintenance Following we will show you some advices concerning maintenance, care, trouble shooting and ser- vice for your Rotisserie CONVEX CC. 6.1 Cleaning and care 6.1.1 Safety advices • When cleaning the outside of the rotisserie switch off the unit before you start and disconnect it from the mains. - Page 29 Maintenance • Grids: Remove both grids from the bottom of the rotisserie chamber. Clean them external using e.g. a dish- washer. • Outside Glasses: Remove dust and dirt from the glass surface with soft cloth to avoid scratches. Weekly cleaning •...
-
Page 30: Trouble Shooting
If your Rotisserie does not work satisfactorily we would like to give a first help with the following check list. Only after checking these points you should contact: a) Your responsible service partners b) Directly the company: UBERT GASTROTECHNIK GMBH Werk II Gewerbegebiet Nord Vennekenweg 17 46348 Raesfeld Tel.:02865 / 602-226... -
Page 31: Wiring Diagrams
Maintenance 6.3 Wiring Diagrams RT606CC: ConvexUserManualRT6XXCC.docx printed: 07/2023 Subject to change! - Page 32 Maintenance RT608CC: ConvexUserManualRT6XXCC.docx printed: 07/2023 Subject to change!
-
Page 33: Spare Parts
Maintenance 6.4 Spare Parts Defect parts are to be replaced only by original spare parts of UBERT GASTROTECHNIK GMBH; the replacement is to be carried out only by their service staff or by your authorized service companies. If you do not observe this note or in... - Page 34 Maintenance 380124 Gearbox motor for spit rotation 380633 drive shaft RT608 Ø30x68 380129 Capacitor 4µF for fan 344103 380130 Capacitor 5µF for motor 380124 126014 Shaft assy RT507 Length 746 mm 126277 disk set RT508 d - 520 342238 Core temperature probe DHTG 355430 Solenoid Valve Twofold 355425...
-
Page 35: Exploded View
Maintenance 6.5 Exploded View ConvexUserManualRT6XXCC.docx printed: 07/2023 Subject to change! -
Page 36: Declaration Of Conformity
Maintenance 6.6 Declaration of Conformity ConvexUserManualRT6XXCC.docx printed: 07/2023 Subject to change!
Need help?
Do you have a question about the CONVEX RT6 CC Series and is the answer not in the manual?
Questions and answers