Table of Contents
Advertisement
Quick Links
OPERATION MANUAL
FEATURES:
• 1/2.8" 8.46 MegaPixel Sony STARVIS® CMOS Sensor
• 8 MegaPixel [4K] Network Camera (3864 x 2192 @ 30/25fps)
• f=2.7~13.5mm Motorized Varifocal Lens
• ONVIF Compliant with Zero Configuration, ONVIF Event Mapping
• 2 High Power IR LEDs with up to 100' IR Range [VTD-MV8NZ213PN]
• 5 x 850nm High Power LEDs with up to 130' IR Range [VTC-IR8NZ4213PN]
• Adaptive Web-Based Resizing (Layout/Display Device Dependent)
• H.265, H.264 & MJPEG
• Alarm Input/Output
• MicroSD Memory Card Slot (Supporting Local Recording up to 256GB)
• 120dB Dynamic Range with DOL (Digital Overlap) WDR @30/25fps
• Line Crossing, Field Intrusion, Appear / Disappear Smart Stream, RoI
• Motion Detection, Privacy Masking, Digital Zoom (8x), Backlight / Highlight
Compensation, Mirror / Flip, Sens-up (Slow shutter), Hue, Contrast, Brightness /
Saturation, Sharpness
• PoE (IEEE Std. 802.3af) and AC24V / DC12V
• Built-in Fan and Optimized Cooling System
• IP68
• IK10 (VTD-MV8NZ213PN Only)
• Built-in / Integrated Junction Box (VTC-IR8NZ4213PN)
• Flush and Surface Mounts Included with VTD-MV8NZ213PN
Optional Wall Mount: VT-MV/WMT, Adapters: VT-MV/PLMT (Pole), VT-MV/SB
(Surface), VT-MV/TB, (Tilted Base), VT-MV/JMT (Junction Mount)
• 3-Year Warranty
***FOR WIRING AND HARDWARE, SEE SEPARATE
VITEK VIRTUOSO INSTALLATION GUIDE
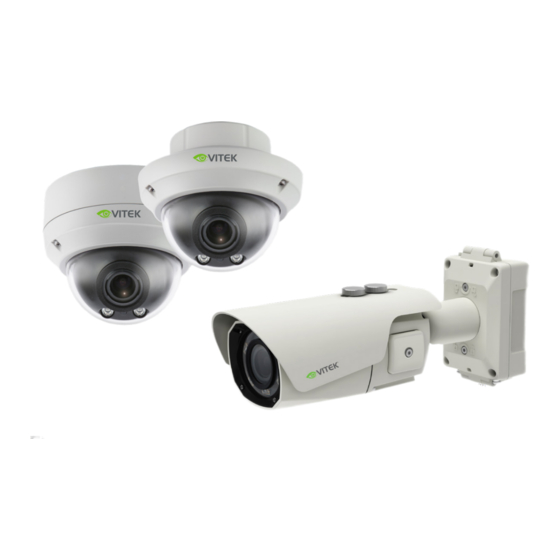
Virtuoso Series
8 MegaPixel [4K]
Premium Network Cameras
VTD-MV8NZ213PN
VTC-IR8NZ4213PN
®
Advertisement
Table of Contents

Related Manuals for Vitek Virtuoso VTD-MV8NZ213PN


Summary of Contents for Vitek Virtuoso VTD-MV8NZ213PN
- Page 1 • Built-in / Integrated Junction Box (VTC-IR8NZ4213PN) • Flush and Surface Mounts Included with VTD-MV8NZ213PN Optional Wall Mount: VT-MV/WMT, Adapters: VT-MV/PLMT (Pole), VT-MV/SB (Surface), VT-MV/TB, (Tilted Base), VT-MV/JMT (Junction Mount) • 3-Year Warranty ***FOR WIRING AND HARDWARE, SEE SEPARATE VITEK VIRTUOSO INSTALLATION GUIDE...
-
Page 2: Table Of Contents
TABLE OF CONTENTS Network Menu Control ............3~4 Full Menu Setup ................ 4~6 LIVE VIEW ..............7 PLAYBACK ..............10 SETUP ................11 3-1. Information ..............11 3-2. Video & Image ............. 12 3-2-1. Source ................12 3-2-2. Stream ................12 3-2-3. - Page 3 Category Menu Configuration Player Control Pause, Snapshot, Record Display (Window Fit, Full Screen, Custom) LIVE VIEW Video Stream Stream1, Stream2, Stream3, Stream4 Protocol HTTPS, HTTP, TCP, UDP Zoom, Focus, Direct Zoom(or Push AF) PTZ Control PLAYBACK Event Search, Timeline Search, Timeline Bar Information General, System Information, Open-source Information Video &...
-
Page 4: Network Menu Control
Event Triggers Motion, VCA, System, Manual, Network, Timer, Day/Night Actions Record, Alarm Out, E-Mail, FTP, Video Boost, Notification Server Rules Event Processing, ONVIF Mapping System Security User, HTTPS, IP Filter, ONVIF, Video Stream, Export/Import Date & Time Current Time, New Time, Time Zone, Date & Time Display Network TCP/IP, DDNS, RTP, UPnP, Zeroconf, Bonjour... - Page 5 The default username / password Are admin / admin ■ SYSTEM Requirements • OS: Windows 7 or higher / MAC OS • Web browser: - MS Internet Explorer (Ver. 9 or higher) - MS Edge - Mozilla Firefox: Windows Only - Google Chrome: Windows Only - Apple Safari: Mac OS X only •...
- Page 6 ※ Change all connected camera’s IP address at once: x= 1) Highlight all cameras (hold Ctrl and click all cameras) and right click mouse and choose “Change IP…”. 2) Open the Change IP control panel. 3) Type the IP address to change and click OK button. ■...
-
Page 7: Live View
1. LIVE VIEW Enter the live view menu on the Web Viewer. ■ Web Viewer description XXX-XXXX-X XXX-XXXXXXXX XX A) Menu button: Click the button to show or hide the setup menu bar. B) Model name: Shows the camera model name connected. C) Main setup menu bar: Set the camera or network functions. - Page 8 ■ Player Control. 1. Pause: Pauses live view. Snapshot: Captures the image in .jpg format with the current stream resolution. Speaker: (Available only with built-in Audio Models) Microphone: (Available only with built-in Audio Models) Record: (Available with the built-in Storage feature version only) Records live video in H.264 format into the equipped storage memory like SD, SDHC &...
- Page 9 Window Fit: Resizes the live view display to fit along with the display window size. ⑦ Full Screen: Resizes the live view display to fit to the monitor resolution. ESC key returns to the previous view. ⑧ Custom: Selects the live view display scale, 0%~200%, by the control bar.
-
Page 10: Playback
CAUTION • Set LENS LOCKING at Setup>Video & Image>Image>AF>Lens Locking to ON or TIMER after completing lens setting to prevent unwanted lens operation. • Do not adjust zoom/focus in low light conditions or night mode. It might cause erroneous focusing. •... -
Page 11: Setup
3. SETUP Enter the setup menu on the Web Viewer. 3-1. Information Shows the overall information about the system such as Model name, MAC address, IP address, Zeroconf, IP address, Firmware version, Server time, Running time, CPU usage, Inbound/Outbound Bandwidth and Open-source list. -
Page 12: Video & Image
3-2. Video & Image 3-2-1. Source • SIGNAL: Set NTSC/PAL mode depending on TV system. Generally set to NTSC in 60Hz area and PAL in 50Hz area for the electrical power system of your country. Changes will restart the camera. XXXXxXXXX@25fps 3-2-2. - Page 13 Stream1, 2, 3, 4 ● > COMPRESSION: H.265(+) and H.264(+) are available in all streams but MJPEG is available in Streams 3, and 4 only. • H.265+, H.264+: ability to process video data according to users’ demand and lowering overall bandwidth and reduce the storage burden. If H.265+ or H.264+ is selected, Smart Video Stream and Dynamic GOP are switched ON automatically.
-
Page 14: Smart Video Stream
3-2-3. Smart Video Stream ● ROI (Region of Interest) > Ability to process video data according to user’s demand. > Available to deliver high quality video on interested regions while delivering lower quality video on non-interested region. > Lowering overall bandwidth and reduce the storage burden. >... - Page 15 4) ROI frame rate is available to set in Settings> Video & Image> Video Stream. 5) To delete the selected area, Click the right mouse button on the video viewer, select "Create ROI area" or click “Delete” button. 6) After setting the mode, press SAVE. >...
-
Page 16: Image
3-2-4 . Image... - Page 17 Basic ● > BRIGHTNESS: Adjusts the overall brightness of the scene. Increasing the value increases the brightness. > CONTRAST: Adjusts the contrast of the scene. Increasing the value increases the contrast. > SATURATION: Adjusts the color richness of the scene. Increasing the value increases the color richness.
- Page 18 ● > MODE: Selects how to control the exposure, AUTOMATIC or MANUAL. > SLOW SHUTTER: Extends the shutter time over the maximum shutter at multiple times of value in SLOW SHUTTER. Increasing the values increases brightness but also increases blurriness. >...
- Page 19 Vertical View ● (Available with the built-in motor driven V/F lens version only) > MODE: Selects how to control the focus of the built-in Motor driven V/F lens or AF lens. • MANUAL: Focusing works during zoom operation only and stops thereafter. •...
- Page 20 [ WARNING ] LENS CALIBRATION is not necessary for regular installations. LENS CALIBRATION would only be necessary should you not be able to focus the lens after a zoom operation due to shock during transportation of the camera. To perform LENS CALIBRATION; A fixed object with sharp edges should be at least 3 meters away in front of the camera and should be stationary i.e., not moving.
- Page 21 > IR LED CONTROL: LEDs can be controlled on the web [ CAUTION ] • The gap between THRESHOLD [D->N] and THRESHOLD [N->D] should be greater than 18. Otherwise, an undesirable transition may occur. • Too high a value in THRESHOLD [N->D] can cause cameras installed in low- light areas to stay in night mode permanently i.e., even during daytime.
- Page 22 ● Vertical View > BLC (Back Light Compensation): • MODE: ON enhances the visibility of the back-lit object. • LEVEL: Determines the strength of the brightness. Higher value gets brighter. > HLC (High Light Compensation): ON cuts out the bright area with a black mask and excludes it from compensation. ●...
- Page 23 ● (Lens Distortion Compensation) > MODE: ON compensates for the barrel distortion caused by wide angles. > LEVEL: Determines the amount of the compensation. Higher values expand the shrunken areas in the corners. Vertical View ● Mode : On Rotation : 90 degrees >...
-
Page 24: Privacy Mask
3-2-5. Privacy Mask Mark ENABLE checkbox to activate the privacy masks. > COLOR: Select the color to mask at each privacy area. > NAME: Input the individual name for each privacy mask. -
Page 25: Digital Zoom
To set the privacy mask (up to 8 privacy areas): 1) Mark ENABLE checkbox. 2) In the video window, place the mouse cursor anywhere and right click the mouse button. A mini pop up appears. Select CREATE MASK AREA / DELETE MASK AREA. 3) In the video window, place the mouse cursor where you would like to create a mask. -
Page 26: Dis (Digital Image Stabilization)
3-2-7. DIS (Digital Image Stabilization) > Mark ENABLE checkbox to reduce and stabilize the shaky image from a camera installed in a vibrating area. FOV (Field of view) will be reduced if set to ENABLE . -
Page 27: Record
3-3. Record (Available only with the built-in Storage feature version) 3-3-1. Record > Mark OVERWRITE WHEN STORAGE IS FULL checkbox to allow the storage to be overwritten. > CONTINUOUS RECORD SETTING: Mark ENABLE checkbox to activate continuous recording into the storage. >... -
Page 28: Schedule
3-3-2. Schedule > Mark ENABLE SCHEDULED RECORD checkbox to activate the scheduled recording into the storage. > Mark each box in time and day matrix when to be recorded. It can be selected a time zone or day of the week. 3-3-3. -
Page 29: Storage
3-3-4. Storage > FORMAT: Formats the storage. Backup the data before formatting the storage if necessary. > REMOVE: Helps removing the storage safely. [ NOTE ] Common Internet File System (CIFS) is a remote file access protocol that forms the basis for Windows file sharing, network printing, and various other network services. - Page 30 Motion ● > Mark ENABLE checkbox to create & activate up to 4 motion areas. > NAME: Input the individual name for each motion detection area. > SENSITIVITY: Sets the motion detection sensitivity for all areas. Higher values increase sensitivity >...
- Page 31 ● VCA (Video Contents Analysis) > Mark ENABLE checkbox to create & activate up to 3 VCAs (Line Cross, Field intrusion & Appear/Disappear) > NAME: Input the individual name for each VCA. To set the VCA detection area (up to total 3 VCAs including Line Cross, Field intrusion &...
- Page 32 • Motion detection and VCA cannot be used simultaneously. [ NOTE ] If either one is enabled, the other one is disabled automatically. > OBJECT SETTING: Click the green rotating icon on the top-right of the video window and OBJECT SETTING menu will appear.
- Page 33 System ● Used to trigger the event when the camera gets rebooted. > Mark ENABLE checkbox to activate the system event. > DWELL TIME: Sets the time for the alarm once the system event is detected. Manual ● Enables to user to set the event trigger optionally. >...
- Page 34 Network ● Used to trigger the event when the network connection fails. > Mark ENABLE checkbox to activate the network event. > DWELL TIME: Sets the time for the event once triggered by the network connection event. Timer ● Mark ENABLE checkbox to trigger the event as defined Timer Interval. (Hour/Minute/Second)
-
Page 35: Actions
Day / Night ● Mark ENABLE checkbox to trigger the event when Day/Night is switched. > MODE: Select the mode, Day->Night or Night->Day. > DWELL TIME: Sets the interval duration for the alarm event. 3-4-2. Actions EVENT ACTIONS menu defines and sets the parameters for how to treat the various event sources. - Page 36 Record ● (Available only with the built-in storage feature version) > Mark ENABLE checkbox to enable recording into the built-in storage when the event occurs. > VIDEO STREAM: Selects the stream to be recorded when the event occurs. > RECORDING TIME: Sets the length of time to record after the event. >...
- Page 37 > Mark ENABLE USE(SMTP) AUTHENTICATION checkbox if the mail server requires authentication. • USERNAME: Enter the username as provided by the network administrator. • PASSWORD: Enter the password as provided by the network administrator. • LOGIN METHOD: Select one for SMTP authentication method allowed. Video Boost Notification Server...
- Page 38 [ NOTE ] If a PLAIN or LOGIN mechanism is negotiated, the camera sends the username and password to the SMTP server. The LOGIN mechanism is supported by Microsoft, as well as some other clients. Most other clients support the PLAIN authentication mechanism.
- Page 39 Video Boost Notification Server > JPEG SETTING: Configures JPEG for the FTP server. • PRE-EVENT: Sets the time & the frame rate for JPEG images to be sent to FTP before the event. • POST-EVENT: Sets the time & the frame rate for JPEG images to be sent to FTP after the event.
- Page 40 8000 8000 Notification Server ● > Mark ENABLE checkbox to notify the event to the notification server when it occurs. • TYPE: Selects the network protocol to connect the notification server. • SERVER URL: Input the server URL of the notification sever. •...
- Page 41 Record Alarm Out E-Mail Video Boost...
-
Page 42: Rules
3-4-3. Rules EVENT RULES menu defines and sets the parameters for what to do for the various event sources. Event process lists have to be generated and can be edited for what to do when the event occurs. List shows the rule name, trigger source and type of action for each event process. - Page 43 > NOTIFICATION SERVER: Mark the checkbox to use the notification server as set in SETUP>EVENT> ACTIONS> NOTIFICATION SERVER when the selected event occurs. • MESSAGE: Input the message to be sent to the notification server.
-
Page 44: System
> FTP: Mark the checkbox to use FTP as set in SETUP>EVENT>ACTIONS>FTP when the selected event occurs. > VIDEO BOOST: Select the video stream to be boosted up. [ NOTE ] Video boost is disabled if RECORD is enabled. > RECORD: (Available only with the built-in Storage feature version) Mark the checkbox to record the image into the built-in storage, if available, as set in SETUP>EVENT>ACTIONS>RECORD when the selected event occurs. -
Page 45: Security
3-5-1. Security Users ● Manages the user accounts by names, groups and authorities. > USERS: Can be added, edited or deleted. HTTPS ● Selects the CONNECTION MODE. > HTTP: Transfers data without encryption. Supports a URL that only starts with "HTTP: " >... - Page 46 To add a subnet of network addresses, these must be added in CIDR [ NOTE ] (Classless Inter-Domain Routing) notation. For example: entering 192.168.1.0/24 will add all the addresses in the range 192.168.1.1 to 192.168.1.254. Contact your network administrator for more detail. If the network camera is accessed via a proxy server, the IP address for the proxy server must be added as an allowed address.
-
Page 47: Date & Time
Export / Import ● > Mark ENABLE ENCRIPTION FOR EXPORT AND IMPORT FILE : System configuration file, which is exported at SETUP>SYSTEM>MAINTENANCE> SETUP EXPORT, is encrypted with the password herein. THIS PASSWORD MUST BE USED when System configuration file is [ NOTE ] imported by other cameras if the file was exported with the password. -
Page 48: Network
Date & Time Display ● Select the date & time formats to be displayed. 3-5-3. Network TCP/IP ● > IPv4 ADDRESS : • OBTAIN IP ADRESS VIA DHCP : Gets the IP address assigned by the DHCP (Dynamic Host Configuration Protocol) server. •... - Page 49 • USE THE FOLLOWING DNS ADDRESS : Requires manual input as per below. - DOMAIN NAME : Enter the domain for the host name - PRIMARY DNS SERVER : Enter the IP address of the primary DNS server. - SECONDARY DNS SERVER : Enter the IP address of the secondary DNS server. >...
- Page 50 > PORT : • HTTP PORT : Use a port number in the range 1024-65535. Default is 80. • HTTPS PORT : Use a port number in the range 1024-65535. Default is 443.
- Page 51 • RTSP PORT : Use a port number in the range 1024-65535. Default is 554. DDNS ● (Dynamic Domain Naming Service) > Mark ENABLE checkbox to use DDNS. > DDNS server : Select the DDNS server to use. > Input REGISTERED HOST name, USERNAME, PASSWORD and INTERVAL. [ NOTE ] If the camera has not been registered to the DDNS host previously, the registration is required.
- Page 52 • Mark ENABLE checkbox to use the multicast for each stream. • DESTINATION IP: Type IP address in the range. Multicast addresses are allocated according to these IANA policies. • PORT : Use the port number in the range 1024-65532. Default is 4000. •...
-
Page 53: Language
Zeroconf ● ZeroConf (Zero configuration) networking enables the network to establish automatically with the automatic assignment of numeric network addresses (zeroconf IP addresses) without requiring manual operator intervention or special configuration servers when the DHCP server is not available in the network. >... -
Page 54: Maintenance
3-5-5. Maintenance Maintain ● > RESTART : Restarts the camera without changing any settings. > RESET : Restarts and loads the factory settings but does not change IP address and PTZ settings. > DEFAULT : Loads and saves the factory defaults for all parameters including IP address and PTZ settings. -
Page 55: Logs & Report
3-5-6. Logs & Report - Logs The log file records the story into the unit since the system restarts. > DATABASE CAPACITY: Shows the useable system memory space for Log file. > SEARCH CONDITION: Allows you to search the log as per the type. E.g., System, Access, Event and Media, Start-End date and Start-End time. -
Page 56: Troubleshooting
Troubleshooting If you suspect a problem is being caused by incorrect configuration or some other minor problem, consult the troubleshooting guide below. Upgrading the Firmware Firmware is software that determines the functionality of the network camera. One of your first actions when troubleshooting a problem should be to check the current firmware. - Page 57 Images only shown in Check the Video & Image setting. black & white. Blurred images. Refocus the camera. Troubleshooting Cont’d… Poor image quality. Increased lighting can often improve image quality. Check that there is sufficient lighting at the monitored location. Check all image and lighting settings. Rolling dark bands or flickering Try adjusting the Exposure Control setting under AE in image.
- Page 58 DETAILED SPECIFICATIONS VTD-MV8NZ213PN Imaging Sensor 1/2.8” 8.46MP [4K] RGB Bayer Array CMOS Sony STARVIS® Sensor Effective Pixels 3864(H) x 2192(V) Sensitivity Color : 0.15 Lux, B/W : 0.01 Lux Scanning Mode Progressive Scan S/N Ratio 50dB IR LEDs / Range 2 Hi Pwr 850nm IR LEDs / 100’...
- Page 59 DETAILED SPECIFICATIONS VTC-IR8NZ213PN Imaging Sensor 1/2.8” 8.46MP [4K] RGB Bayer Array CMOS Progressive Scan Sony STARVIS® Sensor* Effective Pixels 3864(H) x 2192(V) Sensitivity Color : 0.15 Lux, B/W : 0.01 Lux S/N Ratio 50dB IR LEDs / Range 5 Hi Pwr 850nm IR LEDs / Up to 130’ Lens F=2.7~13.5mm Motorized Vari-Focal Lens Day/Night...
- Page 60 LIMITED PRODUCT WARRANTY This VITEK product carries a three (3) year limited warranty. VITEK warrants to the purchaser that products manufactured by VITEK are free of any rightful claim of infringement or the like, and when used in the manner intended, will...
Need help?
Do you have a question about the Virtuoso VTD-MV8NZ213PN and is the answer not in the manual?
Questions and answers