
Related Manuals for Alcedo ABP-B07


Summary of Contents for Alcedo ABP-B07
- Page 1 Scan for online copy Blood Pressure Monitor Model : ABP-B07 User Manual Questions or Concerns? info@alcedohealth.com (833)682-8655...
-
Page 2: Table Of Contents
Table of Contents Introduction and Intended Use Important Information on Blood Pressure and Its Measurement Components of Your Blood Pressure Monitor Using Your Monitor for the First Time Measurement Procedure Care and Maintenance Warranty Certifications Technical Specifications EMC Declaration... -
Page 3: Introduction And Intended Use
Introduction and Intended Use This manual is for ABP-B07 models. It is a fully automatic digital blood pressure measur- ing device for use by adults on the upper arm at home or in your doctor’s/nurse’s office. It enables reliable measurement of systolic and diastolic blood pressure as well as pulse through the oscillometric method. - Page 4 In cases of irregular heartbeat , measurements made with this instrument should only be evaluated after consultation with a physician. Host products, including accessories, shall be processed in accordance with local regu- lations after reaching the life cycle. Warnings and Precautions Warning:The use of other accessories other than those specified or provided by the equipment manufacturer may cause electromagnetic radiation to increase or decrease electromagnetic immunity resulting in operational failure.
- Page 5 Warning:This device can not be used together with high frequency surgical equip- ment. Warning:Use of power adapters Adapter:input 100-240V, 50/60hz output d.c. 5V 1A Do not to position the device to make it difficult to operate the disconnection de- vice while using adaptor. Do not be prone to water leakage, high temperature, moisture, direct sunlight and more or more corrosive gas environment.
- Page 6 Attention: Self-measurement means control, not diagnosis or treatment. Unusual values must always be discussed with a physician. Under no circumstances should you alter the dosages of any drugs prescribed by a physician. The pulse display is not suitable for checking the frequency of heart pacemakers! In cases of irregular heartbeat, measurements made with this instrument should only be evaluated after consultation with a physician.
-
Page 7: Important Information On Blood Pressure And Its Measurement
Important Information on Blood Pressure and Its Measurement How Does High or Low Blood Pressure Arise? Your level of blood pressure is determined in the circulatory center of the brain and ad- justs to a variety of situations through feedback from the nervous system. To adjust blood pressure, the strength and speed of the heart (Pulse), as well as the width of circu- latory blood vessels is altered. - Page 8 Diastolic blood Severe hypertension pressure (mmHg) Moderate hypertension Mild hypertension High normal value Normal blood pressure Optimal blood Systolic blood pressure pressure (mmHg) (target value) 130 140 160 180 Picture-01 There are six grids in the display of device. Please refer to the Table-01. Different grids represent different interval scales of WHO.
-
Page 9: Components Of Your Blood Pressure Monitor
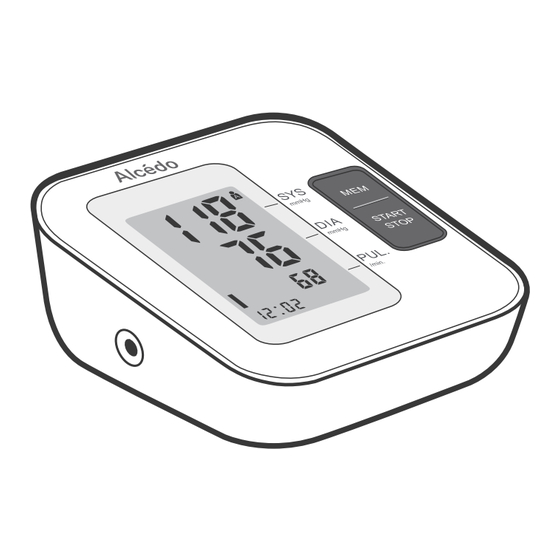
Components of Your Blood Pressure Monitor LCD Display Air Hose Artery Mark Air Plug Cuff Memory Button Start / Stop Button AC Adapter Port Battery Compartment Cuff Connector Port Picture-02 The Symbols on the LCD Display Systolic Blood Pressure Irregular Heartbeat Symbol Diastolic Blood Pressure Memory Symbol Heartbeat Symbol (Flashes During... - Page 10 User B Movement Error Symbol Average Value Symbol Low Battery Symbol Cuff Self-Checking Function Pulse Unit Symbol WHO Function Symbol Picture-03 Features of Model ABP-B07 Average value Two users: Cuff self-checking function 2 x 120 sets memory function External power...
-
Page 11: Using Your Monitor For The First Time
Using Your Monitor for the First Time Battery Installation Use only 1.5V AAA alkaline batteries with this device. Press the hook on the bottom of the battery cover and lift the cover off in the direction of the arrow. Install 4 AAA size batteries and make sure the + (positive) and - (negative) polarities match the polarities of the battery compartment, then close the battery cover. - Page 12 Dispose of the device, components and optional accessories according to applicable lo- cal regulations. Unlawful disposal may cause environmental pollution. System Settings Press the START/STOP button and hold it for more than 3 SECONDS. The User symbol will then flash. Set User, Date and Time follow the steps below. Setting the User: Press the MEM button to select User A or User B.
- Page 13 Setting Time: When the hour display is flashing, press the MEM button, the hour will increase by 1, press START/STOP button to confirm, and follow the same way to set the minute. Press START/STOP button to confirm. Year Month Time Delete All Saved Results: Select a user.
-
Page 14: Measurement Procedure
Measurement Procedure Before Measurement: Avoid eating and smoking as well as all forms of exertion directly before measurement. These factors influence the measurement result. Find time to relax by sitting in an arm- chair in a quiet atmosphere for about ten minutes before taking a measurement. Remove any garment that fits closely to your upper arm. - Page 15 To secure the cuff, wrap it around your arm and press the hook and loop closure to- gether. There should be little free space between your arm and the cuff. You should be able to fit 2 fingers between your arm and the cuff. Cuffs that don’t fit properly result in false measurement values.
- Page 16 After the cuff has been appropriately positioned on the arm and connected to the blood pressure monitor, the measurement can begin: Press the START/STOP button. The pump begins to inflate the cuff. In the display, the increasing cuff pressure is continually displayed. After automatically reaching an individual pressure, the pump stops and the pressure slowly falls.
- Page 17 NOTE: Patient Position Comfortably seated Legs uncrossed Feet flat on the floor Back and arm supported Middle of the CUFF at the level of the right atrium of the heart Irregular Heartbeat Indicator This symbol - indicates that certain pulse irregularities were detected during the measure- ment.
- Page 18 Symbol Descriptions The following symbols may appear in this manual, on the Digital Blood Pressure Mon- itor ABP-B07, or on it's accessories. Some of the symbols represent standards and compliances associated with the Digital Blood Pressure Monitor ABP-B07 and its use.
- Page 19 Viewing the Stored Values Press the MEM button. Select a user (A or B). The first display reading with AVG symbol is the average of the last 3 results. Press MEM again to view each result, beginning with the most recent measurement taken.
- Page 20 Discontinuing a Measurement If it is necessary to interrupt a blood pressure measurement for any reason (e.g the patient feels unwell), the START/STOP button can be pressed at any time. The device then im- mediately lowers the cuff pressure automatically. Using the AC Adapter You may also operate this monitor using the AC adapter (output d.c.
-
Page 21: Care And Maintenance
Care and Maintenance Wash hands after each time measurement. If one device is used by different patients, wash hands before and after each use. Do not expose the device to either extreme temperatures, humidity, dust or direct sunlight. The cuff contains a sensitive air-tight bubble. Handle this cuff carefully and avoid all types of stress through twisting or buckling. -
Page 22: Warranty
Warranty Your blood pressure monitor is guaranteed for 1 year against manufacturers’ defects for the original purchaser only, from date of purchase. The warranty does not apply to dam- age caused by improper handling, accidents, non-professional use, not following the operating instructions or alterations made to the instrument by third parties. -
Page 23: Technical Specifications
Technical Specifications Measuring DIA: 40-130mmHg Model ABP-B07 Range SYS: 60-230mmHg 220g (Batteries and AC adapter are Weight not included) Pulse 40 to 170 per minute 48*65mm / 2.56"x1.89" Cuff Pressure Display <300 mmHg LCD Digital Display Display Range 116 (W) x 110 (L) x 52 (H) mm /... - Page 24 Display Error Readings The following symbol will appear on the display when measuring abnormal Symbol Cause Correction No display Weak battery or improper Replace both batteries with new ones. Check the battery installa- appears placement tion for proper placement of the battery polarities. Check if the pump is working or not.
-
Page 25: Emc Declaration
Trouble Shooting Problem Check This Cause and solutions Replace new batteries Check the battery power No power Installation for proper placement of the batteries polarities Check the polarity position Whether the plug insert Insert into the air socket tightly No inflation Change a new cuff Whether the plug broken or leak Whether move the arm when inflate... - Page 26 Caution: This unit has been thoroughly tested and inspected to assure proper per- formance and operation. Caution: This machine should not be used adjacent to or stacked with other equip- ment and that if adjacent or stacked use is necessary. This machine should be ob- served to verify normal operation in the configuration in which it will be used.
- Page 27 Guidance and manufacture’s declaration – electromagnetic immunity The device is intended for use in the electromagnetic environment specified below. The customer or the user of device should assure that it is used in such an environment. Immunity test IEC 60601 test level Compliance level Electromagnetic environment - guidance Electrostatic...
- Page 28 Guidance and manufacture’s declaration – electromagnetic immunity The device is intended for use in the electromagnetic environment specified below. The customer or the user of device should assure that it is used in such an environment. Immunity test IEC 60601 test level Compliance level Electromagnetic environment - guidance Portable and mobile RF communications equipment...
- Page 29 Guidance and manufacture’s declaration – electromagnetic immunity Field strengths from fixed transmitters, such as base stations for radio (cellular/cordless) telephones and land mobile radios, amateur radio, AM and FM radio broadcast and TV broadcast cannot be predicted theoretically with accuracy. To assess the electromagnetic environment due to fixed RF transmitters, an electromagnetic site survey should be considered.
- Page 30 Recommended separation distances between portable and mobile RF communications equipment and the device For transmitters rated at a maximum output power not listed above, the recommended separation distance d in metres (m) can be estimated using the equation applicable to the frequency of the transmitter, where P is the maximum output power rating of the transmitter in watts (W) according to the transmitter manufacturer.
- Page 31 Guidance and manufacturer’s declaration - electromagnetic immunity 1720 GSM 1800; CDMA 1900; GSM 1900; DECT; Pulse Modulation 1845 1700 – 1990 LTE Band 1, 3 217 Hz 4, 25;UMTS 1970 Bluetooth, WLAN Pulse Modulation 2450 2400 – 2570 802.11 b/g/n, 217 Hz RFID 2450, LTE Band 7...
- Page 32 Customer Support If you have any questions or concerns about your product, please contact our helpful Customer Support Team.* Email: info@alcedohealth.com Toll-Free: (833)682-8655 www.AlcedoHealth.com Support Hours Monday-Friday 10:00 am – 4:00 pm EST Distributed by: Nature Major Inc. 300 Old Country Rd Suite GL11, Mineola, NY 11501 *Please have your order invoice and order ID ready before contacting Customer Support.
Need help?
Do you have a question about the ABP-B07 and is the answer not in the manual?
Questions and answers