
Related Manuals for Roland WIZARD ERP RDI-WZ09HSS/N1

Summary of Contents for Roland WIZARD ERP RDI-WZ09HSS/N1
- Page 1 Air Conditioner Service Manual Inverter air conditioner Service Manual WIZARD ERP DC Inverter Models RDI-WZ09HSS/N1 RDI-WZ12HSS/N1 RDI-WZ18HSS/N1 RDI-WZ24HSS/N1...
-
Page 2: Table Of Contents
Air Conditioner Service Manual CONTENTS Part Ⅰ Technical Information ..............3 1. Important Notice ......................3 2. Specifications ........................... 4 2.1 The relation curve of CAPACITY-TEMPERATURE..................4 2.2 The relation curve of PRESSURE-TEMPERATURE ..................4 2.3 The relation curve of NOISE-COMPRESSURE OPERATION FREQUENCY ..........5 3. -
Page 3: Part Ⅰ Technical Information
Air Conditioner Service Manual Part Ⅰ Technical Information 1. Important Notice This service manual is intended for use by individuals possessing adequate backgrounds of electrical, electronic and mechanical experience. Any attempt to repair the appliance may result in personal injury and property damage. The manufacturer or seller cannot be responsible for the interpretation of this information, nor can it assume any liability in connection with its use. -
Page 4: Specifications
Air Conditioner Service Manual 2. Specifications 2.1 The relation curve of CAPACITY-TEMPERATURE 4000 150.0% 4000 150.0% 3000 3000 100.0% 100.0% 2000 2000 50.0% 50.0% 1000 1000 0.0% 0.0% 35℃ 48℃ 35℃ 48℃ Capacity Rate Capacity Rate 6000 8000 6000 4000 4000 2000 2000... -
Page 5: The Relation Curve Of Noise-Compressure Operation Frequency
Air Conditioner Service Manual 2.5 The relation curve of NOISE-COMPRESSURE OPERATION FREQUENCY Indoor unit 40.0 40.0 20.0 20.0 Muter High Super Muter High Super speed speed speed speed speed speed speed speed Indoor cooling noise Indoor heating noise Indoor cooling noise Indoor heating noise Low speed Mid Low speed Mid speed Mid High speed High speed... -
Page 6: The Production Dimensions
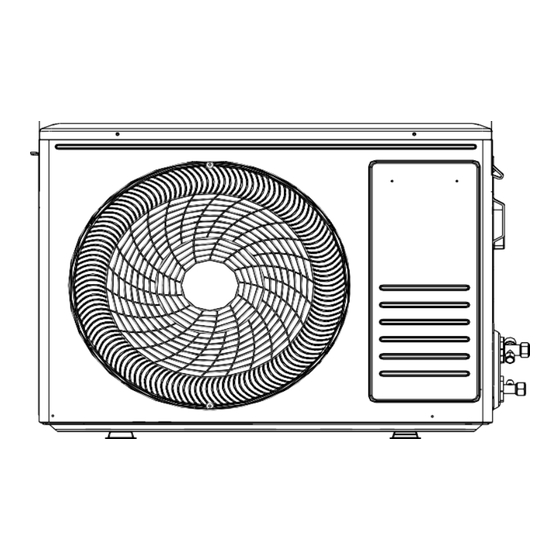
Air Conditioner Service Manual 3. Product Dimensions Indoor Unit: Outdoor Unit: Indoor unit Outdoor unit Model RDI-WZ09HSS/N1 48.5 RDI-WZ12HSS/N1 48.5 RDI-WZ18HSS/N1 53.9 RDI-WZ24HSS/N1 1097 374.9 347.5 58.6... -
Page 7: Refrigeration Cycle Diagram
Air Conditioner Service Manual 4. Refrigeration cycle diagram Heat pump 9K,12K valve side Capillary (Evaporator) (Condenser) side Muffler Muffler Heating Cooling 18K,24K side Electronic (Condenser) (Evaporator) side Muffler Heating Compressor... -
Page 8: Electric Diagram
Air Conditioner Service Manual 5. Electric Diagram 5.1 Wiring diagram MODEL: RDI-WZ09HSS/N1, RDI-WZ12HSS/N1, RDI-WZ18HSS/N1 INDOOR UNIT OUTDOOR UNIT θ θ... - Page 9 Air Conditioner Service Manual MODEL: RDI-WZ24HSS/N1 INDOOR UNIT: OUTDOOR UNIT θ θ θ...
-
Page 10: Pcb Laout
Air Conditioner Service Manual 5.2 PCB LAOUT Indoor PCB Bottom view... - Page 11 Air Conditioner Service Manual utdoor unit 9K, 12K ODU PCB Mainly relay Fuse L, N & 1 4-way valve Heater DC fan motor connector Electronic expansion valve Discharge sensor connector/ OAT/OPT connector LED5 LED5 Discharge sensor connector/ OAT/OPT connector Electronic expansion valve AC/DC fan motor connector 4-way valve Heater...
- Page 12 Air Conditioner Service Manual LED5 OAT/OPT connector Discharge sensor connector Electronic expansion valve AC/DC fan motor connector Heater 4-way valve Communication wiring L line Fuse N line ODU PCB Mainly relay LED1-LED4 Note: OAT: Outdoor Ambient Temperature OPT: Outdoor pipe temperature...
-
Page 13: Electronic Controller Introduction
Air Conditioner Service Manual Electronic Controller Introduction 6.1Remote controller ON/OFF button To switch the conditioner on and off. TURBO button In cooling mode, press this button, the unit will give the maximum cooling temperature with 16 In heating mode, press this button, the unit will give the maximum heating temperature with 31 MODE button To select the mode of operation... - Page 14 Air Conditioner Service Manual Remote controller DISPLAY Meaning of symbols on the liquid crystal display. FEEL mode indicator or AUTO COOLING indicator or COOL DEHUMIDIFYING indicator or DRY FAN ONLY OPERATION indicator or FAN HEATING indicator or HEAT SIGNAL RECEPTION indicator TIMER OFF indicator TIMER ON indicator AUTO FAN indicator...
-
Page 15: Electronic Controller
Air Conditioner Service Manual 6.2 Electronic controller RT ------ Room Temperature. IPT ----- Indoor Pipe (Coil) Temperature. ST ----- Indoor Setting Temperature. OPT -- Outdoor Pipe Temperature. OAT -- Outdoor Ambient Temperature. ODT -- Outdoor Discharge Temperature. CRT -- Compensated Room Temperature. IDU --- Indoor unit ODU --- Outdoor unit. - Page 16 Air Conditioner Service Manual delay for the motor should be less than 160s. 2). When switch on unit on cooling mode, ODU fan motor will delay 5s after compressor starts up. 4. When ODU failure or stops for protection, IDU works as preset. Anti-frosting protection Control the unit operation frequency and the frequency changing rate to achieve anti-frosting protection.
- Page 17 Air Conditioner Service Manual 4). The compressor will also stop working while unit: a. switched off. b. under protection. c. changed to fan mode. 5). Under normal operation, the compressor can be stopped by program only working after 7 min once it starts up. 6).
- Page 18 Air Conditioner Service Manual 6. Defrost Note: t1: compressor continuous works time. t2: AC unit operation first time going to defrost circle. t3: compressor accumulated working time (when OPT≤3℃ unit starts to count the time for t3). When AC unit working to: a.
- Page 19 Air Conditioner Service Manual 6.2.5 Fan mode 1. The temperature setting: 16~31℃, Fan speed and vane position: as preset. The function for remote controller 58E only. 2. For above function, when unit preset to be auto fan mode, the fan motor will change its operation speed based on the temperature difference of ambient and preset temperature.
- Page 20 Air Conditioner Service Manual Note: The function setting: Within 3 min while power on unit, set the unit on cooling mode, set temperature 30℃, and mid fan speed, press the ECO button 10 times within 8s, the AUTO-RESTART will be activated. 6.2.10 Protection 6.2.10.1 Overload protection 1.
- Page 21 Air Conditioner Service Manual unless press ON/OFF button. In the process of unit operation, once the compressor runs continuously more than 6 min, the counter of stop- working protection will be reset to zero and re-start a new counting process. Note: For different models, I and I have different programmed value.
-
Page 22: Wifi Introduction
Air Conditioner Service Manual WIFI OPERATION MAUAL 6.3.1 The WIFI control logic CLOUD Internet controller Home wireless router TCL AC IDU WIFI module IDU PCB Remote controller 6.3.2 Download and installation Customer can scan the QR in the user manual or from appliance APP store to download the APP and install it in the cell phone, while installation achieved, there would be an icon as picture created on the desktop. -
Page 23: Part Ⅱ Installation And Maintenance
Air Conditioner Service Manual PART Ⅱ Installation and Maintenance 1. Notes for installation and maintenance Safety Precautions Important! Please read the safety of precautions carefully before installation and maintenance. The following contents are very important for installation and maintenance. Please follow the instructions bellow. ●... - Page 24 Air Conditioner Service Manual 5) Use equipped components or appointed components during installation. 6) Make sure no foreign objects are left in the unit after finishing installation. Improper installation may lead to fire hazard, explosion, electric shock or injury. Safety precautions for Installing and Relocating the unit. To ensure safety, please be mindful of the following precautions.
- Page 25 Air Conditioner Service Manual Introduction R32, R290 air conditioner installation 1) Introduction to Refrigerants R32 & R290 The refrigerants used for air conditioners are environmentally friendly hydrocarbons R32 and R290. The two kinds of refrigerants are combustible and odorless. Moreover, they can burn and explode under certain condition.
- Page 26 Air Conditioner Service Manual Caution: ⚫ Please contact the nearest after-sale service center when maintenance is necessary. At the time of maintenance, the maintenance personnel must strictly comply with the Operation Manual provided by the corresponding manufacturer and any non-professional is prohibited to maintain the air conditioner. ⚫...
- Page 27 Air Conditioner Service Manual ⚫ It is necessary to choose the place where the inlet and outlet air of the indoor unit is even. ⚫ It is necessary to avoid the places where there are other electrical products, power switch plugs and sockets, kitchen cabinet, bed, sofa and other valuables right under the lines on two sides of the indoor unit.
- Page 28 Air Conditioner Service Manual of the refrigerant leak detector should not exceed 25% of the lower explosion limit (LEL), the refrigerant leak detector must be working during maintenance. 2) Inspection of air conditioner ⚫ It is necessary to ensure that the air conditioner is in reliable ground connection before maintenance. ⚫...
- Page 29 Air Conditioner Service Manual ⚫ It is necessary to provide firefighting devices such as dry powder or carbon dioxide fire extinguisher appropriate for extinguishing the electrical fire and keep such firefighting devices in a usable condition. ⚫ Temporary wires and sockets are prohibited on the maintenance location. 6).
- Page 30 Air Conditioner Service Manual precautionary measures in work. For example, it is prohibited to enter the location with any kindling material and it is prohibited to wear clothing or shoes which easily produce static. Handling suggestions when a large amount of combustible refrigerant leaks: ⚫...
-
Page 31: Installation
Air Conditioner Service Manual 2 Installation 2.1 Installation Dimension Diagram wire... -
Page 32: Inspection Of Accessories
Air Conditioner Service Manual 2.2 Accessory Remote controller Remote Batteries Vinyl tape controller supporter Drain hose Hole cover Screw Insulation material 2.3 Tools Picture Picture Picture Tool name Tool name Tool name Standard Pipe Vacuum Pump Wrench Cutter Screw Adjustable/ drivers (Phillips &... -
Page 33: Position Of Idu/Odu
Air Conditioner Service Manual 1) Must follow the electric safety regulations when 2.4 Position installing the unit. Indoor unit 2) According to the local safety regulations, use qualified power supply circuit and air switch. ⚫ Install the indoor unit level on a strong wall that is 3)... - Page 34 Air Conditioner Service Manual Indoors Out doors The hole must slope downwards towards the exterior. Note: Keep the drain pipe down towards the direction of the wall hole, otherwise leakage may occur. 2.6.3 Electrical connections---Indoor unit 1).Lift the front panel. 2).Take off the cover as indicated in the picture (by removing a screw or by breaking the hooks).
- Page 35 Air Conditioner Service Manual When extending the drain hose at the indoor unit, numbers in the picture. When the piping is run in install the drain pipe. direction 1 or 3, cut a notch along the groove on the side of the indoor unit with a cutter. Wrap the insulation material around the Run the piping in the direction of the wall hole and bind connecting portion.
-
Page 36: The Odu Installation
Air Conditioner Service Manual Outdoor unit condensed water drainage (only for heat pump models) The condensed water and the ice formed in the outdoor unit during heating operation can be drained away through the drain pipe. 1) Fasten the drain port in the 25mm hole placed in the ⚫... -
Page 37: Vacuum And Gas Leakage Test
Air Conditioner Service Manual 2. Leakage Detection could be damaged. 1).With leakage detection. Check if there is leakage with leakage detection. connection pipes 2).With soap water. If leakage detection is not available, please use soap water for leakage flare nuts detection. -
Page 38: Maintenance
Air Conditioner Service Manual 3. Maintenance 3.1 Failure code Code Reason Remark IDU & ODU Communication failure The IDU & ODU wiring connection correct? IDU Room Temperature sensor failure.(IDU IDU sensor and PCB. RT failure) IDU Coil temperature sensor failure.(IDU IPT IDU sensor and PCB. - Page 39 Air Conditioner Service Manual Cooling system gas flow abnormal Please check the troubleshooting for detail. PROTECTION.. PFC PROTECTION Please check the troubleshooting for detail. The Compressor lack of phase / Anti-phase Please check the troubleshooting for detail. PROTECTION. IPM Module temperature PROTECTION Please check the troubleshooting for detail.
-
Page 40: Trouble Shooting
Air Conditioner Service Manual 3.2 Trouble shooting 3.2.1 E0 ---IDU & ODU communication failure Start Display E0 IDU wiring Check and re- E0 disappear? connection correct ? connect Check communication Replace/ re- E0 disappear? wiring and the connection, connect in good condition? ODU wiring Check and re- E0 disappear? - Page 41 Air Conditioner Service Manual E0 disappear? First replace IDU PCB Replace ODU PCB Replace ODU PCB...
- Page 42 Air Conditioner Service Manual 3.2.2 E1, E2 ---IDU Room temperature sensor and/or coil temperature sensor failure. Start Display E1or E2 Is the sensor well Re-connect connected to PCB E1/E2 disappear? Multi-meter check the Replace the sensor sensor, is it open or short circuit? The malfunction eliminated?
- Page 43 Air Conditioner Service Manual 3.2.3 E4 --- AC Cooling system abnormal (Gas not enough) Start Display E4 Check the pressure AC pressure correct? Check the sensor short or (cooling:0.8-1.3Mpa,/ open? heating 2.0-3.6Mpa) Replace the sensor Check the valves open or Replace the main PCB Open the valves Lower than 0.8 Mpa in...
- Page 44 Air Conditioner Service Manual 3.2.4 E6 --- IDU ventilation failure (PG and DC fan motor only) Start Display E6 Turn the fan blades by hand while power-off Adjust the motor and blade Can the fan blades run assembly so that rotor can smoothly? run smoothly.
- Page 45 Air Conditioner Service Manual 3.2.5 E3, E7 or E8--- ODU Coil temperature sensor, Ambient temperature sensor or Discharge temperature sensor failure. When any of the sensor resistance open or short circuit , unit will display failure code as E3/E7 or E8, IDU and ODU turns off.
- Page 46 Air Conditioner Service Manual 3.2.6 E9---ODU IPM /Compressor drive fault If unit have 6 times stopping works for IPM protection (P0) continuously, it will display E9 error, and unit can’t be recovered to operation, except press ON/OFF button. Display E9 Display F9 or FA first Replace ODU PCB then E9...
- Page 47 Air Conditioner Service Manual 3.2.7 EF---ODU DC fan motor failure Shut off Check the fan blade by Re install the DC motor hand, can it rotate freely Works normal? Fan motor well connect connect to PCB Works normal? 1. For built-in control (5pins) =310V? motor: check the =15V?
- Page 48 Air Conditioner Service Manual 3.2.8 EU---ODU voltage test sensor failure After power relay works, when tested voltage effective value less than 50V for 3s continuously, unit will display EU. Start Display EU Test voltage btw ODU Check while voltage terminal L/N, more than become normal 50V~? Unit works?
- Page 49 Air Conditioner Service Manual 3.2.9 P0---IPM protection When overheat or overcurrent for IPM, AC unit will display P0protection. Display P0 Restart unit. It works normal? Wiring connection Re-connect U/V/W correct? P0 disappear? ODU fan motor no Can compressor works or too slowly? start up? Replace ODU fan motor...
- Page 50 Air Conditioner Service Manual...
- Page 51 Air Conditioner Service Manual 3.2.10 P1--- Over / under voltage protection 1. Test voltage between L &N, When the power supply V>AC260V or V<AC150V, AC will display P1 protection, unit will recover back to previous status while V>AC155V. 2. Test voltage on the big size electrolytic capacitor of ODU PCB, When DC busbar voltage V>DC420V or V <DC150V, unit will recover back to previous status while DC190V<V<DC410V Wait until the AC Is the power supply...
- Page 52 Air Conditioner Service Manual 3.2.11 P2---Over Current protection When the AC unit running current more than I , it will stop and display P2 protection. Note: for different AC model, I has difference valve. ODU fan motor Replace fan motor works? P2 disappear? IDU filter or ODU...
- Page 53 Air Conditioner Service Manual 3.2.12 P4 ---ODU Discharge temperature overheating protection Display P4 ODU temperature higher than 60℃? Normal protection ODU location Enough space for Unit operate? acceptable? ventilation? Adjust ODU installation Condenser too Clean IDU filter or P4 disappear? dirty? or filter ODU condenser.
- Page 54 Air Conditioner Service Manual 3.2.13 P5---Sub-cooling protection on Cooling/Dry mode On Cooling or Dry mode, when IDU evaporator coil temperature IPT<1℃ continuously for 3 min after compressor start up for 6 min, CPU will switch off outdoor unit and show P5 failure code. Display P5 Switch on unit after minutes...
- Page 55 Air Conditioner Service Manual 3.2.14 P6---Overheating protection on Cooling mode On Cooling or Dry mode, when ODU condenser coil temperature OPT≥62℃ , MCU will switch off outdoor unit and show P6 failure code. ODU fan motor Replace fan motor Fan motor works normal? broken? P6 disappear?
- Page 56 Air Conditioner Service Manual 3.2.15 P7---Overheating protection on Cooling mode On heating mode, when IDU evaporator coil temperature IPT≥62 ℃ , ODU PCB will switch off outdoor unit and show P7 failure code. ODU fan motor Fan motor Replace fan motor works normal? broken? P7 disappear?
- Page 57 Air Conditioner Service Manual 3.2.16 P8---Outdoor Overtemperature/Under-temperature protection When environment temperature as below condition, the compressor will stop working, after 200s delay, the IDU will show P8 failure code. (1). On Cooling or Dry mode: ODU ambient temperature: OAT<-20℃ or OAT>63℃;...
- Page 58 Air Conditioner Service Manual 3.2.17 P9---The compressor driving protection (the compressor load abnormal) When compressor start up or in the process of operation, if: (1). MCU can’t test the feedback signal from compressor, or (2). Tested a abnormal signal from compressor, or (3).
- Page 59 Air Conditioner Service Manual 3.2.18 F4---Cooling system Gas flow abnormal protection When compressor startup, unit will check the variation of IDU coil temperature. If there is mistake installer forgetting to open the 2-way or 3-way valve on ODU, the gas can’t flow in the cooling system, it will show F4 protection. Start Display F4 Check the 2-way...
- Page 60 Air Conditioner Service Manual 3.2.19 F5---PFC Protection PFC Overcurrent protection F5 Code Check the power supply, Display F5 by is it abnormal? (this is random? normal protection) Display F5 frequently Switch off the unit for 3 Still F5? minutes and re-switch on Still F5? Replace ODU PCB...
- Page 61 Air Conditioner Service Manual 3.2.20 F6 The Compressor Lack of phase / Anti-phase protection. If ODU PCB can’t test one, or even three phase of compressor current, it will show F6 protection. Display F6 Check compressor connect wiring connector, is it well connected? Problem solved? The Compressor...
- Page 62 Air Conditioner Service Manual 3.2.21 F7---Module temperature protection. IPM overtemperature protection, when IPM temperature more than 95℃, it will show F7. Display F7 IPM well contact Any dust or gap btw to heat sink? Clean or adjust the gap IPM & heat sink? btw IPM and heat sink F7 disappear? Check the screw...
- Page 63 Air Conditioner Service Manual...
- Page 64 Air Conditioner Service Manual 3.2.22 F8 - 4-Way Value Reversing abnormal On heating mode, if IDU Coil temperature tested lower than Room temperature 5℃ or even more after compressor works for 8min, unit will show F8 code. Display F8 the 4-way valve connect wiring connection correct?
- Page 65 Air Conditioner Service Manual 9.2.23 Fy--- Gas leakage protection After compressor works in high frequency for 9 min, if the temperature on IDU evaporator & ODU condenser has only a little variation comparing previous, but, the compressor discharge temperature on high level, then the unit will show Fy failure code.
-
Page 66: Exploded View
Air Conditioner Service Manual 4. Exploded view and parts list Indoor Unit- RDI-WZ09HSS/N1-IN Q’ty Part No. Part Name Remark 41105-000373 Electrical Box Cover 31101-001327 Main PCB 10104-100014 Indoor Sensor Assembly 42001-000103 Cable Clamp 11304-100028 Terminal 22007-001028 WIFI USB Connector 41105-000104 Electrical Box 22001-000313 Vane Motor... - Page 67 Air Conditioner Service Manual Outdoor Unit- RDI-WZ09HSS/N1-OUT Q’ty Part No. Part Name Remark 41202-000177 Base 41208-000142 Partition plate 92014-000760 Compressor and accessories 92007-007253 4-way valve assembly 92008-000289 4-way valve 31201-002137 Outdoor PCB Assembly 42001-000038 Cable clamp 42001-000035 Cable clamp 11304-100004 Terminal 41205-000206 Right plate...
- Page 68 Air Conditioner Service Manual Indoor Unit- RDI-WZ12HSS/N1-IN Q’ty Part No. Part Name Remark 41105-000373 Electrical Box Cover 31101-001327 Main PCB 10104-100014 Indoor Sensor Assembly 42001-000103 Cable Clamp 11304-100028 Terminal 22007-001028 WIFI USB Connector 41105-000104 Electrical Box 22001-000313 Vane Motor 29901-000078 Step Motor 41101-000354 In And Out Pipe Cover...
- Page 69 Air Conditioner Service Manual Outdoor Unit- RDI-WZ12HSS/N1-OUT Q’ty Part No. Part Name Remark 41202-000177 Base 41208-000142 Partition plate 92014-000760 Compressor and accessories 92007-007253 4-way valve assembly 92008-000289 4-way valve 31201-002137 Outdoor PCB Assembly 42001-000038 Cable clamp 42001-000035 Cable clamp 11304-100004 Terminal 41205-000206 Right plate...
- Page 70 Air Conditioner Service Manual Indoor Unit- RDI-WZ18HSS/N1-IN 14 13 Q’ty Part No. Part Name Remark 41105-000373 Electrical Box Cover 31101-001394 Main PCB 10104-100014 Indoor Sensor Assembly 42001-000103 Cable Clamp 11304-100028 Terminal 22007-001028 WIFI Connector 41105-000104 Electrical Box 22001-000313 Vane Motor 22001-000485 Step Motor 41101-000354...
- Page 71 Air Conditioner Service Manual Outdoor Unit- RDI-WZ18HSS/N1-OUT Q’ty Part No. Part Name Remark 41202-000364 Base 41208-000149 Partition plate 92014-000589 Compressor and accessories 92007-006705 4-way valve assembly 92008-000207 4-way valve 31201-001834 Outdoor PCB Assembly 42001-000035 Cable clamp 42001-000038 Cable clamp 11304-100004 Terminal 41205-000084 Right plate...
- Page 72 Air Conditioner Service Manual Indoor Unit- RDI-WZ24HSS/N1-IN 14 13 Q’ty Part No. Part Name Remark 41105-000373 Electrical Box Cover 31101-001352 Main PCB 10104-100014 Indoor Sensor Assembly 42001-000103 Cable Clamp 11304-100028 Terminal 22007-001028 WIFI Connector 41105-000104 Electrical Box 22001-000360 Vane Motor 22001-000485 Step Motor 41101-000240...
- Page 73 Air Conditioner Service Manual Outdoor Unit- RDI-WZ24HSS/N1-OUT Q’ty Part No. Part Name Remark 41202-000245 Base 41208-000152 Partition plate 92014-000357 Compressor and accessories 92007-001022 4-way valve assembly 92008-000207 4-way valve 22011-000014 Inductor 31201-001635 Outdoor PCB Assembly 42001-000038 Cable clamp 42001-000035 Cable clamp 11304-100004 Terminal 41205-000074...
-
Page 74: Disassembly Idu & Odu
Air Conditioner Service Manual 5. Disassembly IDU & ODU 5.1. IDU Disassembly Steps Reference photo 1. Before disassembly The original status. 2. Disassemble Front Panel, Display Board. Display A. Open front panel. B. Remove one screw and take the display box out from panel. C. - Page 75 Air Conditioner Service Manual 5. Disassemble the Bottom Plate. Force apart the bottom plate left and right sides with hands towards as RED arrow, you can easily disassemble the bottom plate. (Note: there’re buckles on bottom plate) 6. Disassemble the Flap Assembly Force apart the flap assembly from base plate, you can take the it out.
- Page 76 Air Conditioner Service Manual 8. Disassemble the Mid Frame Buckles A. unfix 2 screws between mid frame and base plate. B. Apart 4 buckles upside mid frame from base plate. C. Apart air outlet the upper Hooks at air outlet upper side side and lower side hooks from base plate shown as picture.
- Page 77 Air Conditioner Service Manual 11. Disassemble Evaporator (EVP). A. Unfix screw btw EVP and Clip base. B. Loose the EVP left locker Clip with base, you can raise up EVP left side. C. When raise EVP left side up, along with the EVP right side loosen accordingly.
- Page 78 Air Conditioner Service Manual 5.2 ODU Assembly Step Reference picture step1:Remove the PCB Cover , valve Cover and top cover 1). Unfix one screw on the PCB cover, you can take the cover out from unit. 2). Unfix one screw on the valve cover, you can take it out easily.
- Page 79 Air Conditioner Service Manual ODU middle separate plate and base plate, uplift front panel you can take it out from unit. step3:Disassemble the Left and Right plate. Unfix screws btw Right Plate and the Electric Box assembly, Valve Plate , Base Plate, then you can take the Right plate out.
-
Page 80: The Comparison Table Of Celsius-Fahrenheit Temperature
Air Conditioner Service Manual step4:Disassemble the Axis Fan Blade Unscrew the fan blade nut, and take the blade out. step5:Disassemble the electric box Unfix screw btw Electric Box and motor supporter etc. loosen the wiring clamp, then you can take the control box out. -
Page 81: Pipe Flaring
Air Conditioner Service Manual step7:Disassemble the separate plate Unfix the screw btw separate plate and unit, and take it out step8:Disassemble the 2 and 3-way valve Unfix screw btw Valve plate and base, you can take the 2-way and 3-way valve out by welding. -
Page 82: The Thermistor Temperature Characteristics
Air Conditioner Service Manual step10:Disassemble the compressor. Unscrew the nuts and take the compressor out. step11:Remove the fan motor and fan supporter. Unfix screws btw fan motor with supporter, and supporter with base plate. Note: Pay attention to the motor wiring, it can’t be taken out by force. -
Page 83: Appendix
Air Conditioner Service Manual APPENDIX Appendix 1 The comparison table of Celsius-Fahrenheit temperature Fahrenheit Fahrenheit Fahrenheit Celsius Celsius Celsius diplay Fahrenheit diplay Fahrenheit diplay Fahrenheit ℃ ℃ ℃ temperature temperature temperature (℉) (℉) (℉) (℉) (℉) (℉) 60.8 69/70 69.8 78/79 78.8 62/63... - Page 84 Air Conditioner Service Manual Appendix 3 Pipes Flaring Main cause for gas leakage is due to defect in flaring work. Carry out correct flaring work in the following procedure. A. Cut the pipes and the cable. 1) Use the piping kit accessory or the pipes purchased locally.
- Page 85 Air Conditioner Service Manual Appendix 4 THERMISTOR TEMPERATURE CHARACTERISTICS 1). Indoor unit and outdoor exchange temperature and outside air temperature sensor temperature characteristics TEMP. TEMP. TEMP. Resistance Voltage of Resistance Voltage of Resistance Voltage of ℃ ℃ ℃ (k Ohm) resistance (k Ohm) resistance...
- Page 86 Air Conditioner Service Manual TH1: indoor room temperature sensor and outside air temperature sensor TH2: indoor exchange temperature sensor and outside exchange temperature sensor Before measuring resistance, disconnect connectors as shown above. Outdoor unit sensor temperature characteristics TEMP. TEMP. TEMP. R min R(t) R max...
- Page 87 Air Conditioner Service Manual 63.74 70.48 77.87 6.309 6.655 7.013 1.073 1.12 1.168 60.69 67.05 6.08 6.409 6.748 1.042 1.089 1.136 57.81 63.8 70.34 5.861 6.173 6.495 1.013 1.058 1.104 55.08 60.72 66.88 5.651 5.947 6.253 0.9833 1.028 1.074 52.49 57.81 63.61 5.449...
Need help?
Do you have a question about the WIZARD ERP RDI-WZ09HSS/N1 and is the answer not in the manual?
Questions and answers